|
|
PBP Commentary |
Coming up we have a welterweight MMA rules bout between Joe Grizzly (ranked 0 p4p, 0 weight class) and Dont Lose (ranked 0 p4p, 0 weight class). Over to our ring announcer for the fighter introductions!
 |
|
 |
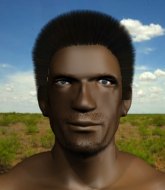
| 187 cm
18
184 lbs
1 - 3 - 0 |
|
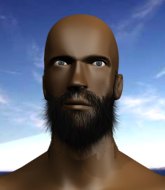
179 cm
18
170 lbs
1 - 1 - 0 |
BJJ White Belt
Solid Muay Thai
Good chin |
|
BJJ White Belt
Brawler
Granite chin |
|
| |
|
Ladies and gentlemen. This fight is 3 rounds, in the welterweight division.
Introducing the fighter to my left, fighting out of the red corner.
With a record of
1 - 3 - 0, fighting out of Los Angeles, Joe Grizzly!
And introducing the fighter to my right, fighting out of the blue corner.
With a record of
1 - 1 - 0, fighting out of Los Angeles, Dont Lose!
The judges for this bout are Frank Antenori, and Jack Bonds.

The bell rings for round one and we are underway!
Grizzly throws a right high kick that is partially blocked by Lose.
Lose tries for a takedown but Grizzly sees it coming a mile off and avoids it easily.
Lose fails to land the takedown.
Grizzly lands a high kick!
Lose takes one on the button.
Grizzly shoots in but no luck this time.
Wooooo! Give it up for these two warriors! They are putting on a show!
Lose throws a head kick that misses.

Lose instigates a clinch.
Grizzly wants to break free but Lose has control.

Grizzly breaks the clinch.
Grizzly shoots in for a takedown but Lose shows good takedown defense there and keeps this one on the feet.
Grizzly fails miserably with a takedown attempt.
That's three failed takedown attempts in the round for Joe Grizzly. That's going to take a lot out of him.
Grizzly fails with a takedown attempt.
Lose tries to clinch but Grizzly is having none of it.

That's one minute gone in the round.
Grizzly shoots for a double leg takedown but Lose sprawls well. He's pushed Grizzly's face into the mat and manages to get back to his feet relatively easily.
Lose shoots in for a takedown but doesn't get it.
Lose looks frustrated there after his takedown attempt is stuffed easily.
Grizzly changes levels and looks for a double leg takedown. Lose tries to avoid it but Grizzly manages to keep hold of a leg and drag Lose to the ground. Lose escapes though and pops straight back up to his feet.
Grizzly misses with a takedown attempt. He shot from a bit too far out.
Lose tries to close the distance and clinch but Grizzly swats him to one side with an open hand palm strike and circles away.
Grizzly closes this distance looking for a takedown but Lose circles away.
Grizzly looks for a takedown here. Will he get it? Lose is fending him off so far but Grizzly persists. Nope, Lose circles away and we're back to standing.
Lose tries to clinch up but Grizzly circles away and keeps his distance.
Joe Grizzly seems to be the more aggressive standup fighter in this bout.
Lose throws a nice looking combination but Grizzly bobs and weaves to avoid any damage.
Grizzly gets his takedown attempt stuffed easily
and Lose counters with a left to the body.
Grizzly is breathing heavily.
Lose blocks a head kick by Grizzly.

That's two minutes gone in the round.
Grizzly shoots for a double leg takedown but Lose sprawls well. He's pushed Grizzly's face into the mat and manages to get back to his feet relatively easily.
Lose throws a hook to the side of Grizzly's head but Grizzly sees it coming and ducks under it beautifully.
Grizzly tries to shoot in for a takedown. He's got hold of a leg but Lose swivels and escapes.
Grizzly connects with a high kick.
Grizzly shoots in but doesn't get the takedown
and Lose counters by moving into the clinch. Good anticipation by Lose.
Lose blocks an elbow strike.
The crowd are loving this. Great action here.
Lose tries for a takedown but Grizzly manages to get underhooks.
Lose is trying to pull guard but being pressed up against the cage enables Grizzly to keep the fight standing.
Grizzly breaks from the clinch.
Grizzly lands with a slapping head kick.
No joy there for Grizzly, who threw a few shots but didn't land.
Grizzly lands with a kick to the temple. Lose shrugs as if to say "is that all you've got?"
No luck with that takedown attempt from Lose.

That's three minutes gone in the round.
Grizzly shoots in but Lose avoids the takedown attempt easily.
Grizzly closes the distance and clinches up with Lose, looking for a takedown. Grizzly pushes Lose against the cage but Lose circles to the side and manages to break the clinch.
Grizzly stuffs the takedown.
Nice takedown defense from Grizzly. No joy for Lose on that attempt.
Grizzly tries a head kick but it misses.
Lose tries to close the distance and clinch up but Grizzly swats him away and circles back towards the center.
Grizzly shoots in with a takedown attempt and he has Lose pinned against the cage. Lose gets the underhooks and manages to circle away.
Grizzly looks frustrated there after his takedown attempt is stuffed easily.
Grizzly leaves Lose with his face pressed against the mat as he sprawls beautifully, defending against a solid takedown attempt.

That's four minutes gone in the round.
A telegraphed takedown attempt from Grizzly is defended easily by Lose.
Lose stuffs a takedown. It's all about dictating where the fight takes place and Lose wants it to stay on the feet.
Lose tries for a takedown but Grizzly circles away easily
and Grizzly counters with a head kick.
Grizzly will have to do better than that with his takedown attempts.
Grizzly scores with a head kick. Lose tried to block it but didn't get his arm up in time.
Grizzly tries a head kick but it misses.
The crowd are going absolutely nuts as the round comes to an end - what a fantastic round of action!
Lose shoots in for a takedown but doesn't get it.
This has been an exciting period of action!
Grizzly lands with a nice combination. Lose backs away looking to recover.
Lose shoots in but no luck this time.
And thats the end of the round the fighters go back to their corners.
Joe Grizzly dominated that round.
That's time! Back to the action!

Grizzly tries to score a power double leg takedown but Lose sees that one coming and sprawls well. That will dishearten Grizzly somewhat.
Grizzly closes this distance looking for a takedown but Lose circles away.
No luck for Grizzly with that takedown attempt.
That's three failed takedown attempts in the round for Joe Grizzly. That's going to take a lot out of him.
Lose lands with a two punch combination before moving back out of range.
No luck with that takedown attempt from Grizzly.
Lose shoots in and drives through. Grizzly sprawls well.
Grizzly shoots in for a takedown but doesn't get it.
Both fighters are absolutely exhausted here.
Grizzly fails miserably with a takedown attempt.
Lose shoots in looking for a takedown but Grizzly manages to keep the fight standing, pushing Lose's face into the canvas for good measure before circling away.
Lose throws a nice looking combination but Grizzly bobs and weaves to avoid any damage.
That's one minute gone in the round.
Grizzly throws a looping left and ducks down for a takedown. He's got his arms around Lose's waist but Lose gets an underhook and avoids the takedown by throwing Grizzly off to one side.
Grizzly tries to score a power double leg takedown but Lose sees that one coming and sprawls well. That will dishearten Grizzly somewhat.
Joe Grizzly is looking to throw some combinations by the looks of things.
Lose tries to clinch but Grizzly is having none of it.
A really sloppy takedown attempt there from Grizzly.
Lose is trying desperately to land a takedown but Grizzly is having absolutely none of it. This is turning into a bit of a nightmare for Lose.
Lose shoots in for a double leg but Grizzly sprawls well. That's going to sap some energy.
Nice sprawl there from Grizzly as Lose shoots in.
Lose tries to close the distance and clinch but Grizzly swats him to one side with an open hand palm strike and circles away.
Grizzly stuffs the takedown attempt from Lose. Lose gets slowly back to his feet.

Grizzly changes levels and drives through with a really nice takedown into side control. Lose looks really pissed at himself for not defending that better.
That's two minutes gone in the round.
Grizzly throws a knee to the body but it doesn't do much damage.
Lose is positioning himself to get back to half guard.
Lose is trying to control Grizzly's posture but Grizzly avoids it.
The fighters are starting to perspire pretty heavily.
An elbow from Grizzly crashes against the mat.
Lose wants to control but Grizzly postures up.
The ground and pound from Grizzly seems to be hitting the mat more than his opponent.
Wooooo! Give it up for these two warriors! They are putting on a show!
Grizzly working the ground and pound but Lose is defending the strikes.
Grizzly scores with a couple of short elbows.
The strikes coming from Grizzly are missing the target in this wave of attacks.
The ground and pound from Grizzly seems to be hitting the mat more than his opponent.
That's three minutes gone in the round.
Grizzly looking to punish the body of his opponent here but Lose is avoiding damage well.
Grizzly is trying to ground and pound but Lose uses the momentary lack of control by Grizzly to regain half guard.
Lose keeping his head moving to avoid the ground and pound.
Grizzly throwing shots but Lose is blocking nicely.

Lose is defending against the submission attempts here by Grizzly.
Lose slips a foot under and gets full guard. Nice work.
The fighters are pressed up against the cage, both looking to find a bit of space to work.
Grizzly trying to land body shots but he keeps hitting the mat.
Grizzly wants to control from the top but Lose keeps moving.
Grizzly has to be careful here, sitting in the guard of a superior BJJ player.
That's four minutes gone in the round.

Grizzly stands up from Lose's guard - Grizzly perhaps looking for a knockout.
Joe Grizzly is winning the standup battle so far.
Lose blocks a head kick by Grizzly.
Grizzly shoots in for a takedown. "Ole!" shouts Lose as he jumps to the side.
Grizzly shoots in but no luck this time.
Grizzly lands with a cross to side of his opponent's head.
Grizzly closes this distance looking for a takedown but Lose circles away.
As the round comes to an end the crowd are showing their appreciation for a great round of action.
Lose will have to do better than that with his takedown attempts.
Lose takes a head kick and keeps coming.
The crowd are loving this. Great action here.
Lose stuffs the takedown attempt from Grizzly. Grizzly gets slowly back to his feet.
And thats the end of the round the fighters go back to their corners.
Joe Grizzly dominated that second round.
That's the end of the round. The referee orders the cornermen out of the cage so we can get back down to business. This is the final round!

Lose closes the distance and clinches up with Grizzly, looking for a takedown. Lose pushes Grizzly against the cage but Grizzly circles to the side and manages to break the clinch.
Grizzly shoots in for a takedown but Lose shows good takedown defense there and keeps this one on the feet.
Lose displays good takedown defense there as he swats away a double leg from Grizzly.
Lose tries to clinch up but Grizzly circles away and keeps his distance.

Excellent takedown into side control there by Lose.

Lose stands up.
Grizzly shoots in for a takedown - he's clinched up with Lose but Lose pushes him off and we're back to square one.
That's three failed takedown attempts in the round for Joe Grizzly. That's going to take a lot out of him.
Both fighters are breathing heavily.
That's one minute gone in the round.
Grizzly shoots in for a takedown but Lose shows good takedown defense.
Lose displays good takedown defense there as he swats away a double leg from Grizzly.
Grizzly looks for a takedown but Lose sprawls well.
Grizzly circles away from the clinch attempt.
Lose avoids the head kick by Grizzly.
Lose shoots in for a takedown but doesn't get it.
Lose swings and misses with a hook to the body.
Lose fakes high and shoots in for a takedown but Grizzly avoids it really well and circles away.
Grizzly goes for a high kick. It partially lands.
That's two minutes gone in the round.
Lose shoots in with a takedown attempt and he has Grizzly pinned against the cage. Grizzly gets the underhooks and manages to circle away.
Grizzly scores with a head kick.
Grizzly changes levels and looks for a double leg takedown. Lose tries to avoid it but Grizzly manages to keep hold of a leg and drag Lose to the ground. Lose escapes though and pops straight back up to his feet.
Lose stuffs the takedown attempt from Grizzly. Grizzly gets slowly back to his feet.
Grizzly closes this distance looking for a takedown but Lose circles away.
Fantastic stuff here - a very entertaining period of action, which has drawn cheers from the crowd.
Grizzly defends well against a solid takedown attempt from Lose.
Grizzly shoots in looking for a single leg takedown. Lose is trying to defend but Grizzly finishes it well and ends up in half guard. Let's see if he can advance position further.
Lose landing strikes from the bottom.
That's three minutes gone in the round.
Grizzly not landing any meaningful shots this time.
Grizzly trying to control the action but Lose is working from the bottom.

Lose looking for submissions off his back.
Lose has no desire to be mounted, so is trying to control. Grizzly is working away from the top position though.
Lose taking some punishment here, with Grizzly in his half guard.
Grizzly slips a nice elbow through Lose's hands, connecting with Lose's forehead.
Grizzly sitting in half guard, looking to land shots. Lose defending well though.
Lose is looking to improve his position.
Joe Grizzly is fighting for a decision here - he's started to take the cautious approach.
That's four minutes gone in the round.
Grizzly sitting in half guard, looking to land shots. Lose defending well though.
Lose is looking to regain full guard. Not this time though.
Lose is refusing to be controlled, as Grizzly sits in half guard.
Grizzly thows a huge punch but Lose dodges it nicely.
Grizzly trying to control from half guard but Lose is working away.
Grizzly is really struggling to control Lose but he's trying to hold on to the position.
As the round comes to an end the crowd are showing their appreciation for a great round of action.
The referee claps his hands together and tells the fighters to work.
Dont Lose has stepped it up - he knows he needs a finish here!

The ref stands the fighters back up because Joe Grizzly just wasn't active enough.
Grizzly shoots in for a takedown. He's persisting with it as Lose sprawls well. Lose wins this battle and keeps the fight standing. Grizzly gets slowly back to his feet.
And that's the end of the fight!
Joe Grizzly showed his dominance in that final round.
Well I reckon that's a shut out for Grizzly, winning every round. Will the judges agree? They are the ones who matter, even if they are often depressingly incompetent. Over to the ring announcer for the scorecards.
Ladies and gentlemen, after 3 rounds of action, we go to the scorecards for a decision.
Judge Frank Antenori scores the fight 30:27
Judge Percy O'Donnell scores the fight 30:27
Judge Jack Bonds scores the fight 30:27
In favor of your winner, by unanimous decision... Joe Grizzly!
An out of breath Joe Grizzly thanked his loyal fans in his post fight interview, giving them credit for his success over the course of his career.
|
|
|
|
|
|
|
|
|
|
|
|
|
|
|
|
|
|
|
|
|
|
|
| S |
C
A |
G |
S |
C
B |
G |
|
S |
C |
G |
|
energy
A | B |
|
hype
A | B |
|
pop
A | B |
|
mgr
A | B |
|
FIGHT
RATING
69% |
|
|
|
|
|
|

