|
|
PBP Commentary |
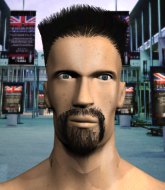
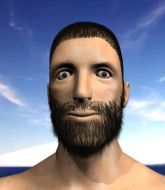
Coming up we have a super heavyweight MMA rules bout between Dwayne Hubbard (ranked 0 p4p, 0 weight class) and Wily Kealoha (ranked 0 p4p, 0 weight class). Hubbard comes to the cage accompanied by Rehab......drinkin problem. Kealoha is bouncing up and down as he enters the arena, backed by Hula Hula. Dwayne Hubbard has the better chin. Will he look to stand and bang today?
 |
|
 |
| 190 cm
26
230 lbs
6 - 0 - 0 |
|
194 cm
25
215 lbs
3 - 1 - 0 |
BJJ Purple Belt
Solid boxing
Good chin |
|
BJJ Brown Belt
Basic striking
Intelligent |
|
| |
|
Ladies and gentlemen. This fight is 5 rounds, in the super heavyweight division.
Introducing the fighter to my left, fighting out of the red corner.
With a record of
6 - 0 - 0, fighting out of Las Vegas, Dwayne Hubbard!
And introducing the fighter to my right, fighting out of the blue corner.
With a record of
3 - 1 - 0, fighting out of Hilo, Wily Kealoha!
The judges for this bout are Eddie Farnsworth, Dean Styles and Joseph Jones.

The bell rings for round one and we are underway!
Hubbard misses with a hook.
Hubbard works over Kealoha's head and body with a nice combination.
Kealoha throws a poor cross that misses
and Hubbard counters with a stiff right hand.
Kealoha staying out of range there.
Hubbard feints a straight left to the body, then turns around with a flashy move and hits Kealohas jaw with a dramatic spinning back fist!
Hubbard tries to clinch but is not successful on this occasion.
Kealoha tries to land with a swinging hook to the body but Hubbard was well out of range. Poor timing from Kealoha.
Hubbard goes to the watering hole and comes back with a big thumbs up from the judges as he scores a three punch combo.
We've seen a great period of action over the last minute or so - credit to both fighters for going all out!
Hubbard misses with a few strikes there.

Kealoha shoots in for a takedown and gets it. Let's see what he's got on the mat.
The referee is pacing around the two fighters - he looks like he's thinking about a standup.
Hubbard keeping full guard, as Kealoha tries to pass.
Kealoha passes Hubbard's right leg, so he's now in half guard.
Kealoha trying to control from half guard but Hubbard is working away.
Kealoha works his way into side control.
Kealoha is looking to take a break and control but Hubbard is keeping him honest, looking to work from the bottom.

That's one minute gone in the round.

Kealoha is looking for a kimura. He might have it! No, Hubbard has escaped the position, nice work there.
Kealoha in side control, just content to control the action for now.
Kealoha works to advance to full mount. Hubbard defends for a few seconds but eventually he succumbs.
Hubbard working to try and regain half guard.
Kealoha working to secure an arm triangle but it's not happening for him just yet.
Hubbard stops Kealoha from taking his back. Still, being mounted isn't any better.

That's two minutes gone in the round.
Hubbard working to try and regain half guard.
Kealoha goes for an armbar but he's fallen flat on his backside there and now Hubbard is on top in guard.
The fighters are starting to perspire pretty heavily.
There's a bit of a scramble here and now Kealoha is on top in guard.
Kealoha stops Hubbard from standing up.
Hubbard is trying to keep Kealoha in close.
Hubbard throwing strikes off his back to little effect.
The crowd are loving this. Great action here.
Kealoha passes easily into side control. Nice work.
Kealoha tries to advance to mount but can't.
Kealoha wants to work for a kimura but he's foiled early by Hubbard, who protects the arm well.

That's three minutes gone in the round.
Hubbard gives up the full mount - oops, sloppy defensive grappling there!
Kealoha tries to control but Hubbard wriggling away.
Hubbard regains half guard.
Hubbard is looking to improve his position.
Kealoha has freed up his trapped foot and advances to mount.
Kealoha trying to control but he's not successful this time.
Kealoha working to secure an arm triangle but it's not happening for him just yet.

That's four minutes gone in the round.
Kealoha jumps to the side looking to secure the arm triangle
. Ooooh, that looks tight
Hubbard is gargling but he's managed to escape! Nice work there by Hubbard and Kealoha has given up the dominant position trying to land that submission.
Kealoha wants to control but Hubbard is keeping him busy.
Hubbard struggling a bit here.
Kealoha advances nicely into full mount.
This has been an exciting period of action!
The crowd are going absolutely nuts as the round comes to an end - what a fantastic round of action!
Hubbard is looking to improve his position but Kealoha isn't that keen on the idea.
Kealoha is looking to work his way around to Hubbard's back. He needs to be careful though, as he's in danger of losing this dominant position.
And thats the end of the round the fighters go back to their corners.
A close round but Wily Kealoha will probably get the nod.
The referee calls time. The cornermen exit stage left and we're back to business.

Hubbard throws a series of punches but Kealoha avoids them all with ease.
Kealoha on the wrong end of an overhand right that came out of nowhere.
Kealoha looks for a takedown but Hubbard sprawls well.
Hubbard moves into range and throws a lovely three punch combination.
Hubbard swinging wildly here.
Hubbard avoids the body shot from Kealoha.
Hubbard throws out a token jab with nothing on it.
Hubbard throws a combination. Kealoha tries to block but a couple of punches get through.
Fantastic stuff here - a very entertaining period of action, which has drawn cheers from the crowd.
Kealoha slips a jab and a cross from Hubbard.
Hubbard smiles there as he lands a nice right hand right on the button.
Kealoha manages to get an easy takedown there - catching Hubbard on his heels. He'll look to pass Hubbard's guard now, I'm sure.
Kealoha passes Hubbard's right leg, so he's now in half guard.
That's one minute gone in the round.
Kealoha is working for submissions here but there's nothing on.

Hubbard actively working from the bottom here.
Kealoha has freed up his trapped foot and advances to mount.
Kealoha works his way to his opponent's back.
Kealoha looking to break Hubbard's wrist control so he can sink in the choke. Hubbard remaining controlled and patient though - he really has to keep calm otherwise Kealoha will wrap this one up with the rear naked choke!
Kealoha slows the pace down here. Having a little breather whilst he's in a dominant position, looking to rest and regain some energy, ready to go for the finish.
Hubbard preventing the rear naked choke attempt from Kealoha.
The crowd cheering loudly, showing their appreciation for the quality fight we're seeing here.
Hubbard is being controlled on the ground here - he must escape this position otherwise surely the end is near.
That's two minutes gone in the round.
Hubbard breaks Kealoha's hooks off and manages to turn into his guard.
The ref warns both fighters not to hold the cage as they work up against the meshing.
Kealoha looking for submissions from the bottom here. Moving his hips around, possibly looking for an armbar.
Hubbard pressing down on his opponent's thigh, looking to pass guard. Kealoha is keeping the position for now.
Hubbard passes easily into side control. Nice work.
Hubbard wants to stand but Kealoha has his arm trapped.
Hubbard is looking for a kimura. He might have it! No, Kealoha has escaped the position, nice work there.
Kealoha manages to land a sweep and he's now on top! Lovely Jiu Jitsu!
Kealoha frees up his trapped foot and advances to mount.
Hubbard slips a leg in and gets back to half guard.
That's three minutes gone in the round.
Kealoha is looking for an arm triangle, whilst trying to pass to side control. Hubbard doesn't seem that keen to cooperate though. No luck this time Kealoha.
Hubbard is looking to regain full guard. Not this time though.
Kealoha is working for submissions here but there's nothing on.
Kealoha is looking for a kimura but he's never going to get it from there.
Kealoha is pressing down on Hubbard's thigh, looking to free his foot. Hubbard is holding on for now.
Hubbard is looking to control Kealoha's leg but it's slowly edging free. Can Hubbard avoid being mounted?
That's four minutes gone in the round.
Kealoha wants to free his trapped foot but Hubbard is holding on for dear life with his legs.
Kealoha is trying to work for a kimura but Hubbard is defending well.
Kealoha passes the guard and advances to mount!
Kealoha can't quite control the action as he would like just now, as Hubbard is looking to escape.
The crowd are going absolutely nuts as the round comes to an end - what a fantastic round of action!
Hubbard prevents Kealoha from taking his back.
And thats the end of the round the fighters go back to their corners.
A close second round but Wily Kealoha will probably get the nod - 10:9.
OK. That's time! The bell goes and we're back to the action.

Hubbard tests Kealoha's chin there with a solid looking shot.
Nice takedown defense from Kealoha. No joy for Hubbard on that attempt.
Hubbard scores with a nice strike.
Kealoha changes levels and looks for a double leg takedown. Hubbard tries to avoid it but Kealoha manages to keep hold of a leg and drag Hubbard to the ground. Hubbard escapes though and pops straight back up to his feet.

Kealoha rushes Hubbard and presses him up against the cage.
Hubbard is looking to break free of the clinch but Kealoha has double underhooks.
Kealoha has Hubbard pressed against the cage, preventing Hubbard from circling away and getting back to striking at range.
Hubbard goes for a body shot but it's blocked.
Kealoha swings away with an uppercut that misses.
Hubbard looks like he'd prefer to be striking at range right now.
Kealoha will no doubt start fighting again in a minute but for now he's just having a little rest, leaning Hubbard up against the cage.
Kealoha has hold of one of Hubbard's legs. Hubbard is fighting the takedown attempt but Kealoha gets the trip and lands the takedown into guard.
That's one minute gone in the round.
Hubbard controls Kealoha momentarily but Kealoha frees himself.
Hubbard wants to sweep but no luck.
Kealoha looking to sit in guard and control but Hubbard gets the butterfly guard and sweeps. He's now in the guard on the top.
Hubbard wanted to stand there but Kealoha had control of the position.
The fighters are pressed up against the cage, both looking to find a bit of space to work.
Kealoha is working for submissions here. He's thrown up his legs looking for a triangle but Hubbard frees his head nicely. Oh but Kealoha has switched to an armbar! Hubbard is tapping furiously! Lovely submission there!
Ladies and gentlemen, after 1:46 of round 3, we have a winner by way of Submission (Triangle Armbar). Wily Kealoha!
A very excited looking Wily Kealoha made sure he remembered to thank all the fans both in the arena and on the internet. He said all the coolest people spend all day on MMA websites, which got a big reaction.
|
|
|
|
|
|
|
|
|
|
|
|
|
|
|
|
|
|
|
|
|
|
|
| S |
C
A |
G |
S |
C
B |
G |
|
S |
C |
G |
|
energy
A | B |
|
hype
A | B |
|
pop
A | B |
|
mgr
A | B |
|
FIGHT
RATING
100% |
|
|
|
|
|
|

