|
|
PBP Commentary |
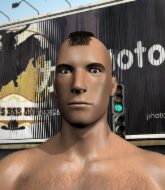
Coming up we have a heavyweight MMA rules bout between Shawn Bhaltair (ranked 0 p4p, 0 weight class) and Trygve Bondevik (ranked 0 p4p, 0 weight class). Bhaltair comes to the cage accompanied by GSTP. Shawn Bhaltair looks tired to me. Hopefully he has got enough gas left in the tank to put in a good performance.
 |
|
 |
| 187 cm
20
270 lbs
4 - 3 - 0 |
|
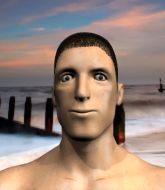
206 cm
28
280 lbs
7 - 6 - 0 |
BJJ Blue Belt
Brawler
Granite chin |
|
BJJ Blue Belt
Decent boxing
Knockout power |
|
| |
|
Ladies and gentlemen. This fight is 3 rounds, in the heavyweight division.
Introducing the fighter to my left, fighting out of the red corner.
With a record of
4 - 3 - 0, fighting out of Los Angeles, Shawn Bhaltair!
And introducing the fighter to my right, fighting out of the blue corner.
With a record of
7 - 6 - 0, fighting out of London, Trygve Bondevik!
The judges for this bout are Steve Smith, Robert Douchet and William Peck.

The bell rings for round one and we are underway!
Bondevik fails with a takedown attempt.
Bhaltair stuffs a takedown. It's all about dictating where the fight takes place and Bhaltair wants it to stay on the feet.
Bondevik wants to clinch.
Bhaltair tries to bum rush Bondevik with a series of wild strikes but Bondevik uses good footwork to avoid the assault.
Bondevik fakes high and shoots in for a takedown but Bhaltair avoids it really well and circles away.
Shawn Bhaltair has stuffed three takedown attempts in the round now. That's going to take a lot out of Trygve Bondevik.

Bondevik closes the distance and gets a double leg, slamming Bhaltair to the mat! Bhaltair manages to get full guard.
Bondevik stopping the sweep attempt from Bhaltair.
Bhaltair keeping full guard, as Bondevik tries to pass.
Bhaltair trying to strike from the bottom but really, it's not the best position to be doing that from!

That's one minute gone in the round.

Bhaltair escapes his hips to the side and looks to be working for an armbar. Bondevik gives him a little smile and shakes his head. No chance.
Bhaltair throws a couple of weedy looking strikes off his back.
Bhaltair on his back here. We all know that wrestlers don't like being on their back so let's see if Bhaltair tries to get out of the position.
Bhaltair keeping moving, preventing Bondevik from controlling successfully.
Bondevik is taking a break and basically stalling. The referee will not allow him to do that for long.
Bondevik won't allow Bhaltair to get back to his feet.
Bondevik trying to control but Bhaltair is working from the bottom.

The ref calls for a clean break and stands the fighters back up. Trygve Bondevik wasn't active enough on the ground.
The fight stays on the outside here - Bhaltair looks like he's thinking about clinching though.

That's two minutes gone in the round.
Bondevik checks a leg kick.
Bondevik fails with a takedown attempt from distance.
Bondevik shoots in and gets a takedown into half guard. Bondevik showed some decent athleticism there.
Bondevik prevents Bhaltair from improving his position.
Bhaltair is breathing heavily.
Bhaltair wants to get back to his feet.

Bondevik is trying to work for a kimura. This could be trouble! No, Bhaltair has managed to free his arm - good work.
The crowd cheering loudly, showing their appreciation for the quality fight we're seeing here.
Bondevik is sneakily working for an arm triangle but Bhaltair sees it coming and defends easily.
Bondevik wants to pass the guard but Bhaltair is defending well.

That's three minutes gone in the round.
Bondevik is trying to work for a kimura. This could be trouble! No, Bhaltair has managed to free his arm - good work.
Bondevik is trying to control. Bhaltair wants to improve his position but can't escape this time.
Bondevik prevents Bhaltair from improving his position.
Bhaltair is trying to control but can't.
Bondevik wants to lay and pray for a moment but Bhaltair keeps working.
Bhaltair knows he needs to get back to his feet asap. He's simply no match for Bondevik on the ground.
Bhaltair tries to get to full guard but Bondevik has control of the leg.
Bondevik is looking for a kimura here.

That's four minutes gone in the round.
Bondevik uses his free foot to push down on Bhaltair's thigh. Eventually he works his other foot free and he's advanced to mount - this is trouble for Bhaltair.
Bondevik looking to control but Bhaltair is working nicely, looking to advance position himself.
Bhaltair regains half guard.
Bhaltair might be looking to lock onto one of his opponent's long limbs for a submission, whilst we're on the ground.
Bondevik passes the half guard and he's now in mount! Big trouble for Bhaltair!
As the round comes to an end the crowd are showing their appreciation for a great round of action.
Bhaltair is looking to improve his position but Bondevik isn't that keen on the idea.
And thats the end of the round the fighters go back to their corners.
Trygve Bondevik dominated that round.
The fighters' corners scream their final instructions, as the referee calls time. Here we go, back to the action!

A punch combination from Bhaltair misses.
Bondevik shoots in for a takedown. He's persisting with it as Bhaltair sprawls well. Bhaltair wins this battle and keeps the fight standing. Bondevik gets slowly back to his feet.
Bhaltair showing good head movement there, avoiding the strikes from Bondevik.
Bhaltair tries to clinch but Bondevik is having none of it.
Bhaltair has a takedown stuffed.
Bondevik shoots in for a takedown. He's persisting with it as Bhaltair sprawls well. Bhaltair wins this battle and keeps the fight standing. Bondevik gets slowly back to his feet.
Bhaltair throws a body punch but Bondevik moves out of range.
Bondevik tries to close the distance and clinch but Bhaltair swats him to one side with an open hand palm strike and circles away.
Bondevik is looking to take this fight into the clinch.
Bondevik tries to shoot in for a takedown. He's got hold of a leg but Bhaltair swivels and escapes.
Shawn Bhaltair has stuffed three takedown attempts in the round now. That's going to take a lot out of Trygve Bondevik.
That's one minute gone in the round.
Bondevik fails with a rather predictable takedown attempt.

Bhaltair closes the distance and looks for a trip takedown... aaaand he's got it - Bhaltair lands in his opponent's guard.
The fighters are pressed up against the cage, both looking to find a bit of space to work.
Both fighters are absolutely exhausted here.
Bondevik has a loose triangle. He'll be looking to tighten that up but Bhaltair can see exactly what he's planning and manages to posture up and free himself.
Bondevik utilising some decent striking defenses from the guard, preventing the ground and pound.
Bhaltair landing some decent shots from guard.
Bondevik is working the butterfly guard. He manages to land a nice scissor sweep and is now in half guard on the top. Nice move.
Bondevik looking to pass the half guard. Not this time.
That's two minutes gone in the round.
The fans in attendance giving it up for the two fighters, who have really let it all hang out in the last minute or so!
Bhaltair looking to work for a kimura from the bottom.
Bhaltair looking for submissions from an awkward position here.
The ref warns both fighters not to hold the cage as they work up against the meshing.
Bhaltair is not content to let Bondevik control the position.
Bondevik slows the pace down in half guard.
Bondevik is looking for a kimura but he's never going to get it from there.
Bondevik blocks the strikes from Bhaltair.
That's three minutes gone in the round.
Bondevik passes the half guard and he's now in mount! Big trouble for Bhaltair!
Bhaltair tries to get back to half guard but can't.
Bondevik can't quite control the action as he would like just now, as Bhaltair is looking to escape.
Bondevik swings around for an armbar but it's a sloppy attempt and Bhaltair is now in Bondevik's guard. A big mistake from Bondevik there, giving up the dominant position!
Bondevik being controlled here, momentarily.
Bhaltair wants to stand but Bondevik is controlling his posture from full guard.
That's four minutes gone in the round.
Bhaltair postures up in Bondevik's guard and throws a big left but Bondevik blocks it.
Bhaltair working some ground and pound from guard but it's not doing any damage.
Bhaltair avoids a guillotine attempt easily.
This has been an exciting period of action!
Bondevik is working actively off his back, looking to secure an arm or perhaps work for a triangle.
Bondevik looking to try and escape his hips here, looking for a submission. It looks like he's going for a triangle but Bhaltair is defending well. Bondevik quickly switches to an armbar and extends the arm! Bhaltair has no choice but to tap, to a very quick submission! Wow, that was lightning fast! Bondevik celebrates on the cage, with the crowd.
Ladies and gentlemen, after 4:59 of round 2, we have a winner by way of Submission (Armbar). Trygve Bondevik!
|
|
|
|
|
|
|
|
|
|
|
|
|
|
|
|
|
|
|
|
|
|
|
| S |
C
A |
G |
S |
C
B |
G |
|
S |
C |
G |
|
energy
A | B |
|
hype
A | B |
|
pop
A | B |
|
mgr
A | B |
|
FIGHT
RATING
38% |
|
|
|
|
|
|
