|
|
PBP Commentary |
Coming up we have a middleweight MMA rules bout between Solomon Conflict (ranked 0 p4p, 0 weight class) and Joao Henrique Acosta (ranked 0 p4p, 0 weight class). Joao Henrique Acosta is the more experienced fighter, so let's see if that makes a difference tonight.
 |
|
 |
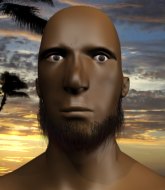
| 184 cm
25
188 lbs
0 - 0 - 0 |
|
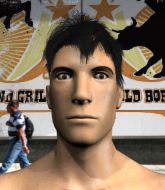
180 cm
19
185 lbs
1 - 4 - 0 |
BJJ White Belt
Excellent MT
Good in bed |
|
BJJ White Belt
Brawler
Solid chin |
|
| |
|
Ladies and gentlemen. This fight is 3 rounds, in the middleweight division.
Introducing the fighter to my left, fighting out of the red corner.
With a record of
0 - 0 - 0, fighting out of Sydney, Solomon Conflict!
And introducing the fighter to my right, fighting out of the blue corner.
With a record of
1 - 4 - 0, fighting out of Sydney, Joao Henrique Acosta!
The judges for this bout are Skip Squint, Summer Carpenter and Bruno Hogan.

The bell rings for round one and we are underway!

Conflict rushes Acosta and presses him up against the cage.

Conflict pushes off and circles away, back to the middle of the mat.
Conflict doesn't manage to clinch there - Acosta circles away.
Acosta keeps the fight standing with a nice sprawl.
The fight moves into the clinch position.
Acosta is trying to break the clinch but Conflict has him pressed against the cage.
Conflict has Acosta pressed against the cage, preventing Acosta from circling away and getting back to striking at range.
Acosta is trying to work out of this bad position, with his back against the cage.
Conflict is trying to pull guard but Acosta turns him against the cage and we stay in the clinch.
Conflict is looking to take this one to the mat.
That's three failed takedown attempts in the round for Solomon Conflict. That's going to take a lot out of him.
Acosta using the Thai plumb to throw knees but Conflict has his back arched nicely, preventing the strike.
Acosta tries to break free but Conflict pushes him back against the cage.

Conflict gets the body lock takedown. After a quick scramble, Acosta regains guard.
Acosta looks winded!
The referee claps his hands together and tells the fighters to work.
Conflict's corner is telling him to maintain position.
Conflict preventing the sweep.
We've seen a great period of action over the last minute or so - credit to both fighters for going all out!
Conflict throwing strikes from guard but Acosta blocks nicely.
Conflict has been looking to land a fair amount of strikes on the ground. He might be looking to soften his opponent up in order to work for a submission.
Conflict controlling from the top position.

That's one minute gone in the round.

Acosta looking for submissions off his back, moving his hips, looking for an opening.
Acosta wants to sweep but no luck.
Conflict not doing a lot at the moment. He'll have to show some more aggression or the fight will get stood up.

Solomon Conflict has forced the referee to step in and bring the fight back to the feet.
Conflict tries to clinch but is not successful on this occasion.
Conflict rushes Acosta and pushes him back against the cage in a clinch.
Conflict pushes off and circles away, back to the middle of the mat.
Acosta will need to tighten up his combinations if he doesn't want to gas himself out, swinging at thin air.
Joao Henrique Acosta seems to be the more aggressive standup fighter in this bout.
Conflict closes this distance looking for a takedown but Acosta circles away.
Conflict gets a clinch.

That's two minutes gone in the round.
Conflict ties up his opponent against the cage and manages to drag the fight down to the ground. Conflict no doubt will be looking to work submissions from his guard.

Conflict looking for a guillotine here but Acosta defends easily.
Conflict throwing strikes off his back to little effect.
Conflict tries to land a sweep but no joy.
Conflict looking for submissions from the bottom here. Moving his hips around, possibly looking for an armbar.
Acosta preventing the sweep.

Conflict has his feet on Acosta's hips. He pushes off and gets to his feet. Nice work.
Fantastic stuff here - a very entertaining period of action, which has drawn cheers from the crowd.
Thud! ouch! good body kick from Acosta - that will leave a mark!
Acosta throws a wild body kick that Conflict sees coming a mile off.
Acosta throws a hook to the side of Conflict's head but Conflict sees it coming and ducks under it beautifully.

That's three minutes gone in the round.
Conflict closes the distance and clinches up with Acosta, looking for a takedown. Conflict pushes Acosta against the cage but Acosta circles to the side and manages to break the clinch.
Conflict shoots in for a takedown - he's clinched up with Acosta but Acosta pushes him off and we're back to square one.
Conflict will have to do better than that with his takedown attempts.
Acosta throws a head kick but Conflict moves out of range.
Conflict throws a hook to the body but it doesn't connect.
Conflict fails with a takedown attempt.
Conflict clinches.
Conflict changes levels and goes for a takedown here. Acosta fights it off and pushes away nicely.
Conflict closes the distance and pushes Acosta back into the cage.
Conflict pulls Acosta into guard.
Acosta being controlled here momentarily.

That's four minutes gone in the round.
The ref warns both fighters not to hold the cage as they work up against the meshing.
Conflict bucks up whilst keeping hold of a body lock, managing to reverse the position. Now he's in top in Acosta's guard.
Acosta has his foot on Conflict's thigh. He's trying to push off and get in position for a triangle, I think. Conflict works his way back into a safe position though.
This is a great period of action - very entertaining stuff!
Conflict looking to control the position here, rather than advance.
Conflict working some ground and pound from guard but it's not doing any damage.
As the round comes to an end the crowd are showing their appreciation for a great round of action.
Conflict gets to his feet - Acosta follows without any prompting.
Joao Henrique Acosta is looking to keep the fight on the feet at all costs.
Acosta throws a head kick that misses
and Conflict counters by clinching up.
Acosta gets double underhooks to prevent a takedown attempt from Conflict.
And thats the end of the round the fighters go back to their corners.
Solomon Conflict dominated that round.
The minute break is over - no more time for sponges and pep talks - back to the action!

Conflict feints and as Acosta raises his hands in defense, Conflict changes levels and drives through with a takedown into guard.
Conflict drops back looking for a leg! Acosta is in trouble here! The fighters roll with the hold and Acosta manages to kick Conflict off! Conflict jumps back into Acosta's guard.
Conflict is intent on slowing down the pace of the fight, simply looking to control.
Acosta is breathing heavily.
Acosta preventing the ground and pound from doing any damage.
That's one minute gone in the round.
Conflict pushing down on Acosta's thigh, trying to pass to half guard. He's managed it... Nice work.
Conflict wants to pass the guard but Acosta is defending well.
Conflict is figuring out what he wants to do next.
Conflict wants to control but Acosta is keeping him busy.
Solomon Conflict overall seems to be getting the better of the ground position in the fight so far.
We must be close to a standup if these guys don't pick up the pace.
Conflict takes a deep breath and rests his weight momentarily on top of his opponent, to control the position.
The ref stands the fighters back up. Solomon Conflict wasn't doing enough on the ground.
Acosta pulls out of a head kick attempt.
Acosta moves out of range of the body kick.
Acosta tries a head kick but it misses.
Conflict throws a quick head kick that skims the top of Acosta's head.

It looks like Joao Henrique Acosta has been cut.
Conflict manages to get an easy takedown there - catching Acosta on his heels. He'll look to pass Acosta's guard now, I'm sure.
Fantastic stuff here - a very entertaining period of action, which has drawn cheers from the crowd.
Conflict throws a big elbow that misses.
Conflict stands up and looks to throw the legs aside to pass to side control. Acosta swivels though and keeps the full guard.
Conflict postures up in Acosta's guard and throws a big left but Acosta blocks it.
That's two minutes gone in the round.
Conflict passes into half guard.
Conflict throwing shots but they're hitting the canvas more than the man.
Conflict missing with some ground and pound from the half guard.
Acosta is trying to control but can't.
Conflict performing his best blanket impression for a moment.
Acosta wants to get back to full guard.
Conflict decides to stand and escape the position.
Conflict moves into the clinch.
Conflict tries for a takedown but Acosta manages to get underhooks.
That's three minutes gone in the round.
Conflict's corner calls for him to break the clinch, which he does.
Conflict shoots in and drives through. Acosta sprawls well.
Conflict throws a right and a left that Acosta avoids nicely.
Conflict shoots in for a takedown. "Ole!" shouts Acosta as he jumps to the side.
That's three failed takedown attempts in the round for Solomon Conflict. That's going to take a lot out of him.
Acosta looks to land a body kick but Conflict moved away.
A head kick misses from Conflict.
Horrible takedown by Conflict or perhaps it was just good defense by Acosta which made him look bad.
Conflict fails with a takedown attempt from distance.
Acosta throws a body kick that misses.
No luck with that takedown attempt from Conflict.
Acosta throws an uppercut from half a mile away. Conflict sees it coming and avoids it easily.
Conflict drives through and clinches with Acosta against the cage.
That's four minutes gone in the round.
Conflict breaks from the clinch.
Conflict tries to clinch up against the cage, rushing in to close the distance. Acosta manages to break the clinch and circles back to the middle of the mat.
Nice sprawl there from Acosta as Conflict shoots in.
Conflict tries to clinch up against the cage, rushing in to close the distance. Acosta manages to break the clinch and circles back to the middle of the mat.
A punch combination from Acosta misses.
Conflict shoots in for a takedown. "I don't think so" says Acosta as he avoids it easily.
Acosta looks to land a body kick but Conflict moved away.
Acosta throws the kick towards the body but Conflict avoids it.
Conflict tries to land a front kick but Acosta steps back. That was a bit too telegraphed.
Conflict shoots in looking for a takedown. Acosta tries to sprawl out of it but Conflict keeps driving through. The fighters are pinned against the cage. Acosta manages to get underhooks and after a bit of a struggle, circles away and we're back to standing.
This is a great period of action - very entertaining stuff!
Acosta misses with a looping right.
As the round comes to an end the crowd are showing their appreciation for a great round of action.
Acosta throws a sloppy head kick and Conflict moves out of range easily.
Conflict shoots for a takedown but Acosta saw that one coming a mile off and avoided it easily.
And thats the end of the round the fighters go back to their corners.
Solomon Conflict dominated that second round.
The cut man is working on Joao Henrique Acosta's cut.
Well, the break between rounds is over. Let's get back to the scrappin! And we move into the final round!

Conflict throws a nice inside leg kick.
Conflict blocks a head kick by Acosta.
Conflict throws a looping left and ducks down for a takedown. He's got his arms around Acosta's waist but Acosta gets an underhook and avoids the takedown by throwing Conflict off to one side.
A big right from Acosta misses.
Conflict moves out of range as Acosta throws a body kick.
Conflict shoots in but no luck this time.
Conflict fails to land the takedown.
That's three failed takedown attempts in the round for Solomon Conflict. That's going to take a lot out of him.
Conflict shoots in looking for a double leg takedown. Acosta defends it nicely.
Solomon Conflict is looking to throw some combinations by the looks of things.
Conflict tries for a takedown but Acosta sees it coming a mile off and avoids it easily.
Acosta throws a head kick that misses.
Conflict gets a clinch.
Both fighters are breathing heavily.
Acosta working hard to break the clinch.
That's one minute gone in the round.
Conflict's corner calls for him to break the clinch, which he does.
Conflict feints and as Acosta raises his hands in defense, Conflict changes levels and drives through with a takedown into guard.
Conflict is frustrating his opponent with some stalling tactics from top position.
Acosta not looking particularly offensive just at the moment.
Conflict engaging in some classic timewasting tactics.
Acosta throwing some rather feeble looking strikes off his back.
Acosta being controlled here, momentarily.
The referee decides to stand the fighters back up, due to lack of activity on the part of Solomon Conflict.
Acosta stuffs the takedown.
That's two minutes gone in the round.
Conflict will have to do better than that with his takedown attempts.
Acosta throws a head kick that misses and slips in the process. He scrambles back to his feet and the fighters circle.
Conflict has taken the fight to the clinch.
Conflict holding his opponent close, against the cage.
Conflict prevents Acosta from breaking the clinch.
Acosta prevents the takedown attempt.
This has been an exciting period of action!
Conflict decides to pull guard.
Conflict is really dominating this fight. Is there anything that Acosta can do to turn this around?
Acosta would like to get this fight back to the feet but can't get free from the closed guard.
Acosta trying to control but Conflict is working from the bottom.
Acosta throws a strike but Conflict rolls with it and manages to sweep. Now he's in guard on top.
That's three minutes gone in the round.
Conflict throwing strikes but missing.
Conflict showing good wrestling skills to control the position.
Conflict loading up with the ground and pound but he's missing more than he's landing in this flurry.
Conflict's corner is telling him to maintain position.

Neither fighter is doing enough for the referee's liking and he's decided to stand them back up.
Conflict takes a thudding leg kick, right into the meat of the thigh.
That's four minutes gone in the round.
Conflict looks for a takedown here. Will he get it? Acosta is fending him off so far but Conflict persists. Nope, Acosta circles away and we're back to standing.
Acosta stuffs a takedown. It's all about dictating where the fight takes place and Acosta wants it to stay on the feet.
Conflict staying out of range there.
Acosta throws a body kick but he was well out of range there.
Conflict throws a head kick but Acosta moves out of range.
A jab from Acosta misses.
Acosta is pinned up against the cage taking some big shots here. The referee is looking closely deciding whether he should stop the fight.
Conflict avoids the head kick by Acosta.
Acosta throws a head kick that misses and slips in the process. He scrambles back to his feet and the fighters circle.
Solomon Conflict is winning the standup battle so far.
A head kick misses from Conflict.
Acosta displays some good footwork, moving neatly out of range as Conflict throws out the jab.
As the round comes to an end the crowd are showing their appreciation for a great round of action.
Conflict lands a jab.
Conflict shoots in for a takedown - he's clinched up with Acosta but Acosta pushes him off and we're back to square one.
Joao Henrique Acosta has stepped it up - he knows he needs a finish here!
Solomon Conflict is fighting for a decision here - he's started to take the cautious approach.
Acosta throws a body kick but he was well out of range there.
And that's the end of the fight!
Solomon Conflict showed his dominance in that final round.
Well Conflict has outscored his opponent in every aspect of the fight today. Only a scarily incompetent judge or two will keep him from a well deserved win... Over to the ring announcer for the scorecards.
Ladies and gentlemen, after 3 rounds of action, we go to the scorecards for a decision.
Judge Skip Squint scores the fight 30:27
Judge Summer Carpenter scores the fight 30:27
Judge Bruno Hogan scores the fight 30:27
In favor of your winner, by unanimous decision... Solomon Conflict!
|
|
|
|
|
|
|
|
|
|
|
|
|
|
|
|
|
|
|
|
|
|
|
| S |
C
A |
G |
S |
C
B |
G |
|
S |
C |
G |
|
energy
A | B |
|
hype
A | B |
|
pop
A | B |
|
mgr
A | B |
|
FIGHT
RATING
67% |
|
|
|
|
|
|
