|
|
PBP Commentary |
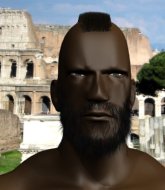
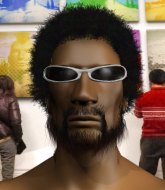
Coming up we have a heavyweight MMA rules bout between James Redmunsta (ranked 0 p4p, 0 weight class) and Remy Musampha (ranked 0 p4p, 0 weight class). James Redmunsta could well score a knockout today. He has the power to get to Remy Musampha's chin.
 |
|
 |
| 192 cm
18
260 lbs
0 - 0 - 0 |
|
192 cm
18
242 lbs
0 - 1 - 0 |
BJJ White Belt
Excellent MT
Granite chin |
|
BJJ Blue Belt
Brawler
Very confident |
|
| |
|
Ladies and gentlemen. This fight is 3 rounds, in the heavyweight division.
Introducing the fighter to my left, fighting out of the red corner.
With a record of
0 - 0 - 0, fighting out of Amsterdam, James Redmunsta!
And introducing the fighter to my right, fighting out of the blue corner.
With a record of
0 - 1 - 0, fighting out of Amsterdam, Remy Musampha!
The judges for this bout are Paulsen Ambrosius, Albert Achterberg and Aafke Stam.

The bell rings for round one and we are underway!
Redmunsta fails with the takedown.
Redmunsta looks to throw the jab but Musampha is out of range.

Musampha shoots in for a takedown and gets it. Let's see what he's got on the mat.
The referee is asking the fighters to pick up the pace.
Redmunsta is looking to stand up but Musampha isn't so interested in that idea.
Redmunsta knows he needs to get back to his feet asap. He's simply no match for Musampha on the ground.
Musampha looking to pass the guard.
Redmunsta is working an open guard here, looking to improve his position. No doubt that will leave him open to counters but at least he's being more offensive.
Musampha won't allow Redmunsta to get back to his feet.
Musampha forces his way into half guard.
The ref warns both fighters not to hold the cage as they work up against the meshing.

Musampha is thinking about going for an arm triangle but he can't free his leg.

That's one minute gone in the round.
Redmunsta is looking for a sweep. Musampha is wise to his cunning plan and keeps the top position.
Musampha seems content to maintain position for now, rather than mounting any offense.
Musampha prevents Redmunsta from standing back up.
Musampha seems content to maintain position for now, rather than mounting any offense.
Musampha prevents Redmunsta from improving his position.
Redmunsta could do with losing a few pounds - he looks very soft around the mid section, to put it politely.

That's two minutes gone in the round.
Redmunsta pushes Musampha off looking to stand but Musampha dives back in and keeps control.

The ref stands the fighters back up, due to lack of action by Remy Musampha.
Redmunsta shoots in and drives through. Musampha sprawls well.
Musampha tries a head kick but it misses.
Musampha tries to clinch there but Redmunsta circles away.
Redmunsta fails with a takedown attempt.
That's three failed takedown attempts in the round for James Redmunsta. That's going to take a lot out of him.
Musampha pulls out of a head kick attempt.
Musampha motions for Redmunsta to come forward. Musampha throws a leg kick but it misses it's target.
Both fighters circling a little - Redmunsta finishes the exchange with a kick to the body.
Musampha shoots in looking for a double leg takedown. Redmunsta defends it nicely.

That's three minutes gone in the round.
Redmunsta stuffs the takedown attempt from Musampha. Musampha gets slowly back to his feet.
Musampha looks winded!
Musampha fails with a rather predictable takedown attempt.
Redmunsta looks for a takedown here. Will he get it? Musampha is fending him off so far but Redmunsta persists. Nope, Musampha circles away and we're back to standing.
Redmunsta shoots in for a takedown but Musampha shows good takedown defense.
Musampha steps to his left, right into the path of a big body kick from Redmunsta. That one must have hurt.
Redmunsta fails to land the takedown.
Redmunsta lands with a head kick! That's gotta hurt.

Redmunsta moves into the clinch successfully.

That's four minutes gone in the round.
This has been an exciting period of action!

Redmunsta gets control of Musampha's arms and successfully pulls guard. Redmunsta will no doubt be looking for submissions off his back.
Musampha missing there with some ground and pound from the guard.
Redmunsta throws a couple of weedy looking strikes off his back.
Redmunsta wants to sweep here but Musampha controlling him for the moment.
Musampha is frustrating his opponent with some stalling tactics from top position.
The fighters are pressed up against the cage, both looking to find a bit of space to work.

Redmunsta is looking for a triangle but Musampha pushes his legs off easily.
As the round comes to an end the crowd are showing their appreciation for a great round of action.
Redmunsta trying to control the position.
And thats the end of the round the fighters go back to their corners.
James Redmunsta dominated that round.
The fighters get back to their feet, the hooter sounds and we're back to the action!

Redmunsta shoots in and drives through. Musampha sprawls well.
Both fighters circling a little - Redmunsta finishes the exchange with a kick to the body.
James Redmunsta is looking to throw some combinations by the looks of things.
Redmunsta fails in his attempt to clinch.
Redmunsta tries to clinch but Musampha moves out of range.
Redmunsta tries to clinch but Musampha is having none of it.
Musampha slaps away a takedown attempt from Redmunsta, before circling back to the center of the mat.
Musampha slaps away a takedown attempt from Redmunsta, before circling back to the center of the mat.
That's three failed takedown attempts in the round for James Redmunsta. That's going to take a lot out of him.
Redmunsta fails to land with the punch combination there - jab, cross, hook, miss, miss, miss.
Redmunsta circles away from the clinch attempt.
Redmunsta throws a quick head kick that skims the top of Musampha's head.
That's one minute gone in the round.
Musampha fakes high and shoots in for a takedown but Redmunsta avoids it really well and circles away.
Redmunsta displays good takedown defense there as he swats away a double leg from Musampha.
Redmunsta throws a right hand that Musampha ducks under and follows up with a left that Musampha also avoids with ease.
Musampha wants to clinch.
Musampha shoots in for a takedown. He's persisting with it as Redmunsta sprawls well. Redmunsta wins this battle and keeps the fight standing. Musampha gets slowly back to his feet.
Musampha is breathing heavily.
Redmunsta tries for a takedown but Musampha sees it coming a mile off and avoids it easily.
That's two minutes gone in the round.
Redmunsta clinches up against the cage.

Redmunsta escapes the clinch and we're back to striking.
Musampha takes a kick to the side of the head.
A combination from Redmunsta does no damage.
We've seen a great period of action over the last minute or so - credit to both fighters for going all out!
A telegraphed takedown attempt from Musampha is defended easily by Redmunsta.
Redmunsta shoots in looking for a takedown. Musampha tries to sprawl out of it but Redmunsta keeps driving through. The fighters are pinned against the cage. Musampha manages to get underhooks and after a bit of a struggle, circles away and we're back to standing.
Redmunsta fails with a takedown attempt from distance.
That's three minutes gone in the round.
Redmunsta moves into the clinch.
Musampha is trying to break the clinch but Redmunsta is controlling him.
Redmunsta manages to get underhooks and slows down the pace for a moment.
Redmunsta is trying to pull guard but Musampha has him pressed against the cage.
Redmunsta unloads a knee to the mid-section.
Musampha tries to pull guard but Redmunsta forces him back to his feet, against the cage.
Musampha wants to stall.
Redmunsta pressing his opponent against the cage.
Musampha changes levels and goes for a takedown here. Redmunsta fights it off and pushes away nicely.
That's four minutes gone in the round.
Musampha tries to clinch up.
Musampha shoots in with a takedown attempt and he has Redmunsta pinned against the cage. Redmunsta gets the underhooks and manages to circle away.
Redmunsta bobs and weaves into range and then changes levels and scores with a nice takedown into side control.
As the round comes to an end the crowd are showing their appreciation for a great round of action.
Musampha tries to buck Redmunsta off but Redmunsta is having none of it.
Redmunsta wants to control but Musampha is keeping him busy.
We've seen a great period of action over the last minute or so - credit to both fighters for going all out!
Musampha is working hard to escape and get back to his feet. After a battle for position, Redmunsta asserts his dominance and retains side control.
And thats the end of the round the fighters go back to their corners.
James Redmunsta dominated that second round.
The minute break is over - no more time for sponges and pep talks - back to the action! Let's get this one finished - here comes the final round!

Redmunsta takes the fight into the clinch.
Redmunsta breaks the clinch.
Redmunsta fails with the takedown.
Redmunsta shoots in looking for a takedown. Musampha tries to sprawl out of it but Redmunsta keeps driving through. The fighters are pinned against the cage. Musampha manages to get underhooks and after a bit of a struggle, circles away and we're back to standing.
Redmunsta checks the leg kick.
Redmunsta tries to close the distance and clinch but Musampha swats him to one side with an open hand palm strike and circles away.
Musampha throws a body kick but he was well out of range there.
That's one minute gone in the round.
Musampha shoots for a takedown but Redmunsta saw that one coming a mile off and avoided it easily.
Redmunsta closes the distance and clinches up with Musampha, looking for a takedown. Redmunsta pushes Musampha against the cage but Musampha circles to the side and manages to break the clinch.
That's three failed takedown attempts in the round for James Redmunsta. That's going to take a lot out of him.
Musampha displays good takedown defense there as he swats away a double leg from Redmunsta.
Musampha tries to land with a swinging hook to the body but Redmunsta was well out of range. Poor timing from Musampha.
Redmunsta shoots in with a takedown attempt and he has Musampha pinned against the cage. Musampha gets the underhooks and manages to circle away.
Redmunsta clinches up with Musampha and pushes him back against the cage.
Redmunsta has Musampha pressed against the cage.
Musampha is trying to slow down the pace of the fight but Redmunsta is keeping busy.
That's two minutes gone in the round.
Musampha drops down looking for an ankle pick but Redmunsta pulls his leg out and moves away.
Musampha tries to close the distance and clinch up against the cage but Redmunsta paws at him with a jab and circles away.
Redmunsta shoots in for a takedown but Musampha shows good takedown defense.
Redmunsta clinches.
Musampha looking to stall.
Redmunsta tries for a takedown. No joy.
Musampha jumps guard but Redmunsta stands there with Musampha around his waist. Musampha gives up and drops back to his feet. We remain in the clinch.
Musampha is defending well against a takedown attempt.
That's three minutes gone in the round.
Redmunsta's corner calls for him to break the clinch, which he does.
Redmunsta misses with a takedown attempt. He shot from a bit too far out.
Both fighters are breathing heavily.
Redmunsta will have to do better than that with his takedown attempts.
A head kick misses from Musampha.
Musampha tries to close the distance and clinch up against the cage but Redmunsta paws at him with a jab and circles away.
Redmunsta clinches with his opponent.
Redmunsta jumps guard but Musampha stands there with Redmunsta around his waist. Redmunsta gives up and drops back to his feet. We remain in the clinch.
Redmunsta has Musampha pressed up against the cage and is working for takedown. Musampha manages to improve position though and keeps the fight standing.
That's four minutes gone in the round.
Musampha tries to pull guard but Redmunsta holds him up against the cage and eventually Musampha drops back down to his feet.
Musampha prevents a body shot from Redmunsta.
Redmunsta fails to pull the fight into his guard.
Redmunsta changes levels and goes for a takedown here. Musampha fights it off and pushes away nicely.
Redmunsta misses with a wild body shot.
James Redmunsta is winning the standup battle so far.
Redmunsta wants to clinch
and Musampha counters with a nice single leg takedown and he's in Redmunsta's guard now.
The fans in attendance giving it up for the two fighters, who have really let it all hang out in the last minute or so!
The crowd applaud the fighters efforts here as the round comes to an end.
Musampha trying to control but Redmunsta is working from the bottom.
Remy Musampha has stepped it up - he knows he needs a finish here!
James Redmunsta is fighting for a decision here - he's started to take the cautious approach.
Musampha postures up and lands a big shot to Redmunsta's brow.
And that's the end of the fight!
I would just about give that final round to Remy Musampha.
I think Redmunsta has won this one but let's see what the judges have to say. Over to the ring announcer for the scorecards.
Ladies and gentlemen, after 3 rounds of action, we go to the scorecards for a decision.
Judge Paulsen Ambrosius scores the fight 29:28
Judge Albert Achterberg scores the fight 29:28
Judge Aafke Stam scores the fight 29:28
In favor of your winner, by unanimous decision... James Redmunsta!
|
|
|
|
|
|
|
|
|
|
|
|
|
|
|
|
|
|
|
|
|
|
|
| S |
C
A |
G |
S |
C
B |
G |
|
S |
C |
G |
|
energy
A | B |
|
hype
A | B |
|
pop
A | B |
|
mgr
A | B |
|
FIGHT
RATING
54% |
|
|
|
|
|
|

