|
|
PBP Commentary |
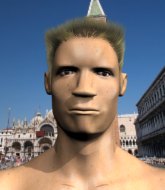
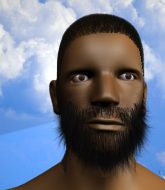
Coming up we have a heavyweight MMA rules bout between Takeya Maeda (ranked 0 p4p, 0 weight class) and Brett Hogers (ranked 0 p4p, 0 weight class). Both these guys have really solid chins. Will we see a standup war or will they both decide that a knockout is unlikely and try to win the fight elsewhere?
 |
|
 |
| 197 cm
22
237 lbs
2 - 0 - 0 |
|
193 cm
22
274 lbs
0 - 2 - 0 |
BJJ Brown Belt
Counter striker
Good chin |
|
BJJ White Belt
Brawler
Solid chin |
|
| |
|
Ladies and gentlemen. This fight is 3 rounds, in the heavyweight division.
Introducing the fighter to my left, fighting out of the red corner.
With a record of
2 - 0 - 0, fighting out of Tokyo, Takeya Maeda!
And introducing the fighter to my right, fighting out of the blue corner.
With a record of
0 - 2 - 0, fighting out of Tokyo, Brett Hogers!
The judges for this bout are Shirou Masuda, Yuuki Gou and Taro Takaoka.

The bell rings for round one and we are underway!
Hogers will need to close the distance a bit before he attacks - that leg kick was thrown from too far away.
Maeda blocks a head kick by Hogers.
Hogers tries a switch kick but it misses it's target.
Maeda fails with a rather predictable takedown attempt.
Maeda blocks a head kick by Hogers.
Hogers throws a head kick that misses and slips in the process. He scrambles back to his feet and the fighters circle.
Hogers connects with a lovely right hand, straight down the pipe.
Hogers rushes forward with a series of wild hooks but Maeda moves out of range and avoids them all easily.
Maeda moves out of range of the strikes.
Hogers throws a sloppy head kick and Maeda moves out of range easily.
Hogers misses with the combination.
Maeda misses with a takedown attempt - Hogers sprawls well and throws a nice strike on the way out which just misses.
We've had a slow start to the round here - hopefully the action picks up.
A really sloppy takedown attempt there from Maeda.
That's three failed takedown attempts in the round for Takeya Maeda. That's going to take a lot out of him.
Maeda fails with the takedown.
Maeda fails miserably with a takedown attempt.

That's one minute gone in the round.

Maeda drives through with a takedown into guard.
Maeda stops Hogers from standing up.
Maeda trying to control the position from guard on top but Hogers is wriggling around, looking for whatever he can.
Hogers wants to stand up but Maeda is controlling him.
Maeda stands up and looks to throw the legs aside to pass to side control. Hogers swivels though and keeps the full guard.
Maeda prevents Hogers from getting back to his feet.

That's two minutes gone in the round.
The crowd are getting on the fighters' backs, as the pace has dropped off in the last minute or so.
Hogers is looking to stand back up but Maeda counters by passing into half guard. Oops... bit sloppy there by Hogers.
Hogers should think about turning a few of those tyres round his middle into muscle if he wants people to take him seriously as an athlete.
Hogers is trying to stand back up. He's worked his way up against the cage but Maeda has just dragged him back down to the mat.

Neither fighter is doing enough for the referee's liking and he's decided to stand them back up.
Hogers gets taken down but at least he's managed to land in guard.
Maeda stops Hogers from standing up.
Maeda wants to control from the top but Hogers keeps moving.

That's three minutes gone in the round.
Maeda won't allow Hogers to get back to his feet.
Maeda is taking a break and basically stalling. The referee will not allow him to do that for long.
Hogers keeping moving, preventing Maeda from controlling successfully.
Hogers wants to get back to his feet but Maeda is in a dominant position and won't allow it.

That's four minutes gone in the round.
The crowd are hurling abuse towards the fighters... You can hardly blame them though because there isn't a lot going on in the fight.
Maeda is taking a break and basically stalling. The referee will not allow him to do that for long.
Hogers wants to get back to his feet but Maeda is in a dominant position and won't allow it.
It looks like we're going to have a standup here. Neither fight is doing enough on the ground.
Hogers wants to slow Maeda down by chopping away at his legs.
Maeda misses with a takedown attempt - Hogers sprawls well and throws a nice strike on the way out which just misses.
Maeda is breathing heavily.
Boooooooooooooooooooo!!! God, this has been a terrible round. Come on you two, sort yourselves out!
Maeda fails with a rather predictable takedown attempt.
Maeda checks a leg kick.
And thats the end of the round the fighters go back to their corners.
Takeya Maeda dominated that round.
That's time! Maeda's corner gives him a slap on the ass as he gets ready to fight.

Hogers ducks down and throws a hook to the body but Maeda moves away.
Hogers swings away with a leg kick that misses.
Hogers misses with an uppercut.
A head kick misses from Hogers.
Hogers misses with a few strikes there.
Maeda shoots in and drives through. Hogers sprawls well.
Hogers throws the left hand but Maeda avoids the punch easily.
Hogers scores with a decent looking hook.
Hogers ducks under a wild hook from Maeda.
Hogers throws a decent looking leg kick but it doesn't land clean.
Takeya Maeda is looking to throw some combinations by the looks of things.
Hogers fakes a head punch and goes low to the body. Nicely done.
We've had a slow start to the round here - hopefully the action picks up.
Maeda tries for a takedown but Hogers sees it coming a mile off and avoids it easily.
Hogers throws a sloppy head kick and Maeda moves out of range easily.
Hogers looking to land some kicks to the body here.
Maeda fails with a rather predictable takedown attempt.
That's three failed takedown attempts in the round for Takeya Maeda. That's going to take a lot out of him.
Both fighters are absolutely exhausted here.
Hogers throws a head kick but Maeda moves out of range.
That's one minute gone in the round.
Maeda blocks a head kick by Hogers.
Brett Hogers is looking to keep the fight on the feet at all costs.
Nice sprawl there from Hogers as Maeda shoots in.
Hogers misses with a double jab.
Hogers cracks a nice hook into Maeda's ribs.
Maeda fails with a rather predictable takedown attempt.
Hogers fails to land with a series of punches.
Maeda throws a looping left and ducks down for a takedown. He's got his arms around Hogers's waist but Hogers gets an underhook and avoids the takedown by throwing Maeda off to one side.
Hogers fails to land with a series of punches.
Hogers misses the shot to the body.
Hogers scores with a nice body kick.
Hogers throws a hook but Maeda avoids it easily.
Hogers throws a sloppy head kick and Maeda moves out of range easily.
Hogers swings for the body but Maeda moves out of range.
That's two minutes gone in the round.
Well. There's a bit of a lull in the action here and the crowd are starting to get restless.
Maeda moves out of range of the body kick.
Hogers rushes forward with a series of wild hooks but Maeda moves out of range and avoids them all easily.
Hogers misses with a hook.
Nice sprawl there from Hogers as Maeda shoots in.
Hogers lands a nice looking body shot.
Maeda will have to do better than that with his takedown attempts.
No joy there for Hogers, who threw a few shots but didn't land.
Maeda tries for a takedown but Hogers sees it coming a mile off and avoids it easily.
Hogers throws an uppercut from half a mile away. Maeda sees it coming and avoids it easily.
Hogers misses with the combination.
Nice takedown defense from Hogers. No joy for Maeda on that attempt.
Maeda will have to do better than that with his takedown attempts.
Hogers throws a hook to the body but it doesn't connect.
Maeda blocks a head kick by Hogers.
That's three minutes gone in the round.
Nice takedown defense from Hogers. No joy for Maeda on that attempt.
Hogers throws a body kick but he wasn't in range.
Maeda shoots in for a takedown but doesn't get it.
Maeda closes the distance and clinches up with Hogers, looking for a takedown. Maeda pushes Hogers against the cage but Hogers circles to the side and manages to break the clinch.
Maeda darts in and lands a nice takedown into half guard.
Maeda trying to control from half guard but Hogers is working away.
That's four minutes gone in the round.
Maeda stops Hogers from getting back to his feet.
Maeda is figuring out what he wants to do next.
Maeda trying to control the action but Hogers is working from the bottom.
Hogers is trying to escape back to his feet but Maeda uses the scramble to pass into side control.
And thats the end of the round the fighters go back to their corners.
Brett Hogers showed his class in that round. I'd imagine he'll take it on all the scorecards.
That's time! Maeda's corner gives him a slap on the ass as he gets ready to fight. Ladies and gentlemen, this is the final round!

Hogers fakes a head shot and lands one to the body.
Hogers throws a combination but comes up with nothing but fresh air.
Hogers misses with a half-hearted attempt at a head kick.
Maeda closes the distance and looks for a trip takedown... aaaand he's got it - Maeda lands in his opponent's guard.
Maeda stops Hogers from standing up.
That's one minute gone in the round.
Maeda is just sitting in guard, looking to avoid any submissions.
Both fighters are breathing heavily.
Hogers keeping moving, preventing Maeda from controlling successfully.
The ref warns both fighters not to hold the cage as they work up against the meshing.
That's two minutes gone in the round.
The crowd are hurling abuse towards the fighters... You can hardly blame them though because there isn't a lot going on in the fight.
Maeda sitting in guard here, content to control.
Hogers wants to stand and escape but Maeda is having none of it.
That's three minutes gone in the round.
Maeda trying to control the position from guard on top but Hogers is wriggling around, looking for whatever he can.

Hogers uses the cage to get back to his feet.

Maeda gets in close and instigates a clinch.
Maeda prevents Hogers from breaking the clinch.
Maeda jumps into guard, dragging Hogers to the mat.
Maeda is trying to keep Hogers in close.
That's four minutes gone in the round.
Maeda has Hogers pulled in close to control his posture.
Maeda is trying to control the position but Hogers postures up.
Boooooooooooooooooooo!!! God, this has been a terrible round. Come on you two, sort yourselves out!
The referee stands the fighters back up. Takeya Maeda just wasn't active enough from the dominant position.
Hogers throws a body punch but Maeda moves out of range.
Brett Hogers seems to be the more aggressive standup fighter in this bout.
Maeda checks a low kick. Bone on bone - not my idea of a good time.
Maeda closes the distance and clinches up with Hogers, looking for a takedown. Maeda pushes Hogers against the cage but Hogers circles to the side and manages to break the clinch.
And that's the end of the fight!
Takeya Maeda showed his dominance in that final round.
I think Maeda has won this one but let's see what the judges have to say. Over to the ring announcer for the scorecards.
Ladies and gentlemen, after 3 rounds of action, we go to the scorecards for a decision.
Judge Shirou Masuda scores the fight 29:28
Judge Yuuki Gou scores the fight 29:28
Judge Taro Takaoka scores the fight 29:28
In favor of your winner, by unanimous decision... Takeya Maeda!
|
|
|
|
|
|
|
|
|
|
|
|
|
|
|
|
|
|
|
|
|
|
|
| S |
C
A |
G |
S |
C
B |
G |
|
S |
C |
G |
|
energy
A | B |
|
hype
A | B |
|
pop
A | B |
|
mgr
A | B |
|
FIGHT
RATING
17% |
|
|
|
|
|
|
