|
|
PBP Commentary |
Coming up we have a middleweight MMA rules bout between Kaz Shark (ranked 0 p4p, 0 weight class) and Frank Woods (ranked 0 p4p, 0 weight class). Over to our ring announcer for the fighter introductions!
 |
|
 |
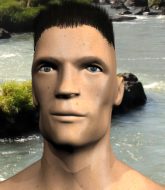
| 197 cm
20
190 lbs
0 - 0 - 0 |
|
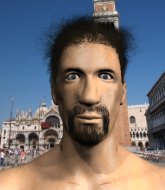
182 cm
21
185 lbs
0 - 2 - 0 |
BJJ White Belt
Brawler
Big heart |
|
BJJ White Belt
Decent boxing
Likes musicals |
|
| |
|
Ladies and gentlemen. This fight is 3 rounds, in the middleweight division.
Introducing the fighter to my left, fighting out of the red corner.
With a record of
0 - 0 - 0, fighting out of London, Kaz Shark!
And introducing the fighter to my right, fighting out of the blue corner.
With a record of
0 - 2 - 0, fighting out of London, Frank Woods!
The judges for this bout are Donald Grub, James Ackerman and Colin Fotheringham.

The bell rings for round one and we are underway!
Shark takes a shot to the eye socket. That's gotta hurt.
Shark fails with an attempt to clinch.
Shark throws a right and a left that Woods avoids nicely.

Shark rushes Woods and pushes him back against the cage in a clinch.

Woods breaks the clinch and we return to the middle of the mat.

Shark drops down and drives through with a powerful takedown into guard.

Shark stands up and waves to Woods to follow him.
Woods is the aggressor but that punch slipped nicely by Shark.
Shark misses with a double jab.
Shark really does look like a pencil wearing a pair of gloves. Let's hope he has a gameplan to suit that ridiculous body shape.
Woods throws a lazy uppercut
and Shark makes him pay by landing a nice hook to the body before moving out of range.
Woods looks winded!
The crowd cheering loudly, showing their appreciation for the quality fight we're seeing here.
Shark will have to do better than that with his takedown attempts.
Shark fails with an attempt to clinch.
Shark fails with a takedown attempt.
Shark misses with a wild combination.

That's one minute gone in the round.
A head kick misses from Shark.
Shark dodges the punch combination from Woods.
Shark looks for a takedown here. Will he get it? Woods is fending him off so far but Shark persists. Nope, Woods circles away and we're back to standing.
That's three failed takedown attempts in the round for Kaz Shark. That's going to take a lot out of him.
Shark moves into the clinch.
Woods has Shark pressed up against the cage and is working for takedown. Shark manages to improve position though and keeps the fight standing.

Shark breaks from the clinch.
Shark shoots in and scores a nice double leg takedown into half guard.
Shark is looking to advance position but Woods won't allow it.
Shark will need to keep those long limbs tucked in whilst he's on the ground, to prevent any submissions.

That's two minutes gone in the round.
Shark looks over to his corner - he wants some instructions but his corner are not responding.
Shark is keen to just control but Woods is a slippery customer.
Shark throwing shots but they're hitting the canvas more than the man.
Woods is trying to stand back up but Shark is controlling him

The ref stands the fighters back up because Kaz Shark just wasn't active enough.
Shark has closed the distance and engaged Woods in a clinch.
Shark has hold of a leg and is looking for a trip takedown. Woods avoids it nicely though and we remain in the clinch.

That's three minutes gone in the round.
A body shot lands from Shark.
Shark tries to score a body lock takedown but Woods shows good agility there to stay on his feet.
Shark manages to break the clinch.
Shark lands with a kick to the temple. Woods shrugs as if to say "is that all you've got?"
Shark fakes with a right hand and throws a good leg kick, right into the thigh. That had to hurt Woods.
Shark tries to clinch but is not successful on this occasion.
Horrible takedown by Shark or perhaps it was just good defense by Woods which made him look bad.
Woods circles away from the clinch attempt.
Shark fakes and then throws a beautiful body shot. Woods looks a bit winded and takes a step backwards to take a breath.
Woods tries to keep at a distance but Shark has taken the fight into the clinch.
Woods goes for a takedown attempt but Shark pushes him away and we're back to fighting at a distance.

That's four minutes gone in the round.
Shark scoring well with a low kick there.
Shark clinches with his opponent.
Shark is pushing Woods up against the cage, for a bit of lean and pray action. Action being used the in the loosest possible sense of the word.
This is a great period of action - very entertaining stuff!
Shark tries for a takedown but Woods manages to get underhooks.
Woods is defending well against a takedown attempt.
Shark pushes off and circles away, back to the middle of the mat.
As the round comes to an end the crowd are showing their appreciation for a great round of action.
Left hook, right uppercut from Woods.
Shark lands a nice hook to Woods's body. Woods takes it in his stride and looks to land his own strikes.
Shark fails with a takedown attempt from distance.
And thats the end of the round the fighters go back to their corners.
Kaz Shark dominated that round.
OK. That's time! The bell goes and we're back to the action.

Woods throws a right and a left that both miss.
Shark shoots in with a lovely double leg takedown. Woods manages to land in full guard to minimise the damage.
Woods looking to control.
Shark wants to control from the top but Woods keeps moving.
Shark throwing elbows and punches but not connecting, as Woods works some decent striking defense from the bottom.
Shark wants to control from the top but Woods keeps moving.
We're going to have a standup here because Kaz Shark wasn't active enough for the referee's liking.
A really sloppy takedown attempt there from Shark.
Woods is breathing heavily.
That's one minute gone in the round.
The fight stays on the outside here - Shark looks like he's thinking about clinching though.
Shark closes the distance and looks for a trip takedown... aaaand he's got it - Shark lands in his opponent's guard.
Shark gets to his feet - Woods follows without any prompting.
Shark catches Woods with a nice straight right. He seems pissed - ooooh, it's on now! On like donkey kong!
Shark lands with a nice body kick.
Shark misses with a series of wild punches.
A telegraphed takedown attempt from Shark is defended easily by Woods.
That's two minutes gone in the round.
Woods stuffs the takedown attempt from Shark. Shark gets slowly back to his feet.
That's three failed takedown attempts in the round for Kaz Shark. That's going to take a lot out of him.
A big right from Woods misses.
Woods misses with a jab, cross combination.
Shark fails with a takedown attempt.
Wooooo! Give it up for these two warriors! They are putting on a show!
Woods throws a poor cross that misses
and Shark counters with a nice jab to the body that keeps Woods thinking.
Shark shoots for a double leg takedown but Woods sprawls well. He's pushed Shark's face into the mat and manages to get back to his feet relatively easily.
Shark gets a double leg takedown into Woods's guard.

Woods scrambles and gets back to his feet.
Kaz Shark is winning the standup battle so far.
That's three minutes gone in the round.
Woods takes one to the chin there.
Shark tries to close the distance and clinch but Woods swats him to one side with an open hand palm strike and circles away.
Woods dips to his left and cracks Shark with an uppercut!
Woods leaves Shark with his face pressed against the mat as he sprawls beautifully, defending against a solid takedown attempt.
A big left from Woods misses.
Shark is looking to take this fight into the clinch.
No luck for Shark with that takedown attempt.
Woods bobs and weaves and unloads with a good uppercut.
Shark misses with a jab and misses with a cross straight after too.
That's four minutes gone in the round.
Shark lands a jab. Then a cross. Then finally a nice hook to the body. Good work there by Shark.
Woods lands with an overhand left.
Shark shoots in looking for a takedown but Woods manages to keep the fight standing, pushing Shark's face into the canvas for good measure before circling away.
Woods scores with a nice right hand.
Shark rushes Woods and pushes him back against the cage in a clinch.
Shark goes for a takedown in the clinch but Woods prevents it.
Woods breaks the clinch.
Both fighters circling a little - Shark finishes the exchange with a kick to the body.
As the round comes to an end the crowd are showing their appreciation for a great round of action.
Nice straight punches there by Woods. You know Roy Jones Jr respects the hands of Woods.
Woods gets tackled into the cage by Shark. Shark maintains the clinch.
Woods is looking for a takedown.
And thats the end of the round the fighters go back to their corners.
Kaz Shark dominated that second round.
Well, the break between rounds is over. Let's get back to the scrappin! This is the final round!

Shark goes for a high kick. It partially lands.
Shark is looking to clinch.
Kaz Shark is looking to throw some combinations by the looks of things.
Shark darts in and lands a nice takedown into half guard.
Shark not doing much here.
Shark stands up from half guard.
Woods might want to mix his strikes up a bit more. He's just going for head shots at the moment and that can become a bit predictable.
Both fighters are breathing heavily.
That's one minute gone in the round.
Woods connects with a crisp jab.
Woods closes the distance and clinches up with Shark, looking for a takedown. Woods pushes Shark against the cage but Shark circles to the side and manages to break the clinch.
Shark connects with a body shot that sends Woods's belly button to the back.
Shark drives through with a really nice takedown into side control.

Shark wants to work for a kimura but he's foiled early by Woods, who protects the arm well.
Woods is not content to let Shark control the position.
That's two minutes gone in the round.
Shark works to advance to full mount. Woods defends for a few seconds but eventually he succumbs.
Shark is really dominating this fight. Is there anything that Woods can do to turn this around?
Shark is standing up, even though he is in mount.
Shark pulls out of a head kick attempt.
Shark shoots in for a double leg but Woods sprawls well. That's going to sap some energy.
Shark stuns Woods with a nice body shot, before stepping back out of range.
Wooooo! Give it up for these two warriors! They are putting on a show!
Woods uses some good footwork to avoid the body shot by Shark.
That's three minutes gone in the round.
Woods tries to bum rush Shark with a series of wild strikes but Shark uses good footwork to avoid the assault.
Woods doesn't succeed with the takedown
and Shark holds on and brings the fighters into a clinch.
Shark has managed to pull guard. Let's see whether he can work an aggressive guard. It will also be interesting to see what tactics Woods uses from the top position.
Woods throws a big right hand that misses.
The fighters are pressed up against the cage, both looking to find a bit of space to work.
Woods throws a big right hand that misses.
Woods postures up and scores with a shot to the body and a follow up elbow to the head.
Shark throws a couple of weedy looking strikes off his back.
Shark with a couple of shots from the bottom there - nothing Woods can't handle though.
Shark keeping moving, preventing Woods from controlling successfully.
The ref warns both fighters not to hold the cage as they work up against the meshing.
Woods missing there with some ground and pound from the guard.
That's four minutes gone in the round.
Shark working a defensive guard here.
Woods keeps in close for a moment and lands a decent shot to the side of Shark's head.
Shark can't keep his opponent in guard - Woods advances to half guard, no doubt looking to mount.
Shark wants to improve his position but Woods is controlling well.
Shark is working hard here to advance position.
Woods throwing punches and elbows but they're not doing any damage.
The crowd applaud the fighters efforts here as the round comes to an end.
Shark is trying to control but can't.
The fans in attendance giving it up for the two fighters, who have really let it all hang out in the last minute or so!
Woods decides he's had enough of the ground and stands up.
Frank Woods has stepped it up - he knows he needs a finish here!
Kaz Shark is fighting for a decision here - he's started to take the cautious approach.
Shark bobs and weaves into range and then changes levels and scores with a nice takedown into side control.
And that's the end of the fight!
Kaz Shark showed his dominance in that final round.
Well Shark has outscored his opponent in every aspect of the fight today. Only a scarily incompetent judge or two will keep him from a well deserved win... Over to the ring announcer for the scorecards.
Ladies and gentlemen, after 3 rounds of action, we go to the scorecards for a decision.
Judge Donald Grub scores the fight 30:27
Judge James Ackerman scores the fight 30:27
Judge Colin Fotheringham scores the fight 30:27
In favor of your winner, by unanimous decision... Kaz Shark!
|
|
|
|
|
|
|
|
|
|
|
|
|
|
|
|
|
|
|
|
|
|
|
| S |
C
A |
G |
S |
C
B |
G |
|
S |
C |
G |
|
energy
A | B |
|
hype
A | B |
|
pop
A | B |
|
mgr
A | B |
|
FIGHT
RATING
60% |
|
|
|
|
|
|
