|
|
PBP Commentary |
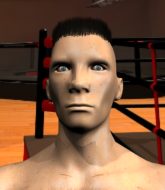
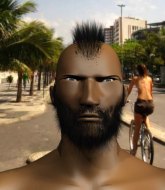
Coming up we have a super heavyweight MMA rules bout between Frodo Baggins (ranked 0 p4p, 0 weight class) and Halibut Halibut (ranked 0 p4p, 0 weight class). Halibut is bouncing up and down as he enters the arena, backed by Peter You Suck. These two fighters really are very evenly matched on the feet - it will be fascinating to see who can assert themselves in that aspect of the fight.
 |
|
 |
| 150 cm
23
135 lbs
10 - 0 - 0 |
|
185 cm
23
165 lbs
6 - 1 - 0 |
BJJ Purple Belt
Solid boxing
Experienced |
|
BJJ Purple Belt
Decent boxing
Granite chin |
|
| |
|
Ladies and gentlemen. This fight is 5 rounds, in the super heavyweight division.
Introducing the fighter to my left, fighting out of the red corner.
With a record of
10 - 0 - 0, fighting out of Las Vegas, Frodo Baggins!
And introducing the fighter to my right, fighting out of the blue corner.
With a record of
6 - 1 - 0, fighting out of Las Vegas, Halibut Halibut!
The judges for this bout are Stewart Dunkirk, Wesley Smith and Frank Dennis.

The bell rings for round one and we are underway!
An inside leg kick lands from Halibut.
Baggins scores with a jab to the jaw of his opponent.
Halibut shoots in for a takedown but doesn't get it.
Nice body kick from Halibut.
Baggins dodges the punch combination from Halibut.
A jab lands there for Halibut.
Baggins throws a combination that misses
and Halibut counters with a lovely straight right hand!
The crowd cheering loudly, showing their appreciation for the quality fight we're seeing here.

Baggins shoots in and gets a takedown into half guard. Baggins showed some decent athleticism there.
Baggins wants to free his trapped foot but Halibut is holding on for dear life with his legs.
Baggins is looking to pass Halibut's guard but actually Halibut recovers to full guard.
There's a bit of a scramble here and now Halibut is on top in guard.

That's one minute gone in the round.
Halibut trying to pass the guard but can't manage it just yet.
Halibut slips nicely into half guard.
Baggins moves into full guard.
Halibut is looking to stand up but Baggins won't let him.
Both fighters really going for it on the ground here!
Halibut stopping the sweep attempt from Baggins.
Halibut throws a big right hand that misses.
Baggins looking to sweep here. No luck so far.
Halibut sneaks a leg through and gets to half guard. That was like a knife through butter how easily he passed Baggins's guard.
Baggins is refusing to be controlled, as Halibut sits in half guard.

Halibut is looking for a kimura. It's going to be difficult to finish that from half guard though and Baggins defends it well.
The ref warns both fighters not to hold the cage as they work up against the meshing.

That's two minutes gone in the round.
Baggins tries to roll over but Halibut keeps him under control.
Halibut trying to mount his opponent but Baggins defends it.
Baggins is staying active underneath Halibut, who seems content to just control the action from this position.
Halibut seems to be looking for submissions.
Halibut controlling the pace.
Halibut is working for a submission of some sort.
Halibut looks gassed!

Neither fighter is doing enough for the referee's liking and he's decided to stand them back up.
Halibut fakes with the hands and throws a leg kick but Baggins is out of range.

That's three minutes gone in the round.
A head kick misses from Halibut.
A head kick misses from Halibut.
Halibut tries to check the leg kick but that clearly hurt him.
Baggins fakes an overhand right and shoots for a takedown. Halibut sprawls well initially but Baggins persists and gets the takedown into half guard.
Halibut is trying to maintain the position but Baggins is very close to passing his half guard.
Baggins working Halibut over with strikes.
Halibut is defending against the submission attempts here by Baggins.
Baggins keeping composed on the top, looking to control the action.
Baggins is pressing down on Halibut's thigh, looking to free his foot. Halibut is holding on for now.

That's four minutes gone in the round.
Halibut is trying to control but can't.
Baggins prevents Halibut from improving his position.
Baggins looking to pass the half guard. Not this time.
Halibut regains full guard. Nicely done.
Halibut had isolated an arm as going for an omaplata. Baggins is defending the submission well but is in a very vulnerable position. Halibut Is leaning forward trying to finish the omaplata but decides to abandon it, and take Baggins's back instead.
Baggins is in bad spot here.
The crowd applaud the fighters efforts here as the round comes to an end.
And thats the end of the round the fighters go back to their corners.
A close round but Halibut Halibut will probably get the nod.
The referee calls time. The cornermen exit stage left and we're back to business.

Baggins shoots in and bounces Halibut off the cage to secure the takedown into guard.
Baggins passes easily into side control. Nice work.
Baggins looking for an arm triangle but it's way too loose to do anything.
Baggins scores with a couple of nice shots to the head there. The referee takes a look at Halibut to see if he's OK.
Baggins thinks about going for a far side armbar but bails out and retains the dominant position instead.
Baggins wants to work for a kimura but he's foiled early by Halibut, who protects the arm well.
Halibut stops Baggins from passing to mount.
Both fighters are absolutely exhausted here.
That's one minute gone in the round.
Halibut manages to get one leg in to regain half guard.
Baggins stops Halibut from getting back to his feet.
Halibut wants to improve his position but Baggins is controlling well.
The fighters are battling for position here. Halibut manages to regain full guard. Nice work.
Halibut looking to sweep here. No luck so far.
Halibut is looking for a triangle but Baggins pushes his legs off easily.
Baggins would like to get this fight back to the feet but can't get free from the closed guard.
Halibut looking to control.
Baggins preventing the sweep.
Halibut looking for submissions from the bottom here. Moving his hips around, possibly looking for an armbar.
That's two minutes gone in the round.
Baggins trying to control the position from guard on top but Halibut is wriggling around, looking for whatever he can.
Halibut lands a beautiful switch and he's in full mount! That could spell trouble for Baggins!
Halibut fails to move to back control.
Halibut is working for a guillotine from mount but Baggins frees his head quite easily.
Halibut looks like he's working for a submission but he's not found anything just yet.
The fighters are pressed up against the cage, both looking to find a bit of space to work.
That's three minutes gone in the round.
Baggins regains half guard.
Baggins moves into full guard.
Baggins is looking for a triangle but Halibut pushes his legs off easily.
Halibut passes Baggins's right leg, so he's now in half guard.
Baggins is trying to get back to full guard.
Halibut is looking for a kimura but Baggins is holding onto that half guard position, so it's hard for Halibut to get the leverage.
That's four minutes gone in the round.
Halibut is looking to advance position but Baggins won't allow it.
Baggins might be looking to lock onto one of his opponent's long limbs for a submission, whilst we're on the ground.
Baggins wants to get back to full guard.
Halibut works his way into full mount!
Frodo Baggins overall seems to be getting the better of the ground position in the fight so far.
Baggins is bucking up trying to escape but Halibut cracks him with another couple of good strikes.
Baggins tries to get back to half guard but can't.
Halibut avoids the attempt from Baggins to control.
Halibut can't quite control the action as he would like just now, as Baggins is looking to escape.
Baggins is desperately trying to improve his position but Halibut has a good base and remains in mount.
And thats the end of the round the fighters go back to their corners.
That was a close second round but I would say that Frodo Baggins will probably get the nod.
That's time! Baggins's corner gives him a slap on the ass as he gets ready to fight.

A right-left combo lands from Halibut.
Halibut swings wildly with a couple of big hooks
and Baggins counters with a nice double leg into side control. Halibut won't be happy with that.
Baggins creates a bit of distance and throws down some hard shots.
Halibut is moving his hips around well on the bottom and has managed to get back to half guard.
Halibut looking to work for a kimura from the bottom.
Baggins wants to free his trapped foot but Halibut is holding on for dear life with his legs.
Halibut regains full guard. Nicely done.
Halibut throwing his legs up looking for a triangle.
Both fighters are breathing heavily.
Baggins is working Halibut over from the guard. He should look to pass the guard and do a little more damage with these strikes.
Baggins working some strikes from top position.
That's one minute gone in the round.
Baggins forces his way into half guard.
Baggins tries to pass the half guard into mount. Halibut knows what he's doing though and prevents the attempt.
Baggins drops an elbow to the side of Halibut's head.
Baggins is working hard to pass the guard. He's done it - he's now in full mount! Trouble for Halibut!
Halibut is bucking up trying to escape but Baggins cracks him with another couple of good strikes.
Baggins lands a big elbow.
Baggins controlling from the full mount.
Baggins looking to control but Halibut is working nicely, looking to advance position himself.
Halibut manages to regain half guard. Good work.
That's two minutes gone in the round.
Halibut manages to get to full guard.
Halibut has a loose triangle. He'll be looking to tighten that up but Baggins can see exactly what he's planning and manages to posture up and free himself.
Halibut escapes his hips to the side and looks to be working for an armbar. Baggins gives him a little smile and shakes his head. No chance.
Baggins pressing down on his opponent's thigh, looking to pass guard. Halibut is keeping the position for now.
Baggins trying to control but Halibut is working from the bottom.
That's three minutes gone in the round.
Halibut trying to control the position.
Baggins is pushing down on Halibut's leg trying to pass to half guard. Halibut is fighting to maintain full guard but Baggins has managed to sneak the leg through.
Baggins wants to pass to mount but Halibut is defending the position.
Halibut moves into full guard.
Halibut has his foot on Baggins's thigh. He's trying to push off and get in position for a triangle, I think. Baggins works his way back into a safe position though.
Baggins slips effortlessly into side control - very nice.
Baggins tries for a kimura but Halibut is defending well.
Halibut is sneaking out the side here. He's bucked Baggins off and has taken his back!
That's four minutes gone in the round.
Halibut is looking to control Baggins but Baggins is wriggling around and keeping busy.
Halibut keeps control of the position as Baggins tries to break free.
Halibut is persistently looking for the submission but Baggins is defending it well.
Baggins breaks Halibut's hooks off and manages to turn into his guard.
Halibut looking for submissions from the bottom here. Moving his hips around, possibly looking for an armbar.
Baggins pushes down on Halibut's leg and manages to get into half guard.
Halibut is looking to escape.
And thats the end of the round the fighters go back to their corners.
That was a close round but Frodo Baggins did the better work so I'd imagine he'll take it.
The referee calls time. The cornermen exit stage left and we're back to business.

Baggins feints with a shoulder and throws a nice leg kick to Halibut's calf.
Baggins looks to land a combination but Halibut avoids it well.
A nice inside leg kick there by Halibut. That's going to slow Baggins down.
Halibut misses with a combination
and Baggins counters with a nice double leg into guard.
Halibut bucks up whilst keeping hold of a body lock, managing to reverse the position. Now he's in top in Baggins's guard.
Baggins throwing some rather feeble looking strikes off his back.
Halibut wants to control from the top but Baggins keeps moving.
Halibut controlling from the guard. I say controlling but really, he's stalling.
Halibut tries to free his leg and advance position but Baggins is retaining full guard.
It's got to the stage where if one of these guys blows hard enough, the other might fall over.
Baggins lands a beautiful switch and he's in full mount! That could spell trouble for Halibut!
That's one minute gone in the round.
Baggins lands a big shot there that rocks Halibut but he's holding on and managing to survive for now.
Baggins looking for an armbar but decides to keep the dominant position instead.
Halibut tries to reverse the position but Baggins maintains control.
Baggins wants to control the pace but Halibut is squirming around nicely.
Halibut sneaks a leg under to get to half guard.
Halibut is doing well to avoid being mounted. He's controlling the position at the moment.
Baggins trying to pass the guard but Halibut defending well.
That's two minutes gone in the round.
Neither fighter has done anything of merit for a good minute or two here and the crowd are not happy about it.
Halibut manages to get to full guard.

Halibut pushes Baggins off and gets back to his feet.
Halibut lands a jab followed by a nice looking cross.
Baggins doesn't succeed with the takedown
and Halibut counters with a straight right hand.
Halibut goes to the watering hole and comes back with a big thumbs up from the judges as he scores a three punch combo.
Halibut throws a series of punches but Baggins moves out of range.
Halibut tries a head kick but it misses.
That's three minutes gone in the round.
Halibut thuds a left hand into Baggins's body.
Halibut misses with a half-hearted attempt at a head kick.
Danga de danga de dang - Halibut scores with a four punch combination!
Baggins shoots in and drives through. Halibut sprawls well.
Halibut works the jab nicely.
Halibut scores with a nice looking left hook and follows it up with an uppercut!
Halibut Halibut seems to be the more aggressive standup fighter in this bout.
Baggins will have to do better than that with his takedown attempts.
That's three failed takedown attempts in the round for Frodo Baggins. That's going to take a lot out of him.
Baggins takes a body punch that cleary hurt but he's trying not to show any weakness.
Frodo Baggins is looking to throw some combinations by the looks of things.
Baggins takes a kick to the body and keeps moving.
Halibut throws a series of punches but Baggins moves out of range.
Baggins closes the distance and clinches up with Halibut, looking for a takedown. Baggins pushes Halibut against the cage but Halibut circles to the side and manages to break the clinch.
Baggins doesn't react quick enough there as he takes a shot to the body.
Halibut scores with a jab. Baggins acknowledges it with a nod of the head.
That's four minutes gone in the round.
Halibut lands a jab to the head.
Baggins shoots for a takedown but Halibut saw that one coming a mile off and avoided it easily.
Halibut swinging wilding here.
Baggins walks straight into a jab right on the nose. That one stung - he's blinking and trying to clear his head.
Baggins fails with a takedown attempt.
Jab from Halibut.
Halibut misses with a double jab
and Baggins counters with a nice double leg into half guard.
The crowd applaud the fighters efforts here as the round comes to an end.
Baggins is pressing down on Halibut's thigh, looking to free his foot. Halibut is holding on for now.
Halibut looking for submissions off his back.
And thats the end of the round the fighters go back to their corners.
That was a close fourth round but I would say that Frodo Baggins will probably get the nod.
That's the end of the round. The referee orders the cornermen out of the cage so we can get back down to business. Let's hear some noise people - this is the final round!

Baggins tries to clinch up but Halibut circles away and keeps his distance.
Halibut stuffs the takedown.
Halibut swats away the attempt to clinch by Baggins.
Halibut lands a vicious shot with the stealth of a sniper and the strength of a viper. Are vipers that strong? I can think of lots of things that are stronger than a viper - not many rhyme with sniper though.
Halibut misses with a jab, cross combination.
Halibut scores with a nice one two combo and darts back out of range to avoid anything coming in the opposite direction.
Halibut misses with a jab and misses with a cross straight after too.
Baggins misses with a takedown attempt - Halibut sprawls well and throws a nice strike on the way out which just misses.
Both of our modern day gladiators look out of it here - an gruelling 5 rounds of action taking it's toll on them, no doubt.
Halibut scores to the head and body with a nice combination!
Halibut lands a head shot.
That's one minute gone in the round.
Halibut misses with a series of wild punches.
Baggins takes a hook to the side of the head. I wonder if that's got his ears ringing.
Baggins closes the distance and takes a jab right on the nose as he does so.
Baggins walks into a straight right hand from Halibut.
Halibut swats away the attempt to clinch by Baggins.
Halibut throws a series of punches but Baggins moves out of range.
Baggins looking to shoot here. He's gone for it and he's landed a takedown into mount! Oh, that's bad for Halibut!
Halibut is looking to improve his position but Baggins isn't that keen on the idea.
Baggins punching from mount but Halibut doing a good job of avoiding damage.
That's two minutes gone in the round.
Halibut tries to hold on but Baggins pushes him away.
Baggins lands a couple of nice shots there from mount.
Halibut tries to reverse the position but Baggins maintains control.
Baggins has his opponent pinned against the cage, landing some nasty ground and pound that is really making a bit of a mess out of Halibut's face.
Baggins trying to control but Halibut is having none of it.
Halibut defends a decent attempt at a guillotine from Baggins.
That's three minutes gone in the round.
Baggins trying to control but Halibut is having none of it.
Baggins throwing strikes here but Halibut is writhing around nicely and avoiding any serious damage.
Halibut is desperately trying to get back to half guard.
Halibut is persisting with the attempt to improve his position.
Baggins looking to finish Halibut with some ground and pound. This is bad for Halibut!
Baggins trying to control but Halibut is having none of it.
Baggins with some aggressive grappling here. He's looking for submissions here, rather than waiting for the opportunity to counter.
Frodo Baggins is fighting for a decision here - he's started to take the cautious approach.
That's four minutes gone in the round.
Neither fighter has done anything of merit for a good minute or two here and the crowd are not happy about it.
Baggins tries to control but Halibut wriggling away.
Halibut is working to get back to half guard.
Baggins looks like he's working for a submission but he's not found anything just yet.
Halibut bucks up and manages to get a nice reversal! He's in guard on the top - nicely done!
Halibut Halibut has stepped it up - he knows he needs a finish here!
Halibut working from the guard for now, landing some ground and pound.
Halibut chips away with some ground and pound.
And that's the end of the fight!
Halibut Halibut comfortably won the final round on my scorecard.
I think Baggins has won this one but let's see what the judges have to say. Over to the ring announcer for the scorecards.
Ladies and gentlemen, after 5 rounds of action, we go to the scorecards for a decision.
Judge Stewart Dunkirk scores the fight 48:49
Judge Wesley Smith scores the fight 48:47
Judge Frank Dennis scores the fight 48:47
In favor of your winner, by split decision... Frodo Baggins!
|
|
|
|
|
|
|
|
|
|
|
|
|
|
|
|
|
|
|
|
|
|
|
| S |
C
A |
G |
S |
C
B |
G |
|
S |
C |
G |
|
energy
A | B |
|
hype
A | B |
|
pop
A | B |
|
mgr
A | B |
|
FIGHT
RATING
100% |
|
|
|
|
|
|

