|
|
PBP Commentary |
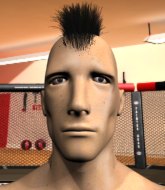
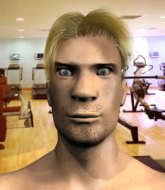
Coming up we have a light heavyweight MMA rules bout between Chris Harrington (ranked 0 p4p, 0 weight class) and Eddy Hoop (ranked 0 p4p, 0 weight class). Chris Harrington has the edge in experience - let's see if he can make that count tonight.
 |
|
 |
| 195 cm
27
211 lbs
6 - 6 - 0 |
|
183 cm
20
212 lbs
0 - 0 - 0 |
BJJ White Belt
Dangerous knees
Very strong |
|
BJJ Purple Belt
Excellent boxer
Powerful |
|
| |
|
Ladies and gentlemen. This fight is 3 rounds, in the light heavyweight division.
Introducing the fighter to my left, fighting out of the red corner.
With a record of
6 - 6 - 0, fighting out of Hilo, Chris Harrington!
And introducing the fighter to my right, fighting out of the blue corner.
With a record of
0 - 0 - 0, fighting out of Hilo, Eddy Hoop!
The judges for this bout are Roger Salmon, Jeff Smith and Ryoma Takatsuka.

The bell rings for round one and we are underway!
Harrington tries to clinch but is not successful on this occasion.
Hoop circles away from the clinch attempt.
Harrington dodges the punch combination from Hoop.
Hoop circles away from the clinch attempt.
Hoop circles away from the clinch attempt
and Hoop counters with a three punch combination, finished off with a leg kick. Nice work.
Harrington fails with an attempt to clinch.
A decent looking body kick lands there for Hoop.
Harrington tries to grapple but his opponent circles
and Hoop makes the exchange count by landing a cracking kick to the body. Harrington really felt that one!
Chris Harrington seems to be the more aggressive standup fighter in this bout.
Fantastic stuff here - a very entertaining period of action, which has drawn cheers from the crowd.
Harrington moves to clinch but Hoop breaks away
and Hoop counters with a lovely straight right hand!

It looks like Chris Harrington has been cut.
Hoop avoids the clinch attempt nicely.
Hoop works Harrington's body with a nice hook.
Hoop connects with a looping left hand that seems like it dazed Harrington momentarily.
Hoop misses with the combination.
Hoop throws a head kick that misses.

That's one minute gone in the round.
Hoop throws a right hand that Harrington ducks under and follows up with a left that Harrington also avoids with ease.
Harrington tries to clinch up.
Hoop throws a head kick that misses.
Hoop throws a body kick that misses.

Harrington forces Hoop back against the cage and clinches.
Harrington keeps the fight in the clinch, despite Hoop's efforts to push away.
A short uppercut from Hoop.
A head punch on the inside from Hoop fails to land.
Hoop tries for a takedown but Harrington manages to get underhooks.
Hoop on the defensive, avoiding the knees to the body.
Harrington with a knee to the head.

Hoop ties up his opponent against the cage and manages to drag the fight down to the ground. Hoop no doubt will be looking to work submissions from his guard.

Hoop had isolated an arm as going for a kimura. Harrington defends it easily.
Hoop throwing strikes off his back to little effect.

That's two minutes gone in the round.
Hoop manages to land a sweep and now he's in mount on top!
The fighters are pressed up against the cage, both looking to find a bit of space to work.
Hoop with good strikes from the mount here!
This is a great period of action - very entertaining stuff!
Hoop landing strikes from the mount.
Harrington knows he needs to get back to his feet asap. He's simply no match for Hoop on the ground.
Hoop jumps to side control looking for an arm triangle but Harrington manages to avoid the submission attempt.
Hoop is trying to get an arm triangle but Harrington is defending well.
Harrington is looking to reverse the position.
Check out the look on Hoop's face as he threw that strike - that's one determined fighter!
Hoop trying to control the action but Harrington is working from the bottom.

That's three minutes gone in the round.
Hoop thinks about going for a far side armbar but bails out and retains the dominant position instead.
Hoop scoring with punches and elbows.
Hoop landing with strikes to the head and body from side control.
Hoop creates a bit of distance and throws down some hard shots.
Hoop looking for an arm triangle but it's way too loose to do anything.
Harrington on his back here. We all know that wrestlers don't like being on their back so let's see if Harrington tries to get out of the position.
Hoop is looking for a kimura. He might have it! No, Harrington has escaped the position, nice work there.
Harrington is putting a lot of effort into getting back to his feet here.
Hoop cracks Harrington with a big right hand but Harrington just smiles back at him and invites him to have another go.

That's four minutes gone in the round.
Hoop trying to control the position but Harrington is working away.
Hoop might have to switch it up a bit here because his efforts to control Harrington haven't been going to plan, at least at the current moment in time.
Hoop is looking to finish here, going for an Americana. Harrington knows the correct defense though, so he's OK.
We've seen a great period of action over the last minute or so - credit to both fighters for going all out!
Hoop wants to work for a kimura but he's foiled early by Harrington, who protects the arm well.
Hoop scores with punches from side control.
The crowd are going absolutely nuts as the round comes to an end - what a fantastic round of action!
Hoop looking for an arm triangle but it's way too loose to do anything.
Hoop thinks about going for a far side armbar but bails out and retains the dominant position instead.
And thats the end of the round the fighters go back to their corners.
Eddy Hoop dominated that round.
The cut man is working on Chris Harrington's cut.
That's time! Back to the action!

Hoop scores with a crisp jab that stopped Harrington in his tracks.
Chris Harrington's cut is getting worse.
Decent striking displayed by Hoop there.
A head kick misses from Hoop.
Harrington tries to close the distance and clinch up against the cage but Hoop paws at him with a jab and circles away.
Hoop throws a series of punches but Harrington avoids them all with ease.
Harrington moves to clinch but Hoop breaks away
and Hoop counters with a straight right hand.
Hoop circles away from the clinch attempt.
Hoop throws a series of punches but Harrington avoids them all with ease.
Eddy Hoop seems to be getting the better of the standup.
Harrington tries to close the distance and clinch up against the cage but Hoop paws at him with a jab and circles away.
Harrington tries to close the distance and clinch up against the cage but Hoop paws at him with a jab and circles away.
Harrington fails with an attempt to clinch.

Hoop throws a big overhand right that connects, sending Harrington tumbling to the canvas!

Harrington is rocked!
Chris Harrington's cut is bleeding quite badly. He's got to try and protect it.
The crowd cheering loudly, showing their appreciation for the quality fight we're seeing here.
Hoop slips nicely into half guard.
Oh Harrington is still in real trouble! Will he be able to recover?!!
Hoop is keeping good posture, landing some ground and pound.
That's one minute gone in the round.
Harrington is staying active underneath Hoop, who seems content to just control the action from this position.
Hoop has the superior BJJ but he's also working some ground strikes into his gameplan.
Hoop is looking for an arm triangle, whilst trying to pass to side control. Harrington doesn't seem that keen to cooperate though. No luck this time Hoop.
Harrington seems to have got his legs back now.
Harrington blocking the ground and pound attempt from Hoop.
Harrington looks like he's trying to stand up.
Hoop seems to be looking for submissions.
Hoop slips a nice elbow through Harrington's hands, connecting with Harrington's forehead.
Harrington is trying to control but can't.
Harrington tries to roll over but Hoop keeps him under control.
Hoop is sneakily working for an arm triangle but Harrington sees it coming and defends easily.
Hoop passes the half guard and he's now in mount! Big trouble for Harrington!
That's two minutes gone in the round.
Hoop working the ground and pound effectively.
Hoop has control of Harrington's right arm, working for a kimura. It's a bit of a token attempt though and Harrington regains control of the situation pretty easily.
Hoop landing strikes from the mount and Harrington is in trouble!
This has been an exciting period of action!
Hoop has hold of Harrington's left arm, perhaps looking for a submission. The two fighters tussle over control of the isolated limb and Harrington manages to get his arm back to his side and away from danger.
Harrington taking shots to the head.
Hoop raining down hammerfists from mount.
Jeez, Chris Harrington's cut is really nasty now. The referee must be thinking about getting that checked.
The referee calls the doctor in to look at Chris Harrington's cut. Oh no, the doctor has called an end to the bout!
Ladies and gentlemen, after 3:56 of round 2, we have a winner by way of TKO (Cut). Eddy Hoop!
Eddy Hoop decided to thank the fans in attendance for making a great atmosphere. It seemed to go down pretty well.
|
|
|
|
|
|
|
|
|
|
|
|
|
|
|
|
|
|
|
|
|
|
|
| S |
C
A |
G |
S |
C
B |
G |
|
S |
C |
G |
|
energy
A | B |
|
hype
A | B |
|
pop
A | B |
|
mgr
A | B |
|
FIGHT
RATING
89% |
|
|
|
|
|
|
