|
|
PBP Commentary |
Coming up we have a welterweight MMA rules bout between Phoenix Miyamoto (ranked 0 p4p, 0 weight class) and John White (ranked 0 p4p, 0 weight class). Over to our ring announcer for the fighter introductions!
 |
|
 |
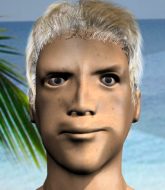
| 180 cm
32
185 lbs
12 - 11 - 0 |
|
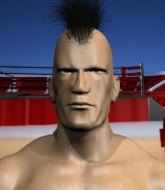
184 cm
28
173 lbs
11 - 24 - 0 |
Good wrestling
Excellent MT
Cardio machine |
|
BJJ Blue Belt
Decent boxing
Granite chin |
|
| |
|
Ladies and gentlemen. This fight is 3 rounds, in the welterweight division.
Introducing the fighter to my left, fighting out of the red corner.
With a record of
12 - 11 - 0, fighting out of Tokyo, Phoenix Miyamoto!
And introducing the fighter to my right, fighting out of the blue corner.
With a record of
11 - 24 - 0, fighting out of Tokyo, John White!
The judges for this bout are Hirohito Nitta, Kenichi Hosakawa and Yukihiro Shimada.

The bell rings for round one and we are underway!

Miyamoto moves into the clinch successfully.
White misses with a punch on the inside.
White misses with a hook from the clinch.
Miyamoto is looking to score with knees to the body. Maybe he'll change it up and go body then head. White is defending well for now.
White misses with some punches.
Miyamoto missing with knees to the body.
White blocks a knee to the body. He'll have a nicely bruised forearm in the morning.
White tries a shoulder strike but it doesn't do any damage.
White misses with some punches.
White lands with a quick shot inside that doesn't really do much damage.
White misses with some punches.
White lands with a short punch from the clinch.
White working aggressively here.
A hook to the body from Miyamoto.
White is looking to break free of the clinch but Miyamoto has double underhooks.
An uppercut on the inside fails to land for White.
Nice elbow from Miyamoto.

It looks like John White has been cut.
A right handed body shot lands from Miyamoto.
White tries a shoulder strike but it doesn't do any damage.
Wooooo! Give it up for these two warriors! They are putting on a show!
White has a couple of punches blocked by Miyamoto.
Miyamoto tries to land a knee to the body but he is off balance and White avoids it.
White misses with a short punch on the inside.
Miyamoto lands a nice uppercut.
A nice left hand lands by White.

That's one minute gone in the round.
A short right hand to the side of the head by White.
White misses with a punch on the inside.
Miyamoto lands an elbow just above White 's eye.
Miyamoto lands a body punch - he's looking to wear down White.
Miyamoto throws an elbow but it's blocked.
White is trying to work out of this bad position, with his back against the cage.
White has a couple of punches blocked by Miyamoto.
Miyamoto working on landing some head shots here - that one got through nicely.
Miyamoto working some nice short punches in the clinch.
Miyamoto misses the knee to the body. Nice hip positioning from White.
White misses with some punches.
A short body shot lands from Miyamoto as the two fighters clinch.
White on the defensive, avoiding the knees to the body.
This has been an exciting period of action!
Miyamoto is leaning against White and scores with a nice uppercut to the body.
White looks winded!
Miyamoto lands a body punch.
Miyamoto is working White over against the cage.
Miyamoto holding his opponent close, against the cage.
Miyamoto tries to land a knee to the body but he is off balance and White avoids it.
White swings away with an uppercut that misses.
Miyamoto is looking to score with knees to the body. Maybe he'll change it up and go body then head. White is defending well for now.
A left hand lands to the body for Miyamoto.

That's two minutes gone in the round.
Miyamoto gets an overhook and lands an elbow to the side of the head.
White's head jolts backwards as he takes an uppercut right on the button!
Miyamoto controlling the action here for a moment.
Miyamoto lands a right uppercut that snaps the head of White backwards.
Miyamoto tries a body shot but White blocks it.
Miyamoto misses the knee to the body. Nice hip positioning from White.
Miyamoto has White pushed against the cage.
White throws a punch but it's blocked by Miyamoto.
White looks like he'd prefer to be striking at range right now.
Miyamoto slowing the pace effectively.
White misses with a punch on the inside.
Miyamoto stays in close to his opponent and throws a right hand to the body.
A head punch blocked on the inside by Miyamoto.
Miyamoto lands a left hand that snaps the head of White backwards.
White has a couple of punches blocked by Miyamoto.

That's three minutes gone in the round.
Miyamoto throws a nice elbow but it doesn't land.
Miyamoto is looking to control White's arms but White gets an underhook and turns him. Now Miyamoto has his back to the cage.
White throws a punch but it's blocked by Miyamoto.
Miyamoto lands a hook to the side of the head.
Miyamoto digs a right hand underneath White's ribcage. White let out a lung full of air as it connected.
Good body shot from Miyamoto.
Come on Miyamoto - let's have some action - none of this stalling nonsense.
A right hook to the body lands for Miyamoto.
This is a great period of action - very entertaining stuff!
A hook to the body from Miyamoto.
Miyamoto misses the knee to the body. Nice hip positioning from White.
Miyamoto is pushing White up against the cage, for a bit of lean and pray action. Action being used the in the loosest possible sense of the word.
A left hand lands to the body for Miyamoto.
Miyamoto works on White's body with a couple of short punches.
Miyamoto lands a short shot on the inside that snaps the head of White backwards.
White's head jolts backwards as he takes an uppercut right on the button!
White blocks a knee to the body. He'll have a nicely bruised forearm in the morning.
Miyamoto tries to land a knee to the body but he is off balance and White avoids it.
Miyamoto is looking to score with knees to the body. Maybe he'll change it up and go body then head. White is defending well for now.

That's four minutes gone in the round.
Miyamoto lands a hook to the side of the head.
Miyamoto taking a breather.
Miyamoto tries to land knees in the clinch but White avoids the damage to the body.
The fighters are starting to perspire pretty heavily.
A head punch on the inside from White fails to land.
Miyamoto trying to land knees to the body.
A body shot lands from Miyamoto.
White on the defensive, avoiding the knees to the body.
White fails to land with a short punch on the inside.
White managing to block the knees to the body from Miyamoto.
White tries a shoulder strike but it doesn't do any damage.
White swings away with an uppercut that misses.
An uppercut to the body lands inside from Miyamoto.
White throws a head punch that misses.
White misses with a hook from the clinch.
A real battle for position is taking place between these two warriors.
The crowd are going absolutely nuts as the round comes to an end - what a fantastic round of action!
Miyamoto lands a damaging elbow.
Miyamoto lands a glancing elbow in the clinch.
Miyamoto is looking to score with knees to the body. Maybe he'll change it up and go body then head. White is defending well for now.
A head punch on the inside from White fails to land.
Miyamoto lands a nice elbow from the clinch.
And thats the end of the round the fighters go back to their corners.
Phoenix Miyamoto dominated that round.
The cut man is working on John White's cut.
That's the end of the round. The referee orders the cornermen out of the cage so we can get back down to business.

Miyamoto tries to clinch but is not successful on this occasion.
John White seems to be the more aggressive standup fighter in this bout.
Miyamoto takes a swing at White's ribcage but misses.

Miyamoto tries to keep at a distance but White has taken the fight into the clinch.
Miyamoto lands a hook to the side of the head.
A head punch blocked on the inside by Miyamoto.
Miyamoto scores with a shot to the side of White's head.
Miyamoto has White pressed against the cage.
Miyamoto working some nice short punches in the clinch.
Miyamoto lands an elbow inside that White shrugs off.
Miyamoto comes over the top with an elbow. That landed flush.
White managing to block the knees to the body from Miyamoto.
Miyamoto tries to work over White's body with a swooping hook but it only glances the target.
A battle for position here, against the cage.
Miyamoto misses with a body punch.
The crowd are loving this. Great action here.
White working aggressively here.
White misses with a short punch on the inside.
Miyamoto pushes White back against the cage and lands a hook to the side of the head.
Miyamoto blocks a punch to the side of the head.
That's one minute gone in the round.
A short right hand to the side of the head by White.
Miyamoto is really dominating this fight. Is there anything that White can do to turn this around?
A head punch on the inside from White fails to land.
Miyamoto tries to land knees in the clinch but White avoids the damage to the body.
A head punch on the inside from White fails to land.
Miyamoto lands a body punch in the clinch.
Miyamoto stays in close to his opponent and throws a right hand to the body.
White is breathing heavily.
Miyamoto lands a short shot on the inside that snaps the head of White backwards.
Miyamoto throws a blind hook that connects with the side of Whites head.
Miyamoto lands a nice looking hook to the body, against the cage.
White doesn't land with the attempted body shot.
We've seen a great period of action over the last minute or so - credit to both fighters for going all out!
Miyamoto avoiding damage.
Nice elbow from Miyamoto.
A head punch on the inside from White fails to land.
White has had enough of the clinch but Miyamoto keeps him there for the moment.
Miyamoto lands a right hand that snaps the head of White backwards.
Phoenix Miyamoto has scored more points in the clinch so far.
Miyamoto lands a hook to the side of the head.
A hook to the body from Miyamoto.
Miyamoto is working hard here but doesn't seem to be able to control effectively, up against the cage.
Miyamoto tries to land a knee to the body but he is off balance and White avoids it.
That's two minutes gone in the round.
Miyamoto lands a nice looking hook to the body, against the cage.
White misses with the head strike.
Miyamoto softening up his opponent with strikes, against the cage.
White avoiding damage as Miyamoto throws knees to the body.
A head punch blocked on the inside by Miyamoto.
White managing to block the knees to the body from Miyamoto.
Nice elbow from Miyamoto.
White's head jolts backwards as he takes an uppercut right on the button!
White lands with a good tight uppercut to the head.
Miyamoto blocks a punch to the side of the head.
Miyamoto effectively controlling the action here.
A right handed body shot lands from Miyamoto.
Miyamoto works on White's body with a couple of short punches.
Miyamoto lands an elbow inside that White shrugs off.
A battle for position here, against the cage.
Miyamoto tries to land a knee to the body but he is off balance and White avoids it.
White tries a shoulder strike but it doesn't do any damage.
That's three minutes gone in the round.
Miyamoto trying to control the position but instead, White has worked for underhooks and has pushed Miyamoto into the cage.
White throws a head punch that misses.
White misses with a punch on the inside.
Miyamoto working on landing some head shots here - that one got through nicely.
Miyamoto misses the knee to the body. Nice hip positioning from White.
A right hook to the body lands for Miyamoto.
Miyamoto has White pressed against the cage.
Miyamoto is trying to stall.
White on the defensive, avoiding the knees to the body.
A quick uppercut on the inside from Miyamoto.
Miyamoto lands a damaging elbow.
Miyamoto is working hard here but doesn't seem to be able to control effectively, up against the cage.
White is trying to push Miyamoto away but Miyamoto has him pressed against the cage, so he's going nowhere.
Miyamoto pushes White back against the cage and lands a hook to the side of the head.
Miyamoto stays in close to his opponent and throws a right hand to the body.
That's four minutes gone in the round.
Wooooo! Give it up for these two warriors! They are putting on a show!
An uppercut on the inside fails to land for White.
Miyamoto is looking to score with knees to the body. Maybe he'll change it up and go body then head. White is defending well for now.
Miyamoto misses the knee to the body. Nice hip positioning from White.
A right handed body shot lands from Miyamoto.
A body shot lands from Miyamoto.
Miyamoto lands a shot to the body.
Miyamoto softening up his opponent with strikes, against the cage.
Miyamoto digs a right hand underneath White's ribcage. White let out a lung full of air as it connected.
Miyamoto lands a nice elbow.
Miyamoto lands a body punch in the clinch.
White's head jolts backwards as he takes an uppercut right on the button!
With the fighters clinched against the cage, Miyamoto creates a bit of distance for himself and scores with a nice uppercut.
A hook to the body from Miyamoto.
Miyamoto trying to land knees to the body.
Miyamoto lands an elbow that stopped White in his tracks for a moment.
The crowd are going absolutely nuts as the round comes to an end - what a fantastic round of action!
Miyamoto effectively controlling the action here.
Miyamoto tries to land knees in the clinch but White avoids the damage to the body.
White doesn't land with the attempted body shot.
White letting Miyamoto take a breather here.
And thats the end of the round the fighters go back to their corners.
Phoenix Miyamoto dominated that second round.
The cut man is working on John White's cut.
Well, the break between rounds is over. Let's get back to the scrappin! The crowd applaud as we get ready to start the final round!

Miyamoto pushes White up against the cage in a clinch.
White throws a punch but it's blocked by Miyamoto.
Miyamoto gets through White's defenses to land a nice punch to the side of the head.
White managing to block the knees to the body from Miyamoto.
With the fighters clinched against the cage, Miyamoto creates a bit of distance for himself and scores with a nice uppercut.
White tries a shoulder strike but it doesn't do any damage.
White tries to break free but Miyamoto pushes him back against the cage.
White is trying to break the clinch but Miyamoto is controlling him.
Miyamoto tries to land knees in the clinch but White avoids the damage to the body.
Miyamoto lands a nice elbow from the clinch.
White can't break the clinch.
White takes an elbow to the temple.
Both guys are working to get underhooks.
Miyamoto lands a damaging elbow.
White tries a shoulder strike but it doesn't do any damage.
Miyamoto trying to land knees to the body.
Miyamoto pushes White back against the cage and unloads with a body punch.
White misses with some punches.
White takes a big intake of breath there - he's definitely tired.
Good body shot from Miyamoto.
That's one minute gone in the round.
White managing to block the knees to the body from Miyamoto.
White doesn't land with the attempted body shot.
Miyamoto taking a break, stalling in the clinch.
Miyamoto works on White's body with a couple of short punches.
A real battle for position is taking place between these two warriors.
Miyamoto trying to land knees to the body.
Miyamoto misses the knee to the body. Nice hip positioning from White.
White tries a shoulder strike but it doesn't do any damage.

White manages to break the clinch.
Miyamoto takes the fight into the clinch.
Miyamoto is pushing White up against the cage, for a bit of lean and pray action. Action being used the in the loosest possible sense of the word.
Miyamoto scores with an uppercut up the middle.
Miyamoto stalls.
Miyamoto blocks a couple of punches on the inside.
That's two minutes gone in the round.
White misses with a hook from the clinch.
Miyamoto lands with a short punch from the clinch.
Miyamoto gets an overhook and lands an elbow to the side of the head.
White lands with a good tight uppercut to the head.
The crowd cheering loudly, showing their appreciation for the quality fight we're seeing here.
Miyamoto comes over the top with an elbow. That landed flush.
Miyamoto lands a glancing elbow in the clinch.
Miyamoto controlling the action here for a moment.
Miyamoto is looking to control White's arms but White gets an underhook and turns him. Now Miyamoto has his back to the cage.
White on the defensive, avoiding the knees to the body.
Miyamoto tries to land knees in the clinch but White avoids the damage to the body.
White is the more experienced fighter here and he's going to need to draw on some of that experience if he's going to pull this one out the bag.
Miyamoto blocks a couple of punches on the inside.
White on the defensive, avoiding the knees to the body.
Miyamoto blocking some punches.
Miyamoto effectively controlling the action here.
Miyamoto lands a nice shot to the body.
That's three minutes gone in the round.
White breaks the clinch and we return to the middle of the mat.
White has a takedown stuffed.
White shoots in but no luck this time.
Phoenix Miyamoto is looking to keep the fight on the feet at all costs.
Miyamoto has managed to clinch.
Miyamoto lands an elbow inside.
A nice glancing elbow lands by Miyamoto.
That has opened up John White's cut even more.
Miyamoto blocks a couple of punches on the inside.
Miyamoto comes over the top with an elbow. That landed flush.
White throws a punch but it's blocked by Miyamoto.
A quick uppercut on the inside from Miyamoto.
Miyamoto lands with a quick shot inside that doesn't really do much damage.
White being controlled against the cage.
Miyamoto lands a nice elbow.
Miyamoto lands with a quick shot inside that doesn't really do much damage.
Miyamoto trying to land knees to the body.
That's four minutes gone in the round.
A right hand to the body from Miyamoto.
Fantastic stuff here - a very entertaining period of action, which has drawn cheers from the crowd.
White on the defensive, avoiding the knees to the body.
Miyamoto trying to land knees to the body.
White doesn't land with the attempted body shot.
Miyamoto lands a nice elbow.
Miyamoto stalls.
Miyamoto throws a nice elbow but it doesn't land.
Miyamoto misses the knee to the body. Nice hip positioning from White.
Miyamoto lands a glancing elbow in the clinch.
White working aggressively here.
Miyamoto lands a damaging elbow.
Miyamoto blocking some punches.
The crowd are going absolutely nuts as the round comes to an end - what a fantastic round of action!
White misses with some punches.
White wants to break free but Miyamoto has control.
Phoenix Miyamoto is fighting for a decision here - he's started to take the cautious approach.
White fails to land with a short punch on the inside.
John White has stepped it up - he knows he needs a finish here!
White doesn't land with the attempted body shot.
Miyamoto lands a hook that snaps the head of White backwards.
And that's the end of the fight!
Phoenix Miyamoto showed his dominance in that final round.
Well Miyamoto has outscored his opponent in every aspect of the fight today. Only a scarily incompetent judge or two will keep him from a well deserved win... Over to the ring announcer for the scorecards.
Ladies and gentlemen, after 3 rounds of action, we go to the scorecards for a decision.
Judge Hirohito Nitta scores the fight for Phoenix Miyamoto!
Judge Kenichi Hosakawa scores the fight for Phoenix Miyamoto!
Judge Yukihiro Shimada scores the fight for Phoenix Miyamoto!
Phoenix Miyamoto wins by unanimous decision!
After winning the bout, Phoenix Miyamoto thanked all his fans and promised he'd do even better in his next fight. The crowd seemed to love his humility.
|
|
|
|
|
|
|
|
|
|
|
|
|
|
|
|
|
|
|
|
|
|
|
| S |
C
A |
G |
S |
C
B |
G |
|
S |
C |
G |
|
energy
A | B |
|
hype
A | B |
|
pop
A | B |
|
mgr
A | B |
|
FIGHT
RATING
96% |
|
|
|
|
|
|

