|
|
PBP Commentary |
Coming up we have a light heavyweight MMA rules bout between Anthony Underwood (ranked 0 p4p, 0 weight class) and Shaun Bradfield (ranked 0 p4p, 0 weight class). We have two fighters making their debuts here, so let's see who comes out of this one with their first professional victory.
 |
|
 |
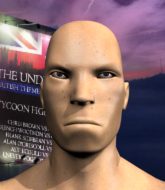
| 186 cm
23
200 lbs
0 - 0 - 0 |
|
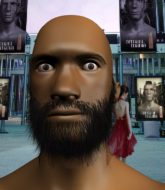
176 cm
18
208 lbs
0 - 0 - 0 |
BJJ Blue Belt
Brawler
Big heart |
|
BJJ Purple Belt
Counter fighter
Solid chin |
|
| |
|
Ladies and gentlemen. This fight is 3 rounds, in the light heavyweight division.
Introducing the fighter to my left, fighting out of the red corner.
With a record of
0 - 0 - 0, fighting out of London, Anthony Underwood!
And introducing the fighter to my right, fighting out of the blue corner.
With a record of
0 - 0 - 0, fighting out of London, Shaun Bradfield!
The judges for this bout are Donald Grub, Paul Tew and Andrew Berry.

The bell rings for round one and we are underway!
Bradfield steps to the side to avoid the strikes from Underwood.
Bradfield stuffs a takedown. It's all about dictating where the fight takes place and Bradfield wants it to stay on the feet.
Bradfield keeps the fight standing with a nice sprawl.
Underwood cracks Bradfield with a good shot that sees him stumbling back into the cage.
Underwood lands with a hook. Bradfield tried to avoid it but it clipped the top of his head.
Bradfield stuffs the takedown attempt from Underwood. Underwood gets slowly back to his feet.
That's three failed takedown attempts in the round for Anthony Underwood. That's going to take a lot out of him.
Underwood looking to land some kicks to the body here.
Underwood fails to land with a series of punches.
Underwood throws a looping left and ducks down for a takedown. He's got his arms around Bradfield's waist but Bradfield gets an underhook and avoids the takedown by throwing Underwood off to one side.
Underwood tries a switch kick but it misses it's target.
Bradfield slaps away a takedown attempt from Underwood, before circling back to the center of the mat.
Underwood throws a right hand that Bradfield ducks under and follows up with a left that Bradfield also avoids with ease.

That's one minute gone in the round.
Underwood defends well against a solid takedown attempt from Bradfield.
Bradfield shoots in with a takedown attempt and he has Underwood pinned against the cage. Underwood gets the underhooks and manages to circle away.
Underwood pivots as if he's going to throw a leg kick but stops half way.
Underwood throws a body kick but he wasn't in range.
Bradfield circles away from the clinch attempt

and Bradfield counters with a nice single leg takedown and he's in Underwood's guard now.
Bradfield looking to control the position here, rather than advance.

That's two minutes gone in the round.

Underwood is looking for a triangle but Bradfield pushes his legs off easily.
Bradfield wants to pass the guard but Underwood is keeping the position.
Bradfield wants to control from the top but Underwood keeps moving.
Bradfield is pushing down on Underwood's leg trying to pass to half guard. Underwood is fighting to maintain full guard but Bradfield has managed to sneak the leg through.
The fans in attendance giving it up for the two fighters, who have really let it all hang out in the last minute or so!
Underwood wants to get back to his feet.

That's three minutes gone in the round.
Underwood is refusing to be controlled, as Bradfield sits in half guard.

Bradfield is trying to work for a kimura but Underwood is defending well.
Bradfield trying to mount his opponent but Underwood defends it.
Bradfield controlling the pace.
Bradfield is trying a forearm choke
I don't think that's going to do much at this level of the game.

That's four minutes gone in the round.
Bradfield wants to lay and pray for a moment but Underwood keeps working.
Bradfield performing his best blanket impression for a moment.
The fighters are starting to perspire pretty heavily.
Underwood is trying to stand back up but Bradfield is controlling him
The crowd applaud the fighters efforts here as the round comes to an end.
Underwood actively working from the bottom here.
Bradfield is figuring out what he wants to do next.
And thats the end of the round the fighters go back to their corners.
Shaun Bradfield dominated that round.
OK. That's time! The bell goes and we're back to the action.

Underwood tries to close the distance and clinch up against the cage but Bradfield paws at him with a jab and circles away.
Underwood misses with a double jab
and Bradfield counters with a nice double leg into half guard.
Bradfield wants to pass the guard but Underwood is defending well.

Underwood kicks off Bradfield and gets to his feet.
Underwood slaps away a takedown attempt from Bradfield, before circling back to the center of the mat.
Underwood misses with a jab and misses with a cross straight after too.

Underwood moves into the clinch.
Bradfield prevents Underwood from breaking the clinch.
That's one minute gone in the round.
Underwood has Bradfield pressed up against the cage and is working for takedown. Bradfield manages to improve position though and keeps the fight standing.
Underwood lands a nice elbow.
Underwood is pressed up against the cage. Bradfield has hold of a leg and is looking to drag Underwood down to the mat. Underwood avoids the attempt though and has circled away. We're back to striking at a distance.
A combination from Underwood does no damage.
Bradfield tries to clinch up.
Bradfield closes the distance and clinches up with Underwood, looking for a takedown. Bradfield pushes Underwood against the cage but Underwood circles to the side and manages to break the clinch.
Anthony Underwood has stuffed three takedown attempts in the round now. That's going to take a lot out of Shaun Bradfield.
Underwood clinches with his opponent.

Bradfield's corner calls for him to break the clinch, which he does.
Bradfield tries to close the distance and clinch but Underwood swats him to one side with an open hand palm strike and circles away.
Bradfield avoids a kick to the body.
Bradfield misses with a takedown attempt - Underwood sprawls well and throws a nice strike on the way out which just misses.
Bradfield is breathing heavily.
That's two minutes gone in the round.
Underwood fakes with an overhand right and moves in to clinch with Bradfield, pushing him back against the cage.
Bradfield tries to take the fight to the ground by pulling guard but can't manage it.

Underwood pulls Bradfield into guard.
Bradfield stands up and looks to throw the legs aside to pass to side control. Underwood swivels though and keeps the full guard.
Underwood is edging up against the cage. He's using the cage to get back to his feet. Nice work there - the fighters are clinched.
This is a great period of action - very entertaining stuff!
Underwood fails to pull guard.
Bradfield can't get the takedown.
Underwood controlling the action here for a moment.
Underwood is trying to break the clinch but Bradfield has him pressed against the cage.
That's three minutes gone in the round.

Underwood breaks the clinch and we're back to striking at distance.
Underwood closes the distance and clinches.
Underwood wants a takedown but no success here.
Bradfield wants to take the fight to the mat but Underwood manages to get underhooks and keep the fight in the clinch.
Underwood breaks the clinch and we return to the middle of the mat.
Underwood misses with a series of wild punches.
Underwood throws a half hearted mid kick.
Bradfield shoots in and gets a takedown into Underwood's guard.
That's four minutes gone in the round.
Bradfield got a little sloppy there for a moment and Underwood has worked his way into a loose triangle - can he finish it?! No, Bradfield has managed to get both his arms back between Underwood's legs - danger averted.
The fighters are pressed up against the cage, both looking to find a bit of space to work.
There's a bit of a scramble here and now Underwood is on top in guard.
Bradfield keeping moving, preventing Underwood from controlling successfully.
Bradfield is looking for a triangle but Underwood pushes his legs off easily.
The crowd cheering loudly, showing their appreciation for the quality fight we're seeing here.
Underwood trying to control but Bradfield is working from the bottom.
As the round comes to an end the crowd are showing their appreciation for a great round of action.
And thats the end of the round the fighters go back to their corners.
Anthony Underwood dominated that second round.
The corners get their ten second warning. Both fighters stand from their stools and stare eachother down, ready to get back to the action. This is the final round!

Bradfield shoots in but no luck this time.
Underwood misses with a half-hearted attempt at a head kick.
Underwood lands with a kick to the temple. Bradfield shrugs as if to say "is that all you've got?"
Bradfield takes a shot to the nose. Hopefully that hasn't broken it.
Bradfield drops down and drives through with a powerful takedown into guard.
The ref warns both fighters not to hold the cage as they work up against the meshing.
We've seen a great period of action over the last minute or so - credit to both fighters for going all out!
Underwood pushes Bradfield off for just long enough to get back to his feet. Very athletic spring there.
Underwood lands with a nice combination. Bradfield backs away looking to recover.
Bradfield closes the distance and gets a double leg, slamming Underwood to the mat! Underwood manages to get full guard.
Underwood has his feet on Bradfield's hips. He pushes off and gets to his feet. Nice work.
Both fighters are breathing heavily.
That's one minute gone in the round.
Underwood fakes a strike and closes the distance, dragging Bradfield to the ground. Underwood is now in Bradfield's guard.
Underwood throws an elbow that misses. Bradfield uses the momentum to reverse the position. He's now in Underwood's guard. Nice move by Bradfield!
Bradfield trying to control the position from guard on top but Underwood is wriggling around, looking for whatever he can.
Bradfield passes into half guard.
The two fighters exchange a few words. I couldn't hear what they were saying but maybe it's more fun if you make it up yourself. Bradfield connects with a nice short shot to Underwood's temple.
Underwood is looking to improve his position.
That's two minutes gone in the round.
Bradfield is trying to work for a kimura. This could be trouble! No, Underwood has managed to free his arm - good work.
Underwood is pressing down on Bradfield's left leg trying to get back to full guard. He's managed it.
Bradfield stands up and looks to throw the legs aside to pass to side control. Underwood swivels though and keeps the full guard.
Bradfield should think about turning a few of those tyres round his middle into muscle if he wants people to take him seriously as an athlete.
Underwood wants to stand but Bradfield is controlling the position.
Bradfield wants to control from the top but Underwood keeps moving.
That's three minutes gone in the round.
Underwood is working actively off his back, looking to secure an arm or perhaps work for a triangle.
Bradfield wants to control from the top but Underwood keeps moving.
Underwood is trying to control the position but Bradfield postures up.
Shaun Bradfield has got the better of the ground game so far.
Bradfield won't allow Underwood to sweep him here.
Underwood being controlled here, momentarily.

The ref calls for a clean break and stands the fighters back up. Shaun Bradfield wasn't active enough on the ground.
Bradfield closes the distance and after a bit of a stuggle, scores a takedown into Underwood's guard.
That's four minutes gone in the round.
Underwood uses the cage to get back to his feet.
Bradfield shoots in for a takedown and gets it.
Bradfield is working hard to pass the guard. He's done it - he's now in full mount! Trouble for Underwood!
Fantastic stuff here - a very entertaining period of action, which has drawn cheers from the crowd.
As the round comes to an end the crowd are showing their appreciation for a great round of action.
Underwood is trying desperately to improve position.
Underwood is working hard here to advance position.
And that's the end of the fight!
That was a close round. You could make an argument for either fighter but I would give it to Anthony Underwood.
I think Underwood has won this one but let's see what the judges have to say. Over to the ring announcer for the scorecards.
Ladies and gentlemen, after 3 rounds of action, we go to the scorecards for a decision.
Judge Donald Grub scores the fight 29:28
Judge Paul Tew scores the fight 29:28
Judge Andrew Berry scores the fight 29:28
In favor of your winner, by unanimous decision... Anthony Underwood!
During a confident post fight interview, Anthony Underwood thanked all his fans. He seemed very genuine when describing how motivated his fans keep him.
|
|
|
|
|
|
|
|
|
|
|
|
|
|
|
|
|
|
|
|
|
|
|
| S |
C
A |
G |
S |
C
B |
G |
|
S |
C |
G |
|
energy
A | B |
|
hype
A | B |
|
pop
A | B |
|
mgr
A | B |
|
FIGHT
RATING
59% |
|
|
|
|
|
|
