|
|
PBP Commentary |
Coming up we have a light heavyweight MMA rules bout between Samuel Bar (ranked 0 p4p, 0 weight class) and Rei Akuma (ranked 0 p4p, 0 weight class). We have two fighters making their debuts here, so let's see who comes out of this one with their first professional victory.
 |
|
 |
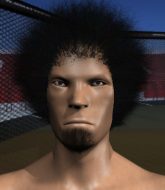
| 197 cm
18
200 lbs
0 - 0 - 0 |
|
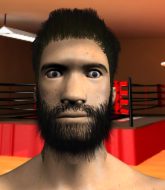
200 cm
18
206 lbs
0 - 0 - 0 |
BJJ White Belt
Counter fighter
Intelligent |
|
BJJ White Belt
Brawler
Intelligent |
|
| |
|
Ladies and gentlemen. This fight is 3 rounds, in the light heavyweight division.
Introducing the fighter to my left, fighting out of the red corner.
With a record of
0 - 0 - 0, fighting out of Tokyo, Samuel Bar!
And introducing the fighter to my right, fighting out of the blue corner.
With a record of
0 - 0 - 0, fighting out of Tokyo, Rei Akuma!
The judges for this bout are Shirou Masuda, Yuuki Gou and Taro Takaoka.

The bell rings for round one and we are underway!
Akuma misses with a wild combination.

Bar closes the distance and pushes Akuma back into the cage.
Bar goes for a takedown attempt but Akuma pushes him away and we're back to fighting at a distance.
Bar defends well against a solid takedown attempt from Akuma.
Akuma swinging wildly here.
Akuma shoots and misses
and Bar counters with a left and a right that stings Akuma.
Bar gets in close and instigates a clinch.
Bar is trying to break the clinch but Akuma is controlling him.
Bar jumps guard but Akuma stands there with Bar around his waist. Bar gives up and drops back to his feet. We remain in the clinch.
Bar has had enough of the clinch but Akuma keeps him there for the moment.

Akuma lands a nice trip takedown into half guard.
Akuma seems content to maintain position for now, rather than mounting any offense.
The fans in attendance giving it up for the two fighters, who have really let it all hang out in the last minute or so!
Akuma wants to pass to mount but Bar is defending the position.

That's one minute gone in the round.

Akuma wants to work for an arm triangle but Bar is really keeping half guard well and defending the submission attempt.
Akuma looks winded!
Bar blocking the ground and pound attempt from Akuma.
The ref warns both fighters not to hold the cage as they work up against the meshing.
Bar is looking to control Akuma's leg but it's slowly edging free. Can Bar avoid being mounted?
Akuma controlling the pace.
Akuma sitting in half guard, looking to land shots. Bar defending well though.
Bar wants to improve his position but Akuma is controlling well.
The fighters are pressed up against the cage, both looking to find a bit of space to work.

Bar looking for submissions off his back.

That's two minutes gone in the round.
Akuma throwing punches and elbows but they're not doing any damage.
Akuma is thwarting Bar's attempts to control the position.
Akuma tries to pass to full mount but Bar defends it.
Bar tries to roll over but Akuma keeps him under control.
Bar trying to control from the bottom.

That's three minutes gone in the round.
Akuma is trying to advance to mount but he's lost his balance and Bar reverses the position - he's now on top in Akuma's guard.
Bar trying to control but Akuma is working from the bottom.

We're going to have a standup here because Samuel Bar wasn't active enough for the referee's liking.
Bar shoots in and drives through. Akuma sprawls well.
That's three failed takedown attempts in the round for Samuel Bar. That's going to take a lot out of him.
A momentary lapse in concentration from Bar enables Akuma to shoot in and score with a neat double leg. Bar manages to secure a closed guard as the fighters hit the mat.
Bar wants to stand but Akuma is controlling the position.
Akuma controls the pace of the fight for a moment.

That's four minutes gone in the round.
Hammerfist, elbow! yells Akuma's corner. There ya go! There ya go!
Akuma slows down the pace of the fight, as he sits in guard.
Akuma slips effortlessly into side control - very nice.
Bar is looking for a sweep.
Bar is looking to slip a leg under and get half guard but Akuma is one step ahead and moves to full mount!
Wooooo! Give it up for these two warriors! They are putting on a show!
As the round comes to an end the crowd are showing their appreciation for a great round of action.
Akuma looking to finish Bar with some ground and pound. This is bad for Bar!
Akuma scores with a couple of good head shots there.
Akuma wants to finish this one by submission but Bar is holding onto his waist, trying to prevent any attacks from Akuma.
And thats the end of the round the fighters go back to their corners.
Rei Akuma dominated that round.
The fighters get back to their feet, the hooter sounds and we're back to the action!

Akuma drops down and drives through with a powerful takedown into guard.
Akuma postures up in Bar's guard and throws a big left but Bar blocks it.
Akuma wants to control from the top but Bar keeps moving.
Akuma forces his way into half guard.
Akuma is thwarting Bar's attempts to control the position.

Akuma decides to stand up.
Both fighters are absolutely exhausted here.
That's one minute gone in the round.
Bar tries to shoot in for a takedown. He's got hold of a leg but Akuma swivels and escapes.
Akuma shoots in for a takedown and gets it. Let's see what he's got on the mat.
Akuma gets to his feet - Bar follows without any prompting.
Bar fails with the takedown.
Samuel Bar is looking to throw some combinations by the looks of things.

Akuma closes the distance and pushes Bar back into the cage.
Akuma successfully pulls guard.
Bar tries to stand but Akuma is controlling from the bottom.
Bar wants to control from the top but Akuma keeps moving.
That's two minutes gone in the round.
Akuma manages to escape and get back to his feet.
The fans in attendance giving it up for the two fighters, who have really let it all hang out in the last minute or so!
Akuma clinches with his opponent.
Akuma misses the knee to the body. Nice hip positioning from Bar.
Akuma wants the takedown. Bar is fighting it off but Akuma persists and manages to bring the fight to the ground, ending up in Bar's guard against the cage.
Akuma postures up.
Akuma throws an elbow that misses. Bar uses the momentum to reverse the position. He's now in Akuma's guard. Nice move by Bar!
Akuma is working from a closed guard but he's struggling to control his opponent.
That's three minutes gone in the round.
Akuma is trying to hold Bar in close to prevent damage but Bar has managed to pass into half guard.
Bar not doing much here.
Akuma is not content to let Bar control the position.
That's four minutes gone in the round.
Bar is going to have to think about doing something other than just controlling because Akuma is managing to avoid having the position dictated to him.
We've had a lack of effective grappling in the last minute or so, which could well see a referee standup.
Akuma is concentrating on defense, preventing Bar from advancing position.
The referee decides to stand the fighters back up, due to lack of activity on the part of Samuel Bar.
Akuma tries to shoot in for a takedown. He's got hold of a leg but Bar swivels and escapes.
Bar is looking to clinch.
Bar stuffs a takedown. It's all about dictating where the fight takes place and Bar wants it to stay on the feet.
Bar scores with a reasonable looking shot to the body. Akuma doesn't seem bothered though.
As the round comes to an end the crowd are showing their appreciation for a great round of action.
Bar tries to close the distance and clinch but Akuma swats him to one side with an open hand palm strike and circles away.
Bar fakes high and shoots in for a takedown but Akuma avoids it really well and circles away.
That's three failed takedown attempts in the round for Samuel Bar. That's going to take a lot out of him.
Bar tries to clinch there but Akuma circles away.
And thats the end of the round the fighters go back to their corners.
Rei Akuma showed his class in that round. I'd imagine he'll take it on all the scorecards.
The corners get their ten second warning. Both fighters stand from their stools and stare eachother down, ready to get back to the action. This is the final round!

Akuma fails with a takedown attempt.
Akuma misses with a double jab.
Bar tries to clinch up against the cage, rushing in the close the distance. Akuma manages to break the clinch and circles back to the middle of the mat.
Bar wants to clinch up but Akuma keeps it at a distance.
Bar moves in looking to clinch but Akuma pushes him off.
Bar displays good takedown defense there as he swats away a double leg from Akuma.
Bar closes the distance and presses his opponent up against the cage.
Akuma takes a big intake of breath there - he's definitely tired.
Bar is trying to break the clinch but Akuma is controlling him.
Akuma gets underhooks to prevent Bar's takedown attempt.
Bar is trying to push Akuma away but Akuma has him pressed against the cage, so he's going nowhere.
Akuma fails to pull guard.
Samuel Bar has stuffed three takedown attempts in the round now. That's going to take a lot out of Rei Akuma.
Akuma has a body lock and is looking for a takedown. Bar is bouncing around trying to prevent the takedown and somehow he has indeed managed to stay on his feet.
That's one minute gone in the round.
Akuma is pressed up against the cage. Bar has hold of a leg and is looking to drag Akuma down to the mat. Akuma avoids the attempt though and has circled away. We're back to striking at a distance.
Bar shoots in for a takedown but Akuma shows good takedown defense.
Akuma decides to change it up a bit and drives through with a nice takedown into half guard.
Akuma is trying to control the action in half guard but Bar is working away on the bottom, looking perhaps to get back to full guard.
Akuma looks to land a strike but Bar avoids it nicely and regains full guard.
Bar striking off his back but it's not causing Akuma any problems.
Akuma trying to pass the guard but can't manage it just yet.
Bar wants to sweep here but Akuma controlling him for the moment.
Akuma throwing strikes but missing.
Bar working for a triangle but Akuma defends it easily.
That's two minutes gone in the round.
Bar has his foot on Akuma's thigh. He's trying to push off and get in position for a triangle, I think. Akuma works his way back into a safe position though.
Bar wants to sweep but no luck.
Akuma trying to move into half guard but instead Bar has managed to sweep!
This is a great period of action - very entertaining stuff!
Bar won't allow Akuma to sweep him here.
We get told so often about how wrestlers don't like to be on their backs. Let's see if Akuma can do anything to dispel that myth.
Akuma is doing well to control the posture of his opponent and prevent any damage.
Bar won't allow Akuma to sweep him here.
That's three minutes gone in the round.
Akuma is working for submissions here. He's thrown up his legs looking for a triangle but Bar frees his head nicely. Oh but Akuma has switched to an armbar! Bar is tapping furiously! Lovely submission there!
Ladies and gentlemen, after 3:28 of round 3, we have a winner by way of Submission (Triangle Armbar). Rei Akuma!
|
|
|
|
|
|
|
|
|
|
|
|
|
|
|
|
|
|
|
|
|
|
|
| S |
C
A |
G |
S |
C
B |
G |
|
S |
C |
G |
|
energy
A | B |
|
hype
A | B |
|
pop
A | B |
|
mgr
A | B |
|
FIGHT
RATING
65% |
|
|
|
|
|
|
