|
|
PBP Commentary |
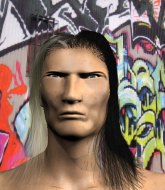
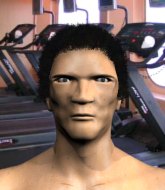
Coming up we have a middleweight MMA rules bout between Otis Driftwood (ranked 0 p4p, 0 weight class) and Calgary Alberta (ranked 0 p4p, 0 weight class). Otis Driftwood is staring across the cage at his opponent, tweaking his nipples... Tweaking his own nipples that is.
 |
|
 |
| 178 cm
27
195 lbs
13 - 13 - 0 |
|
172 cm
25
194 lbs
8 - 8 - 0 |
BJJ Brown Belt
Excellent boxer
Cardio machine |
|
Good wrestler
Decent boxing
Granite chin |
|
| |
|
Ladies and gentlemen. This fight is 3 rounds, in the middleweight division.
Introducing the fighter to my left, fighting out of the red corner.
With a record of
13 - 13 - 0, fighting out of Montreal, Otis Driftwood!
And introducing the fighter to my right, fighting out of the blue corner.
With a record of
8 - 8 - 0, fighting out of Montreal, Calgary Alberta!
The judges for this bout are Alec Ball, Robert Douchet and Trevor Gratis.

The bell rings for round one and we are underway!
Driftwood throws a head kick that misses and slips in the process. He scrambles back to his feet and the fighters circle.
Alberta tries to clinch up but Driftwood circles away and keeps his distance.
A punch combination from Alberta misses.
Alberta slips a jab and a cross from Driftwood.
Driftwood slips under a jab.
Alberta misses with a takedown attempt. He shot from a bit too far out.

Alberta forces Driftwood back against the cage and clinches.

Alberta breaks the clinch and we return to the middle of the mat.
Driftwood misses with an attempted mid kick.
Driftwood misses with a takedown attempt - Alberta sprawls well and throws a nice strike on the way out which just misses.
Alberta tries to clinch there but Driftwood circles away.
Alberta tries to clinch up but Driftwood circles away and keeps his distance.
Alberta takes one on the chin but seems OK.
Alberta tries to clinch but Driftwood is having none of it.
Alberta pulls out of a head kick attempt.
Alberta waving his hands out in front of him, looking to distract Driftwood.

That's one minute gone in the round.
Driftwood throws a combination but comes up with nothing but fresh air.
Driftwood lands a high kick!

It looks like Calgary Alberta has been cut.
Alberta tries to close the distance and clinch up but Driftwood swats him away and circles back towards the center.
Driftwood throws a combination that misses
and Alberta counters with a left to the body.
Alberta wants to clinch.

Driftwood gets taken down but at least he's managed to land in guard.
Driftwood controls Alberta momentarily but Alberta frees himself.
Alberta trying to control the position from guard on top but Driftwood is wriggling around, looking for whatever he can.

Driftwood looking for submissions from the bottom here. Moving his hips around, possibly looking for an armbar.
This is a great period of action - very entertaining stuff!
Driftwood is trying to control the position from the bottom.
Driftwood is looking for a triangle but Alberta pushes his legs off easily.
Alberta really doesn't want to stay on the ground with Driftwood. If he can't get it back to his feet, it's only a matter of time before he'll be tapping out.

That's two minutes gone in the round.
Alberta throws a big right hand that misses.
Alberta postures up in Driftwood's guard and throws a big left but Driftwood blocks it.
Alberta postures up.
The ref warns both fighters not to hold the cage as they work up against the meshing.
Alberta pressing down on his opponent's thigh, looking to pass guard. Driftwood is keeping the position for now.
Driftwood looking to sweep here. No luck so far.

Alberta postures up as if he's going to throw some strikes but drops back for an ankle! Driftwood is in big trouble! He looks ready to tap! But no, he's escaped and dives on top of Alberta, into his guard.
Driftwood wants to pass the guard but Alberta is keeping the position.
Driftwood postures up in Alberta's guard and throws a big left but Alberta blocks it.
The fighters are pressed up against the cage, both looking to find a bit of space to work.

That's three minutes gone in the round.
Alberta is looking for a guillotine. You can't force these things though and Driftwood defends well.
Alberta had isolated an arm as going for a kimura. Driftwood defends it easily.
The fighters are starting to get a bit slippery now, which will make submissions a bit more difficult.
Alberta looking for a sweep. Not yet Alberta, not yet.
Alberta throws his legs up looking to secure a triangle. Oh, that looks pretty tight, I gotta say! Driftwood escapes and throws Alberta's legs to the side, diving into side control!
Alberta is looking to reverse the position.
Alberta is letting Driftwood control him for a moment.
Alberta is not content to let Driftwood control the position.

That's four minutes gone in the round.
Driftwood just content to control the position.
Alberta is trying to improve his position.
Alberta sneaks a leg under to get back to half guard.
Driftwood keeping composed on the top, looking to control the action.
As the round comes to an end the crowd are showing their appreciation for a great round of action.
Alberta is in trouble now - Driftwood has advanced to mount!
Driftwood punching from mount but Alberta doing a good job of avoiding damage.
And thats the end of the round the fighters go back to their corners.
Otis Driftwood dominated that round.
The cut man is working on Calgary Alberta's cut.
Well, the break between rounds is over. Let's get back to the scrappin!

Driftwood keeping his hands up high there, blocking the jab from Alberta.
Alberta jabs Driftwood to the body, keeping him at a distance.
Driftwood throws a wild combination but nothing lands.
Alberta shoots in for a takedown. "I don't think so" says Driftwood as he avoids it easily.
Alberta swings and misses with a hook to the body.
Alberta's hands are dropping dangerously low here and Driftwood connects clean with a right hook that sends him down to one knee! Alberta scrambles back to his feet.
Driftwood misses with a jab, cross combination.
Alberta takes a step towards his opponent and connects with a left hand, before circling away.
Driftwood throws a head kick but Alberta moves out of range.
Alberta avoids a kick to the body.
Alberta closes the distance and pushes Driftwood back into the cage.
Driftwood tries to jump guard but he falls flat on his backside. Alberta smiles and moves away.
Driftwood shoots in but no luck this time.
Otis Driftwood is looking to throw some combinations by the looks of things.
Driftwood keeps the fight on the outside.
That's one minute gone in the round.
Alberta fails to land with the punch combination there - jab, cross, hook, miss, miss, miss.
Driftwood throws the kick towards the body but Alberta avoids it.
Driftwood keeping a good distance there, avoiding the body shot.
Alberta wants to clinch up but Driftwood keeps it at a distance.
Alberta closes the distance and clinches.
Alberta dictating the pace here, as the fighters clinch against the cage.
Alberta drops to a knee looking for a takedown but Driftwood gets the underhooks and prevents it.
Driftwood is working for takedown but Alberta is calmly controlling the position for now.
That's three failed takedown attempts in the round for Otis Driftwood. That's going to take a lot out of him.
Driftwood tries to pull guard but Alberta won't allow it.
Driftwood fails to pull the fight into his guard.
Driftwood tries to pull guard but Alberta forces him back to his feet, against the cage.
Alberta is looking to score with knees to the body. Maybe he'll change it up and go body then head. Driftwood is defending well for now.
Driftwood drops down for a takedown but doesn't get it.
That's two minutes gone in the round.
Driftwood tries to take the fight to the ground by pulling guard but can't manage it.
Driftwood tries to pull guard but Alberta forces him back to his feet, against the cage.
Alberta gets underhooks to prevent Driftwood's takedown attempt.
Alberta's corner calls for him to break the clinch, which he does.
Alberta misses with a jab, cross combination.
Driftwood throws a right hand that Alberta ducks under and follows up with a left that Alberta also avoids with ease.
Alberta jabs Driftwood to the body, keeping him at a distance.
This has been an exciting period of action!
Alberta fakes with an overhand right and moves in to clinch with Driftwood, pushing him back against the cage.
Alberta has moved round to his opponent's back and is looking for a suplex! Oh snap! He's tossed Driftwood clear over his head and slammed him to the mat!
Alberta is looking for the choke from the back position but Driftwood is controlling his hands well.
Driftwood tries to escape the position - he's now mounted. Is that better or worse? Hard to tell!
Driftwood is writhing around trying to get back to his feet.
That's three minutes gone in the round.
Driftwood regains half guard.
Alberta is trying a forearm choke
I don't think that's going to do much at this level of the game.
Alberta is looking for a kimura. It's going to be difficult to finish that from half guard though and Driftwood defends it well.
Driftwood is pressing down on Alberta's left leg trying to get back to full guard. He's managed it.
Alberta wants to control from the top but Driftwood keeps moving.
Alberta thinks about going for a leg but decides against it, in order to maintain the position.
Driftwood has a closed guard, preventing Alberta from standing up.
Alberta drops back looking for a heel hook - he quickly realises he's not going to get it but Driftwood manages to dive on top of him before he can escape and now Alberta has Driftwood in his guard.
That's four minutes gone in the round.
Driftwood trying to control the position from guard on top but Alberta is wriggling around, looking for whatever he can.
Alberta has an active guard here but Driftwood has managed to pass into half guard.
Alberta wants to improve his position but Driftwood is controlling well.
As the round comes to an end the crowd are showing their appreciation for a great round of action.
Driftwood moves nicely into side control.
Driftwood looking for an arm triangle but it's way too loose to do anything.
And thats the end of the round the fighters go back to their corners.
A close second round but Calgary Alberta will probably get the nod - 10:9.
The cut man is working on Calgary Alberta's cut.
That's time! Back to the action! This is the final round!

Alberta has closed the distance and engaged Driftwood in a clinch.
Driftwood on the defensive, avoiding the knees to the body.
Driftwood tries to pull guard but Alberta won't allow it.
Alberta slows down the pace here.
Driftwood fails to pull guard.
Driftwood drops to a knee looking for a takedown but Alberta gets the underhooks and prevents it.
That's three failed takedown attempts in the round for Otis Driftwood. That's going to take a lot out of him.
Driftwood tries to jump guard but he falls flat on his backside. Alberta smiles and moves away.
Driftwood throws a series of strikes that have Alberta backpedaling.
That's one minute gone in the round.
Driftwood walks into a straight right hand from Alberta.
Alberta takes a shot to the body in his stride.
Alberta pushes Driftwood up against the cage in a clinch.
Alberta's corner calls for him to break the clinch, which he does.
Alberta sees a low kick coming and goes to check it, but it's actually a body kick and it thuds into his unprotected ribs.
Driftwood throws a head kick that misses.
Driftwood looks to throw the jab but Alberta is out of range.
Alberta throws a body punch but Driftwood moves out of range.
Driftwood defends well against a solid takedown attempt from Alberta.
Driftwood tries to keep at a distance but Alberta has taken the fight into the clinch.
Alberta breaks from the clinch.
Alberta scores with a body shot.
Alberta throws a hook to the side of Driftwood's head but Driftwood sees it coming and ducks under it beautifully.
Driftwood avoids the clinch attempt nicely.
That's two minutes gone in the round.
Alberta moves in looking to clinch but Driftwood pushes him off.
Driftwood throws a right and a left that both miss.
We've seen a great period of action over the last minute or so - credit to both fighters for going all out!
Driftwood throws a hard body shot but it just misses.
Alberta is looking to clinch but Driftwood is avoiding it.
Driftwood scores with a nice strike.
Alberta closes the distance and presses his opponent up against the cage.
Driftwood jumps guard but Alberta stands there with Driftwood around his waist. Driftwood gives up and drops back to his feet. We remain in the clinch.
Alberta tries to land knees in the clinch but Driftwood avoids the damage to the body.
Alberta breaks the clinch and we return to the middle of the mat.
Alberta darts in and clinches Driftwood up against the cage.
Driftwood jumps guard but Alberta stands there with Driftwood around his waist. Driftwood gives up and drops back to his feet. We remain in the clinch.
Driftwood jumps guard but his hands slip and he falls flat on his back. Well, he's made himself look a right mug there, as Alberta walks away with a smile on his face. Driftwood gets slowly back to his feet and shakes his head.
That's three minutes gone in the round.
Driftwood scores with a punch to the head.
Driftwood connects with a solid leg kick.
Nice uppercut there from Alberta.
Alberta tries to close the distance and clinch but Driftwood swats him to one side with an open hand palm strike and circles away.
Driftwood is looking to clinch.
Driftwood throws a right hand that Alberta ducks under and follows up with a left that Alberta also avoids with ease.
Alberta scores with a jab.
Alberta gets to the clinch - let's see what his plan is here.
Alberta gets control of Driftwood's arms and successfully pulls guard. Alberta will no doubt be looking for submissions off his back.
Driftwood controlling from the top position.
Driftwood prevents Alberta from getting back to his feet.
Driftwood slips nicely into half guard.
That's four minutes gone in the round.
Alberta is looking to improve his position.
The crowd are loving this. Great action here.
Driftwood is sneakily working for an arm triangle but Alberta sees it coming and defends easily.
Driftwood is looking to advance position but Alberta won't allow it.
Driftwood seems to be working for a kimura but Alberta defends the submission attempt.
Alberta looks like he's trying to stand up.
As the round comes to an end the crowd are showing their appreciation for a great round of action.

Alberta has one foot on Driftwood's thigh - he pushes off and manages to get back to his feet.
And that's the end of the fight!
I would just about give that final round to Calgary Alberta.
I think Alberta has won this one but let's see whether the judges agree with me. Over to the ring announcer for the scorecards.
Ladies and gentlemen, after 3 rounds of action, we go to the scorecards for a decision.
Judge Alec Ball scores the fight 28:29
Judge Robert Douchet scores the fight 28:29
Judge Trevor Gratis scores the fight 28:29
In favor of your winner, by unanimous decision... Calgary Alberta!
A very excited looking Calgary Alberta rambled incoherently for about 5 minutes post fight about how awesome he is. It was kinda funny for a while but then everyone got annoyed.
|
|
|
|
|
|
|
|
|
|
|
|
|
|
|
|
|
|
|
|
|
|
|
| S |
C
A |
G |
S |
C
B |
G |
|
S |
C |
G |
|
energy
A | B |
|
hype
A | B |
|
pop
A | B |
|
mgr
A | B |
|
FIGHT
RATING
82% |
|
|
|
|
|
|
