|
|
PBP Commentary |
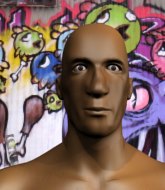
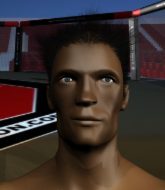
Coming up we have a welterweight MMA rules bout between Marcus Baldridge (ranked 0 p4p, 0 weight class) and Shadow Deathgrip (ranked 0 p4p, 0 weight class). Both fighters look fresh as a daisy as they make their way towards the cage.
 |
|
 |
| 182 cm
31
180 lbs
12 - 5 - 0 |
|
195 cm
30
180 lbs
16 - 9 - 0 |
Good wrestling
Basic striking
Cardio machine |
|
BJJ Brown Belt
Decent boxing
Good gas tank |
|
| |
|
Ladies and gentlemen. This fight is 2 rounds, in the welterweight division.
Introducing the fighter to my left, fighting out of the red corner.
With a record of
12 - 5 - 0, fighting out of Tokyo, Marcus Baldridge!
And introducing the fighter to my right, fighting out of the blue corner.
With a record of
16 - 9 - 0, fighting out of Tokyo, Shadow Deathgrip!
The judges for this bout are Yukihiro Yamamoto, Hirohito Nitta and Shirou Masuda.

The bell rings for round one and we are underway!
Deathgrip buckles his opponent's knee momentarily with a nice leg kick.
Baldridge tries to land with a swinging hook to the body but Deathgrip was well out of range. Poor timing from Baldridge.
Deathgrip scores with a punch to the head.
Baldridge throws a jab when Deathgrip was well out of range.
Deathgrip connects with a body shot.
Deathgrip is a painfully thin specimen of a man. You do wonder whether a good body kick would snap him clean in two.
Baldridge ducks down and throws a hook to the body but Deathgrip moves away.
Baldridge misses with a looping left.
Baldridge throws a hook but Deathgrip blocks it.
Baldridge ducks down and throws a hook to the body but Deathgrip moves away.
Baldridge tries to land with a swinging hook to the body but Deathgrip was well out of range. Poor timing from Baldridge.
Deathgrip ducks under a wild hook from Baldridge.
Deathgrip stooping low to avoid any incoming strikes and then lunges in with an uppercut come cross that lands flush.
Baldridge misses the shot to the body.
Deathgrip fails with the takedown.
Deathgrip feints with a shoulder and throws a nice leg kick to Baldridge's calf.

That's one minute gone in the round.
A looping hook to the body misses from Deathgrip. Baldridge does a little dance to reset his feet.
Deathgrip tries for a takedown but Baldridge circles away easily
enabling Baldridge to counter with a crisp jab.
Deathgrip closes the distance but Baldridge moves to the side
and Baldridge counters with a stiff right hand.
Baldridge fails to land the takedown.
This fight brought to you by 5M nutrition - it's mmmmm tasty. Nice jab by Deathgrip.
Deathgrip uses decent footwork to sidestep a right hand from Baldridge.
Baldridge misses with a wild body shot.
Deathgrip throws a nice outside leg kick.

That's two minutes gone in the round.

Baldridge closes the distance and scores a nice trip takedown into half guard. Deathgrip did well to prevent Baldridge getting side control.
The referee is pacing around the two fighters - he looks like he's thinking about a standup.
Deathgrip tries to get to full guard but Baldridge has control of the leg.
This is a great period of action - very entertaining stuff!
Baldridge is keen to just control but Deathgrip is a slippery customer.
Baldridge not throwing his punches with enough precision this time.
Baldridge stalling away here and it's allowed Deathgrip to slip out his trapped foot and regain full guard.
Baldridge throws a big right hand that misses.
The fighters are pressed up against the cage, both looking to find a bit of space to work.
Deathgrip looking for a sweep. Not yet Deathgrip, not yet.
Deathgrip is looking to get back to his feet but can't, whilst Baldridge is controlling him.
Baldridge might be looking to lock onto one of his opponent's long limbs for a submission, whilst we're on the ground.
Baldridge postures up to throw the ground and pound strikes but they don't connect.
Baldridge passes Deathgrip's right leg, so he's now in half guard.
Baldridge missing with some ground and pound from the half guard.

That's three minutes gone in the round.
Baldridge passes to full mount!
Baldridge raining down hammerfists from mount.
The crowd growing excited in anticipation of a finish here! Right on cue, Baldridge cracks his opponent with a massive right hand that draws loud cheers!
Baldridge looking to ground and pound his opponent to a finish here.
Baldridge landing strikes from the mount and Deathgrip is in trouble!
Wooooo! Give it up for these two warriors! They are putting on a show!
Baldridge trying to control but Deathgrip is having none of it.
Deathgrip working to try and regain half guard.
Baldridge working the ground and pound effectively.

Deathgrip is rocked!
Baldridge postures up and connects with a big shot that has rocked Deathgrip badly. He's trying desperately to grab hold of Baldridge around the waist but Baldridge pushes him off and unloads with more strikes, forcing the referee to jump in and save him! Baldridge is the winner by TKO! Baldridge jumps onto the cage and shouts into the camera. "We did it momma!"
Ladies and gentlemen, after 4:59 of round 1, we have a winner by way of TKO (Strikes). Marcus Baldridge!
Marcus Baldridge made sure to mention his sponsor, A.C: Awesome Clothing in his post fight interview.
|
|
|
|
|
|
|
|
|
|
|
|
|
|
|
|
|
|
|
|
|
|
|
| S |
C
A |
G |
S |
C
B |
G |
|
S |
C |
G |
|
energy
A | B |
|
hype
A | B |
|
pop
A | B |
|
mgr
A | B |
|
FIGHT
RATING
58% |
|
|
|
|
|
|
