|
|
PBP Commentary |
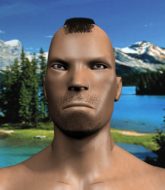
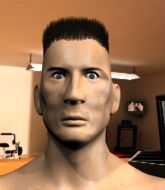
Coming up we have a featherweight MMA rules bout between Bada Boom (ranked 0 p4p, 0 weight class) and Hatsu Hioki (ranked 0 p4p, 0 weight class). Boom comes into the arena with Metallica - All Nightmare Long blaring out of the sound system. Hatsu Hioki has the eye of the tiger tonight.
 |
|
 |
| 170 cm
23
152 lbs
4 - 1 - 0 |
|
181 cm
23
149 lbs
4 - 0 - 0 |
Good takedowns
Counter striker
Granite chin |
|
BJJ Purple Belt
Brawler
Tends to cut |
|
| |
|
Ladies and gentlemen. This fight is 3 rounds, in the featherweight division.
Introducing the fighter to my left, fighting out of the red corner.
With a record of
4 - 1 - 0, fighting out of Tokyo, Bada Boom!
And introducing the fighter to my right, fighting out of the blue corner.
With a record of
4 - 0 - 0, fighting out of Tokyo, Hatsu Hioki!
The judges for this bout are Taro Takaoka, Kenichi Hosakawa and Shigeki Sano.

The bell rings for round one and we are underway!
Hioki stuffs the takedown.
The fight stays on the outside here - Hioki looks like he's thinking about clinching though.
Hioki throws a head kick but Boom moves out of range.
Boom avoids the head kick by Hioki.

Hioki moves into the clinch.
Hioki unloads a knee to the mid-section. Boom lets out a prehistoric sounding urrrrgh.

Hioki gets the body lock takedown. After a quick scramble, Boom regains guard.
Hioki is a painfully thin specimen of a man. You do wonder whether a good body kick would snap him clean in two.
Hioki is fighting to break Boom's control of his arms but Boom is doing a good job of controlling the position at the moment.
Boom looking to control.
Hioki must be cautious of submissions here, given that his opponent has the superior Jiu Jitsu.
Boom is working an open guard here, looking to improve his position. No doubt that will leave him open to counters but at least he's being more offensive.
The ref warns both fighters not to hold the cage as they work up against the meshing.
Hioki throws a big right hand that misses.
Hioki throwing strikes but missing.
Boom is working an open guard here, looking to improve his position. No doubt that will leave him open to counters but at least he's being more offensive.
Boom has momentary wrist control but Hioki slips an elbow through the middle.

That's one minute gone in the round.
Boom has a closed guard, preventing Hioki from standing up.

The referee decides to stand the fighters back up.
Hioki closes the distance and looks for a trip takedown... aaaand he's got it - Hioki lands in his opponent's guard.
Hioki in full guard, throwing the ground and pound. No damage this time.
There's a bit of a scramble here and now Boom is on top in guard.

Boom drops back looking for a heel hook - he quickly realises he's not going to get it but Hioki manages to dive on top of him before he can escape and now Boom has Hioki in his guard.
Boom looking to sweep here. No luck so far.
Boom is working hard here to advance position.
Boom can't keep his opponent in guard - Hioki advances to half guard, no doubt looking to mount.

That's two minutes gone in the round.
Boom wants to control but Hioki is keeping busy and won't allow it.
Boom makes his way to full guard. A much better position for Boom.
Hioki working in close now, lands a nice elbow to the side of Boom's head.
Hioki wants to stand but Boom has a closed guard, so he can't escape.
Boom not looking particularly offensive just at the moment.
Hioki wants to get up but he can't break Boom's closed guard. He needs to be careful trying to break the legs open, as he's open to submissions here.
Boom might be looking to lock onto one of his opponent's long limbs for a submission, whilst we're on the ground.
Hioki is holding a leg here, probably looking for an ankle lock - he drops back and goes for it! Boom is in trouble! Is it all over??? No! Boom has escaped and now he's on top!
Boom passes Hioki's left leg - he's now in half guard.
Hioki is looking to sinch up a gullotine here but Boom pulls his head out easily.

That's three minutes gone in the round.
Boom is pressing down on Hioki's thigh, looking to free his foot. Hioki is holding on for now.
It looks like Boom is going to stand back up.
The fighters are pressed up against the cage, both looking to find a bit of space to work.
Boom is looking for a kimura but Hioki is holding onto that half guard position, so it's hard for Boom to get the leverage.
Boom thows a huge punch but Hioki dodges it nicely.
Boom wants to work for an arm triangle but Hioki is really keeping half guard well and defending the submission attempt.
Boom is breathing heavily.
Hioki is looking for a sweep. Boom is wise to his cunning plan and keeps the top position.
Boom tries to stand but his hand is stuck under Hioki.
The referee has ruled that neither fighter is active enough on the ground and has stood them back up.
Hioki throws a quick head kick that skims the top of Boom's head.
Hioki pulls out of a head kick attempt.

That's four minutes gone in the round.
Hioki is looking to clinch.
Hioki misses with a half-hearted attempt at a head kick.
Hioki throws a head kick that connects with a bit of head and a bit of hand.
Boom closes the distance and looks for a trip takedown... aaaand he's got it - Boom lands in his opponent's guard.
Hioki throws a couple of weedy looking strikes off his back.
Hioki lands a beautiful switch and he's in full mount! That could spell trouble for Boom!
Boom regains half guard.
Boom is looking for a sweep. Hioki is wise to his cunning plan and keeps the top position.
Hioki is trying for a guillotine from the top but the pressure isn't in the right place so Boom is just riding it out for now. Hioki eventually gives up the hold.
Boom trying to hold on to Hioki's head to control him but Hioki postures up.
And thats the end of the round the fighters go back to their corners.
Hatsu Hioki dominated that round.
That's time! Back to the action!

Boom circles away from the clinch attempt.
A head kick misses from Hioki.
Excellent takedown into side control there by Boom.
Hioki throws a couple of strikes even though he's not really in a good position to do so.
Hioki regains half guard.
Hioki is not content to let Boom control the position.
Boom is looking for a kimura but he's never going to get it from there.
Hioki is trying to stand back up but Boom is controlling him
Hioki looking for submissions from an awkward position here.
Hioki looking for submissions from an awkward position here.
That's one minute gone in the round.
Boom wants to control but Hioki is keeping him busy.
It looks like we're going to have a standup here. Neither fight is doing enough on the ground.
Boom tries to check the leg kick but that clearly hurt him.
Boom swats away the attempt to clinch by Hioki.
Hioki gets in close and instigates a clinch.
Hioki misses the knee to the body. Nice hip positioning from Boom.
Hioki lands a knee to the head.
Boom wants to strike at distance but he can't break free of the clinch.
Hioki tries to land a knee to the head but misses.
Hioki is breathing heavily.
Boom on the defensive, avoiding the knees to the body.
Boom fails to pull guard.
Hioki stops a takedown attempt from Boom.
Hioki trying to land knees to the body.
That's two minutes gone in the round.
Neither fighter has done anything of merit for a good minute or two here and the crowd are not happy about it.
Hioki with an attempt at a knee that misses.
Hioki gets double underhooks to prevent a takedown attempt from Boom.
That's three failed takedown attempts in the round for Bada Boom. That's going to take a lot out of him.
Hioki throws a knee to the head but misses.
Boom tries to pull guard but Hioki holds him up against the cage and eventually Boom drops back down to his feet.
Hioki missing with knees to the body.

Hioki breaks from the clinch.
Hatsu Hioki seems to be the more aggressive standup fighter in this bout.
Boom tries for a takedown but Hioki circles away easily
and Hioki counters with a takedown into side control.
Hioki tries for a kimura but Boom is defending well.
Boom gets one leg under and gets the fight to half guard.
Boom trying to control from the bottom.
That's three minutes gone in the round.
Hioki uses his free foot to push down on Boom's thigh. Eventually he works his other foot free and he's advanced to mount - this is trouble for Boom.
Hioki with good strikes from the mount here!
Hioki working for a guillotine from mount but Boom is in no mood to give up.
Boom gets back to half guard.
Boom won't allow Hioki to pass to mount.
Boom actively working from the bottom here.
Hatsu Hioki has got the better of the ground game so far.
Boom is looking to regain full guard. Not this time though.
That's four minutes gone in the round.
Boom looking for submissions off his back.
Hioki looks towards his corner to check for any instructions. The corner give him nothing to work with, so he cracks Boom with a short hammerfist. I guess that's as good as any advice he could get in this position.
Hioki wants to free his trapped foot but Boom is holding on for dear life with his legs.
Boom is looking to control Hioki's leg but it's slowly edging free. Can Boom avoid being mounted?
Boom wants to get back to full guard.
Neither fighter is doing enough for the referee's liking and he's decided to stand them back up.
Hioki clinches with his opponent.
Hioki misses with a knee to the head.
Hioki turns his hips and lands a very nice judo throw into side control!
Hioki tries for a kimura. Not really close to a finish though.
And thats the end of the round the fighters go back to their corners.
Hatsu Hioki showed his class in that round. I'd imagine he'll take it on all the scorecards.
The minute break is over - no more time for sponges and pep talks - back to the action! And we move into the final round!

Hioki clinches with his opponent.
Hioki gets the body lock takedown. After a quick scramble, Boom regains guard.
Boom working from the bottom, still in full guard. He's managed to get a loose triangle. Hioki doesn't seem to be doing much to defend here, obviously he feels comfortable in the position. Oh but Boom is tightening it up a little... Hioki has to be careful here... He's got his foot tucked under now, this looks tight! Hioki reacted too slowly and this one could be over in a matter of seconds! YES! Hioki taps out! nice BJJ there by Boom!
Ladies and gentlemen, after 0:41 of round 3, we have a winner by way of Submission (Triangle Choke). Bada Boom!
|
|
|
|
|
|
|
|
|
|
|
|
|
|
|
|
|
|
|
|
|
|
|
| S |
C
A |
G |
S |
C
B |
G |
|
S |
C |
G |
|
energy
A | B |
|
hype
A | B |
|
pop
A | B |
|
mgr
A | B |
|
FIGHT
RATING
100% |
|
|
|
|
|
|

