|
|
PBP Commentary |
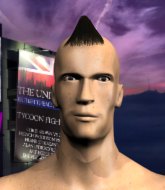
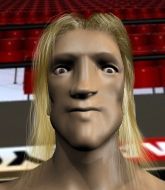
Coming up we have a lightweight MMA rules bout between Blackhole Corleone (ranked 0 p4p, 0 weight class) and Hanz Stokenhizer (ranked 0 p4p, 0 weight class). Stokenhizer has chosen The Lucky Bullets "Cross the Line" as his entrance music. Hanz Stokenhizer will no doubt be trying to keep this one on the feet, where he has a distinct advantage.
 |
|
 |
| 171 cm
18
157 lbs
0 - 0 - 0 |
|
184 cm
35
162 lbs
14 - 20 - 0 |
Good wrestling
Counter striker
KO power |
|
Good wrestler
Dangerous knees
Knockout power |
|
| |
|
Ladies and gentlemen. This fight is 3 rounds, in the lightweight division.
Introducing the fighter to my left, fighting out of the red corner.
With a record of
0 - 0 - 0, fighting out of Las Vegas, Blackhole Corleone!
And introducing the fighter to my right, fighting out of the blue corner.
With a record of
14 - 20 - 0, fighting out of Las Vegas, Hanz Stokenhizer!
The judges for this bout are Cecil Peabody, Chris Downing and George Francis.

The bell rings for round one and we are underway!
Corleone misses with a takedown
and Stokenhizer counters with a flying knee. Nice.
Corleone throws a body punch but Stokenhizer moves out of range.
Corleone fails with the takedown
and Stokenhizer counters with a head kick.
No luck with that takedown attempt from Corleone.
That's three failed takedown attempts in the round for Blackhole Corleone. That's going to take a lot out of him.

Corleone tries to keep at a distance but Stokenhizer has taken the fight into the clinch.
Corleone goes for a takedown attempt but Stokenhizer pushes him away and we're back to fighting at a distance.

That's one minute gone in the round.
Stokenhizer pulls out of a head kick attempt.
Stokenhizer clinches up against the cage.
Corleone has Stokenhizer pressed up against the cage and is working for takedown. Stokenhizer manages to improve position though and keeps the fight standing.
Corleone tries to score a body lock takedown but Stokenhizer shows good agility there to stay on his feet.
Stokenhizer connects with a knee to the head.
Corleone wants to break the clinch but can't.
Corleone has hold of a leg and is looking for a trip takedown. Stokenhizer avoids it nicely though and we remain in the clinch.
Stokenhizer prevents the takedown attempt.

Stokenhizer is fighting off a takedown attempt but Corleone is just too persistent for him and manages to trip Stokenhizer to the mat. Stokenhizer regains guard as soon as the fighters hit the mat.

That's two minutes gone in the round.
If this pace continues, the referee will definitely step in and force a standup.
Stokenhizer looking to sweep here. No luck so far.
Corleone has to be careful here, sitting in the guard of a superior BJJ player.
Stokenhizer keeping moving, preventing Corleone from controlling successfully.
We get told so often about how wrestlers don't like to be on their backs. Let's see if Stokenhizer can do anything to dispel that myth.
Stokenhizer is adopting a defensive guard.
Corleone with a flurry of punches that miss.
Fantastic stuff here - a very entertaining period of action, which has drawn cheers from the crowd.
Corleone throws an elbow that misses. Stokenhizer uses the momentum to reverse the position. He's now in Corleone's guard. Nice move by Stokenhizer!
Stokenhizer tries to free his leg and advance position but Corleone is retaining full guard.

That's three minutes gone in the round.
Stokenhizer passes into half guard.
Stokenhizer is looking to advance position but Corleone won't allow it.
Corleone tries to roll over but Stokenhizer keeps him under control.
Stokenhizer with a momentary lay and pray from half guard.
Corleone is looking to get back to full guard here but Stokenhizer has managed to pass to side control instead.
Corleone might be looking to lock onto one of his opponent's long limbs for a submission, whilst we're on the ground.

That's four minutes gone in the round.
Corleone is looking for a sweep.
Stokenhizer controlling from side mount.
Corleone struggling a bit here.
Stokenhizer is pausing for a moment. What's he doing? It looks like he's clearing his nose. Oh dude! He's shot a load of snot all down Corleone's shoulder. That is not cool.
The crowd applaud the fighters efforts here as the round comes to an end.
Corleone tries to improve position but can't.
And thats the end of the round the fighters go back to their corners.
Hanz Stokenhizer dominated that round.
OK. That's time! The bell goes and we're back to the action.

Stokenhizer lands a high kick!

It looks like Blackhole Corleone has been cut.
Stokenhizer gets taken down but at least he's managed to land in guard.
Corleone pressing down on his opponent's thigh, looking to pass guard. Stokenhizer is keeping the position for now.
Stokenhizer working the defensive guard well to avoid strikes from Corleone.
Stokenhizer is adopting a defensive guard.
Corleone trying to control the position from guard on top but Stokenhizer is wriggling around, looking for whatever he can.
Corleone loading up with the ground and pound but he's missing more than he's landing in this flurry.
That's one minute gone in the round.
Stokenhizer wants to sweep here but Corleone controlling him for the moment.
Stokenhizer keeping moving, preventing Corleone from controlling successfully.
Corleone looking to sit in guard and control but Stokenhizer gets the butterfly guard and sweeps. He's now in the guard on the top.
Stokenhizer works a leg free and moves into half guard.
Corleone trying to get back to full guard but Stokenhizer takes advantage of the position and moves to full mount!
That's two minutes gone in the round.
Corleone is just holding on here. Stokenhizer manages to take his back.
Stokenhizer controlling from the back.
The ref warns both fighters not to hold the cage as they work up against the meshing.
Stokenhizer has the hooks in. Corleone is trying to push off one leg but he has to do so cautiously to avoid being submitted.
Corleone is very frustrated here, being controlled quite effectively by Stokenhizer.
That's three minutes gone in the round.
Corleone has the hand control, trying to stop the rear naked choke.
Corleone needs to remain patient if he's going to get out of this sticky situation.
Corleone can't escape the position.
I would not like to be Corleone right now.
That's four minutes gone in the round.
Stokenhizer avoiding Corleone 's attempts to control his hands.
Stokenhizer trying to secure his dominant position for a moment - making sure Corleone doesn't escape.

It looks like we're going to have a standup here. Neither fighter is doing enough on the ground.
Corleone shoots in but Stokenhizer avoids the takedown attempt easily.
Corleone misses with a body shot. Nice footwork from Stokenhizer.
The crowd applaud the fighters efforts here as the round comes to an end.
A shot to the body from Corleone misses

and Stokenhizer counters with a takedown into full mount! That could mean trouble for Corleone!
And thats the end of the round the fighters go back to their corners.
Hanz Stokenhizer showed his class in that round. I'd imagine he'll take it on all the scorecards.
The cut man is working on Blackhole Corleone's cut.
The minute break is over - no more time for sponges and pep talks - back to the action! Ladies and gentlemen, this is the final round!

Stokenhizer tries to sprawl but Corleone drives through with a takedown into half guard.
Stokenhizer has no desire to be mounted, so is trying to control. Corleone is working away from the top position though.
Stokenhizer gets full guard.
Corleone trying to pass the guard but can't manage it just yet.
Stokenhizer has a closed guard, preventing anything of note from happening. Perhaps he's looking to stall.
Corleone throws an elbow that misses. Stokenhizer uses the momentum to reverse the position. He's now in Corleone's guard. Nice move by Stokenhizer!
Stokenhizer controls the pace of the fight for a moment.
That's one minute gone in the round.
Stokenhizer postures up.
Well, the referee has seen enough. Neither fighter is active enough on the ground so he's stood them back up.
Corleone misses with a takedown
and Stokenhizer counters with a head kick. That will keep Corleone thinking before he tries any more sloppy attacks!
Stokenhizer takes a shot to the eye socket. That's gotta hurt.
Corleone shoots in but doesn't get the takedown
and Stokenhizer counters with a kick to the head that grazes his opponent. Corleone is lucky that one didn't land flush.
Blackhole Corleone has stepped it up - he knows he needs a finish here!
That's two minutes gone in the round.
Stokenhizer keeping a good distance there, avoiding the body shot.
Corleone swings away but doesn't land with a series of punches.
Stokenhizer tries a switch kick but it misses it's target.
Corleone closes the distance and clinches up with Stokenhizer, looking for a takedown. Corleone pushes Stokenhizer against the cage but Stokenhizer circles to the side and manages to break the clinch.
That's three failed takedown attempts in the round for Blackhole Corleone. That's going to take a lot out of him.
Corleone shoots for a double leg takedown but Stokenhizer sprawls well. He's pushed Corleone's face into the mat and manages to get back to his feet relatively easily.
Corleone misses with a takedown
and Stokenhizer counters with a flying knee. Nice.

Corleone is rocked!
Fantastic stuff here - a very entertaining period of action, which has drawn cheers from the crowd.
Stokenhizer pulls out of a head kick attempt.
Stokenhizer lands with an uppercut that bounces Corleone off the cage and back into range.
Oh Corleone is still all over the place! His legs are completely gone! Will he be able to recover?!!
That's three minutes gone in the round.
Stokenhizer throws a combination but it was largely blocked by Corleone.
Corleone seems to have got his legs back now.
Corleone misses with a takedown attempt
enabling Stokenhizer to counter with a crisp jab.
Corleone misses with a body shot. Nice footwork from Stokenhizer.
Stokenhizer throws a head kick that misses and slips in the process. He scrambles back to his feet and the fighters circle.
Stokenhizer goes for a high kick. It partially lands.
Corleone shoots in for a takedown - he's clinched up with Stokenhizer but Stokenhizer pushes him off and we're back to square one.
Stokenhizer drops a shoulder and throws an uppercut that cracks Corleone right on the button. Corleone goes down! Stokenhizer follows him to the mat and finishes the job with more strikes! Stokenhizer gets the win via TKO!
Ladies and gentlemen, after 3:56 of round 3, we have a winner by way of TKO (Strikes). Hanz Stokenhizer!
|
|
|
|
|
|
|
|
|
|
|
|
|
|
|
|
|
|
|
|
|
|
|
| S |
C
A |
G |
S |
C
B |
G |
|
S |
C |
G |
|
energy
A | B |
|
hype
A | B |
|
pop
A | B |
|
mgr
A | B |
|
FIGHT
RATING
52% |
|
|
|
|
|
|
