|
|
PBP Commentary |
Coming up we have a welterweight MMA rules bout between Jim Jakasashii (ranked 0 p4p, 0 weight class) and Takeya Akazumi (ranked 0 p4p, 0 weight class). The crowd seem to be enjoying Akazumi's choice of entrance music: Asian Kung-Fu Generation - Haruka Kanata. Takeya Akazumi will no doubt be trying to keep this one on the feet, where he has a distinct advantage.
 |
|
 |
| 183 cm
26
167 lbs
6 - 3 - 0 |
|
180 cm
26
176 lbs
5 - 1 - 0 |
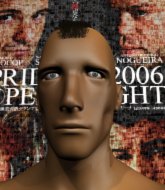
Good takedowns
Brawler
Good chin |
|
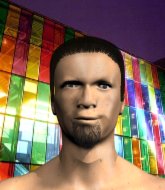
Good takedowns
Brawler
Knockout power |
|
| |
|
Ladies and gentlemen. This fight is 3 rounds, in the welterweight division.
Introducing the fighter to my left, fighting out of the red corner.
With a record of
6 - 3 - 0, fighting out of Tokyo, Jim Jakasashii!
And introducing the fighter to my right, fighting out of the blue corner.
With a record of
5 - 1 - 0, fighting out of Tokyo, Takeya Akazumi!
The judges for this bout are Shigeki Fujiwara, Shigeki Sano and Yukihiro Shimada.

The bell rings for round one and we are underway!
Akazumi scores with a jab to the jaw of his opponent.
Akazumi tries to clinch but Jakasashii moves out of range.
Jakasashii avoids the clinch attempt nicely.
Jakasashii tries for a takedown but Akazumi sees it coming a mile off and avoids it easily.

Akazumi closes the distance and presses his opponent up against the cage.
Jakasashii tries for a takedown but Akazumi manages to get underhooks.
Akazumi lands a short shot on the inside that snaps the head of Jakasashii backwards.

Akazumi manages to break the clinch.
Jakasashii fails with the takedown

and Akazumi counters with a series of strikes that sends Jakasashii to the canvas! Akazumi follows down into guard, looking to finish the fight!
That's three failed takedown attempts in the round for Jim Jakasashii. That's going to take a lot out of him.
The crowd cheering loudly, showing their appreciation for the quality fight we're seeing here.

Jakasashii throwing his legs up looking for a triangle.
Jakasashii had isolated an arm as going for a kimura. Akazumi defends it easily.
Jakasashii is active off his back here, looking for submissions.

Akazumi drops back looking for a leg! Jakasashii is in trouble here! The fighters roll with the hold and Jakasashii manages to kick Akazumi off! Akazumi jumps back into Jakasashii's guard.
Jakasashii has his foot on Akazumi's thigh. He's trying to push off and get in position for a triangle, I think. Akazumi works his way back into a safe position though.
Jakasashii is breathing heavily.

That's one minute gone in the round.
Akazumi wanted to stand there but Jakasashii had control of the position.
Jakasashii is active off his back here, looking for submissions.
Akazumi thinks about going for a leg but decides against it, in order to maintain the position.
Akazumi scoring with punches to the head and body.
Akazumi stands up over Jakasashii, holding his feet. He dives back in and lands a decent shot to the head.
Akazumi stands and throws Jakasashii's legs to the side, diving into side control.
Akazumi scoring with punches and elbows.
Akazumi wants to lay and pray for a moment but Jakasashii keeps working.
Akazumi connects with a decent looking elbow from side control that caused Jakasashii some visible discomfort.
Jakasashii is sneaking out the side here. He's bucked Akazumi off and has taken his back!

That's two minutes gone in the round.
Jakasashii doesn't have the hooks in and Akazumi manages to turn into his guard.
The crowd cheering loudly, showing their appreciation for the quality fight we're seeing here.
Akazumi got a little sloppy there for a moment and Jakasashii has worked his way into a loose triangle - can he finish it?! No, Akazumi has managed to get both his arms back between Jakasashii's legs - danger averted.
Akazumi is looking to stand up but Jakasashii won't let him.

Jakasashii is working an open guard so Akazumi takes the opportunity to get back to his feet.
Jakasashii gets tackled into the cage by Akazumi. Akazumi maintains the clinch.
Akazumi's corner are urging him to control the action in the clinch for a moment, rather than mount any serious offense. I'm sure the crowd appreciate those instructions... not.
Akazumi is trying to slow down the pace of the fight but Jakasashii is keeping busy.
Akazumi breaks the clinch.
Akazumi wants to clinch up but Jakasashii keeps it at a distance.
Jakasashii with a lazy takedown attempt
and Akazumi counters with a nice kick to the body.

Akazumi shoots in from a long way out. He's driving through with the takedown attempt and he eventually gets it, landing in Jakasashii's guard.
Akazumi is frustrating his opponent with some stalling tactics from top position.
Akazumi working in close now, lands a nice elbow to the side of Jakasashii's head.

That's three minutes gone in the round.
Akazumi scoring with some ground and pound.
Akazumi thinks about going for a leg but decides against it, in order to maintain the position.
Akazumi drops back for a leg! It's a sloppy attempt though and Akazumi jumps back into guard quickly, to retain the dominant position.
Akazumi wants to get up but he can't break Jakasashii's closed guard. He needs to be careful trying to break the legs open, as he's open to submissions here.
Akazumi content to strike from guard, landing some decent shots.
Akazumi trying to control the position from guard on top but Jakasashii is wriggling around, looking for whatever he can.
Akazumi trying to stand up but can't free himself from Jakasashii's guard.
Akazumi trying to control the position from guard on top but Jakasashii is wriggling around, looking for whatever he can.
Akazumi missing there with some ground and pound from the guard.

That's four minutes gone in the round.
Akazumi looking to pass the guard.
Akazumi lands a couple of decent looking shots.
Akazumi wants to pass the guard but Jakasashii is keeping the position.
Jakasashii is active off his back here, looking for submissions.
Jakasashii throws his legs up looking for a submission but Akazumi uses it to pass to side control.
Akazumi lands a few punches from side control.
This is a great period of action - very entertaining stuff!
Akazumi decides to take the fight back to the feet.
The crowd are going absolutely nuts as the round comes to an end - what a fantastic round of action!
Akazumi with a hook.
Akazumi has closed the distance and engaged Jakasashii in a clinch.
Akazumi breaks the clinch and we return to the middle of the mat.
And thats the end of the round the fighters go back to their corners.
Takeya Akazumi dominated that round.
That's time! Jakasashii's corner gives him a slap on the ass as he gets ready to fight.

Akazumi pushes Jakasashii away with a front kick.
Akazumi clinches up with Jakasashii and pushes him back against the cage.
Akazumi is working Jakasashii over against the cage.
Akazumi is defending well against a takedown attempt.
Jakasashii looking for a takedown.
Akazumi throws a blind hook that connects with the side of Jakasashiis head.
Akazumi has clasped his hands together around Jakasashii's back... aaand, he's got a takedown into side control. Nicely done.
Akazumi stands up and beckons Jakasashii to his feet.
Wooooo! Give it up for these two warriors! They are putting on a show!
Akazumi rushes Jakasashii and pushes him back against the cage in a clinch.
Jakasashii tries to score a body lock takedown but Akazumi shows good agility there to stay on his feet.
That's three failed takedown attempts in the round for Jim Jakasashii. That's going to take a lot out of him.
Jakasashii is looking to take this one to the mat.
Akazumi working some nice short punches in the clinch.
Both fighters are absolutely exhausted here.
Jakasashii can't get the takedown.
Akazumi's corner calls for him to break the clinch, which he does.
Akazumi moves into the clinch.
An uppercut to the body lands inside from Akazumi.
Akazumi crunches a lovely knee into Jakasashii's ribcage.
That's one minute gone in the round.
Akazumi controlling the action here for a moment.
Kneeeeees! The crowd are calling for knees to the body. Akazumi obliges.
A shot in the inside from Akazumi.
Akazumi lands a good knee to the midsection. Jakasashii won't want to take too many of those.
Akazumi lands a shoulder strike.
Akazumi lands punches inside but they're not really causing much damage.
Akazumi scores with a hook to the body.
Akazumi stalling the fight.
Akazumi breaks the clinch and we return to the middle of the mat.
Akazumi has managed to clinch.
Akazumi lands a left hand.
Jakasashii is fighting off a takedown attempt but Akazumi is just too persistent for him and manages to trip Jakasashii to the mat. Jakasashii regains guard as soon as the fighters hit the mat.
The crowd cheering loudly, showing their appreciation for the quality fight we're seeing here.
Akazumi distracts Jakasashii with his right hand and drops a big elbow with his other arm.
Akazumi postures up and lands a big shot to Jakasashii's brow.
Akazumi working in close now, lands a nice elbow to the side of Jakasashii's head.
That's two minutes gone in the round.
Akazumi wants to control from the top but Jakasashii keeps moving.
The ref warns both fighters not to hold the cage as they work up against the meshing.
Akazumi is trying to work a guillotine from the top, or something like that? Don't know how he thinks he's going to get a finish from there.
Jakasashii throws his legs up looking to secure a triangle. Oh, that looks pretty tight, I gotta say! Akazumi escapes and throws Jakasashii's legs to the side, diving into side control!
Akazumi working the ground and pound from side control.
Jakasashii is trying to get back to half guard.
Akazumi working hard here to secure a kimura but he's not really in the right position for it.
Akazumi has had enough of the ground for now and decides to stand.
That's three minutes gone in the round.
Jakasashii fails miserably with a takedown attempt.
Akazumi instigates a clinch.
Akazumi presses Jakasashii against the cage and delivers a mid-strength body shot.
Akazumi is defending well against a takedown attempt.
A nice left hand lands by Akazumi.
Akazumi breaks the clinch and we're back to striking at distance.
Akazumi has been the more effective fighter overall so far.
Akazumi closes the distance and clinches.
A right hand to the body from Akazumi.
Akazumi working on landing some head shots here - that one got through nicely.
Akazumi lands a right hand.
Akazumi works on Jakasashii's body with a couple of short punches.
A body shot lands from Akazumi.
The fans in attendance giving it up for the two fighters, who have really let it all hang out in the last minute or so!
Jakasashii is looking to take this one to the mat.
Akazumi escapes the clinch and we're back to striking.
That's four minutes gone in the round.
The fight moves into the clinch position.
Akazumi lands with a short punch from the clinch.
Akazumi pushes off and circles away, back to the middle of the mat.
Akazumi throws a quick head kick that skims the top of Jakasashii's head.
Jakasashii gets tackled into the cage by Akazumi. Akazumi maintains the clinch.
A knee to the head by Akazumi.
Good anti-grappling being displayed by Jakasashii as Akazumi tries to tie him up.
Jakasashii is working on a leg, looking for a takedown but Akazumi is defending well.
Akazumi lands with a quick shot inside that doesn't really do much damage.
Akazumi turns his hips and lands a very nice judo throw into side control!
The crowd are going absolutely nuts as the round comes to an end - what a fantastic round of action!
Akazumi advances to full mount.
Akazumi lands with some vicious ground and pound - can Jakasashii hang on?
The fighters are pressed up against the cage, both looking to find a bit of space to work.
Akazumi swings around for an armbar and he's got it! Wow, that came out of nowhere! What a finish!
Ladies and gentlemen, after 4:58 of round 2, we have a winner by way of Submission (Armbar). Takeya Akazumi!
Takeya Akazumi decided to go for the less than humble approach in his post fight interview, telling everyone how he is going to conquer the world. The crowd seemed to like it when really that sort of approach could have gone either way.
|
|
|
|
|
|
|
|
|
|
|
|
|
|
|
|
|
|
|
|
|
|
|
| S |
C
A |
G |
S |
C
B |
G |
|
S |
C |
G |
|
energy
A | B |
|
hype
A | B |
|
pop
A | B |
|
mgr
A | B |
|
FIGHT
RATING
65% |
|
|
|
|
|
|
