|
|
PBP Commentary |
Coming up we have a welterweight MMA rules bout between Shadow Deathgrip (ranked 0 p4p, 0 weight class) and Chris Langham (ranked 0 p4p, 0 weight class). Shadow Deathgrip has a significant reach advantage - let's see if he can make it count.
 |
|
 |
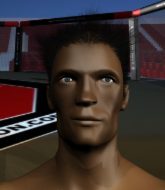
| 195 cm
28
180 lbs
13 - 7 - 0 |
|
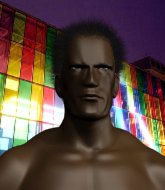
172 cm
30
169 lbs
8 - 10 - 0 |
BJJ Brown Belt
Solid boxing
Cardio machine |
|
BJJ Purple Belt
Solid Muay Thai
Powerful |
|
| |
|
Ladies and gentlemen. This fight is 3 rounds, in the welterweight division.
Introducing the fighter to my left, fighting out of the red corner.
With a record of
13 - 7 - 0, fighting out of Tokyo, Shadow Deathgrip!
And introducing the fighter to my right, fighting out of the blue corner.
With a record of
8 - 10 - 0, fighting out of Tokyo, Chris Langham!
The judges for this bout are Ren Mimura, Yukihiro Yamamoto and Taro Takaoka.

The bell rings for round one and we are underway!
Deathgrip misses with a two punch combination.
Deathgrip throws a front kick aimed at Langham's knee but Langham avoids it well.

Deathgrip closes the distance, clinches up and gets a nice trip takedown into side control. Very smooth.
The referee must be thinking about standing these guys back up.
Langham is moving his hips around well on the bottom and has managed to get back to half guard.
The fighters are pressed up against the cage, both looking to find a bit of space to work.

Langham is looking to sinch up a guillotine here but Deathgrip pulls his head out easily.
Deathgrip will need to keep those long limbs tucked in whilst he's on the ground, to prevent any submissions.

Deathgrip is looking for a kimura. It's going to be difficult to finish that from half guard though and Langham defends it well.
Langham is pressing down on Deathgrip's left leg trying to get back to full guard. He's managed it.
Langham keeping full guard, as Deathgrip tries to pass.
Langham wants to sweep here but Deathgrip controlling him for the moment.
Langham manages to sweep nicely, so he's now on top. Deathgrip manages to get himself to full guard.

That's one minute gone in the round.
Langham avoids a guillotine attempt easily.
Langham drops back looking for a heel hook - he quickly realises he's not going to get it but Deathgrip manages to dive on top of him before he can escape and now Langham has Deathgrip in his guard.
Deathgrip looking to pass the guard.
Deathgrip slips effortlessly into side control - very nice.
Deathgrip looking to punish the body of his opponent here but Langham is avoiding damage well.

That's two minutes gone in the round.
Langham tries to work a leg under to get back to half guard but Deathgrip wriggles his own leg back out and remains in side control.
Deathgrip gets to mount! Langham was on the offensive and wasn't defending properly.
Deathgrip jumps to the side looking to secure the arm triangle
. Ooooh, that looks tight
Langham is gargling but he's managed to escape! Nice work there by Langham and Deathgrip has given up the dominant position trying to land that submission.
Deathgrip working hard here to secure a kimura but he's not really in the right position for it.
Langham is looking for a sweep.
Langham regains half guard.
The crowd are loving this. Great action here.
Langham is working for an escape here. He's hooked one of Deathgrip's legs and he's managed to sneak out and take Deathgrip's back!

That's three minutes gone in the round.
Langham tightening his grip on Deathgrip, looking for the choke.
Langham is trying to stick to Deathgrip's back but Deathgrip is turning into Langham. He's managed to reverse the position - now he's in Langham's guard. Polite applause from the crowd in appreciation of some nice Jiu Jitsu by Deathgrip.
Deathgrip sitting in guard, not really doing much.
Deathgrip trying to control but Langham is working from the bottom.
The ref warns both fighters not to hold the cage as they work up against the meshing.
Deathgrip throwing shots from guard but he's hitting more mat than opponent.
Deathgrip stands and throws Langham's legs to the side, diving into side control.
Langham is trying to get back to half guard.

That's four minutes gone in the round.
Langham is persisting with the attempt to improve his position.
Deathgrip trying to control the position but Langham is working away.
Deathgrip really does look like a pencil wearing a pair of gloves. Let's hope he has a gameplan to suit that ridiculous body shape.
Deathgrip tries for a kimura. Not really close to a finish though.
Deathgrip tries for an arm triangle. That looks pretty tight to me. Is this one over!?! Possibly, maybe, no Deathgrip has let go of the choke. Obviously it wasn't as tight as we thought!
And thats the end of the round the fighters go back to their corners.
Shadow Deathgrip dominated that round.
That's the end of the interval. I'm sure that seemed a lot quicker than a minute for our two fighters! Back to the action.


Deathgrip forces Langham back against the cage and clinches.
Deathgrip has dropped down and is working for a takedown. Langham is trying to keep an underhook but Deathgrip manages to get the takedown into half guard.
Langham actively working from the bottom here.
Deathgrip trying to control from half guard but Langham is working away.
Shadow Deathgrip overall seems to be getting the better of the ground position in the fight so far.
Langham is working for an escape here. He's hooked one of Deathgrip's legs and he's managed to sneak out and take Deathgrip's back!
Deathgrip defends a rear naked choke attempt by controlling one of Langham's arms.
Langham patiently working for the choke. Which fighter will keep their nerve here?
That's one minute gone in the round.
Deathgrip turns into Langham and is now in his guard.
Deathgrip forces his way into half guard.
Langham is not content to let Deathgrip control the position.
Langham is working for an escape here. He's hooked one of Deathgrip's legs and he's managed to sneak out and take Deathgrip's back!
Deathgrip trying to control the action but Langham just sinks the hooks in.
Deathgrip showing good submission defense here.
Deathgrip holding both Langham 's hands and preventing any damage.
That's two minutes gone in the round.
Langham is looking to finish the fight by rear naked choke. Deathgrip knows exactly what he's got planned though, so he's defending well. Maybe a few strikes would soften Deathgrip for a finish.
Deathgrip breaks Langham's hooks off and manages to turn into his guard.
Deathgrip stays in close to Langham's body and controls the position.
Fantastic stuff here - a very entertaining period of action, which has drawn cheers from the crowd.
Langham looking for submissions from the bottom but instead Deathgrip passes into side control.
Langham is moving his hips around well on the bottom and has managed to get back to half guard.
That's three minutes gone in the round.
Deathgrip is working for a submission of some sort.
Langham tries to roll over but Deathgrip keeps him under control.
Langham gets back to full guard.
Deathgrip pressing down on his opponent's thigh, looking to pass guard. Langham is keeping the position for now.
Deathgrip slows down the pace of the fight, as he sits in guard.
That's four minutes gone in the round.
Langham has his foot on Deathgrip's thigh. He's trying to push off and get in position for a triangle, I think. Deathgrip works his way back into a safe position though.
Langham is working actively off his back, looking to secure an arm or perhaps work for a triangle.
Deathgrip slips effortlessly into side control - very nice.
Deathgrip is trying to get an arm triangle but Langham is defending well.
Deathgrip happy to just control the position for now.
As the round comes to an end the crowd are showing their appreciation for a great round of action.
Deathgrip tries for a kimura. Not really close to a finish though.
And thats the end of the round the fighters go back to their corners.
That was a close second round but I would say that Shadow Deathgrip will probably get the nod.
That's the end of the round. The referee orders the cornermen out of the cage so we can get back down to business. Let's get this one finished - here comes the final round!

Deathgrip lands with a hook. Langham tried to avoid it but it clipped the top of his head.
Deathgrip scores with a nice takedown into half guard. Let's see what he's got on the ground.
Deathgrip winds up and cracks Langham with a swinging punch to the side of the head.
Langham looking to work for a kimura from the bottom.
Deathgrip looking for a kimura but he'll have to free his other leg if he wants to finish that. Perhaps he's just using it as a distraction technique.
Deathgrip wants to lay and pray for a moment but Langham keeps working.
That's one minute gone in the round.
Langham is pressing down on Deathgrip's left leg trying to get back to full guard. He's managed it.
Deathgrip trying to pass the guard but can't manage it just yet.
Deathgrip missing there with some ground and pound from the guard.
Deathgrip connects with a couple of short punches.
Deathgrip passes Langham's left leg - he's now in half guard.
Langham looking to force a kimura from the bottom here. He's concentrating on that move too much though and Deathgrip pushes past his half guard into mount!
Langham working to try and regain half guard.
That's two minutes gone in the round.
Langham takes a big intake of breath there - he's definitely tired.
Langham defends a decent attempt at a guillotine from Deathgrip.
Langham gets back to half guard.
Deathgrip is nestled in close to Langham, controlling him well. He's worked in a nice elbow to the side of the head as well, for good measure.
This has been an exciting period of action!
Deathgrip passes the half guard and he's now in mount! Big trouble for Langham!
Deathgrip has control of Langham's right arm, working for a kimura. It's a bit of a token attempt though and Langham regains control of the situation pretty easily.
That's three minutes gone in the round.
Deathgrip can't quite control the action as he would like just now, as Langham is looking to escape.
Langham really trying hard to get back to half guard here.
Shadow Deathgrip is fighting for a decision here - he's started to take the cautious approach.
Deathgrip controlling from mount.
That's four minutes gone in the round.
Langham is looking to improve his position but Deathgrip isn't that keen on the idea.
Langham is squirming around, avoiding Deathgrip's attempts to control the action.
As the round comes to an end the crowd are showing their appreciation for a great round of action.
Deathgrip content just to control the position here.
And that's the end of the fight!
Shadow Deathgrip showed his dominance in that final round.
Well Deathgrip has outscored his opponent in every aspect of the fight today. Only a scarily incompetent judge or two will keep him from a well deserved win... Over to the ring announcer for the scorecards.
Ladies and gentlemen, after 3 rounds of action, we go to the scorecards for a decision.
Judge Ren Mimura scores the fight 30:27
Judge Yukihiro Yamamoto scores the fight 30:28
Judge Taro Takaoka scores the fight 30:27
In favor of your winner, by unanimous decision... Shadow Deathgrip!
As Shadow Deathgrip got his breath back, he grabbed the microphone and managed to blurt out the following: I would like to thank all the MMA fans who came here tonight! This win is for all you guys and I wanna give a shout out to TEAM BEST, to Randy and all the coaches who helped me prepare for this fight.'.
|
|
|
|
|
|
|
|
|
|
|
|
|
|
|
|
|
|
|
|
|
|
|
| S |
C
A |
G |
S |
C
B |
G |
|
S |
C |
G |
|
energy
A | B |
|
hype
A | B |
|
pop
A | B |
|
mgr
A | B |
|
FIGHT
RATING
58% |
|
|
|
|
|
|

