|
|
PBP Commentary |
Coming up we have a light heavyweight MMA rules bout between Tom McKenzie (ranked 0 p4p, 0 weight class) and Jyri Kiero (ranked 0 p4p, 0 weight class). Over to our ring announcer for the fighter introductions!
 |
|
 |
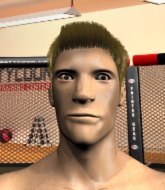
| 195 cm
22
210 lbs
1 - 0 - 0 |
|
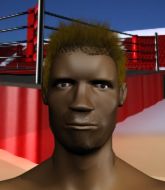
185 cm
21
200 lbs
0 - 0 - 0 |
BJJ Blue Belt
Brawler
Big right hand |
|
BJJ Blue Belt
Counter striker
Solid chin |
|
| |
|
Ladies and gentlemen. This fight is 3 rounds, in the light heavyweight division.
Introducing the fighter to my left, fighting out of the red corner.
With a record of
1 - 0 - 0, fighting out of Helsinki, Tom McKenzie!
And introducing the fighter to my right, fighting out of the blue corner.
With a record of
0 - 0 - 0, fighting out of Helsinki, Jyri Kiero!
The judges for this bout are Roosa Järviläinen, Ben Zyskovitsi and Arvi Lind.

The bell rings for round one and we are underway!
Kiero pulls out of a head kick attempt.

McKenzie scores a takedown into full mount!
Kiero wants to get back to his feet.
McKenzie prevents Kiero from getting the reversal.
McKenzie with the ground and pound from mount.
McKenzie lands with some strikes.
Kiero can't escape the position.
McKenzie controlling from the full mount.
Kiero wants to hold on but McKenzie pushes him away.
McKenzie looking to control and managing it successfully.

That's one minute gone in the round.
Kiero working to try and regain half guard.
Kiero avoids a series of strikes thrown by McKenzie.
Kiero is trying desperately to improve position.
McKenzie landing strikes from the mount and Kiero is in trouble!
McKenzie content just to control the position here.
Kiero tries to hold on but McKenzie postures up.

That's two minutes gone in the round.
A few boos can be heard. I'm sure they will multiply if the fighters don't pick up the pace.
McKenzie throwing sloppy strikes here. Perhaps if he tightened up his striking from such a dominant position, he'd be able to finish easier.
A nice elbow there by McKenzie.
The fighters are going at a pretty good pace and they're both starting to sweat now.
Kiero taking shots to the head.
Kiero is looking to improve his position but McKenzie isn't that keen on the idea.

That's three minutes gone in the round.
Kiero takes a big shot to the head but keeps on trying to improve his position.
McKenzie throwing sloppy strikes, which aren't doing any damage.
McKenzie controlling the pace for now.
McKenzie is breathing heavily.
McKenzie lands a nice shot to the head.
Kiero is looking to get back to his feet - it's going to be hard from this position.
McKenzie prevents Kiero from getting the reversal.
McKenzie takes a little breather and maintains the position. The referee will be looking for him to stay active from such a dominant position though.

That's four minutes gone in the round.
McKenzie fakes a shot to the body and cracks his opponent in the head. Nice ground and pound there!
A nice elbow there by McKenzie.
McKenzie trying to control but Kiero is having none of it.
The ref warns both fighters not to hold the cage as they work up against the meshing.
McKenzie scores with a couple of good head shots there.
Kiero working to try and regain half guard.
McKenzie can't quite control the action as he would like just now, as Kiero is looking to escape.
And thats the end of the round the fighters go back to their corners.
Tom McKenzie dominated that round.
That's time! McKenzie's corner gives him a slap on the ass as he gets ready to fight.

Kiero avoids a punch combination nicely.
Kiero keeps the fight on the outside.
McKenzie is moving around nicely and scores here with a single head shot.

McKenzie tries to keep at a distance but Kiero has taken the fight into the clinch.
Kiero is trying to slow down the pace of the fight but McKenzie is keeping busy.
We've had a slow start to the round here - hopefully the action picks up.
McKenzie wants to break the clinch but can't.
Both fighters are absolutely exhausted here.
McKenzie wants to push off and get back to the center of the mat but Kiero has him pressed against the cage.
That's one minute gone in the round.
Kiero changes levels and goes for a takedown here. McKenzie fights it off and pushes away nicely.
McKenzie throws a series of punches but Kiero moves out of range.
Kiero scores with a nice one two combo and darts back out of range to avoid anything coming in the opposite direction.
McKenzie lands three nice shots there - that looked like it hurt!
Kiero takes the fight into the clinch.
McKenzie wants to break free but Kiero has control.
Kiero wants to break the clinch but can't.
Kiero prevents a takedown attempt there.
That's two minutes gone in the round.
McKenzie has double underhooks and is working for a body lock takedown. He's got it. The fighters land in half guard but Kiero regains guard immediately.
Kiero trying to control the position.
McKenzie seems content to control from guard here. He's going to have to remain active though if he doesn't want to get stood back up.

McKenzie stands and steps away. Kiero gets to his feet too and we're back to the striking game.
Kiero drives through and clinches with McKenzie against the cage.
Kiero with the Thai clinch. He's looking to land a big knee but he's not managed it this time.
That's three minutes gone in the round.
McKenzie prevents the takedown attempt.
McKenzie wants to get back to striking at distance but Kiero won't allow it.
McKenzie gets underhooks to prevent Kiero's takedown attempt.
Tom McKenzie has stuffed three takedown attempts in the round now. That's going to take a lot out of Jyri Kiero.
McKenzie tries to jump guard but he falls flat on his backside. Kiero smiles and moves away.
McKenzie tries to clinch but Kiero moves away
and Kiero counters with a flying knee. Nice.
Kiero fails with a takedown attempt.
McKenzie tries for a takedown but Kiero circles away easily
and Kiero counters with a nice double leg into side control. McKenzie won't be happy with that.
McKenzie manages to get one leg in to regain half guard.
McKenzie pushes Kiero off looking to stand but Kiero dives back in and keeps control.
McKenzie tries to get to full guard but Kiero has control of the leg.
The fighters are pressed up against the cage, both looking to find a bit of space to work.
That's four minutes gone in the round.

McKenzie actively working from the bottom here.
Tom McKenzie overall seems to be getting the better of the ground position in the fight so far.
McKenzie is trying to control but can't.
Kiero missing with the ground and pound from half guard.
McKenzie gets back to full guard.
McKenzie looking to control.
Kiero looking to sit in guard and control but McKenzie gets the butterfly guard and sweeps. He's now in the guard on the top.
McKenzie controls the pace of the fight for a moment.
And thats the end of the round the fighters go back to their corners.
That was a close second round but I would say that Tom McKenzie will probably get the nod.
The minute break is over - no more time for sponges and pep talks - back to the action! Ladies and gentlemen, this is the final round!

Kiero misses with a takedown attempt. He shot from a bit too far out.
McKenzie shoots in for a takedown but Kiero shows good takedown defense.
McKenzie misses with a jab and misses with a cross straight after too.
Kiero tries to clinch
and McKenzie counters with a driving takedown into guard. Nice work there by McKenzie.
McKenzie postures up in Kiero's guard and throws a big left but Kiero blocks it.
McKenzie trying to land body shots but he keeps hitting the mat.
McKenzie stands up and waves to Kiero to follow him.
Kiero throws a nice head kick!
Kiero takes a big intake of breath there - he's definitely tired.
That's one minute gone in the round.
McKenzie feints and then dives in with a takedown. That was a long way out but the feint bought him enough time to close the distance and complete the takedown. Now we'll play guard for a bit and see who can get the better of that position.
McKenzie stands and steps away. Kiero gets to his feet too and we're back to the striking game.
McKenzie swings away but doesn't land with a series of punches.
McKenzie tries for a takedown but Kiero sees it coming a mile off and avoids it easily.
Tom McKenzie seems to be the more aggressive standup fighter in this bout.
Nice takedown defense from Kiero. No joy for McKenzie on that attempt.
That's three failed takedown attempts in the round for Tom McKenzie. That's going to take a lot out of him.
McKenzie shoots in and drives through. Kiero sprawls well.
McKenzie lands a jab. Then a cross. Then finally a nice hook to the body. Good work there by McKenzie.
McKenzie throws a sloppy head kick and Kiero moves out of range easily.
McKenzie thows a leg kick but Kiero checks it
and Kiero counters by moving into the clinch.
McKenzie jumps guard.
That's two minutes gone in the round.
McKenzie wants to stand up but Kiero is controlling him.
McKenzie looking for a sweep. Not yet McKenzie, not yet.
McKenzie is trying to control the position from the bottom.
McKenzie is controlling Kiero's posture.
McKenzie looking to sweep here. No luck so far.
Kiero wants to control from the top but McKenzie keeps moving.
That's three minutes gone in the round.
McKenzie trying to control the position.

Well, the referee has seen enough. Neither fighter is active enough on the ground so he's stood them back up.
McKenzie fails with the takedown
and Kiero counters with a nice double leg into half guard.
McKenzie is looking to control Kiero's leg but it's slowly edging free. Can McKenzie avoid being mounted?
McKenzie has one foot on Kiero's thigh - he pushes off and manages to get back to his feet.
McKenzie shoots in but Kiero avoids the takedown attempt easily.
Kiero closes the distance but McKenzie moves to the side
and McKenzie counters with a single leg into guard. Kiero didn't expect that.
Jyri Kiero has stepped it up - he knows he needs a finish here!
That's four minutes gone in the round.
The crowd are loving this. Great action here.
McKenzie advances to half guard.
McKenzie is scoring with some nice ground and pound from the dominant position.
Kiero is trying to get back to full guard.
Kiero makes his way to full guard. A much better position for Kiero.
McKenzie stands up and looks to throw the legs aside to pass to side control. Kiero swivels though and keeps the full guard.
Kiero bucks up whilst keeping hold of a body lock, managing to reverse the position. Now he's in top in McKenzie's guard.
As the round comes to an end the crowd are showing their appreciation for a great round of action.
Kiero is looking to work some ground and pound but McKenzie has wrist control.
Kiero throwing strikes from guard but McKenzie blocks nicely.
And that's the end of the fight!
Tom McKenzie showed his dominance in that final round.
Well I reckon that's a shut out for McKenzie, winning every round. Will the judges agree? They are the ones who matter, even if they are often depressingly incompetent. Over to the ring announcer for the scorecards.
Ladies and gentlemen, after 3 rounds of action, we go to the scorecards for a decision.
Judge Roosa Järviläinen scores the fight 30:26
Judge Ben Zyskovitsi scores the fight 30:27
Judge Arvi Lind scores the fight 30:28
In favor of your winner, by unanimous decision... Tom McKenzie!
|
|
|
|
|
|
|
|
|
|
|
|
|
|
|
|
|
|
|
|
|
|
|
| S |
C
A |
G |
S |
C
B |
G |
|
S |
C |
G |
|
energy
A | B |
|
hype
A | B |
|
pop
A | B |
|
mgr
A | B |
|
FIGHT
RATING
54% |
|
|
|
|
|
|
