|
|
PBP Commentary |
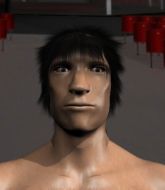
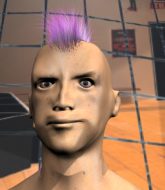
Coming up we have a middleweight MMA rules bout between Mark Munoz (ranked 0 p4p, 0 weight class) and Nobunaga Oda (ranked 0 p4p, 0 weight class). These two fighters really are very evenly matched on the feet - it will be fascinating to see who can assert themselves in that aspect of the fight.
 |
|
 |
| 182 cm
20
195 lbs
3 - 0 - 0 |
|
189 cm
20
194 lbs
3 - 1 - 0 |
Decent wrestler
Good kicks
Granite chin |
|
BJJ Purple Belt
Brawler
Granite chin |
|
| |
|
Ladies and gentlemen. This fight is 5 rounds, for the middleweight championship of the world!
Introducing the champion to my left, fighting out of the red corner.
With a record of
3 - 0 - 0, fighting out of Montreal, Mark Munoz!
And introducing the challenger to my right, fighting out of the blue corner.
With a record of
3 - 1 - 0, fighting out of Montreal, Nobunaga Oda!
The judges for this bout are Ian Loll, William Peck and Yves DeLean.

The bell rings for round one and we are underway!
Oda fails to land the takedown.
Oda tries for a takedown but Munoz sees it coming a mile off and avoids it easily.
Munoz lands a front kick.
Nice body kick there by Munoz.
Munoz throws a leg kick but Oda moved away.
A jab from Munoz does it's job there.
Munoz jabs away that one connects to the head of his opponent.
The crowd cheering loudly, showing their appreciation for the quality fight we're seeing here.
Munoz thuds a left hand into Oda's body.
Oda with a lazy takedown attempt
and Munoz counters with a nice body shot.
Mark Munoz has stuffed three takedown attempts in the round now. That's going to take a lot out of Nobunaga Oda.
Oda looks gassed!
Munoz lands with an uppercut that bounces Oda off the cage and back into range.
Munoz lands with a nice body punch.
Oda is trying desperately to land a takedown but Munoz is having absolutely none of it. This is turning into a bit of a nightmare for Oda.
Munoz lands a kick to the ribs of his opponent. Nice work there - in and out in a flash.
Munoz swings for the body but Oda moves out of range.
Munoz throws a body kick that sends a sickening thudding noise reverberating around the arena.
Munoz uses some good footwork to avoid the body shot by Oda.
Munoz comes forward and lands a shot to the body, then darts back out of range.
Ooooh, nice body kick lands from Munoz. Oda shrugs it off though.
Munoz looking to take his opponent's legs away with the low kicks.

That's one minute gone in the round.
Munoz moves into range and lands a nice leg kick.
Munoz scores with a crisp jab that stopped Oda in his tracks.
Mark Munoz is looking to keep the fight on the feet at all costs.
Munoz lunges in with swinging rights and lefts but Oda circles away quickly and effectively.

Munoz has Oda up against the cage in a clinch.
Oda throws a knee to the head but misses.
Munoz lands a body punch in the clinch.
Munoz leaning his opponent against the cage.
Munoz lands a right uppercut that snaps the head of Oda backwards.
Fantastic stuff here - a very entertaining period of action, which has drawn cheers from the crowd.
Munoz lands with a good tight uppercut to the head.
A short left from Munoz.
A short left from Munoz.
Oda tries a knee to the head but Munoz blocks it.
Munoz throws a blind hook that connects with the side of Odas head.
Oda looking to stall.
Munoz blocks a knee to the body. He'll have a nicely bruised forearm in the morning.

That's two minutes gone in the round.
Oda throws a vicious knee straight up the middle but Munoz blocks it with crossed arms.
Oda blocks a body shot from Munoz.
Oda throws a knee to the head but misses.
Munoz lands with a good tight uppercut to the head.
Oda tries a shoulder strike but it doesn't do any damage.
Stalling in the clinch from Munoz.
Munoz lands a short shot on the inside that snaps the head of Oda backwards.
Oda tries to stall but Munoz uses the opportunity to gain a better position.
A short right hand to the side of the head by Munoz.
Munoz pushes Oda back against the cage and lands a hook to the side of the head.
Munoz goes for a body shot but it's blocked.
Still in the clinch, Munoz scores with a nice short uppercut.
Munoz scores with a nice hook to the head.
Oda misses with a punch on the inside.
Oda wants to push off and get back to the center of the mat but Munoz has him pressed against the cage.

Oda breaks the clinch.
Oda throws a looping left and ducks down for a takedown. He's got his arms around Munoz's waist but Munoz gets an underhook and avoids the takedown by throwing Oda off to one side.

That's three minutes gone in the round.
Oda has his takedown stuffed
and Munoz counters with a right hand to the body.
Oda on the wrong end of a nice jab.
Nobunaga Oda seems to be the more aggressive standup fighter in this bout.
Munoz with a hook.
Munoz fakes a head punch and goes low to the body. Nicely done.
Munoz turns his hip over beautifully as he lands a nice leg kick.
This fight brought to you by 5M nutrition - it's mmmmm tasty. Nice jab by Munoz.
The fans in attendance giving it up for the two fighters, who have really let it all hang out in the last minute or so!
Oda takes a nasty kick to the mid section... That should keep him thinking. Does he try and block and risk a head kick landing?
A decent looking cross lands there for Munoz.
Munoz closes the distance and clinches.
Munoz content to slow the pace in the clinch.
A hook to the body from Munoz.
Munoz working some nice short punches in the clinch.
A right handed body shot lands from Munoz.
A battle for position here, against the cage.
Oda with an attempt at a knee that misses.
Munoz lands a shot to the body.

That's four minutes gone in the round.
Munoz makes some space for himself and lands an uppercut.
Munoz pushes Oda back against the cage and lands a hook to the side of the head.
Munoz lands a right hand that snaps the head of Oda backwards.
Munoz misses with a punch to the body.
Oda has developed a nice purple lump on his ribcage, as a result of some heavy body kicks from Munoz.
Oda misses with some punches.
Munoz lands with a right to the head.
Munoz lands with a short punch from the clinch.
Munoz holding his opponent close, against the cage.
Munoz scores with a hook to the body.
Munoz is working Oda over against the cage.
Munoz lands an uppercut.
Munoz scores with a shot to the side of Oda's head.
The crowd are going absolutely nuts as the round comes to an end - what a fantastic round of action!
Munoz lands with a right to the head.
Munoz lands a hook to the body. It's hard to tell if that hurt Oda or not.
The referee is keeping an eye on Munoz - much more stalling and he will separate the fighters.
With the fighters clinched against the cage, Munoz creates a bit of distance for himself and scores with a nice uppercut.
And thats the end of the round the fighters go back to their corners.
Mark Munoz dominated that round.
That's time! Back to the action!

Nice body punch from Munoz.
Oda tries for a takedown but Munoz circles away easily
and Munoz counters with a crisp hook to the side of the head.
Oda has his hands up protecting his head but a hook from Munoz finds it's way round the side to connect with Oda's head.
Munoz delivers a nice body kick.
Munoz misses with a half-hearted attempt at a head kick.
Oda stumbles momentarily as he takes a strong leg kick from Munoz.
Munoz fakes a head punch and goes low to the body. Nicely done.
The fans in attendance giving it up for the two fighters, who have really let it all hang out in the last minute or so!
Munoz has taken the fight to the clinch.
Munoz lands a right hand that snaps the head of Oda backwards.
Munoz stalling the fight.
Oda is breathing heavily.
Oda trying to land knees to the body.
Munoz on the defensive, avoiding the knees to the body.
Nice body punch from Munoz.
A short right hand to the side of the head by Munoz.
Munoz lands a right hand.
That's one minute gone in the round.
Munoz controlling the action here for a moment.
The crowd are getting pretty annoyed with Munoz for his constant stalling in the clinch and are voicing their displeasure.
Oda wants to break free. God knows he wants to breaaaak freeee.
A head punch on the inside from Munoz fails to land.
The fighters are pressed against the cage, as the pace of the fight slows.
Oda misses the knee to the body. Nice hip positioning from Munoz.
Munoz misses with the head strike.
Oda swings wildly with an uppercut but Munoz uses good head movement to avoid it.
Munoz lands a hook that snaps the head of Oda backwards.
Munoz lands a hook to the side of the head.
A hook to the body from Munoz.
That's two minutes gone in the round.
Munoz lands with a quick shot inside that doesn't really do much damage.
Munoz scores with a nice hook to the head.
Oda blocks an uppercut.
Munoz tries to land a shot to the body but it's blocked.
Munoz lands with a short shot to the head.
Both fighters working to control the clinch.
Munoz throws a blind hook that connects with the side of Odas head.
The two fighters are working to gain dominance in the clinch.
Munoz looking to slow down the pace here.
The crowd are loving this. Great action here.
Oda tries to break free but Munoz pushes him back against the cage.

Munoz lands a takedown into guard.

Oda has a loose triangle. He'll be looking to tighten that up but Munoz can see exactly what he's planning and manages to posture up and free himself.
Munoz works over Oda with some ground and pound from guard.
The fighters are pressed up against the cage, both looking to find a bit of space to work.
That's three minutes gone in the round.
Munoz's corner is telling him to maintain position.
Munoz looking to pass the guard.
Oda can't keep his opponent in guard - Munoz advances to half guard, no doubt looking to mount.
Munoz is trying to control. Oda wants to improve his position but can't escape this time.
Munoz prevents Oda from improving his position.
Munoz knows he needs to get back to his feet asap. He's simply no match for Oda on the ground.
Munoz looks over to his corner - he wants some instructions but his corner are not responding.
Oda is refusing to be controlled, as Munoz sits in half guard.
Oda trying to control here.
That's four minutes gone in the round.
Oda tries to roll over but Munoz keeps him under control.
Munoz lands strikes from half guard.
Munoz slows the pace down in half guard.
Munoz is really dominating this fight. Is there anything that Oda can do to turn this around?
Oda looking for submissions from an awkward position here.
Oda wants to get back to full guard.
As the round comes to an end the crowd are showing their appreciation for a great round of action.
Oda is refusing to be controlled, as Munoz sits in half guard.
Oda flails away from the bottom but he's not doing any damage.
And thats the end of the round the fighters go back to their corners.
Mark Munoz dominated that second round.
That's time! Back to the action!

Munoz gets to the clinch - let's see what his plan is here.
Oda breaks from the clinch.
Oda misses with an uppercut.
Donk. Munoz catches Oda right on the button with a cross.
Munoz lands a right hook to the body.

Oda closes the distance and presses his opponent up against the cage.
Munoz misses with a shot to the kidneys.
Munoz is working hard here but doesn't seem to be able to control effectively, up against the cage.
Oda doesn't land with the attempted body shot.
A real battle for position is taking place between these two warriors.
A frustrated look appears on Oda's face as he tries to break the clinch.
Oda slowing the pace effectively.
Oda is trying to force a seperation but Munoz has the dominant position.
Oda is trying to break the clinch but Munoz has him pressed against the cage.
Oda takes a shot to the head.
That's one minute gone in the round.
Munoz is trying to slow down the pace of the fight but Oda is keeping busy.
Munoz misses with a hook from the clinch.
Oda misses with a knee strike.
Nice body punch from Munoz.
Oda takes a big intake of breath there - he's definitely tired.
Still in the clinch, Munoz scores with a nice short uppercut.
Munoz lands on the inside with an uppercut.
Munoz wants the takedown. Oda is fighting it off but Munoz persists and manages to bring the fight to the ground, ending up in Oda's guard against the cage.
Munoz showing good wrestling skills to control the position.
Munoz has to be careful here, sitting in the guard of a superior BJJ player.
Munoz trying to control the position from guard on top but Oda is wriggling around, looking for whatever he can.
Munoz is really struggling to control Oda but he's trying to hold on to the position.
Munoz slips effortlessly into side control - very nice.
That's two minutes gone in the round.
Oda is not content to let Munoz control the position.
Munoz cracks Oda with a big elbow.
The fans in attendance giving it up for the two fighters, who have really let it all hang out in the last minute or so!
Munoz grinds an elbow into Oda's temple.
Oda tries to get back to half guard but can't.
Munoz connects with a decent looking elbow from side control that caused Oda some visible discomfort.
Oda gets one leg under and gets the fight to half guard.
Oda manages to get to full guard.
That's three minutes gone in the round.
Oda is looking for a triangle but Munoz pushes his legs off easily.
Oda wants to sweep here but Munoz controlling him for the moment.
Oda had isolated an arm as going for a kimura. Munoz defends it easily.
The ref warns both fighters not to hold the cage as they work up against the meshing.
Munoz is trying to tuck his arms in to keep them safe but Oda has managed to isolate one of them and has got a loose triangle. Munoz is looking to defend but Oda has done well to lock his legs together - this could be big trouble for Munoz! Oda pulls down on the head and a little smile comes across his face - he knows he's got it. Yep, Munoz taps out and this one is all over!
Ladies and gentlemen, after 3:59 of round 3, we have a winner by way of Submission (Triangle). Nobunaga Oda!
Nobunaga Oda is the new middleweight champion!
A victorious Nobunaga Oda thanked his army of followers in his post fight interview, telling people to make sure they follow him on Twitter.
|
|
|
|
|
|
|
|
|
|
|
|
|
|
|
|
|
|
|
|
|
|
|
| S |
C
A |
G |
S |
C
B |
G |
|
S |
C |
G |
|
energy
A | B |
|
hype
A | B |
|
pop
A | B |
|
mgr
A | B |
|
FIGHT
RATING
100% |
|
|
|
|
|
|

