|
|
PBP Commentary |
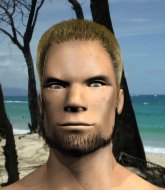
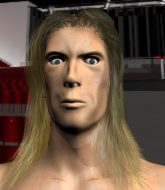
Coming up we have a bantamweight MMA rules bout between Jokke Mela (ranked 0 p4p, 0 weight class) and Chris Mayo (ranked 0 p4p, 0 weight class). Mela comes to the cage accompanied by Da Rockwilder . Mayo has chosen Super Furry Animals - Golden Retriever as his entrance music. Jokke Mela had a look across the cage there at his opponent. He definitely means business
 |
|
 |
| 170 cm
30
144 lbs
21 - 12 - 0 |
|
170 cm
33
142 lbs
17 - 16 - 0 |
Abu Dhabi Champ
Excellent boxer
Cardio machine |
|
Good wrestler
Dangerous knees
Powerful |
|
| |
|
Ladies and gentlemen. This fight is 2 rounds, in the bantamweight division.
Introducing the fighter to my left, fighting out of the red corner.
With a record of
21 - 12 - 0, fighting out of Hilo, Jokke Mela!
And introducing the fighter to my right, fighting out of the blue corner.
With a record of
17 - 16 - 0, fighting out of Hilo, Chris Mayo!
The judges for this bout are Colin Fray, Micheangelo Fripello and Paul Gruel.

The bell rings for round one and we are underway!
Mela jabs Mayo right on the nose. Mayo blinks but takes it well.
Mela circles away from the clinch attempt.
Mayo throws an off balance right hand
and Mela counters with a nice body shot.
Mela fails with a takedown attempt.
Mela lands a jab.
Mayo looks to score with a jab to the body but Mela is just out of range.
Mela moves out of range of the strikes.

Mayo clinches with his opponent.
Mayo blocks a body shot from Mela.
Mayo misses with a hook to the ribs.
A knee to the head by Mayo.
Mayo keeps the fight in the clinch, despite Mela's efforts to push away.
Mayo stalling the fight.
Mayo landing knees to the head.
Mela lands a left hand.

Mela escapes the clinch and we're back to striking.
Mela avoids the body shot from Mayo.

That's one minute gone in the round.
Mayo is moving around nicely and scores here with a single head shot.
Mayo staying out of range there.
Mayo misses with a body shot. Nice footwork from Mela.
Mela swings and misses with a hook to the body.
Chris Mayo seems to be the more aggressive standup fighter in this bout.
Mayo uses good footwork to avoid the strikes from Mela.
Mela takes a jab on the nose there. A little bit of blood seems to be coming out. Hopefully that won't affect his breathing.
Nice cross by Mayo.

Mela looking for a takedown here - he's got it.
Mela pushes down on Mayo's leg and manages to get into half guard.
Mayo is refusing to be controlled, as Mela sits in half guard.
Mayo is looking to improve his position.

Mela looking for a kimura but he'll have to free his other leg if he wants to finish that. Perhaps he's just using it as a distraction technique.

That's two minutes gone in the round.
The fans in attendance giving it up for the two fighters, who have really let it all hang out in the last minute or so!
Mayo is looking for a sweep. Mela is wise to his cunning plan and keeps the top position.
Mela tries to pass to full mount but Mayo defends it.
Mayo wants to get back to full guard.
Mayo is pressing down on Mela's left leg trying to get back to full guard. He's managed it.

That's three minutes gone in the round.
Mayo working a defensive guard here.
Mela looking to pass the guard.
Mela showing good wrestling skills to control the position.
The fighters are starting to perspire pretty heavily.
Mela stands up and looks to throw the legs aside to pass to side control. Mayo swivels though and keeps the full guard.
Mela trying to control the position from guard on top but Mayo is wriggling around, looking for whatever he can.

Neither fighter is doing enough for the referee's liking and he's decided to stand them back up.
Mayo keeping a good distance there, avoiding the body shot.

That's four minutes gone in the round.
Mela bobs and weaves well there to avoid the strikes.
Mayo is looking to clinch.
Mela shoots in and scores a nice double leg takedown into half guard.
Mela throwing punches and elbows but they're not doing any damage.
Mela wants to work for an arm triangle but Mayo is really keeping half guard well and defending the submission attempt.
Mela is thwarting Mayo's attempts to control the position.
Mela sitting in half guard, looking to land shots. Mayo defending well though.
Mela content to control rather than advance.
Mayo is doing well to control the position and prevent Mela from advancing to side control.

That's five minutes gone in the round.
Mayo tries to roll over but Mela keeps him under control.
Mayo is persisting with the attempt to improve his position.
Mayo is not content to let Mela control the position.
Mela uses his free foot to push down on Mayo's thigh. Eventually he works his other foot free and he's advanced to mount - this is trouble for Mayo.
Mela controlling the position easily from mount.
Mela lands a heavy elbow.
The ref warns both fighters not to hold the cage as they work up against the meshing.

That's six minutes gone in the round.
Mela tries to control but Mayo wriggling away.
Mayo tries to lock up and control but Mela gives him a forearm to the face and pushes him away.
Mela lands a big elbow.
Mela tries to control but Mayo wriggling away.
Mayo wants to hold on but Mela pushes him away.
Mela can't quite control the action as he would like just now, as Mayo is looking to escape.
Mela avoids the attempt from Mayo to control.

That's seven minutes gone in the round.
Mela goes for an armbar but Mayo turns quickly into his guard - lovely anticipation from Mayo.
Mela is throwing his legs up, looking for submissions. Mayo is aware though and is defending well.
Mayo must be cautious of submissions here, given that his opponent has the superior Jiu Jitsu.
Mayo sneaks a leg through and gets to half guard. That was like a knife through butter how easily he passed Mela's guard.
Mela is looking to sinch up a guillotine here but Mayo pulls his head out easily.
Mela is pressing down on Mayo's left leg trying to get back to full guard. He's managed it.
Mela wants to sweep here but Mayo controlling him for the moment.
Mayo pressing down on his opponent's thigh, looking to pass guard. Mela is keeping the position for now.

That's eight minutes gone in the round.
Mayo is looking to work some ground and pound but Mela has wrist control.
Mela working a defensive guard here.
Mela has momentary wrist control but Mayo slips an elbow through the middle.
The crowd are loving this. Great action here.
Mela avoiding any damage from the ground and pound.
Mayo connects with a couple of short punches.
Mayo passes easily into side control. Nice work.
Mela prevents Mayo from moving into mount.
Mayo misses with an attempted head punch from side control.
Mayo working the ground and pound but Mela is defending the strikes.

That's nine minutes gone in the round.
Mela tries to improve position but can't.
Mela is trying to control Mayo's posture but Mayo avoids it.
Mela tries to work a leg under to get back to half guard but Mayo wriggles his own leg back out and remains in side control.
Mayo working the ground and pound.
Check out the look on Mayo's face as he threw that strike - that's one determined fighter!
Mayo advances to full mount.
Mayo lands a heavy elbow.
Mayo lands a shot to the body, followed up by a shot to the exposed head of his trapped opponent.
As the round comes to an end the crowd are showing their appreciation for a great round of action.
Mela is looking to improve his position but Mayo isn't that keen on the idea.
The crowd cheering loudly, showing their appreciation for the quality fight we're seeing here.
Mela wants to control but Mayo is having none of it.
And thats the end of the round the fighters go back to their corners.
A close round but Chris Mayo will probably get the nod.
The minute break is over - no more time for sponges and pep talks - back to the action! Let's get this one finished - here comes the final round!

Mayo leaves Mela with his face pressed against the mat as he sprawls beautifully, defending against a solid takedown attempt.
Mayo lands with a cross to side of his opponent's head.
A swing and a miss from Mayo.
Mayo keeps his opponent at a distance with a nice jab.
Mayo clobbers Mela with an overhand right that has the crowd gasping. That made a horrendous noise.
Mayo looks for a takedown but Mela sprawls well.
The fighters circle momentarily. Mela darts into range and connects with a nice straight punch.
Mayo tries to clinch up but Mela circles away and keeps his distance.
Mela slips a jab from Mayo.
Mela scores with a jab to the jaw.
Mela uses decent footwork to sidestep a right hand from Mayo.
Mayo takes a jab on the nose. He smiles like he loves it and keeps coming.
Mayo tries to close the distance and clinch up but Mela swats him away and circles back towards the center.
Mayo throws out a loose jab but Mela uses good head movement to avoid it.
That's one minute gone in the round.
Mela dips down and scores with a jab to the body.
Mayo tries to clinch up against the cage, rushing in the close the distance. Mela manages to break the clinch and circles back to the middle of the mat.
Mayo shoots in for a double leg but Mela sprawls well. That's going to sap some energy.
Mayo misses with a straight left.
Mela avoids a lazy jab quite easily.
A telegraphed takedown attempt from Mayo is defended easily by Mela.
Jokke Mela has stuffed three takedown attempts in the round now. That's going to take a lot out of Chris Mayo.
Mayo ducks under a wild hook from Mela.
Mayo on the wrong end of a nice hook.
Donk. Mela catches Mayo right on the button with a cross.
Mela swings for the body but Mayo moves out of range.
Mela will have to do better than that with his takedown attempts.
Mela moves out of range of the strikes.
Mela tries to land with a swinging hook to the body but Mayo was well out of range. Poor timing from Mela.
Mela connects with a looping left hand that seems like it dazed Mayo momentarily.
That's two minutes gone in the round.
Mayo gets caught on his heels momentarily as he allows Mela to score an easy takedown into full guard.
Mayo is trying to keep Mela in close.
The crowd are loving this. Great action here.
Mayo wants to improve his position but instead Mela has moved into half guard.
Mela trying to control from Mayo's half guard. Mayo has other ideas though and has regained full guard.
Mayo lands a beautiful switch and he's in full mount! That could spell trouble for Mela!
Mela regains half guard.
That's three minutes gone in the round.
Mela taking some punishment here, with Mayo in his half guard.
Mela is trying to maintain the position but Mayo is very close to passing his half guard.

Mayo is looking for a kimura here.
Mayo not landing any meaningful shots this time.
Mayo is looking to pass Mela's guard but actually Mela recovers to full guard.
Mayo content to strike from guard, landing some decent shots.
Mela has Mayo pulled in close to control his posture.
That's four minutes gone in the round.
Mayo slips nicely into half guard.
Mela gets full guard.
Mela is throwing his legs up, looking for submissions. Mayo is aware though and is defending well.
Mayo throwing shots from guard but he's hitting more mat than opponent.
Mayo throwing shots from guard but he's hitting more mat than opponent.
Mela trying to keep a closed guard but Mayo is proving a slippery customer.
This is a great period of action - very entertaining stuff!
Mayo trying to control the position from guard on top but Mela is wriggling around, looking for whatever he can.
Mayo working some ground and pound from guard but it's not doing any damage.
Mela preventing the ground and pound from doing any damage.
That's five minutes gone in the round.
Mayo with a nice head shot there.
Mayo stands and throws Mela's legs to the side, diving into side control.
Mayo tries to move into full mount but can't pass Mela's legs.
Mayo trying to control the position but Mela is working away.
Mela wants to control but Mayo postures up.
Mayo with the ground and pound but Mela regains half guard under the barage of strikes.
Mela tries to roll over but Mayo keeps him under control.
Mayo seems very keen to just sit and control from half guard but Mela does not like that idea so much and is remaining active off his back.
Mayo works his foot free and advances to mount.
That's six minutes gone in the round.
Mayo trying to control but he's not successful this time.
Mela takes a big shot to the head but keeps on trying to improve his position.
Mayo landing shots from mount.
We've seen a great period of action over the last minute or so - credit to both fighters for going all out!
Mayo lands a shot to the body, followed up by a shot to the exposed head of his trapped opponent.
Mayo scoring with some good ground and pound from mount here. Will he manage to finish Mela?
Mayo misses with a head shot.
Mela takes a big shot to the head but keeps on trying to improve his position.
Mayo lands a big elbow.

Mela is rocked!
Mayo with the ground and pound from mount.
Oh Mela is still in real trouble! Will he be able to recover?!!
Mayo working away from the top, dropping strikes.
Mayo connects with a bit shot that sees Mela covering up! More strikes from Mayo and the referee jumps in to stop the fight! Mayo is our winner by TKO!
Ladies and gentlemen, after 7:55 of round 2, we have a winner by way of TKO (Strikes). Chris Mayo!
A loyal slave to those sponsorship dollars, Chris Mayo made sure he mentioned Crushed Designs (90% return on laundry service), along with how happy he was to win his fight.
|
|
|
|
|
|
|
|
|
|
|
|
|
|
|
|
|
|
|
|
|
|
|
| S |
C
A |
G |
S |
C
B |
G |
|
S |
C |
G |
|
energy
A | B |
|
hype
A | B |
|
pop
A | B |
|
mgr
A | B |
|
FIGHT
RATING
59% |
|
|
|
|
|
|

