|
|
PBP Commentary |
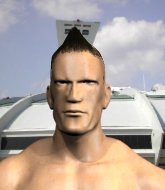
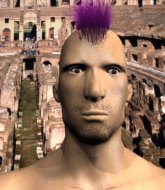
Coming up we have a lightweight MMA rules bout between Jun Kawasaki (ranked 0 p4p, 0 weight class) and Akira Hayabusa (ranked 0 p4p, 0 weight class). Kawasaki kept the crowd waiting but all that was forgotten when his ring entrance music started. The incomparable musical genius that is Linkin Park - Bleed It Out. Hayabusa has chosen Bombs Away as his entrance music. Both fighter's entrance songs getting the crowd jumping here.
 |
|
 |
| 177 cm
26
168 lbs
9 - 5 - 0 |
|
167 cm
21
166 lbs
6 - 1 - 0 |
BJJ Purple Belt
Dangerous knees
Very strong |
|
Powerful takedowns
Decent boxing
Heavy handed |
|
| |
|
Ladies and gentlemen. This fight is 2 rounds, in the lightweight division.
Introducing the fighter to my left, fighting out of the red corner.
With a record of
9 - 5 - 0, fighting out of Tokyo, Jun Kawasaki!
And introducing the fighter to my right, fighting out of the blue corner.
With a record of
6 - 1 - 0, fighting out of Tokyo, Akira Hayabusa!
The judges for this bout are Taro Takaoka, Shigeki Sano and Yukihiro Yamamoto.

The bell rings for round one and we are underway!
Hayabusa lands a glancing blow to the side of Kawasaki's head.
Kawasaki avoids a lazy jab quite easily.
Kawasaki plants his feet and lands a nice head kick!

Hayabusa gets a double leg takedown into Kawasaki's guard.
We've had a lack of effective grappling in the last minute or so, which could well see a referee standup.
Hayabusa controls the pace of the fight for a moment.
Hayabusa trying to land body shots but he keeps hitting the mat.
Kawasaki wants to control here, rather than go for any submissions from the bottom. At least for now.
Hayabusa wants to control from the top but Kawasaki keeps moving.
Kawasaki looking to sweep here. No luck so far.

The ref stands the fighters back up. Akira Hayabusa was stalling too much, according to the referee.
Kawasaki tries to clinch but Hayabusa is having none of it.
The fans in attendance giving it up for the two fighters, who have really let it all hang out in the last minute or so!
Kawasaki is looking to clinch.
Well, he's not going to score with shots like that. A lazy body kick attempt from Kawasaki.
Hayabusa throws a jab but it's blocked by Kawasaki.
Nice defenses there by Kawasaki.
Hayabusa tries to land with a swinging hook to the body but Kawasaki was well out of range. Poor timing from Hayabusa.

That's one minute gone in the round.
Kawasaki moves away from the strike by Hayabusa.
An inside leg kick lands from Kawasaki.
Hayabusa stumbles momentarily as he takes a strong leg kick from Kawasaki.
Kawasaki bobs and weaves and throws out a fast jab that snaps Hayabusa's head backwards.
Kawasaki tries to clinch up but Hayabusa circles away and keeps his distance.

Kawasaki fakes with an overhand right and moves in to clinch with Hayabusa, pushing him back against the cage.
Kawasaki tries to land a knee to the head but misses.
Kawasaki lands punches inside but they're not really causing much damage.
Kawasaki missing with knees to the body.

Hayabusa breaks the clinch.
A decent looking cross lands there for Hayabusa.
Hayabusa circles away from the clinch attempt.
Hayabusa ducks under a wild hook from Kawasaki.
Good standup being displayed there by Kawasaki as he connects with a hook.
Kawasaki lands with an overhand left.
Hayabusa gets a takedown into half guard.
Wooooo! Give it up for these two warriors! They are putting on a show!
Kawasaki is trying to maintain the position but Hayabusa is very close to passing his half guard.

That's two minutes gone in the round.
The referee must be thinking about standing these guys back up.
Hayabusa thumps the canvas. Not on purpose obviously - he just missed Kawasaki's head.
Hayabusa trying to control from half guard but Kawasaki is working away.

We're going to have a standup here because Jun Kawasaki wasn't active enough for the referee's liking.
Hayabusa throws a jab, cross combination which is slipped
letting Kawasaki counter with a right hand.
Hayabusa scores with a big left there. The judges will like that one.
Hayabusa stumbles momentarily as he takes a strong leg kick from Kawasaki.
Jun Kawasaki seems to be the more aggressive standup fighter in this bout.
Kawasaki plants his feet and lands a nice head kick!
Kawasaki looking to take his opponent's legs away with the low kicks.

That's three minutes gone in the round.
Kawasaki lands a nice shot that snaps Hayabusa's head back.
Kawasaki gets to the clinch - let's see what his plan is here.
Kawasaki connects with a knee to the head.
Kawasaki tries to land knees in the clinch but Hayabusa avoids the damage to the body.
Hayabusa takes a knee right on the jaw!
Kawasaki misses with a hook from the clinch.
Kawasaki tries to land a knee to the head but Hayabusa blocks with his arms.
Kawasaki misses with a punch to the body.
Kawasaki with the Thai clinch. He's looking to land a big knee but he's not managed it this time.
Kawasaki stalling in the clinch but Hayabusa improves position.
Kawasaki tries to land a knee to the head but misses.
Kawasaki is using his height advantage well here, landing a good percentage of his punches.
Hayabusa is trying to break the clinch but Kawasaki has him pressed against the cage.
Kawasaki tries to land a knee to the head but Hayabusa blocks with his arms.
Hayabusa escapes the clinch and we're back to striking.

That's four minutes gone in the round.
Kawasaki throws out a token jab with nothing on it.
Hayabusa slips a straight right by Kawasaki.
The crowd cheers as Kawasaki lands an impressive looking overhand right. Hayabusa doesn't seem phased though.
Kawasaki cracks the inside of Hayabusa's front leg.
Kawasaki connects with an inside leg kick.
Hayabusa checks a low kick from Kawasaki.
The fighters circling - Hayabusa throws out the jab but it was never going to land.
Hayabusa avoids the head kick by Kawasaki.
The crowd are loving this. Great action here.
Hayabusa takes a head kick and keeps coming.
Kawasaki motions for Hayabusa to come forward. Kawasaki throws a leg kick but it misses it's target.
Kawasaki tries a low kick but Hayabusa avoids it.
Hayabusa fails with a takedown attempt.
Hayabusa misses with a hook. Kawasaki ducked under it nicely.
A cross from Kawasaki lands.
Kawasaki throws a quick inside leg kick.
Kawasaki misses with a half-hearted attempt at a head kick.
Hayabusa misses with a body shot.

That's five minutes gone in the round.
Hayabusa scores with a nice head shot.
Hayabusa misses with a takedown attempt. He shot from a bit too far out.
Hayabusa has a nice red mark on his side after a thudding body kick by Kawasaki.
The fight stays on the outside here - Kawasaki looks like he's thinking about clinching though.
Hayabusa gets tackled into the cage by Kawasaki. Kawasaki maintains the clinch.
Hayabusa wants to break the clinch but can't.
Kawasaki using the Thai plumb to throw knees but Hayabusa has his back arched nicely, preventing the strike.
Kawasaki is pressed up against the cage. Hayabusa has hold of a leg and is looking to drag Kawasaki down to the mat. Kawasaki avoids the attempt though and has circled away. We're back to striking at a distance.
Jun Kawasaki has stuffed three takedown attempts in the round now. That's going to take a lot out of Akira Hayabusa.
Hayabusa loads up on a big right hand but Kawasaki slips the punch.
Kawasaki lands with a nice low kick. That'll leave a bruise.
Hayabusa is looking to chop away at Kawasaki's legs.
Hayabusa shoots in for a takedown but Kawasaki shows good takedown defense.
Kawasaki will need to close the distance a bit before he attacks - that leg kick was thrown from too far away.
Kawasaki connects with a leg kick. He turned his hip over nicely there.

That's six minutes gone in the round.
Boom, another hit is landed. "You're gunna get knocked out" taunts Kawasaki, as that shot connected.
Kawasaki scores with a hook.
Kawasaki is really peppering his opponent's head with punches.
The crowd cheering loudly, showing their appreciation for the quality fight we're seeing here.
Hayabusa connects with a looping right hand.
Hayabusa doesn't react quick enough there as he takes a shot to the body.
Kawasaki connects with a nice looking jab.
Kawasaki's hands are dropping dangerously low here and Hayabusa connects clean with a right hook that sends him down to one knee! Kawasaki scrambles back to his feet.
Hayabusa misses with a double jab.
Hayabusa dives in and grabs Kawasaki's left leg, looking for a takedown. Kawasaki pushes down on Hayabusa's head and hops out.
Kawasaki rushes Hayabusa and presses him up against the cage.
Kawasaki misses with a knee to the head.
Kawasaki missing with knees to the body.
Kawasaki tries to land a knee to the head but misses.
Hayabusa tries to pull guard but Kawasaki forces him back to his feet, against the cage.
Kawasaki tries to land a knee to the body but he is off balance and Hayabusa avoids it.
Hayabusa breaks the clinch and we return to the middle of the mat.

That's seven minutes gone in the round.
Kawasaki wants to clinch.
The fight stays on the outside here - Kawasaki looks like he's thinking about clinching though.
Hayabusa gets cracked there but stands up to it.
Kawasaki cracks Hayabusa with a right hand to the side of the head.
Kawasaki misses with a hook.
Kawasaki scores with a one two! Hayabusa had his feet all tangled up there and couldn't avoid the strikes.
Kawasaki uses some good footwork to avoid the body shot by Hayabusa.
Hayabusa throws a hook to the body but it doesn't connect.
Kawasaki throws a jab when Hayabusa was well out of range.
Hayabusa works his jab well there, keeping his opponent at a distance.
Kawasaki wants to clinch
and Hayabusa counters with a straight punch to the midsection.
Kawasaki moves out of range of the strikes.

That's eight minutes gone in the round.
Hayabusa misses with an uppercut. Kawasaki saw that one coming.
Decent striking displayed by Hayabusa there.
Hayabusa closes this distance looking for a takedown but Kawasaki circles away.
A big left from Hayabusa misses.
We've seen a great period of action over the last minute or so - credit to both fighters for going all out!
Hayabusa lands a head shot.
Kawasaki fails with an attempt to clinch.
A big left from Hayabusa misses.
Kawasaki takes an uppercut right on the button but keeps his composure.
Kawasaki misses the shot to the body.
Kawasaki takes a hook to the side of the head. I wonder if that's got his ears ringing.
Hayabusa dives in and grabs Kawasaki's left leg, looking for a takedown. Kawasaki pushes down on Hayabusa's head and hops out.
Kawasaki turns his hip over beautifully as he lands a nice leg kick.
Kawasaki scores with the left hand. Hayabusa knows he should have avoided that one.
Kawasaki tries to clinch there but Hayabusa circles away.
Hayabusa throws an uppercut from half a mile away. Kawasaki sees it coming and avoids it easily.
Nice jab there from Kawasaki.
Hayabusa jabs at Kawasaki's body.

That's nine minutes gone in the round.
Kawasaki moves into the clinch.
Hayabusa fails to pull the fight into his guard.
Hayabusa's leg has a nasty welt from taking a succession of leg kicks. That must be slowing him down.
Kawasaki scores with a knee to the head.
Hayabusa blocks a punch to the side of the head.
Hayabusa tries for a takedown. No joy.
Kawasaki is looking to score with knees to the body. Maybe he'll change it up and go body then head. Hayabusa is defending well for now.
Hayabusa lands a nice trip takedown into half guard.
Kawasaki is refusing to be controlled, as Hayabusa sits in half guard.
The fighters are pressed up against the cage, both looking to find a bit of space to work.
Kawasaki is looking to improve his position.
The crowd are going absolutely nuts as the round comes to an end - what a fantastic round of action!
Kawasaki makes his way to full guard. A much better position for Kawasaki.
And thats the end of the round the fighters go back to their corners.
That was a close round but I would say that Jun Kawasaki will probably get the nod.
That's time! Back to the action! The crowd applaud as we get ready to start the final round!

Kawasaki is looking to take this fight into the clinch.
Hayabusa staying out of range there.
Kawasaki lands with a kick to the ribs.
Hayabusa throws out a loose jab but Kawasaki uses good head movement to avoid it.
Kawasaki moves forwards but Hayabusa connects with a nice, crisp jab.
Hayabusa throws an overhand right that lands on Kawasaki's shoulder, as Kawasaki tries to avoid the shot.
Jun Kawasaki is winning the standup battle so far.
Kawasaki slips a straight right by Hayabusa.
Hayabusa with a body punch. A glancing blow.
Kawasaki staying out of range there.
Hayabusa ducks under a wild hook from Kawasaki.
Hayabusa takes one to the side of the head.
Kawasaki scores with a head kick. Hayabusa tried to block it but didn't get his arm up in time.
Kawasaki displays good takedown defense there as he swats away a double leg from Hayabusa.
Hayabusa throws a right hand that Kawasaki ducks under and follows up with a left that Kawasaki also avoids with ease.
That's one minute gone in the round.
Hayabusa swings for the body but Kawasaki moves out of range.
Kawasaki lunges in with an uppercut that skims his opponent's chin.
Hayabusa fails in his attempt to clinch.
Hayabusa throws a looping overhand right but Kawasaki ducks down to avoid it.
Hayabusa takes a swing at Kawasaki's ribcage but misses.
Kawasaki misses with a series of wild punches.
Hayabusa shoots in for a takedown but Kawasaki shows good takedown defense there and keeps this one on the feet.
Hayabusa scores with a decent looking hook.
Hayabusa looks for a takedown here. Will he get it? Kawasaki is fending him off so far but Hayabusa persists. Nope, Kawasaki circles away and we're back to standing.
Jun Kawasaki has stuffed three takedown attempts in the round now. That's going to take a lot out of Akira Hayabusa.
Hayabusa is breathing heavily.
Kawasaki scores with a head kick. Hayabusa tried to block it but didn't get his arm up in time.
Kawasaki throws a couple of head shots and lands with the final one - a decent hook, which struck Hayabusa on the side of the head.
Kawasaki feints with a shoulder and throws a nice leg kick to Hayabusa's calf.
Kawasaki cracks Hayabusa with a right hand to the side of the head.
Kawasaki swings and misses with a hook to the body.
Kawasaki lunges at Hayabusa with a hook that half lands and is half blocked by Hayabusa's hand.
That's two minutes gone in the round.
Hayabusa ducks under a wild hook from Kawasaki.
Hayabusa pushing out the jab but it's not landing.
Hayabusa scores with a takedown into Kawasaki's guard.
Wooooo! Give it up for these two warriors! They are putting on a show!

Hayabusa got a little sloppy there for a moment and Kawasaki has worked his way into a loose triangle - can he finish it?! No, Hayabusa has managed to get both his arms back between Kawasaki's legs - danger averted.
Kawasaki wants to sweep but no luck.
Kawasaki controls Hayabusa momentarily but Hayabusa frees himself.
Hayabusa trying to control the position from guard on top but Kawasaki is wriggling around, looking for whatever he can.
Hayabusa throwing elbows and punches but not connecting, as Kawasaki works some decent striking defense from the bottom.
Kawasaki looking to hit a scissor sweep but Hayabusa is one step ahead there.
Hayabusa looking to pass the guard.
That's three minutes gone in the round.
Kawasaki is trying to control the position but Hayabusa postures up.
Kawasaki wants to sweep here but Hayabusa controlling him for the moment.
Hayabusa throwing shots from guard but he's hitting more mat than opponent.

Hayabusa thinks about going for a leg but decides against it, in order to maintain the position.
Kawasaki is pulling down on Hayabusa's head. It's preventing any offense from Hayabusa, at least for the moment.
Hayabusa cracks Kawasaki with a solid left hand.
Kawasaki looking for a sweep. Not yet Kawasaki, not yet.
Hayabusa throws a strike but Kawasaki rolls with it and manages to sweep. Now he's in guard on top.
That's four minutes gone in the round.
Hayabusa trying to control the position.

Kawasaki stands and steps away. Hayabusa gets to his feet too and we're back to the striking game.
Hayabusa is pinned up against the cage taking some big shots here. The referee is looking closely deciding whether he should stop the fight.
Kawasaki moves in looking to clinch but Hayabusa pushes him off.
Kawasaki is looking to clinch.
Hayabusa fails with a rather predictable takedown attempt.
Kawasaki moves in looking to clinch but Hayabusa pushes him off.
Kawasaki fails to land with the punch combination there - jab, cross, hook, miss, miss, miss.
The crowd are loving this. Great action here.
Kawasaki connects with an inside leg kick.
Kawasaki takes a big uppercut there. He seems a bit wobbly but no, he's OK.
Hayabusa avoids the body shot from Kawasaki.
That's five minutes gone in the round.
Kawasaki just misses with a punch to the body.
Kawasaki throws a right and a left that both miss.
Hayabusa has a pretty nasty looking mouse under his right eye.
Kawasaki with a hook.
Nice defenses there by Hayabusa.
Kawasaki sizes up Hayabusa with a pawing jab and scores with a straight right down the middle.
Kawasaki lands a high kick!
Hayabusa avoids a kick to the body.
Kawasaki takes a swing at Hayabusa's ribcage but misses.
Kawasaki throws a chopping leg kick but Hayabusa manages to avoid taking any serious damage.
Kawasaki ducks under an overhand right and circles away with a smile on his face.
Hayabusa throws the left hand but Kawasaki avoids the punch easily.
Hayabusa connects with a lovely right hand, straight down the pipe.
Some wild striking there from Hayabusa.
Kawasaki misses with a straight left.
Hayabusa swinging wildly here.
That's six minutes gone in the round.
Kawasaki misses the shot to the body.
Hayabusa throws a nice looking combination but Kawasaki bobs and weaves to avoid any damage.
Kawasaki lands a nice looking kick to the body. Hayabusa takes a step back to recover.
Hayabusa slips under a jab.
Kawasaki moves forwards but Hayabusa connects with a nice, crisp jab.
The fans in attendance giving it up for the two fighters, who have really let it all hang out in the last minute or so!
Hayabusa avoids a kick to the body.
A looping hook to the body misses from Kawasaki. Hayabusa does a little dance to reset his feet.
Hayabusa avoids a lazy jab quite easily.
Kawasaki has managed to clinch.
Hayabusa has had enough of the clinch and is looking to separate.
Kawasaki leaning his opponent against the cage.
Kawasaki misses with a short punch on the inside.
That's seven minutes gone in the round.
Hayabusa is working on a leg, looking for a takedown but Kawasaki is defending well.
Kawasaki lands a nice shot to the body.
The referee calls for Kawasaki to work.
Kawasaki fails to land with a short punch on the inside.
The pace slowing considerably in the clinch, as Kawasaki takes a break from that fighting nonsense to think about the finer things in life.
Kawasaki throws a vicious knee straight up the middle but Hayabusa blocks it with crossed arms.
Jun Kawasaki has scored more points in the clinch so far.
Kawasaki swings away with an uppercut that misses.
Kawasaki tries a knee to the head but he's missed.
That's eight minutes gone in the round.
Kawasaki misses with a short punch on the inside.
Hayabusa is trying to pull guard but being pressed up against the cage enables Kawasaki to keep the fight standing.
Hayabusa is trying to pull guard but Kawasaki has him pressed against the cage.
Knees to the body from Kawasaki.
Kawasaki lands a nice knee to the body.
Kawasaki with an attempt at a knee that misses.
Kawasaki throws a vicious knee straight up the middle but Hayabusa blocks it with crossed arms.
Kawasaki tries to work over Hayabusa's body with a swooping hook but it only glances the target.
Kawasaki keeps control of Hayabusa as he tries to wriggle out of the double underhooks.
Hayabusa is trying to force a seperation but Kawasaki has the dominant position.
Hayabusa on the defensive, avoiding the knees to the body.
This has been an exciting period of action!
Kawasaki lands a shoulder strike.
That's nine minutes gone in the round.
Hayabusa on the defensive, avoiding the knees to the body.
Kneeeeees! The crowd are calling for knees to the body. Kawasaki obliges.
Kawasaki lands a good knee to the midsection. Hayabusa won't want to take too many of those.
Kawasaki looking to throw knees to the head but Hayabusa is blocking nicely.
Hayabusa has dropped down and is looking to force the takedown but it's defended by Kawasaki after a bit of a struggle.
Kawasaki with the Thai clinch, lands a knee to the head.
Hayabusa breaks the clinch and we return to the middle of the mat.
Kawasaki ducks down and throws a hook to the body but Hayabusa moves away.
The fighters circling - Hayabusa throws out the jab but it was never going to land.
As the round comes to an end the crowd are showing their appreciation for a great round of action.
Kawasaki swings away but doesn't land with a series of punches.
Kawasaki fakes high and swings low for a body shot but Hayabusa manages to avoid it.
Kawasaki misses with a body shot.
Kawasaki jabs Hayabusa right on the nose. Hayabusa blinks but takes it well.
And that's the end of the fight!
Jun Kawasaki showed his dominance in that final round.
I think Kawasaki has won this one but let's see what the judges have to say. Over to the ring announcer for the scorecards.
Ladies and gentlemen, after 2 rounds of action, we go to the scorecards for a decision.
Judge Taro Takaoka scores the fight for Jun Kawasaki!
Judge Shigeki Sano scores the fight for Jun Kawasaki!
Judge Yukihiro Yamamoto scores the fight for Jun Kawasaki!
Jun Kawasaki wins by unanimous decision!
Jun Kawasaki very nearly forgot to thank Torment Fightwear amongst all the excitement of his win but just as the interview came to a close, he screamed their name. Hopefully he'll get a few nice freebies in the mail as a thank you.
|
|
|
|
|
|
|
|
|
|
|
|
|
|
|
|
|
|
|
|
|
|
|
| S |
C
A |
G |
S |
C
B |
G |
|
S |
C |
G |
|
energy
A | B |
|
hype
A | B |
|
pop
A | B |
|
mgr
A | B |
|
FIGHT
RATING
53% |
|
|
|
|
|
|

