|
|
PBP Commentary |
Coming up we have a middleweight MMA rules bout between Ran Plan III (ranked 0 p4p, 0 weight class) and Paul Ooka (ranked 0 p4p, 0 weight class). These two fighters really are very evenly matched on the feet - it will be fascinating to see who can assert themselves in that aspect of the fight.
 |
|
 |
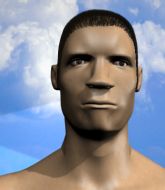
| 180 cm
27
197 lbs
19 - 15 - 1 |
|
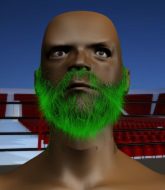
180 cm
31
202 lbs
13 - 18 - 0 |
BJJ Blue Belt
Lethal high kicks
Cardio machine |
|
Good wrestler
Excellent MT
Good gas tank |
|
| |
|
Ladies and gentlemen. This fight is 3 rounds, for the middleweight championship of the world!
Introducing the champion to my left, fighting out of the red corner.
With a record of
19 - 15 - 1, fighting out of Montreal, Ran Plan III!
And introducing the challenger to my right, fighting out of the blue corner.
With a record of
13 - 18 - 0, fighting out of Montreal, Paul Ooka!
The judges for this bout are Ian Loll, Yves DeLean and Steve Smith.

The bell rings for round one and we are underway!
Ooka throws a head kick that Plan III semi-blocks.
Ooka has his front leg slapped to the side - a nice low kick landing there from Plan III.

Ooka throws the overhand right but ducks down into a quick takedown attempt. Plan III was covering up waiting for the punch and Ooka finishes the takedown easily into guard.
Ooka stops Plan III from standing up.
Ooka stands up and looks to throw the legs aside to pass to side control. Plan III swivels though and keeps the full guard.
The ref warns both fighters not to hold the cage as they work up against the meshing.
Plan III utilising some decent striking defenses from the guard, preventing the ground and pound.
The crowd are loving this. Great action here.
Ooka wants to control from the top but Plan III keeps moving.
Ooka is in a good position here but he's just trying to control... And he's not even managing to do that successfully.

Ooka drops back looking for a leg! Plan III is in trouble here! The fighters roll with the hold and Plan III manages to kick Ooka off! Ooka jumps back into Plan III's guard.

That's one minute gone in the round.
Plan III wants to get back to his feet but Ooka is in a dominant position and won't allow it.
Ooka looking to pass the guard.
Plan III knows he needs to get back to his feet asap. He's simply no match for Ooka on the ground.
Ooka stops Plan III from standing up.
Ooka working some ground and pound from guard but it's not doing any damage.
Ooka pressing down on his opponent's thigh, looking to pass guard. Plan III is keeping the position for now.

Plan III has butterfly guard. He's looking to stand up here. He pushes Ooka off him and springs to his feet nicely. The crowd applauds.

That's two minutes gone in the round.
Plan III cracks Ooka with a nice right hand that draws applause from the crowd.
Plan III lands a jab, followed by a cross and another cross, as Ooka backs up against the cage.

It looks like Paul Ooka has been cut.
Plan III tries a switch kick but it misses it's target.
Ooka connects with a right hand. Plan III shakes it off.
The fans in attendance giving it up for the two fighters, who have really let it all hang out in the last minute or so!
A big right from Plan III misses.
Plan III works over Ooka's head and body with a nice combination.
Plan III tries to close the distance and clinch up but Ooka swats him away and circles back towards the center.
Ooka shoots in looking for a double leg takedown. Plan III defends it nicely.
Plan III dips to his left and cracks Ooka with an uppercut!
A telegraphed right hand from Ooka misses the target.
Ooka cracks Plan III with a hook to the jaw. Both fighters smile at eachother and high-five before getting back down to business.
Ooka misses with a body kick.

That's three minutes gone in the round.
Ooka throws a head kick that misses and slips in the process. He scrambles back to his feet and the fighters circle.
Plan III misses the jab.
Plan III swings away but doesn't land with a series of punches.
Plan III tries to score with a low kick but Ooka moves his leg out of the way.
Plan III uses decent footwork to sidestep a right hand from Ooka.
Plan III fails to land with the punch combination there - jab, cross, hook, miss, miss, miss.
The fight stays on the outside here - Plan III looks like he's thinking about clinching though.
Plan III throws a front kick aimed at Ooka's knee but Ooka avoids it well.
Plan III uses good footwork to get in and out and land a nice right hand before Ooka has time to react.
No joy there for Plan III, who threw a few shots but didn't land.

Plan III rushes Ooka and presses him up against the cage.
Ooka wants to break free. God knows he wants to breaaaak freeee.
A shot in the inside from Plan III.
Ooka tries to score a body lock takedown but Plan III shows good agility there to stay on his feet.

That's four minutes gone in the round.
Ooka is looking to take this one to the mat.
Ran Plan III has stuffed three takedown attempts in the round now. That's going to take a lot out of Paul Ooka.
Plan III throws a head punch that misses.
Ooka is trying to work for a single leg takedown but Plan III pulls him back up using the underhooks.
Plan III misses with a short punch on the inside.
Plan III throws a head punch that misses.
Ooka is trying to force a seperation but Plan III has the dominant position.
Ooka is looking to take this one to the mat.
An uppercut on the inside fails to land for Plan III.
This has been an exciting period of action!
Plan III is trying to work out of this bad position, with his back against the cage.
Plan III avoids a wild elbow strike from Ooka.
Plan III fails to land with a short punch on the inside.
Plan III goes for a body shot but it's blocked.
Plan III misses with a short punch on the inside.
The crowd are going absolutely nuts as the round comes to an end - what a fantastic round of action!
Ooka keeps the fight in the clinch, despite Plan III's efforts to push away.
Ooka tries to land a shot to the body but it's blocked.

Ooka manages to break the clinch.
And thats the end of the round the fighters go back to their corners.
Ran Plan III dominated that round.
The cut man is working on Paul Ooka's cut.
The fighters get back to their feet, the hooter sounds and we're back to the action!

Ooka swats away the attempt to clinch by Plan III.
Ooka tries to land with a swinging hook to the body but Plan III was well out of range. Poor timing from Ooka.
Ooka fails with a takedown attempt.
Ooka tries to clinch up but Plan III circles away and keeps his distance.
Plan III lands a slapping body shot.
Ooka fails to land with the punch combination there - jab, cross, hook, miss, miss, miss.
Plan III uses some good footwork to avoid the body shot by Ooka.

Ooka gets to the clinch - let's see what his plan is here.
Plan III lands a hook to the side of the head.
A right hand to the body from Plan III.
Plan III keeps control of Ooka as he tries to wriggle out of the double underhooks.
Plan III misses with some punches.
A head punch blocked on the inside by Ooka.
Plan III lands a right hand that snaps the head of Ooka backwards.
Ooka blocks a punch to the side of the head.
That's one minute gone in the round.
Ooka can't break the clinch.
Ooka avoiding damage.
Plan III lands with a short punch from the clinch.
Plan III scores with a nice hook to the head.
Ooka tries to work over Plan III's body with a swooping hook but it only glances the target.
Ooka takes a shot to the head.
Ooka escapes the clinch and we're back to striking.
Plan III misses with a kick to the body.
Ooka darts in and clinches Plan III up against the cage.
Ooka is working on a single leg takedown against the cage. Plan III can't fight it off and eventually Ooka manages to take the fight to the floor. Plan III looks annoyed but at least he's managed to land in guard.
Plan III is looking to get back to his feet but can't, whilst Ooka is controlling him.
Plan III avoiding any damage from the ground and pound.
That's two minutes gone in the round.
Ooka drops back for a leg! It's a sloppy attempt though and Ooka jumps back into guard quickly, to retain the dominant position.
Plan III wants to control here, rather than go for any submissions from the bottom. At least for now.
Ooka sitting in guard here, content to control.
This is a great period of action - very entertaining stuff!
Plan III keeping moving, preventing Ooka from controlling successfully.
Ooka won't allow Plan III to get back to his feet.
Ooka tries to free his leg and advance position but Plan III is retaining full guard.
Plan III looking to hit a scissor sweep but Ooka is one step ahead there.
The referee wants the fighters to be more active or he's going to reset them on the feet.

Neither fighter is doing enough for the referee's liking and he's decided to stand them back up.
Plan III gets in close and instigates a clinch.
That's three minutes gone in the round.
Ooka blocks an uppercut.
Plan III goes for a body shot but it's blocked.
Ooka has Plan III pressed up against the cage. He's trying to work for a single leg takedown. Ooka pulls back from the cage and twists to the side, sending Plan III tumbling to the mat - Ooka dives into Plan III's guard.
Plan III is pulling down on Ooka's head. It's preventing any offense from Ooka, at least for the moment.
Ooka is looking to advance position but Plan III has hit a scissor sweep - now he's on top in mount!
Plan III wants to get back to his feet but Ooka is holding on tight.
Plan III stands up from the dominant position. He obviously fancies his chances standing.
That's four minutes gone in the round.
Oooooooooooh, not good. A low kick from Plan III lands where it shouldn't have, right in the... well, you know what he did? He kicked him in the penis. He's injured, injured bad. The referee sends both fighters to their corners and Ooka has 5 minutes to recover. He's OK now though... a thumbs up from Ooka and we're back underway with a touch of gloves.
Ooka throws a monster uppercut resembling something out of street fighter but it doesn't land.
Nice body punch from Ooka.
Ooka ducks down and throws a hook to the body.
The crowd cheering loudly, showing their appreciation for the quality fight we're seeing here.
Ooka ducks down and throws a hook to the body.
Ooka has a nice red mark on his side after a thudding body kick by Plan III.
Ooka scores with a one two! Plan III had his feet all tangled up there and couldn't avoid the strikes.
A leg kick checked by Ooka.
Ooka tries to clinch but fails miserably
and Plan III counters with a head kick.
The crowd are going absolutely nuts as the round comes to an end - what a fantastic round of action!
Plan III takes a shot right to the bread basket.
Plan III throws a right and a left that Ooka avoids nicely.
Plan III tries to clinch there but Ooka circles away.
Ooka throws a big shot that misses.
And thats the end of the round the fighters go back to their corners.
A close second round but Paul Ooka will probably get the nod - 10:9.
The cut man is working on Paul Ooka's cut.
The fighters' corners scream their final instructions, as the referee calls time. Here we go, back to the action! This is the final round!

Ooka pulls out of a head kick attempt.
Plan III avoids a lazy jab quite easily.
Plan III misses with a wild body shot.
Ooka shoots in with a takedown attempt and he has Plan III pinned against the cage. Plan III gets the underhooks and manages to circle away.
Ooka throws a low kick, looking for Plan III's leg but Plan III calmly moves out of range.
Plan III throws a leg kick which misses Ooka's front leg but catches the back leg as Ooka tries to avoid it.
Plan III looks to throw the jab but Ooka is out of range.
Plan III throws an uppercut from half a mile away. Ooka sees it coming and avoids it easily.
Plan III is looking to take this fight into the clinch.
Plan III looks to score with a jab to the body but Ooka is just out of range.
Ran Plan III is winning the standup battle so far.
Ooka throws an uppercut from half a mile away. Plan III sees it coming and avoids it easily.
Plan III clobbers Ooka with an overhand right that has the crowd gasping. That made a horrendous noise.
That's one minute gone in the round.
Plan III looks to throw the jab but Ooka is out of range.
Plan III has closed the distance and engaged Ooka in a clinch.
Plan III struggles to land a body shot inside as Ooka controls his hands.
Plan III throws a head punch that misses.
Ooka drops down looking for an ankle pick but Plan III pulls his leg out and moves away.
Plan III throws a head kick that misses and slips in the process. He scrambles back to his feet and the fighters circle.
Plan III gets caught napping as Ooka dives in and scores a takedown. Plan III manages to retain guard.
Ooka stops Plan III from standing up.
Ooka trying to control but Plan III is working from the bottom.
Ooka pressing down on his opponent's thigh, looking to pass guard. Plan III is keeping the position for now.
Ooka wants to control from the top but Plan III keeps moving.
Plan III on his back here. We all know that wrestlers don't like being on their back so let's see if Plan III tries to get out of the position.
That's two minutes gone in the round.
Ooka missing there with some ground and pound from the guard.
The fighters are pressed up against the cage, both looking to find a bit of space to work.
Plan III keeping full guard, as Ooka tries to pass.
Ooka is pushing down on Plan III's leg trying to pass to half guard. Plan III is fighting to maintain full guard but Ooka has managed to sneak the leg through.
Ooka is looking for a kimura. It's going to be difficult to finish that from half guard though and Plan III defends it well.
Fantastic stuff here - a very entertaining period of action, which has drawn cheers from the crowd.
Plan III tries to roll over but Ooka keeps him under control.
Ooka wants to pass to mount but Plan III is defending the position.
That's three minutes gone in the round.
Plan III is trying to stand.
Ooka wants to free his trapped foot but Plan III is holding on for dear life with his legs.
Ooka throwing shots but Plan III is blocking nicely.
Plan III wants to improve his position but Ooka is controlling well.
Paul Ooka has got the better of the ground game so far.
Ooka wants to control but Plan III is keeping him busy.
Ooka is looking to pass the guard... He's managed it - he's now in full mount!
Ooka goes for an armbar but he's fallen flat on his backside there and now Plan III is on top in guard.
That's four minutes gone in the round.
Ooka is working from a closed guard but he's struggling to control his opponent.
Plan III won't allow Ooka to sweep him here.
Ooka working a defensive guard here.
The crowd applaud the fighters efforts here as the round comes to an end.
Plan III wanted to stand there but Ooka had control of the position.
And that's the end of the fight!
I would just about give that final round to Paul Ooka.
I think Ooka has won this one but let's see whether the judges agree with me. Over to the ring announcer for the scorecards.
Ladies and gentlemen, after 3 rounds of action, we go to the scorecards for a decision.
Judge Ian Loll scores the fight 29:29
Judge Yves DeLean scores the fight 28:29
Judge Steve Smith scores the fight 28:29
In favor of your winner, by majority decision... Paul Ooka!
Paul Ooka is the new middleweight champion!
Paul Ooka thanked the fans post fight for their support.
|
|
|
|
|
|
|
|
|
|
|
|
|
|
|
|
|
|
|
|
|
|
|
| S |
C
A |
G |
S |
C
B |
G |
|
S |
C |
G |
|
energy
A | B |
|
hype
A | B |
|
pop
A | B |
|
mgr
A | B |
|
FIGHT
RATING
77% |
|
|
|
|
|
|
