|
|
PBP Commentary |
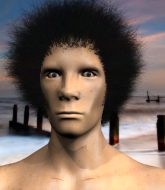
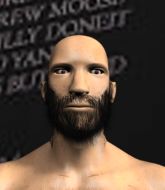
Coming up we have a middleweight MMA rules bout between Laurel Aitken (ranked 0 p4p, 0 weight class) and John Bridge (ranked 0 p4p, 0 weight class). The key to victory for Laurel Aitken has got to be keeping the fight on the feet.
 |
|
 |
| 187 cm
22
195 lbs
5 - 3 - 0 |
|
175 cm
18
185 lbs
3 - 2 - 0 |
BJJ Purple Belt
Improved boxing
Big right hand |
|
BJJ Blue Belt
Counter striker
Determined |
|
| |
|
Ladies and gentlemen. This fight is 3 rounds, in the middleweight division.
Introducing the fighter to my left, fighting out of the red corner.
With a record of
5 - 3 - 0, fighting out of Montreal, Laurel Aitken!
And introducing the fighter to my right, fighting out of the blue corner.
With a record of
3 - 2 - 0, fighting out of Montreal, John Bridge!
The judges for this bout are Trevor Gratis, Gregory Folan and Dillan Fox.

The bell rings for round one and we are underway!
Aitken misses with a wild combination.
Aitken throws a combination but comes up with nothing but fresh air.
Aitken rushes forward with a series of wild hooks but Bridge moves out of range and avoids them all easily.
Aitken lands with a two punch combination before moving back out of range.

It looks like John Bridge has been cut.
Aitken misses with a double jab.
Aitken fails to land with the punch combination there - jab, cross, hook, miss, miss, miss.
No joy there for Aitken, who threw a few shots but didn't land.
Good standup being displayed there by Aitken as he connects with a hook.
Aitken shoots in for a takedown but doesn't get it.
Aitken throws a head kick that misses and slips in the process. He scrambles back to his feet and the fighters circle.
Aitken closes the distance and clinches up with Bridge, looking for a takedown. Aitken pushes Bridge against the cage but Bridge circles to the side and manages to break the clinch.
Aitken fails with a rather predictable takedown attempt.
That's three failed takedown attempts in the round for Laurel Aitken. That's going to take a lot out of him.
Aitken throws a nice looking combination but Bridge bobs and weaves to avoid any damage.
Bridge avoids a punch combination nicely.

That's one minute gone in the round.
Some wild striking there from Aitken.
Aitken fails in his attempt to clinch.
Aitken shoots in for a takedown. "Ole!" shouts Bridge as he jumps to the side.
Aitken fails with the takedown.
Aitken is breathing heavily.
Aitken fails with a takedown attempt from distance.
Aitken looks to score with a combo but nothing lands.
A head kick misses from Bridge.

Bridge fakes an overhand right and shoots for a takedown. Aitken sprawls well initially but Bridge persists and gets the takedown into half guard.

Aitken actively working from the bottom here.
Bridge throwing shots but they're hitting the canvas more than the man.

That's two minutes gone in the round.
Bridge not throwing his punches with enough precision this time.
Aitken keeping his head moving to avoid the ground and pound.
Bridge drops an elbow to the side of Aitken's head.
Bridge takes advantage of the dominant position to land a couple of big hammer fists.
Bridge throwing punches and elbows but they're not doing any damage.

Bridge decides to stand up.
Bridge avoids a punch combination nicely.
Bridge tries a head kick but it misses.
Aitken fails to land with the punch combination there - jab, cross, hook, miss, miss, miss.
Aitken throws a hook to the side of Bridge's head but Bridge sees it coming and ducks under it beautifully.
Aitken rushes forward with a series of wild hooks but Bridge moves out of range and avoids them all easily.
Aitken throws the kick towards the body but Bridge avoids it.
Aitken throws a combination but comes up with nothing but fresh air.

That's three minutes gone in the round.
Aitken fails to land with the punch combination there - jab, cross, hook, miss, miss, miss.
Bridge misses with a half-hearted attempt at a head kick.
Bridge throws a head kick that misses and slips in the process. He scrambles back to his feet and the fighters circle.
Bridge throws a head kick that half lands.
Laurel Aitken seems to be the more aggressive standup fighter in this bout.
Bridge drops down and drives through with a powerful takedown into guard.
Bridge wanted to stand there but Aitken had control of the position.
Aitken bucks up whilst keeping hold of a body lock, managing to reverse the position. Now he's in top in Bridge's guard.
Bridge really doesn't want to stay on the ground with Aitken. If he can't get it back to his feet, it's only a matter of time before he'll be tapping out.
A big thud reverberates around the arena there as Aitken accidentally thumps the mat. Hopefully he's not broken his hand.
Aitken stands and throws Bridge's legs to the side, diving into side control.
Aitken will need to keep those long limbs tucked in whilst he's on the ground, to prevent any submissions.
Aitken lands an elbow.
Aitken in side control, trying to ground and pound but not landing this time.
Aitken wants to control but Bridge is keeping him busy.
Aitken advances to mount.

That's four minutes gone in the round.
Aitken is in full mount, looking to secure a guillotine but Bridge is surviving well by controlling Aitken's body position as best he can.
Aitken working for a submission but Bridge is keeping him at bay.
Bridge tries to get back to half guard but can't.
Bridge punching to the body and holding on for dear life.
Aitken wants to take his opponent's back but Bridge doesn't allow it.
Bridge wants to get back to his feet.
Aitken working for a submission but Bridge is keeping him at bay.
Aitken blocks Bridge's feeble attempts to strike from the bottom.
And thats the end of the round the fighters go back to their corners.
That was a close round but I would say that Laurel Aitken will probably get the nod.
The cut man is working on John Bridge's cut.
That's time! Aitken's corner gives him a slap on the ass as he gets ready to fight.

Aitken lands a jab followed by a nice looking cross.
Aitken tries to close the distance and clinch but Bridge swats him to one side with an open hand palm strike and circles away.
Aitken throws a right and a left that Bridge avoids nicely.
Laurel Aitken is looking to throw some combinations by the looks of things.
Aitken misses with the combination.
Aitken misses with the combination.
Aitken tries a head kick but it misses.
We've had a slow start to the round here - hopefully the action picks up.
Bridge dodges the punch combination from Aitken.
Both fighters are absolutely exhausted here.
Aitken looks to land a combination but Bridge avoids it well.
Aitken shoots and misses
and Bridge counters with a takedown into full mount! That could mean trouble for Aitken!
That's one minute gone in the round.
Bridge pausing momentarily but resumes with a couple of decent strikes that do a bit of damage.
Aitken is desperately trying to improve his position but Bridge has a good base and remains in mount.
Bridge scores with a couple of good head shots there.
Bridge scoring with strikes but Aitken is staying in there.
Bridge postures up and cracks his opponent a couple of times before moving back into close ground control. Aitken looks a forlorn figure.
Bridge scoring with some good ground and pound from mount here. Will he manage to finish Aitken?
Bridge is still in mount, landing shots to his trapped opponent. Aitken can't stay in a position like this for much longer.
Bridge working Aitken over with strikes here.
Bridge connects with a couple of good shots from mount.
Bridge landing strikes, looking to finish!
Aitken is trying desperately to improve position.
Bridge lands a shot to the body, followed up by a shot to the exposed head of his trapped opponent.
Bridge with shots to the head and body - Aitken looks very uncomfortable down there.
Aitken can't escape the position.
Aitken tries to hold on but Bridge postures up.
That's two minutes gone in the round.
Bridge looking to finish Aitken with some ground and pound. This is bad for Aitken!
BOOM! Bridge connects with a massive shot to the dome!
The ref warns both fighters not to hold the cage as they work up against the meshing.
Aitken working to try and regain half guard.
Bridge scores with a couple of good head shots there.
Aitken tries to lock up and control but Bridge gives him a forearm to the face and pushes him away.
Bridge prevents Aitken from getting the reversal.
Aitken manages to regain half guard. Good work.
Aitken actively working from the bottom here.
John Bridge has got the better of the ground game so far.
Aitken looking to work for a kimura from the bottom.
Aitken manages to get to full guard.
Both fighters really going for it on the ground here!
That's three minutes gone in the round.
Aitken is actively looking for submissions from his back. He's worked himself a little space on the bottom and seems to be going for a triangle. No, he's switched into an armbar! That was slick! Bridge rolls with it to try and escape but Aitken cranks on the arm and Bridge is forced to tap out! This one is aaaaaaaaall over!
Ladies and gentlemen, after 3:25 of round 2, we have a winner by way of Submission (Armbar). Laurel Aitken!
|
|
|
|
|
|
|
|
|
|
|
|
|
|
|
|
|
|
|
|
|
|
|
| S |
C
A |
G |
S |
C
B |
G |
|
S |
C |
G |
|
energy
A | B |
|
hype
A | B |
|
pop
A | B |
|
mgr
A | B |
|
FIGHT
RATING
51% |
|
|
|
|
|
|
