|
|
PBP Commentary |
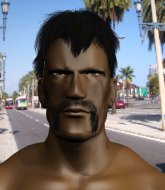
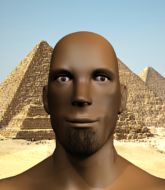
Coming up we have a light heavyweight MMA rules bout between Nathan Mackenzie (ranked 0 p4p, 0 weight class) and Bobby Bracks (ranked 0 p4p, 0 weight class). Both fighters look fresh as a daisy as they make their way towards the cage.
 |
|
 |
| 200 cm
30
205 lbs
8 - 6 - 1 |
|
187 cm
21
205 lbs
6 - 4 - 0 |
Dangerous GnP
Excellent boxer
Very quick |
|
BJJ Blue Belt
Basic striking
Powerful |
|
| |
|
Ladies and gentlemen. This fight is 5 rounds, in the light heavyweight division.
Introducing the fighter to my left, fighting out of the red corner.
With a record of
8 - 6 - 1, fighting out of Los Angeles, Nathan Mackenzie!
And introducing the fighter to my right, fighting out of the blue corner.
With a record of
6 - 4 - 0, fighting out of Los Angeles, Bobby Bracks!
The judges for this bout are Frank Antenori, Don Winkell and Timothy Bukovac.

The bell rings for round one and we are underway!
Bracks looks to throw the jab but Mackenzie is out of range.
Bracks shoots in but Mackenzie avoids the takedown attempt easily.
Bracks has a takedown stuffed.
Bracks ducks under an overhand right and circles away with a smile on his face.
Mackenzie smiles there as he lands a nice right hand right on the button.
Bracks throws a right and a left that both miss.
Donk. Mackenzie catches Bracks right on the button with a cross.
Bracks waving his hands out in front of him, looking to distract Mackenzie.
Mackenzie swings and misses with a hook to the body.
Bracks with a lazy takedown attempt
and Mackenzie makes him pay by landing a nice hook to the body before moving out of range.
Nathan Mackenzie has stuffed three takedown attempts in the round now. That's going to take a lot out of Bobby Bracks.

Bracks gets a double leg takedown into Mackenzie's guard.
The fighters are pressed up against the cage, both looking to find a bit of space to work.
A real slowdown in the pace of the fight for a moment, as Mackenzie holds on and takes a little breather.
Mackenzie knows he needs to get back to his feet asap. He's simply no match for Bracks on the ground.
Mackenzie wants to stand and escape but Bracks is having none of it.
Mackenzie keeping full guard, as Bracks tries to pass.

That's one minute gone in the round.
Mackenzie wants to get back to his feet but Bracks passes into half guard.

Bracks wants to work for an arm triangle but Mackenzie is really keeping half guard well and defending the submission attempt.
Mackenzie controlling the leg, holding on to half guard.
Mackenzie wants to get back to his feet.
The ref warns both fighters not to hold the cage as they work up against the meshing.
Bracks is working for a submission of some sort.
Bracks uses his free foot to push down on Mackenzie's thigh. Eventually he works his other foot free and he's advanced to mount - this is trouble for Mackenzie.

That's two minutes gone in the round.
Bracks working to secure an arm triangle but it's not happening for him just yet.

Bracks stands up from the dominant position, so we're back on the feet.
Bracks tries to shoot in for a takedown. He's got hold of a leg but Mackenzie swivels and escapes.
We've seen a great period of action over the last minute or so - credit to both fighters for going all out!
Bracks tries to shoot in for a takedown. He's got hold of a leg but Mackenzie swivels and escapes.
Bracks throws a hook to the side of Mackenzie's head but Mackenzie sees it coming and ducks under it beautifully.
No luck with that takedown attempt from Bracks.

That's three minutes gone in the round.
Bracks uses decent footwork to sidestep a right hand from Mackenzie.
Mackenzie fakes and then throws a beautiful body shot. Bracks looks a bit winded and takes a step backwards to take a breath.
Bracks with a poor takedown
enabling Mackenzie to counter with a crisp jab.
Bracks swings and misses with a hook to the body.
Mackenzie lands a right hook to the body.
Bracks has a takedown stuffed.
Bracks loads up on a big right hand but Mackenzie slips the punch.
Mackenzie dips to his left and cracks Bracks with an uppercut!
Mackenzie lands a vicious shot with the stealth of a sniper and the strength of a viper. Are vipers that strong? I can think of lots of things that are stronger than a viper - not many rhyme with sniper though.
Bracks has a takedown stuffed.
Bracks takes a solid shot to the body. That one hurt him but he's trying not to show it.
Mackenzie connects with a hook to the side of his opponent's head.

That's four minutes gone in the round.
Donk. Mackenzie catches Bracks right on the button with a cross.
Mackenzie is using his height advantage well here, landing a good percentage of his punches.
Mackenzie lands with a cross to side of his opponent's head.
Bracks fails with the takedown
and Mackenzie makes him pay by landing a nice hook to the body before moving out of range.
Mackenzie cracks Bracks with a right hand to the side of the head.
Mackenzie lands an overhand right.
Wooooo! Give it up for these two warriors! They are putting on a show!
Mackenzie bobs and weaves and unloads with a good uppercut.
Some wild striking there from Mackenzie.
Bracks shoots in for a takedown but Mackenzie shows good takedown defense.
Bracks shoots in for a takedown but Mackenzie shows good takedown defense there and keeps this one on the feet.
As the round comes to an end the crowd are showing their appreciation for a great round of action.
Bracks throws a big shot that misses.
Mackenzie lands a nice shot that snaps Bracks's head back.
A shot to the liver by Mackenzie. Beautiful body shot.
Mackenzie is using his reach advantage well here, landing the more effective single shots from range.
Nice jab there from Mackenzie.
And thats the end of the round the fighters go back to their corners.
That was a close round but I would say that Nathan Mackenzie will probably get the nod.
The minute break is over - no more time for sponges and pep talks - back to the action!

Bracks shoots in with a takedown attempt and he has Mackenzie pinned against the cage. Mackenzie gets the underhooks and manages to circle away.
Bracks ducks right into an uppercut from Mackenzie.
Mackenzie looks to throw the jab but Bracks is out of range.
Mackenzie tests Bracks's chin there with a solid looking shot.
Bracks has his hands up protecting his head but a hook from Mackenzie finds it's way round the side to connect with Bracks's head.
Horrible takedown by Bracks or perhaps it was just good defense by Mackenzie which made him look bad.
Bracks takes a shot right to the liver - Bas would have been proud of that punch.
Mackenzie lands a nice hook to Bracks's body. Bracks takes it in his stride and looks to land his own strikes.
Mackenzie goes to the watering hole and comes back with a big thumbs up from the judges as he scores a three punch combo.
Mackenzie throws a hook to the side of Bracks's head but Bracks sees it coming and ducks under it beautifully.
A jab from Mackenzie does it's job there.
Bracks takes a jab on the nose there. A little bit of blood seems to be coming out. Hopefully that won't affect his breathing.
That's one minute gone in the round.
Bracks throws a shot from downtown. Mackenzie moves away and avoids it.
Bracks is really struggling to land any decent head shots against his taller opponent.
Bracks misses with a jab to the body
and Mackenzie counters with a straight right hand.
Bracks shoots in for a takedown - he's clinched up with Mackenzie but Mackenzie pushes him off and we're back to square one.
Nathan Mackenzie has stuffed three takedown attempts in the round now. That's going to take a lot out of Bobby Bracks.
Mackenzie misses with a few strikes there.
Bracks fails with a takedown attempt.
Mackenzie cracks a nice hook into Bracks's ribs.
Bracks shoots in but Mackenzie avoids the takedown attempt easily.
No joy there for Mackenzie, who threw a few shots but didn't land.
Nice jab there from Mackenzie.
Mackenzie swings wildly with a right hand that was never going to find it's target.
Bracks misses with a takedown attempt. He shot from a bit too far out.
Mackenzie defends well against a solid takedown attempt from Bracks.
That's two minutes gone in the round.
Bracks looks frustrated there after his takedown attempt is stuffed easily.
Bracks is breathing heavily.
Mackenzie lands a vicious shot with the stealth of a sniper and the strength of a viper. Are vipers that strong? I can think of lots of things that are stronger than a viper - not many rhyme with sniper though.
Mackenzie scores with a sloppy right hand. Bracks should have avoided that one.
Mackenzie misses with a jab and misses with a cross straight after too.
Bracks takes a jab right on the kisser.
Mackenzie paws at his opponent with the jab and then lunges in with a straight, right on the button.
This has been an exciting period of action!
Mackenzie lands a jab to Bracks's midsection.
Bracks tries to shoot in for a takedown. He's got hold of a leg but Mackenzie swivels and escapes.
Bracks steps to the side to avoid the strikes from Mackenzie.
Nathan Mackenzie is winning the standup battle so far.
A right-left combo lands from Bracks.
No luck with that takedown attempt from Bracks.
Bracks tries to move into range but Mackenzie moves to the side and lands with a nice right hand.
That's three minutes gone in the round.
Mackenzie's corner calls for a 1-2. Mackenzie obliges with the 1 part as he scores the single shot and moves back out of range.
Bracks's hands are dropping dangerously low here and Mackenzie connects clean with a right hook that sends him down to one knee! Bracks scrambles back to his feet.
Bracks ducks under an overhand right and circles away with a smile on his face.
A telegraphed takedown attempt from Bracks is defended easily by Mackenzie.
Jab from Mackenzie.
Mackenzie comes forward and lands a shot to the body, then darts back out of range.
Bracks fails with the takedown.
Bracks has a pretty nasty looking mouse under his right eye.
Mackenzie tests Bracks's chin there with a solid looking shot.
Bracks walks into a jab.
That's four minutes gone in the round.
A shot to the liver by Mackenzie. Beautiful body shot.
Mackenzie lands with a cross.
A big right from Bracks misses.
Nice jab there from Mackenzie.
Bracks uses decent footwork to sidestep a right hand from Mackenzie.
Bracks looks shocked there as he takes a right hand to the temple.
Bracks on the wrong end of an overhand right that came out of nowhere.
Bracks uses some good footwork to avoid the body shot by Mackenzie.
Mackenzie uses good head movement to avoid the hook from Bracks.
Nathan Mackenzie is looking to keep the fight on the feet at all costs.
This is a great period of action - very entertaining stuff!
Mackenzie ducks under a wild hook from Bracks.
Mackenzie misses with a body shot.
As the round comes to an end the crowd are showing their appreciation for a great round of action.
Mackenzie throws a hard body shot but it just misses.
Mackenzie cracks Bracks with a hook to the jaw. Both fighters smile at eachother and high-five before getting back down to business.
Bracks gets his head snapped back by a nice shot there.
And thats the end of the round the fighters go back to their corners.
Nathan Mackenzie dominated that second round.
The fighters' corners scream their final instructions, as the referee calls time. Here we go, back to the action!

Bracks fakes high and shoots in for a takedown but Mackenzie avoids it really well and circles away.
Mackenzie works Bracks's body with a nice hook.
Mackenzie scores with a jab to the jaw of his opponent.
Bracks fails with the takedown.
Bracks shoots in looking for a takedown. Mackenzie tries to sprawl out of it but Bracks keeps driving through. The fighters are pinned against the cage. Mackenzie manages to get underhooks and after a bit of a struggle, circles away and we're back to standing.
Nathan Mackenzie has stuffed three takedown attempts in the round now. That's going to take a lot out of Bobby Bracks.
Mackenzie smiles there as he lands a nice right hand right on the button.
Bracks shoots in but no luck this time.
Bracks will have to do better than that with his takedown attempts.
Bracks takes a big intake of breath there - he's definitely tired.
Mackenzie cracks a nice hook into Bracks's ribs.
That's one minute gone in the round.
Mackenzie lands a jab.
Bracks shakes his hands off, looking to compose himself, but takes a jab to the jaw whilst he does it.
Mackenzie scores with a nice head shot.
Mackenzie cracks a nice hook into Bracks's ribs.
Mackenzie lands the left hand.
Bracks misses with a series of wild punches.
Bracks misses with the combination.
No luck for Bracks with that takedown attempt.
Mackenzie stooping low to avoid any incoming strikes and then lunges in with an uppercut come cross that lands flush.
No luck for Bracks with that takedown attempt.
Some wild striking there from Bracks.
That's two minutes gone in the round.
Mackenzie digs a good body shot into Bracks's ribs.
Mackenzie jabs Bracks right on the nose. Bracks blinks but takes it well.
Bracks on the wrong end of a nice jab.
Bracks throws out a token jab with nothing on it.
Mackenzie cracks Bracks with a nice right hand that draws applause from the crowd.
The crowd cheering loudly, showing their appreciation for the quality fight we're seeing here.
Bracks swings away but doesn't land with a series of punches.
Bracks misses with a looping right.
Bracks misses the shot to the body.
Mackenzie lands a body shot.
Bracks is trying hard to land a takedown here. Mackenzie sprawls well and keeps this one on the feet.
Mackenzie takes a step towards his opponent and connects with a left hand, before circling away.
Mackenzie scores with a jab to the jaw.
Mackenzie bobs and weaves and throws out a fast jab that snaps Bracks's head backwards.
Bobby Bracks is looking to throw some combinations by the looks of things.
That's three minutes gone in the round.
Bracks takes a solid shot to the body. That one hurt him but he's trying not to show it.
Nice body punch from Mackenzie.
Bracks misses with an uppercut.
Bracks looks shocked there as he takes a right hand to the temple.
Mackenzie lands with a good body shot.
Bracks shoots in with a takedown attempt and he has Mackenzie pinned against the cage. Mackenzie gets the underhooks and manages to circle away.
Mackenzie swings wildly with a hook that is half blocked by Bracks.
Bracks has his head snapped back a nice jab. A little nod from Bracks there as he acknowledges the shot.
Bracks closes the distance and takes a jab right on the nose as he does so.
Bracks takes a body punch that cleary hurt but he's trying not to show any weakness.
Mackenzie showing good head movement there, avoiding the strikes from Bracks.
Nathan Mackenzie seems to be the more aggressive standup fighter in this bout.
Mackenzie feints a jab promting Bracks to slip. Mackenzie then demonstrates his capabilities by jabbing again. Bracks slips again and ducks right into an uppercut.
That's four minutes gone in the round.
Mackenzie scores with a jab. Bracks acknowledges it with a nod of the head.
Mackenzie cracks a nice hook into Bracks's ribs.
Bracks throws a right hand that Mackenzie ducks under and follows up with a left that Mackenzie also avoids with ease.
Mackenzie lands with a nice body punch.
Bracks shoots in for a takedown - he's clinched up with Mackenzie but Mackenzie pushes him off and we're back to square one.
The crowd are loving this. Great action here.
Mackenzie smiles there as he lands a nice right hand right on the button.
Bracks shoots for a double leg takedown but Mackenzie sprawls well. He's pushed Bracks's face into the mat and manages to get back to his feet relatively easily.
As the round comes to an end the crowd are showing their appreciation for a great round of action.
Bracks moves his head to the side to avoid a jab but walks straight into a cross.
Mackenzie cracks Bracks with a good shot that sees him stumbling back into the cage.
Bracks throws a wild combination but nothing lands.
Bracks shoots in for a takedown but Mackenzie shows good takedown defense there and keeps this one on the feet.
And thats the end of the round the fighters go back to their corners.
Nathan Mackenzie clearly takes that round.
The fighters' corners scream their final instructions, as the referee calls time. Here we go, back to the action!

Mackenzie sizes up Bracks with a pawing jab and scores with a straight right down the middle.
Mackenzie lands with a good body shot.
Mackenzie changes levels and scores with a jab to the body.
Mackenzie gets caught napping as Bracks dives in and scores a takedown. Mackenzie manages to retain guard.
Mackenzie is looking to get back to his feet but can't, whilst Bracks is controlling him.
Mackenzie will need to keep those long limbs tucked in whilst he's on the ground, to prevent any submissions.
It's got to the stage where if one of these guys blows hard enough, the other might fall over.
That's one minute gone in the round.
Bracks sneaks a leg through and gets to half guard. That was like a knife through butter how easily he passed Mackenzie's guard.
Bracks is trying for a guillotine from the top but the pressure isn't in the right place so Mackenzie is just riding it out for now. Bracks eventually gives up the hold.
Bracks stops Mackenzie from getting back to his feet.
Bracks is thinking about going for an arm triangle but he can't free his leg.
Mackenzie trying to control from the bottom.
That's two minutes gone in the round.

Mackenzie pushes Bracks off and gets back to his feet.
Mackenzie thuds his right hand into Bracks's forehead from close range. That could be painful for both fighters.
Bracks shoots in from a long way out. He's driving through with the takedown attempt and he eventually gets it, landing in Mackenzie's guard.
Wooooo! Give it up for these two warriors! They are putting on a show!
Bracks stands and throws Mackenzie's legs to the side, diving into side control.
Bracks decides to stand up, so the ref orders Mackenzie to his feet.
A really sloppy takedown attempt there from Bracks.
Mackenzie swings for the body but Bracks moves out of range.
That's three minutes gone in the round.
Bracks lunges in with swinging rights and lefts but Mackenzie circles away quickly and effectively.
Bracks misses with an uppercut.
Bracks takes a big uppercut there. He seems a bit wobbly but no, he's OK.
Mackenzie throws a monster uppercut resembling something out of street fighter but it doesn't land.
Mackenzie leaves Bracks with his face pressed against the mat as he sprawls beautifully, defending against a solid takedown attempt.
Bracks throws a combination but comes up with nothing but fresh air.
Mackenzie fakes a jab and then connects with a hook.
Nice straight punches there by Mackenzie. You know Roy Jones Jr respects the hands of Mackenzie.
Mackenzie scores with a jab. Bracks acknowledges it with a nod of the head.
Bracks looks frustrated there after his takedown attempt is stuffed easily.
Nathan Mackenzie has stuffed three takedown attempts in the round now. That's going to take a lot out of Bobby Bracks.
Bracks takes a shot right to the liver - Bas would have been proud of that punch.
That's four minutes gone in the round.
Nice cross by Mackenzie.
Bracks tries for a takedown but Mackenzie sees it coming a mile off and avoids it easily.
No luck with that takedown attempt from Bracks.
Mackenzie comes forward and lands a shot to the body, then darts back out of range.
Bracks tries to shoot in for a takedown. He's got hold of a leg but Mackenzie swivels and escapes.
Mackenzie fakes and then throws a beautiful body shot. Bracks looks a bit winded and takes a step backwards to take a breath.
Mackenzie works his jab well there, keeping his opponent at a distance.
Bracks takes a body punch but keeps moving.
Bracks misses with a takedown
and Mackenzie counters with a nice uppercut.
This has been an exciting period of action!
As the round comes to an end the crowd are showing their appreciation for a great round of action.
Mackenzie lands with a straight right. Bracks didn't see that one coming.
Mackenzie scores with the left hand. Bracks knows he should have avoided that one.
Bracks changes levels and looks for a double leg takedown. Mackenzie tries to avoid it but Bracks manages to keep hold of a leg and drag Mackenzie to the ground. Mackenzie escapes though and pops straight back up to his feet.
And thats the end of the round the fighters go back to their corners.
That was a close fourth round but I would say that Nathan Mackenzie will probably get the nod.
The fighters' corners scream their final instructions, as the referee calls time. Here we go, back to the action! This is the final round!

Mackenzie throws a jab to the body, straight down the pipe. Boom. That sent Bracks stumbling backwards but he manages to regain his composure quickly.
Bracks takes one to the side of the head.
Bracks shoots for a takedown but Mackenzie saw that one coming a mile off and avoided it easily.
Bracks takes a shot to the eye socket. That's gotta hurt.
Mackenzie ducks low and lands a nice hook to the body of his opponent.
Bracks misses with a two punch combination.
Bracks fakes high and swings low for a body shot but Mackenzie manages to avoid it.
Mackenzie works the jab nicely.
Mackenzie jabs Bracks to the body, keeping him at a distance.
Mackenzie tries to land with a swinging hook to the body but Bracks was well out of range. Poor timing from Mackenzie.
Mackenzie scores with a straight right hand, right through his opponent's guard.
Bracks fails with a rather predictable takedown attempt.
Bracks is wobbling all over the place through exhaustion. Will he make it to the final bell?
Mackenzie stuns Bracks with a nice body shot, before stepping back out of range.
That's one minute gone in the round.
Mackenzie scores with a hook to the body. Bracks takes a step back and tries to catch his breath.
Bracks is trying hard to land a takedown here. Mackenzie sprawls well and keeps this one on the feet.
Nathan Mackenzie has stuffed three takedown attempts in the round now. That's going to take a lot out of Bobby Bracks.
Mackenzie lands a nice hook to Bracks's body. Bracks takes it in his stride and looks to land his own strikes.
Mackenzie jabs Bracks right on the nose. Bracks blinks but takes it well.
Bracks falls off balance throwing a combination
letting Mackenzie counter with a right hand.
Mackenzie digs a good body shot into Bracks's ribs.
Mackenzie tries to land with a swinging hook to the body but Bracks was well out of range. Poor timing from Mackenzie.
Mackenzie displaying good standup as he scores with a three punch combination.
No luck with that takedown attempt from Bracks.
Good shot there by Mackenzie.
A telegraphed takedown attempt from Bracks is defended easily by Mackenzie.
Mackenzie is moving around nicely and scores here with a single head shot.
That's two minutes gone in the round.
Bracks fakes high and shoots in for a takedown but Mackenzie avoids it really well and circles away.
Mackenzie lunges in with an uppercut that skims his opponent's chin.
No luck for Bracks with that takedown attempt.
Bracks takes a body punch but keeps moving.
Bracks throws a jab when Mackenzie was well out of range.
Mackenzie connects with a body shot.
The crowd are loving this. Great action here.
Mackenzie stuffs a takedown. It's all about dictating where the fight takes place and Mackenzie wants it to stay on the feet.
Nice jab there from Mackenzie.
That's three minutes gone in the round.
Mackenzie uses some good footwork to avoid the body shot by Bracks.
Mackenzie bobs and weaves and unloads with a good uppercut.
Bracks takes a solid shot to the body. That one hurt him but he's trying not to show it.
Mackenzie jabs at Bracks's body.
Bracks's corner calls for a 1, 2 combination and Bracks duly obliges.
Mackenzie connects with a single shot there.
Bracks doesn't react quick enough there as he takes a shot to the body.
A telegraphed right hand from Bracks misses the target.
Mackenzie lands a jab to the nose.
Mackenzie slaps away a takedown attempt from Bracks, before circling back to the center of the mat.
Mackenzie fakes low and throws an overhand right that catches Bracks on the side of the head.
Mackenzie punishes Bracks's body with a nice straight punch.
That's four minutes gone in the round.
Bracks swings and misses with a hook to the body.
Bracks fails miserably with a takedown attempt.
Bracks on the wrong end of an overhand right that came out of nowhere.
Bracks misses with a series of wild punches.
Donk. Mackenzie catches Bracks right on the button with a cross.
Mackenzie keeps the fight standing with a nice sprawl.
Bracks shoots in for a takedown but Mackenzie shows good takedown defense.
The crowd cheering loudly, showing their appreciation for the quality fight we're seeing here.
As the round comes to an end the crowd are showing their appreciation for a great round of action.
A telegraphed takedown attempt from Bracks is defended easily by Mackenzie.
Bracks takes a solid shot to the body. That one hurt him but he's trying not to show it.
And that's the end of the fight!
Nathan Mackenzie showed his dominance in that final round.
Well I reckon that's a shut out for Mackenzie, winning every round. Will the judges agree? They are the ones who matter, even if they are often depressingly incompetent. Over to the ring announcer for the scorecards.
Ladies and gentlemen, after 5 rounds of action, we go to the scorecards for a decision.
Judge Frank Antenori scores the fight for Nathan Mackenzie!
Judge Don Winkell scores the fight for Nathan Mackenzie!
Judge Timothy Bukovac scores the fight for Nathan Mackenzie!
Nathan Mackenzie wins by unanimous decision!
A less than humble Nathan Mackenzie misjudged his post fight interview somewhat and came across a little too arrogant whilst trying to hype up his own abilities.
|
|
|
|
|
|
|
|
|
|
|
|
|
|
|
|
|
|
|
|
|
|
|
| S |
C
A |
G |
S |
C
B |
G |
|
S |
C |
G |
|
energy
A | B |
|
hype
A | B |
|
pop
A | B |
|
mgr
A | B |
|
FIGHT
RATING
86% |
|
|
|
|
|
|

