|
|
PBP Commentary |
Coming up we have a lightweight MMA rules bout between Chris Ward (ranked 0 p4p, 0 weight class) and Oh Loc (ranked 0 p4p, 0 weight class). Ward comes to the cage accompanied by All American Nightmare. Loc has chosen Predator as his entrance music. Oh Loc will no doubt be trying to keep this one on the feet, where he has a distinct advantage.
 |
|
 |
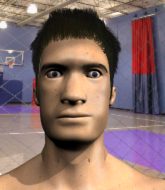
| 180 cm
19
165 lbs
1 - 1 - 0 |
|
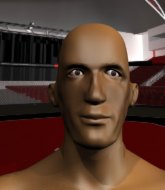
176 cm
18
155 lbs
0 - 0 - 0 |
BJJ Brown Belt
Basic striking
Good chin |
|
BJJ Blue Belt
Good kicks
Solid chin |
|
| |
|
Ladies and gentlemen. This fight is 3 rounds, in the lightweight division.
Introducing the fighter to my left, fighting out of the red corner.
With a record of
1 - 1 - 0, fighting out of Helsinki, Chris Ward!
And introducing the fighter to my right, fighting out of the blue corner.
With a record of
0 - 0 - 0, fighting out of Helsinki, Oh Loc!
The judges for this bout are Matti Vanhoillinen, Tarja Halkonen and Roosa Järviläinen.

The bell rings for round one and we are underway!
Ward throws a lazy right hand but Loc sees it coming a mile off and sidesteps it easily.
Ward lands a powerful looking uppercut that connected with his opponent's jaw.
Loc throws a sloppy head kick and Ward moves out of range easily.
Ward waving his hands out in front of him, looking to distract Loc.

Ward moves into the clinch.

Ward's corner calls for him to break the clinch, which he does.
Loc throws a head kick that misses.
Ward throws an overhand right that lands on Loc's shoulder, as Loc tries to avoid the shot.
Ward throws a hook but Loc blocks it.
Ward misses with a looping right.
Ward rushes Loc and pushes him back against the cage in a clinch.
Ward tries to land a shot to the body but it's blocked.
Loc has had enough of the clinch but Ward keeps him there for the moment.
A hook to the body from Ward.

That's one minute gone in the round.
Ward misses the knee to the body. Nice hip positioning from Loc.
Ward misses with a body punch.
Loc wants to get back to striking at distance but Ward won't allow it.
Good body shot from Ward.
Ward lands a shot to the body.
A hook to the body from Ward.
Loc has had enough of the clinch but Ward keeps him there for the moment.
Loc is trying to break the clinch but Ward is controlling him.
Ward struggles to land a body shot inside as Loc controls his hands.
Loc wants to strike at distance but he can't break free of the clinch.
Loc is trying to push Ward away but Ward has him pressed against the cage, so he's going nowhere.
Loc can't break the clinch.
Loc tries to circle away but Ward has him pinned against the cage.
Loc tries to circle away but Ward has him pinned against the cage.
Loc working hard to break the clinch.
Loc is trying to force a seperation but Ward has the dominant position.

That's two minutes gone in the round.
Loc is trying to break the clinch but Ward is controlling him.
Ward lands a body punch.
Ward keeps control of Loc as he tries to wriggle out of the double underhooks.
Loc is trying to push Ward away but Ward has him pressed against the cage, so he's going nowhere.
Loc is looking to break free of the clinch but Ward has double underhooks.
Ward lands with a light punch inside.
A short body shot lands from Ward as the two fighters clinch.
Loc looks gassed!
The crowd cheering loudly, showing their appreciation for the quality fight we're seeing here.
Loc tries to break the clinch but Ward is controlling the position.
Ward misses with a punch to the body.
Ward keeps the fight in the clinch, despite Loc's efforts to push away.
Ward manages to break the clinch.
Loc uses good footwork to avoid the strikes from Ward.
Ward throws the left hand but Loc avoids the punch easily.
A punch combination from Ward misses.

That's three minutes gone in the round.
Ward misses with a straight left.
Ward throws a shot from downtown. Loc moves away and avoids it.
Ward throws a looping overhand right but Loc ducks down to avoid it.
Ward misses with an uppercut
and Loc counters with a kick to the head that grazes his opponent. Ward is lucky that one didn't land flush.
Ward throws out a loose jab but Loc uses good head movement to avoid it.
Loc moves away from the strike by Ward.
Ward shoots for a double leg takedown but Loc sprawls well. He's pushed Ward's face into the mat and manages to get back to his feet relatively easily.
Ward throws out a token jab with nothing on it.
Ward jabbing away but nothing is landing.
A jab from Ward misses.
Ward shoots in for a takedown. "Ole!" shouts Loc as he jumps to the side.

That's four minutes gone in the round.
No joy there for Ward, who threw a few shots but didn't land.
Ward looks to score with a jab to the body but Loc is just out of range.
Ward fakes high and shoots in for a takedown but Loc avoids it really well and circles away.
That's three failed takedown attempts in the round for Chris Ward. That's going to take a lot out of him.
Ward misses with an uppercut. Loc saw that one coming.
Ward swings widly with a right hand
and Loc counters with a head kick. That will keep Ward thinking before he tries any more sloppy attacks!
As the round comes to an end the crowd are showing their appreciation for a great round of action.
Ward gets a clinch.
Loc working hard to break the clinch.
Loc is trying to push Ward away but Ward has him pressed against the cage, so he's going nowhere.
And thats the end of the round the fighters go back to their corners.
Chris Ward dominated that round.
That's time! Ward's corner gives him a slap on the ass as he gets ready to fight.

Ward moves into the clinch successfully.
Ward manages to break the clinch.
Oh Loc is looking to throw some combinations by the looks of things.
Ward just misses with a punch to the body.
A telegraphed right hand from Ward misses the target.
Ward rushes Loc and pushes him back against the cage in a clinch.
Ward goes for a body shot but it's blocked.
Loc wants to break free. God knows he wants to breaaaak freeee.
Loc wants to break the clinch but can't.
Ward's corner calls for him to break the clinch, which he does.
Loc misses with a half-hearted attempt at a head kick.
Ward misses with a left hand
and Loc counters with a head kick.
Ward shoots in and drives through. Loc sprawls well.
Loc misses with a half-hearted attempt at a head kick.
That's one minute gone in the round.
Ward throws a jab when Loc was well out of range.
Loc steps to the side to avoid the strikes from Ward.
Chris Ward seems to be the more aggressive standup fighter in this bout.
Ward swings wildly with a right hand that was never going to find it's target.
Oh Loc is looking to keep the fight on the feet at all costs.
Loc uses good footwork to avoid the strikes from Ward.
Ward throws the left hand but Loc avoids the punch easily.
Ward throws an ugly left hook that misses
and Loc counters with a big head kick but Ward shrugs it off.
Loc throws a head kick that misses and slips in the process. He scrambles back to his feet and the fighters circle.
Ward misses with a straight left.
Loc ducks under a wild hook from Ward.
Ward misses with a jab, cross combination.
That's two minutes gone in the round.
Ward takes a swing at Loc's ribcage but misses.
Ward throws a big shot that misses.
Loc uses good footwork to avoid the strikes from Ward.
Ward misses with a wild body shot.
Ward looks to land a right hand but Loc moved out of range.
Loc moves away from the strike by Ward.
Loc tries a head kick but it misses.
Ward misses with an uppercut
and Loc counters with a kick to the head that grazes his opponent. Ward is lucky that one didn't land flush.
Ward throws a left and a right that both miss
and Loc counters with a head kick. That will keep Ward thinking before he tries any more sloppy attacks!
Loc throws a head kick but Ward moves out of range.
Loc ducks under a wild hook from Ward.
That's three minutes gone in the round.
Ward throws out a token jab with nothing on it.
Ward pushing out the jab but it's not landing.
Ward throws a shot from downtown. Loc moves away and avoids it.
Ward misses with a wild body shot.
Loc defending well as Ward loads up on a big left hand.
Loc tries a switch kick but it misses it's target.
Ward misses with a body shot. Nice footwork from Loc.
Loc slips under a jab.
Ward fails miserably with a takedown attempt.
Ward throws a monster uppercut resembling something out of street fighter but it doesn't land.
That's four minutes gone in the round.
Ward fails with a takedown attempt.
That's three failed takedown attempts in the round for Chris Ward. That's going to take a lot out of him.
A telegraphed right hand from Ward misses the target.
Loc ducks under an overhand right and circles away with a smile on his face.
A jab from Ward misses.
Ward misses with a looping left.
Ward shoots in with a takedown attempt and he has Loc pinned against the cage. Loc gets the underhooks and manages to circle away.
The crowd applaud the fighters efforts here as the round comes to an end.
A head kick misses from Loc.
And thats the end of the round the fighters go back to their corners.
Chris Ward dominated that second round.
That's the end of the round. The referee orders the cornermen out of the cage so we can get back down to business. So, we enter the final round. Let's see if either fighter can bring us a finish, or whether we're going to the judges scorecards.

Ward fails miserably with a takedown attempt.
Ward throws out a token jab with nothing on it.
Ward shoots in for a double leg but Loc sprawls well. That's going to sap some energy.
Loc staying out of range there.
Ward misses with a double jab
and Loc counters with a flying knee. Nice.
Loc throws a head kick that misses and slips in the process. He scrambles back to his feet and the fighters circle.
Ward thows a left - swing and a miss!
Ward throws a shot from downtown. Loc moves away and avoids it.
Ward misses with the combination.
That's one minute gone in the round.
Ward shoots in for a takedown. "I don't think so" says Loc as he avoids it easily.
That's three failed takedown attempts in the round for Chris Ward. That's going to take a lot out of him.
Loc throws a sloppy head kick and Ward moves out of range easily.
Loc avoids a punch combination nicely.
Ward takes a head kick and keeps coming.
Ward throws a shot from downtown. Loc moves away and avoids it.
Loc tries a head kick but it misses.
Ward fakes with an overhand right and moves in to clinch with Loc, pushing him back against the cage.
Loc wants to break free. God knows he wants to breaaaak freeee.
That's two minutes gone in the round.
Loc is trying to force a seperation but Ward has the dominant position.

Ward turns his back and goes for a hip toss. It's a bit messy but it gets the job done and Ward manages to end up in side control.
The referee looks like he's ready to step in and stand the fighters back up.
Loc is pushing Ward's head away, looking to escape. Ward manages to hold on to the position though.
Loc takes a big intake of breath there - he's definitely tired.
Ward looking to punish the body of his opponent here but Loc is avoiding damage well.
Loc is letting Ward control him for a moment.
Ward postures up a little and throws a couple of hammerfists but they don't connect properly.
An elbow from Ward crashes against the mat.
Loc tries to wriggle free to get back to his feet but he's given up his back! Oops.
The crowd cheering loudly, showing their appreciation for the quality fight we're seeing here.
Ward controlling from the back.
Ward has controlled the position for a good 20 seconds, which will no doubt be starting to frustrate his opponent.
Both fighters really going for it on the ground here!
That's three minutes gone in the round.
Loc wants to get back to his feet.
Loc is in a world of trouble here. He's outmatched on the ground here and he'd better get Ward off his back sharpish unless he wants to be submitted.
Ward missing with punches from the back.
Loc covering up well under a barage of strikes.

Ward is working the back position looking for the choke. Oh, he's slid into an armbar! Beautiful transition and Loc taps out! Fantastic Jiu Jitsu from Ward.
Ladies and gentlemen, after 3:42 of round 3, we have a winner by way of Submission (Armbar). Chris Ward!
After the fight, Chris Ward was humble in paying tribute to his opponent but made it clear he wants to go on to bigger and better things. It seemed to go down well with the crowd who cheered him loudly.
|
|
|
|
|
|
|
|
|
|
|
|
|
|
|
|
|
|
|
|
|
|
|
| S |
C
A |
G |
S |
C
B |
G |
|
S |
C |
G |
|
energy
A | B |
|
hype
A | B |
|
pop
A | B |
|
mgr
A | B |
|
FIGHT
RATING
47% |
|
|
|
|
|
|

