|
|
PBP Commentary |
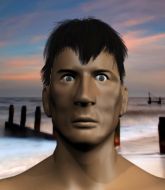
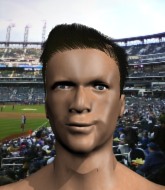
Coming up we have a lightweight MMA rules bout between Ronan Yamokivic (ranked 0 p4p, 0 weight class) and Ba Lil II (ranked 0 p4p, 0 weight class). Ba Lil II has the better chin. Will he look to stand and bang today?
 |
|
 |
| 178 cm
24
170 lbs
7 - 0 - 0 |
|
175 cm
22
150 lbs
7 - 1 - 0 |
Good wrestling
World class boxer
Cardio machine |
|
ADCC Champion
Counter striker
Good gas tank |
|
| |
|
Ladies and gentlemen. This fight is 5 rounds, for the lightweight championship of the world!
Introducing the champion to my left, fighting out of the red corner.
With a record of
7 - 0 - 0, fighting out of Hilo, Ronan Yamokivic!
And introducing the challenger to my right, fighting out of the blue corner.
With a record of
7 - 1 - 0, fighting out of Hilo, Ba Lil II!
The judges for this bout are Jeff Smith, Colin Fray and Micheangelo Fripello.

The bell rings for round one and we are underway!
Yamokivic uses good footwork to get in and out, landing a nice hook.
Yamokivic misses with a double jab.
Lil II slips a jab and a cross from Yamokivic.
Yamokivic looks to score with a jab to the body but Lil II is just out of range.
Lil II shoots for a double leg takedown but Yamokivic sprawls well. He's pushed Lil II's face into the mat and manages to get back to his feet relatively easily.
Lil II moves out of range as Yamokivic strikes.
Lil II avoids a lazy jab quite easily.
Yamokivic avoids the body shot from Lil II.
Lil II throws a shot from downtown. Yamokivic moves away and avoids it.
Yamokivic lands with a shot to the body.
Nice shot by Yamokivic.
Yamokivic looks to score with a combo but nothing lands.
Lil II thows a left - swing and a miss!
Yamokivic uses good footwork to get in and out, landing a nice hook.
Lil II throws an overhand right that lands on Yamokivic's shoulder, as Yamokivic tries to avoid the shot.
Ronan Yamokivic is looking to keep the fight on the feet at all costs.

That's one minute gone in the round.
Lil II throws a wild body kick that Yamokivic sees coming a mile off.
Lil II on the wrong end of a decent looking cross there.
Yamokivic lands with a right hand.
Lil II rushes forward with a series of wild hooks but Yamokivic moves out of range and avoids them all easily.
Good shot there by Yamokivic.
Yamokivic takes a swing at Lil II's ribcage but misses.

Lil II shoots in from a long way out. He's driving through with the takedown attempt and he eventually gets it, landing in Yamokivic's guard.
Yamokivic keeping moving, preventing Lil II from controlling successfully.
Lil II missing there with some ground and pound from the guard.
Yamokivic has a closed guard, preventing anything of note from happening. Perhaps he's looking to stall.
Yamokivic is working an open guard here, looking to improve his position. No doubt that will leave him open to counters but at least he's being more offensive.

That's two minutes gone in the round.
Yamokivic is working from a closed guard but he's struggling to control his opponent.
Lil II pressing down on his opponent's thigh, looking to pass guard. Yamokivic is keeping the position for now.
Lil II throwing strikes from guard but Yamokivic blocks nicely.
The crowd cheering loudly, showing their appreciation for the quality fight we're seeing here.
Lil II wants to control from the top but Yamokivic keeps moving.

That's three minutes gone in the round.

Neither fighter is doing enough for the referee's liking and he's decided to stand them back up.
Yamokivic swings wildly with a couple of big hooks
and Lil II counters with a takedown into side control.
Yamokivic is not content to let Lil II control the position.
Yamokivic tries to work a leg under to get back to half guard but Lil II wriggles his own leg back out and remains in side control.
Lil II trying to control the position but Yamokivic is working away.
Yamokivic tries to improve position but can't.

That's four minutes gone in the round.
Lil II in side control, throwing shots but Yamokivic defends.
Lil II throwing ground and pound but whilst doing so, he forgets to control position and Yamokivic works his way back to half guard. Good composure under pressure.
Lil II throwing punches and elbows but they're not doing any damage.
Lil II wants to lay and pray for a moment but Yamokivic keeps working.

Lil II seems to be working for a kimura but Yamokivic defends the submission attempt.
We've seen a great period of action over the last minute or so - credit to both fighters for going all out!
As the round comes to an end the crowd are showing their appreciation for a great round of action.
Lil II wants to take a breather but Yamokivic is having none of it.
And thats the end of the round the fighters go back to their corners.
A close round but Ba Lil II will probably get the nod.
The fighters get back to their feet, the hooter sounds and we're back to the action!

A combination from Yamokivic does no damage.
Yamokivic misses with a jab and misses with a cross straight after too.
A looping hook to the body misses from Lil II. Yamokivic does a little dance to reset his feet.
Lil II changes levels and drives through with a really nice takedown into side control. Yamokivic looks really pissed at himself for not defending that better.
Lil II has the superior BJJ but he's also working some ground strikes into his gameplan.
Lil II is looking to take a break and control but Yamokivic is keeping him honest, looking to work from the bottom.
Yamokivic is positioning himself to get back to half guard.
Lil II trying to control the action but Yamokivic is working from the bottom.
The fighters are pressed up against the cage, both looking to find a bit of space to work.
That's one minute gone in the round.
Lil II moving around in side mount but really he's just happy to control for now.
Yamokivic on his back here. We all know that wrestlers don't like being on their back so let's see if Yamokivic tries to get out of the position.
Lil II is looking for a kimura. He might have it! No, Yamokivic has escaped the position, nice work there.
Lil II tries for a kimura. Not really close to a finish though.
Ba Lil II has got the better of the ground game so far.
Lil II wants to work for a kimura but he's foiled early by Yamokivic, who protects the arm well.
That's two minutes gone in the round.
Yamokivic can't do much from the bottom here.
Lil II trying to control the action but Yamokivic is working from the bottom.
Lil II looking for an arm triangle but it's way too loose to do anything.
That's three minutes gone in the round.
Lil II is looking for a kimura. He might have it! No, Yamokivic has escaped the position, nice work there.
Yamokivic tries to improve position but can't.
Yamokivic is not content to let Lil II control the position.
A lull in the action here.
That's four minutes gone in the round.
Lil II tries for an arm triangle. That looks pretty tight to me. Is this one over!?! Possibly, maybe, no Lil II has let go of the choke. Obviously it wasn't as tight as we thought!
Yamokivic struggling a bit here.
Lil II is trying to get an arm triangle but Yamokivic is defending well.
Lil II wants to control but Yamokivic is keeping him busy.
And thats the end of the round the fighters go back to their corners.
Ba Lil II showed his class in that round. I'd imagine he'll take it on all the scorecards.
That's the end of the round. The referee orders the cornermen out of the cage so we can get back down to business.

Yamokivic connects with a lovely jab that went straight through the gap between Lil II's hands.
Lil II looks for a takedown here. Will he get it? Yamokivic is fending him off so far but Lil II persists. Nope, Yamokivic circles away and we're back to standing.
Ronan Yamokivic seems to be the more aggressive standup fighter in this bout.
Lil II tries to shoot in for a takedown. He's got hold of a leg but Yamokivic swivels and escapes.
Oooooooooooh, not good. A low kick from Lil II lands where it shouldn't have, right in the... well, you know what he did? He kicked him in the penis. He's injured, injured bad. The referee sends both fighters to their corners and Yamokivic has 5 minutes to recover. He's OK now though... a thumbs up from Yamokivic and we're back underway with a touch of gloves.
Yamokivic throws a hook but Lil II blocks it.
Yamokivic missing with a left hand there. Lil II was out of range so wasted energy throwing that one.
Yamokivic wings a very wild body shot but it does the job and lands to the midsection.
Yamokivic takes a swing at Lil II's ribcage but misses.
Yamokivic throws a series of punches but Lil II avoids them all with ease.
Yamokivic thows a body shot but no joy.
Lil II slips a jab from Yamokivic.
Yamokivic thows a body shot but no joy.
That's one minute gone in the round.
Yamokivic misses with a looping right.
Lil II throws out a token jab with nothing on it.
Yamokivic punishes Lil II's body with a nice straight punch.
Yamokivic lands a lovely overhand right.
Yamokivic throws a jab to the body, straight down the pipe. Boom. That sent Lil II stumbling backwards but he manages to regain his composure quickly.
Yamokivic shuffles to his left behind two crisp jabs. Lil II eats them both and turns towards Yamokivic to reposition himself and eats a stinging right hand-left hook combo.
Yamokivic will need to tighten up his combinations if he doesn't want to gas himself out, swinging at thin air.
Lil II misses with a hook to the body
and Yamokivic counters with a good right hand that lands right on the jaw.
Yamokivic swings away but doesn't land with a series of punches.
The fighters circling - Yamokivic throws out the jab but it was never going to land.
Lil II misses with a body shot. Nice footwork from Yamokivic.
Yamokivic lands a nice hook to Lil II's body. Lil II takes it in his stride and looks to land his own strikes.
That's two minutes gone in the round.
Lil II on the wrong end of a nice hook.
Yamokivic swinging wildly here.
Lil II misses the shot to the body.
Yamokivic looks shocked there as he takes a right hand to the temple.
Lil II misses with a takedown attempt. He shot from a bit too far out.
Ronan Yamokivic has stuffed three takedown attempts in the round now. That's going to take a lot out of Ba Lil II.
Lil II changes levels and drives through with a really nice takedown into side control. Yamokivic looks really pissed at himself for not defending that better.
The crowd cheering loudly, showing their appreciation for the quality fight we're seeing here.
Lil II wants to lay and pray for a moment but Yamokivic keeps working.
Lil II tries for a kimura. Not really close to a finish though.
That's three minutes gone in the round.
Lil II swings around for an armbar but Yamokivic sees it coming a mile off and turns beautifully into Lil II's guard.
Lil II wants to hit a switch here but Yamokivic passes into full mount! Oh no, disaster for Lil II there!
Yamokivic knows he needs to get back to his feet asap. He's simply no match for Lil II on the ground.
Yamokivic throws some wild stikes that Lil II manages to avoid easily.
Lil II is looking to improve his position but Yamokivic isn't that keen on the idea.
Yamokivic trying to control but Lil II is having none of it.
Lil II manages to regain half guard. Good work.
That's four minutes gone in the round.
Lil II blocking the ground and pound attempt from Yamokivic.
Lil II is looking to improve his position.
Yamokivic is thwarting Lil II's attempts to control the position.
Lil II is controlling Yamokivic's trapped leg to prevent Yamokivic from advancing to side control.
As the round comes to an end the crowd are showing their appreciation for a great round of action.
Yamokivic perhaps working for something from half guard, or maybe not. It looks like he's just sitting there.
And thats the end of the round the fighters go back to their corners.
That was a close round but Ronan Yamokivic did the better work so I'd imagine he'll take it.
OK. That's time! The bell goes and we're back to the action.

Lil II misses with a hook to the body
and Yamokivic counters with a straight punch to the midsection.
Lil II takes an uppercut right on the jaw but it doesn't phase him.
Lil II throws a low kick but Yamokivic moves out of range easily.
Lil II misses with a body punch
and Yamokivic counters with a right hand to the body.
Some bone on bone action there as Lil II checks a low kick. Luckily it wasn't a particularly hard one.
Lil II misses with a head kick.
Yamokivic misses with a low kick as Lil II jumps back.
A telegraphed right hand from Yamokivic misses the target.
Lil II ducks down and throws a hook to the body but Yamokivic moves away.
Yamokivic uses good footwork to avoid the strikes from Lil II.
Lil II throws a hook but Yamokivic avoids it easily.
Lil II swings and misses with a hook to the body.
That's one minute gone in the round.
Lil II thows a body shot but no joy.
Yamokivic lands with a hook. Lil II tried to avoid it but it clipped the top of his head.
Ronan Yamokivic is winning the standup battle so far.
Lil II takes a big uppercut there. He seems a bit wobbly but no, he's OK.
Lil II takes an uppercut right on the button but keeps his composure.
Yamokivic swinging wildly here.
Lil II misses with a head kick.
Lil II fails with the takedown.
Lil II takes a solid shot to the body. That one hurt him but he's trying not to show it.
Yamokivic fails to land with the punch combination there - jab, cross, hook, miss, miss, miss.
Yamokivic tries to land with a swinging hook to the body but Lil II was well out of range. Poor timing from Yamokivic.
That's two minutes gone in the round.
Lil II throws a combination but comes up with nothing but fresh air.
Lil II takes a shot to the body in his stride.
A big left from Lil II misses.
Lil II misses with a kick to the body.
Nice straight punches there by Yamokivic. You know Roy Jones Jr respects the hands of Yamokivic.
Lil II fails with the takedown.
Lil II fakes high and swings low for a body shot but Yamokivic manages to avoid it.
Yamokivic throws a shot to the body.
This is a great period of action - very entertaining stuff!
A looping hook to the body misses from Yamokivic. Lil II does a little dance to reset his feet.
Lil II is throwing a lot of body shots here, looking to wear down Yamokivic rather than just go for the knockout.
A shot to the liver by Yamokivic. Beautiful body shot.
That's three minutes gone in the round.
A jab from Lil II misses.
Yamokivic lands a right hook to the body.
Nice defenses there by Lil II.
Lil II displays some good footwork, moving neatly out of range as Yamokivic throws out the jab.
Lil II does a little shimmy and throws a leg kick. The leg kick missed by a considerable margin though, making him look a little bit silly for doing the shimmy.
Yamokivic misses with a wild body shot.
Yamokivic connects with a looping right hand.
Yamokivic misses with a double jab.
Yamokivic throws a shot from downtown. Lil II moves away and avoids it.
A swing and a miss from Yamokivic.
Lil II bobs and weaves well there to avoid the strikes.
Yamokivic swings away but doesn't land with a series of punches.
That's four minutes gone in the round.
Lil II just misses with a punch to the body.
Yamokivic misses with the combination.
Nice shot by Yamokivic.
Yamokivic stuns Lil II with a nice body shot, before stepping back out of range.
Lil II staying out of range there.
A big right from Yamokivic misses.
Lil II staying out of range there.
Lil II uses some good footwork to avoid the body shot by Yamokivic.
The crowd applaud the fighters efforts here as the round comes to an end.
Lil II slips a straight right by Yamokivic.
Lil II keeping a good distance there, avoiding the body shot.
Yamokivic misses with a series of wild punches.
And thats the end of the round the fighters go back to their corners.
Ronan Yamokivic had his way with Ba Lil II in that round.
The corners get their ten second warning. Both fighters stand from their stools and stare eachother down, ready to get back to the action. Ladies and gentlemen, this is the final round!

Lil II moves out of range as Yamokivic strikes.
Yamokivic misses with a body shot.
Nice shot lands for Yamokivic.
Yamokivic avoids the head kick by Lil II.
Yamokivic avoids the head kick by Lil II.
Lil II misses with a half-hearted attempt at a head kick.
Jab by Yamokivic.
Lil II changes levels and scores with a jab to the body.
Lil II shoots in for a takedown! He's got it and he's managed to land in full mount! That's better than Lil II was expecting from the takedown attempt, I'm sure!
Yamokivic wriggling around on the bottom manages to avoid the strikes thrown by Lil II.
That's one minute gone in the round.
Lil II wants to control the pace but Yamokivic is squirming around nicely.
Yamokivic has given up his back. Will we see Lil II going for some submissions?
Yamokivic fending off the submission attempt from Lil II.
Lil II has the rear naked choke here! This is very bad for Yamokivic! Can he survive? No! He's out! Lil II gets to his feet and celebrates with his cornermen. He looks absolutely delighted. In the post fight interviews he takes time to thank his parents and everyone who has believed in him from the start. How sweet.
Ladies and gentlemen, after 2:59 of round 5, we have a winner by way of Submission (RNC). Ba Lil II!
Ba Lil II is the new lightweight champion!
After the big win, Ba Lil II made sure to do all the important stuff like thanking his sponsors Kobra Clothing Inc. and telling the interviewer how much he loves him.
|
|
|
|
|
|
|
|
|
|
|
|
|
|
|
|
|
|
|
|
|
|
|
| S |
C
A |
G |
S |
C
B |
G |
|
S |
C |
G |
|
energy
A | B |
|
hype
A | B |
|
pop
A | B |
|
mgr
A | B |
|
FIGHT
RATING
100% |
|
|
|
|
|
|
