|
|
PBP Commentary |
Coming up we have a featherweight MMA rules bout between Clay Jones (ranked 0 p4p, 0 weight class) and Craig Anderson (ranked 0 p4p, 0 weight class). We have two fighters making their debuts here, so let's see who comes out of this one with their first professional victory.
 |
|
 |
| 155 cm
25
155 lbs
0 - 0 - 0 |
|
174 cm
22
154 lbs
0 - 0 - 0 |
BJJ Blue Belt
Solid boxing
Good chin |
|
BJJ Purple Belt
Decent knees
Granite chin |
|
| |
|
Ladies and gentlemen. This fight is 3 rounds, in the featherweight division.
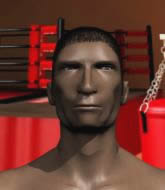
Introducing the fighter to my left, fighting out of the red corner.
With a record of
0 - 0 - 0, fighting out of Montreal, Clay Jones!
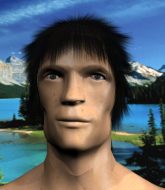
And introducing the fighter to my right, fighting out of the blue corner.
With a record of
0 - 0 - 0, fighting out of Montreal, Craig Anderson!
The judges for this bout are Trevor Gratis, William Peck and Elvis Blanc.

The bell rings for round one and we are underway!
Anderson tries for a takedown but Jones circles away easily
and Jones counters with a straight punch to the midsection.
Jones connects with a body shot.
Anderson shoots in looking for a takedown. Jones tries to sprawl out of it but Anderson keeps driving through. The fighters are pinned against the cage. Jones manages to get underhooks and after a bit of a struggle, circles away and we're back to standing.
Left hook, right uppercut from Jones.
Anderson will have to do better than that with his takedown attempts.
Clay Jones has stuffed three takedown attempts in the round now. That's going to take a lot out of Craig Anderson.
A punch combination from Jones misses.

Jones moves into the clinch.
Anderson drops down for a takedown but doesn't get it.
Jones gets double underhooks to prevent a takedown attempt from Anderson.

That's one minute gone in the round.
A right hook to the body lands for Jones.
Anderson has Jones pressed against the cage, preventing Jones from circling away and getting back to striking at range.
Anderson is looking for a takedown.
Anderson is working for takedown but Jones is calmly controlling the position for now.
Anderson has Jones pushed against the cage.
Anderson goes for a takedown in the clinch but Jones prevents it.
Jones is trying to pull guard but Anderson turns him against the cage and we stay in the clinch.

That's two minutes gone in the round.
Anderson tries to pull guard but Jones won't allow it.
Anderson is trying to stall.
Jones wants to break free but Anderson has control.

Jones breaks the clinch and we return to the middle of the mat.
Anderson closes this distance looking for a takedown but Jones circles away.
Anderson looks gassed!
Jones rushes Anderson and pushes him back against the cage in a clinch.
Jones tries to work over Anderson's body with a swooping hook but it only glances the target.
Jones can't break the clinch.
Jones pushes off and circles away, back to the middle of the mat.
Jones misses with a jab, cross combination.
Anderson tries to shoot in for a takedown. He's got hold of a leg but Jones swivels and escapes.

That's three minutes gone in the round.
Jones throws a right and a left that Anderson avoids nicely.
Jones closes the distance and clinches.
Jones is trying to break the clinch but Anderson is controlling him.
Anderson can't get the takedown.

Jones decides to pull guard.
Jones wants to get back to his feet but Anderson is in a dominant position and won't allow it.

That's four minutes gone in the round.

Jones pushes Anderson off and gets back to his feet.
Jones lunges in with swinging rights and lefts but Anderson circles away quickly and effectively.
Jones throws a series of punches but Anderson moves out of range.
Jones moves into range and clinches up with Anderson.
The crowd applaud the fighters efforts here as the round comes to an end.

Anderson gets a nice trip takedown into half guard.
The crowd are loving this. Great action here.
Jones is trying to stand up here but Anderson is controlling him well.
And thats the end of the round the fighters go back to their corners.
Clay Jones dominated that round.
That's time! Jones's corner gives him a slap on the ass as he gets ready to fight.

Jones fails to land with a series of punches.
Jones clinches up against the cage.
Jones is trying to break the clinch but Anderson is controlling him.
Jones is trying to work out of this bad position, with his back against the cage.
Anderson is looking for a takedown up against the cage. Jones gets underhooks though and prevents the takedown attempt.
Anderson taking a breather.
Jones tries to pull guard but Anderson won't allow it.
Anderson is trying to pull guard but Jones has him pressed against the cage.
Jones prevents the takedown attempt.
Clay Jones has stuffed three takedown attempts in the round now. That's going to take a lot out of Craig Anderson.
Anderson has Jones pressed against the cage, preventing Jones from circling away and getting back to striking at range.
Jones is trying to break the clinch but Anderson is controlling him.
That's one minute gone in the round.
Jones wants to break free. God knows he wants to breaaaak freeee.
Anderson has dropped down and is looking to force the takedown but it's defended by Jones after a bit of a struggle.
Anderson is working for takedown but Jones is calmly controlling the position for now.
Anderson tries for a takedown but Jones manages to get underhooks.
Anderson is breathing heavily.
Anderson is trying to drag Jones to the mat but Jones just about manages to keep his footing. He used the cage to his advantage there.
Jones pushes off and fires off an elbow that misses, before clinching up again, against the cage.
Jones tries to work over Anderson's body with a swooping hook but it only glances the target.
Anderson missing with knees to the body.
That's two minutes gone in the round.
Jones lands a short shot on the inside that snaps the head of Anderson backwards.
Anderson can't find room to land a body shot as Jones controls the action.
Anderson wants to take the fight to the mat but Jones manages to get underhooks and keep the fight in the clinch.
Anderson avoids a wild elbow strike from Jones.
A short right from Jones.
Jones tries to land a shot to the body but it's blocked.
Jones is looking for a takedown.
Jones breaks from the clinch.
Jones throws a low kick but it's checked well by Anderson.
Jones moves into range and clinches up with Anderson.
Clay Jones has scored more points in the clinch so far.
Anderson tries to pull guard but can't drag his opponent to the mat. Jones just stands there and leans against the cage.
That's three minutes gone in the round.
Anderson turns his back and goes for a hip toss. It's a bit messy but it gets the job done and Anderson manages to end up in side control.
Jones throws his opponent off and manages to get back to his feet! Nicely done!
Clay Jones seems to be the more aggressive standup fighter in this bout.
Jones fakes with an overhand right and moves in to clinch with Anderson, pushing him back against the cage.
Jones stops a takedown attempt from Anderson.
Jones is trying to push Anderson away but Anderson has him pressed against the cage, so he's going nowhere.
Jones tries to break the clinch but Anderson is controlling the position.
Jones is trying to pull guard but Anderson has him pressed against the cage.
Jones has picked Anderson up - he's going for a ride! Jones dumps his opponent to the mat with a thud and settles into half guard.
Anderson avoiding damage under a succession of punches from Jones.
That's four minutes gone in the round.
This is a great period of action - very entertaining stuff!

Jones is thinking about going for an arm triangle but he can't free his leg.
Jones sitting in half guard, looking to land shots. Anderson defending well though.
The ref warns both fighters not to hold the cage as they work up against the meshing.
Anderson has hold of Jones's hands but Jones slips his arm to the side and lands an elbow.
Anderson avoiding damage under a succession of punches from Jones.
Jones missing with the ground and pound from half guard.
Anderson tries to roll over but Jones keeps him under control.
As the round comes to an end the crowd are showing their appreciation for a great round of action.
Jones is trying to work for a kimura but Anderson is defending well.
Jones sitting in half guard, looking to land shots. Anderson defending well though.
And thats the end of the round the fighters go back to their corners.
Clay Jones dominated that second round.
The fighters' corners scream their final instructions, as the referee calls time. Here we go, back to the action! This is the final round!

Jones fakes a head punch and goes low to the body. Nicely done.
Jones scores with a nice looking left hook and follows it up with an uppercut!

It looks like Craig Anderson has been cut.
Jones throws a solid leg kick but Anderson takes the impact on his shin and smiles at Jones.
Jones fails to land with the punch combination there - jab, cross, hook, miss, miss, miss.
Jones lunges in with swinging rights and lefts but Anderson circles away quickly and effectively.
Jones stalks Anderson and leaps in with a furious combination of punches. Uppercuts and crosses smash into Anderson's face. Anderson staggers backwards, shaken.
Jones moves into range and clinches up with Anderson.
Jones lands a nice uppercut.
Jones wants to push off and get back to the center of the mat but Anderson has him pressed against the cage.
Jones has a couple of punches blocked by Anderson.
Anderson jumps guard but his hands slip and he falls flat on his back. Well, he's made himself look a right mug there, as Jones walks away with a smile on his face. Anderson gets slowly back to his feet and shakes his head.
That's one minute gone in the round.
Jones closes the distance and clinches.
Jones can't get the takedown.
Both fighters are breathing heavily.
Jones breaks the clinch and we return to the middle of the mat.
Jones drops down and drives through with a powerful takedown into guard.
Anderson manages to land a sweep and now he's in mount on top!
Jones might be looking to lock onto one of his opponent's long limbs for a submission, whilst we're on the ground.
Anderson wants to get back to his feet but Jones is holding on tight.
Jones knows he needs to get back to his feet asap. He's simply no match for Anderson on the ground.

Anderson is in full mount, looking to secure a guillotine but Jones is surviving well by controlling Anderson's body position as best he can.
That's two minutes gone in the round.
Anderson thuds his fist into the canvas! Oooouch!
Jones tries to buck Anderson off but he can't manage it.
That's three minutes gone in the round.
Anderson looking to ground and pound but Jones is blocking nicely.
Jones wants to use the cage to get back to his feet here.
That's four minutes gone in the round.
Anderson looking to ground and pound but Jones is blocking nicely.
Anderson wants to control the pace but Jones is squirming around nicely.
Anderson is in full mount, looking to secure a guillotine but Jones is surviving well by controlling Anderson's body position as best he can.
Craig Anderson has stepped it up - he knows he needs a finish here!
The crowd applaud the fighters efforts here as the round comes to an end.
Jones has left one of his arms exposed and Anderson doesn't need a second invitation. He's isolated it and locked on a tight armbar. Jones screams and taps out, obviously in a lot of pain. Hopefully there isn't permanent damage to that arm.
Ladies and gentlemen, after 4:56 of round 3, we have a winner by way of Submission (Armbar). Craig Anderson!
|
|
|
|
|
|
|
|
|
|
|
|
|
|
|
|
|
|
|
|
|
|
|
| S |
C
A |
G |
S |
C
B |
G |
|
S |
C |
G |
|
energy
A | B |
|
hype
A | B |
|
pop
A | B |
|
mgr
A | B |
|
FIGHT
RATING
43% |
|
|
|
|
|
|
