|
|
PBP Commentary |
Coming up we have a lightweight MMA rules bout between Damn Hardy (ranked 0 p4p, 0 weight class) and Craky Crack (ranked 0 p4p, 0 weight class). Craky Crack is the more experienced fighter, so let's see if that makes a difference tonight.
 |
|
 |
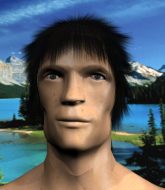
| 185 cm
18
165 lbs
0 - 0 - 0 |
|
170 cm
26
160 lbs
1 - 1 - 0 |
BJJ White Belt
Brawler
Good chin |
|
Decent wrestler
Basic striking
Determined |
|
| |
|
Ladies and gentlemen. This fight is 3 rounds, in the lightweight division.
Introducing the fighter to my left, fighting out of the red corner.
With a record of
0 - 0 - 0, fighting out of Las Vegas, Damn Hardy!
And introducing the fighter to my right, fighting out of the blue corner.
With a record of
1 - 1 - 0, fighting out of Las Vegas, Craky Crack!
The judges for this bout are Gwen Towbar, Cecil Peabody and Frank Dennis.

The bell rings for round one and we are underway!
Hardy wants to clinch

and Crack counters with a nice double leg into half guard.
We must be close to a standup if these guys don't pick up the pace.
Hardy tries to roll over but Crack keeps him under control.
Crack is looking to take a break and control but Hardy is keeping him honest, looking to work from the bottom.
Hardy wants to improve his position but Crack is controlling well.
Crack wants to pass to mount but Hardy is defending the position.
The fighters are pressed up against the cage, both looking to find a bit of space to work.
Hardy tries to get to full guard but Crack has control of the leg.
Hardy avoiding damage under a succession of punches from Crack.

Crack looking for a kimura but he'll have to free his other leg if he wants to finish that. Perhaps he's just using it as a distraction technique.
Hardy is looking to improve his position.

That's one minute gone in the round.
Hardy wants to control but Crack is keeping busy.
Crack takes advantage of the dominant position to land a couple of big hammer fists.
Crack lands strikes from half guard.
Hardy is looking to escape.
Crack missing with the ground and pound from half guard.
Ground and pound from Crack.
Crack is trying to control the action in half guard but Hardy is working away on the bottom, looking perhaps to get back to full guard.
Crack is keeping good posture, landing some ground and pound.
This is a great period of action - very entertaining stuff!
Hardy won't allow Crack to pass to mount.
Crack winds up and cracks Hardy with a swinging punch to the side of the head.
Crack controlling the action here.
Crack is stalling here. Hardy is in no mood to hang around though. He's locked up a kimura from the bottom! Crack seems to be keeping calm but he's forced to roll out of the hold and Hardy has ended up in side control on the top. Nice work.

That's two minutes gone in the round.
Crack avoids any damage from the ground and pound of Hardy.
Hardy wants to control but Crack is keeping him busy.
Crack is looking to reverse the position.
We get told so often about how wrestlers don't like to be on their backs. Let's see if Crack can do anything to dispel that myth.
Hardy trying to control the action but Crack is working from the bottom.
You can see the frustration on Crack's face, being in this tough position on the bottom.

That's three minutes gone in the round.
Crack tries to buck Hardy off but Hardy is having none of it.
Crack is in a bad spot here and he knows it... just holding on for now.
Crack defending against the ground and pound.
Crack tries to work a leg under to get back to half guard but Hardy wriggles his own leg back out and remains in side control.

That's four minutes gone in the round.
Crack wants to control but Hardy postures up.
Hardy throws an elbow but Crack slips to the side and avoids it well.
Crack is looking to regain half guard here but Hardy keeps moving and retains side control.

Hardy is trying to land an Americana. He has the arm isolated but Crack is keeping cool and he's avoided the danger for now.
Who's going to make the next move?
As the round comes to an end the crowd are showing their appreciation for a great round of action.
Hardy trying to control the position but Crack is working away.
And thats the end of the round the fighters go back to their corners.
Craky Crack dominated that round.
The fighters' corners scream their final instructions, as the referee calls time. Here we go, back to the action!

Crack closes the distance, clinches up and gets a nice trip takedown into side control. Very smooth.
Hardy manages to land a sweep and he's now on top! Lovely Jiu Jitsu!
Crack regains full guard. Nicely done.
Crack looking to sweep using the butterfly guard but Hardy puts pay to that idea as he passes nicely into half guard.
Crack is defending against the submission attempts here by Hardy.
Crack keeping control of the position.
Hardy wants to stand up but Crack is controlling the position.
That's one minute gone in the round.
Hardy stalling away here and it's allowed Crack to slip out his trapped foot and regain full guard.
Hardy with a flurry of punches that miss.
Hardy is looking to work some ground and pound but Crack has wrist control.
The ref warns both fighters not to hold the cage as they work up against the meshing.
Hardy trying to stand up but can't free himself from Crack's guard.
Crack keeping moving, preventing Hardy from controlling successfully.
That's two minutes gone in the round.
Hardy passes into half guard.
Crack controlling the leg, holding on to half guard.
Crack tries to roll over but Hardy keeps him under control.
Crack is persisting with the attempt to improve his position.
Crack desperately trying to maintain half guard.
That's three minutes gone in the round.
Hardy is looking to take a break and control but Crack is keeping him honest, looking to work from the bottom.

The referee decides to stand the fighters back up.

Hardy has Crack up against the cage in a clinch.
Hardy wants to strike at distance but he can't break free of the clinch.
Crack tries to break free but Hardy pushes him back against the cage.
Hardy is working hard here but doesn't seem to be able to control effectively, up against the cage.
That's four minutes gone in the round.
A frustrated look appears on Hardy's face as he tries to break the clinch.
Hardy wants a takedown.
A battle for position here, against the cage.
Hardy prevents the takedown attempt.
Hardy changes levels and goes for a takedown here. Crack fights it off and pushes away nicely.
Both fighters are absolutely exhausted here.
Hardy gets caught napping as Crack dives in and scores a takedown. Hardy manages to retain guard.
Crack must be cautious of submissions here, given that his opponent has the superior Jiu Jitsu.
The crowd applaud the fighters efforts here as the round comes to an end.
Crack working in close now, lands a nice elbow to the side of Hardy's head.
And thats the end of the round the fighters go back to their corners.
A close second round but Craky Crack will probably get the nod - 10:9.
The minute break is over - no more time for sponges and pep talks - back to the action! This is the final round!

Crack changes levels and drives through with a really nice takedown into side control. Hardy looks really pissed at himself for not defending that better.
Hardy takes an elbow right on the bridge of the nose and winces in pain.
Crack lands a few punches from side control.
Hardy stops Crack from passing to mount.
Hardy tries to improve position but can't.
Crack is chipping away with strikes.
Hardy tries to buck Crack off but Crack is having none of it.
Crack is looking to take a break and control but Hardy is keeping him honest, looking to work from the bottom.
We've seen a great period of action over the last minute or so - credit to both fighters for going all out!
Hardy is working to avoid the ground and pound but Crack connects with a decent elbow.
Crack landing strikes.
Hardy takes a nasty elbow to the side of the head.
Craky Crack has got the better of the ground game so far.
That's one minute gone in the round.
Crack tries to move to mount but Hardy blocks the move with his legs.
Hardy wants to control but Crack postures up.
Both fighters are breathing heavily.
Crack working the head and body with strikes.
Crack really doesn't want to stay on the ground with Hardy. If he can't get it back to his feet, it's only a matter of time before he'll be tapping out.
Hardy takes a big shot right to the temple there but he's taken it well.
Hardy is trying to get back to half guard.
Hardy can't do much from the bottom here.
Crack connects with a decent looking elbow from side control that caused Hardy some visible discomfort.
Crack works a knee to the body and follows up with a nice elbow to the head.
Hardy is trying to control Crack's posture but Crack avoids it.
Crack working away diligently from side control. Landing strikes effectively there - that will score him some points on the judges scorecards.
The crowd cheering loudly, showing their appreciation for the quality fight we're seeing here.
Hardy struggling a bit here.
That's two minutes gone in the round.
Crack lands a knee to the body and a forearm to the face.

Hardy is rocked!
Crack thinks about going for a far side armbar but bails out and retains the dominant position instead.
Oh Hardy is still in real trouble! Will he be able to recover?!!
Crack is working Hardy over with some ground and pound from side control.
Crack lands some shots froms side control.
Crack in side control here. He's dropped a big elbow there and Hardy looks hurt! Oh, he is hurt! Crack turns on the heat and pounds him out for a TKO victory! Good killer instinct there!
Ladies and gentlemen, after 2:40 of round 3, we have a winner by way of TKO (Strikes). Craky Crack!
|
|
|
|
|
|
|
|
|
|
|
|
|
|
|
|
|
|
|
|
|
|
|
| S |
C
A |
G |
S |
C
B |
G |
|
S |
C |
G |
|
energy
A | B |
|
hype
A | B |
|
pop
A | B |
|
mgr
A | B |
|
FIGHT
RATING
100% |
|
|
|
|
|
|

