|
|
PBP Commentary |
Coming up we have a heavyweight MMA rules bout between Kirbo Kiwes (ranked 0 p4p, 0 weight class) and Chad Hart (ranked 0 p4p, 0 weight class). Over to our ring announcer for the fighter introductions!
 |
|
 |
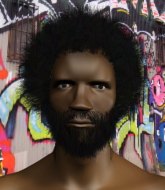
| 193 cm
22
274 lbs
1 - 1 - 0 |
|
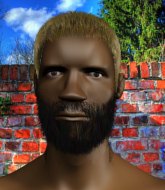
190 cm
22
255 lbs
1 - 0 - 0 |
BJJ Blue Belt
Improved boxing
Good chin |
|
BJJ Brown Belt
Counter striker
Solid chin |
|
| |
|
Ladies and gentlemen. This fight is 3 rounds, in the heavyweight division.
Introducing the fighter to my left, fighting out of the red corner.
With a record of
1 - 1 - 0, fighting out of Las Vegas, Kirbo Kiwes!
And introducing the fighter to my right, fighting out of the blue corner.
With a record of
1 - 0 - 0, fighting out of Las Vegas, Chad Hart!
The judges for this bout are Robert Twigg, Cecil Peabody and Frank Dennis.

The bell rings for round one and we are underway!
Hart cracks Kiwes with a right hand to the side of the head.
Kiwes throws an off balance right hand

and Hart counters with a nice double leg into guard.
Kiwes keeping moving, preventing Hart from controlling successfully.
Hart wants to pass the guard but Kiwes is keeping the position.
Kiwes trying to keep a closed guard but Hart is proving a slippery customer.
Kiwes on his back here. We all know that wrestlers don't like being on their back so let's see if Kiwes tries to get out of the position.
Hart stopping the sweep attempt from Kiwes.
The ref warns both fighters not to hold the cage as they work up against the meshing.

That's one minute gone in the round.
Hart pressing down on his opponent's thigh, looking to pass guard. Kiwes is keeping the position for now.
Hart postures up in Kiwes's guard and throws a big left but Kiwes blocks it.

Neither fighter is doing enough for the referee's liking and he's decided to stand them back up.
Hart looks shocked there as he takes a right hand to the temple.
Hart misses with a jab and misses with a cross straight after too.
Hart fails miserably with a takedown attempt.
Hart scores with a nice looking left hook and follows it up with an uppercut!
Hart shoots in for a takedown and gets it. Let's see what he's got on the mat.
The fighters are pressed up against the cage, both looking to find a bit of space to work.
Hart postures up in Kiwes's guard and throws a big left but Kiwes blocks it.
Hart trying to control the position from guard on top but Kiwes is wriggling around, looking for whatever he can.

Hart drops back for a leg! It's a sloppy attempt though and Hart jumps back into guard quickly, to retain the dominant position.
Hart trying to control but Kiwes is working from the bottom.

That's two minutes gone in the round.
Kiwes bucks up whilst keeping hold of a body lock, managing to reverse the position. Now he's in top in Hart's guard.
Hart has a loose triangle. He'll be looking to tighten that up but Kiwes can see exactly what he's planning and manages to posture up and free himself.
Kiwes trying to control the position from guard on top but Hart is wriggling around, looking for whatever he can.
Hart looking to hit a scissor sweep but Kiwes is one step ahead there.
Hart is working actively off his back, looking to secure an arm or perhaps work for a triangle.
Kiwes could do with loosing a few pounds - he looks very soft around the mid section, to put it politely.
Hart looks gassed!

That's three minutes gone in the round.
Hart is working from a closed guard but he's struggling to control his opponent.

Kiwes stands up from Hart's guard - Kiwes perhaps looking for a knockout.
Kiwes displaying good standup as he scores with a three punch combination.
Kiwes scores with a sloppy punch to the body. Not much technique there but it did the business.
Hart avoids a lazy jab quite easily.
Kiwes connects with a nice looking jab.
Hart uses decent footwork to sidestep a right hand from Kiwes.
Crunch! Kiwes slams his shin into Hart's torso.

That's four minutes gone in the round.
Hart avoids the body shot from Kiwes.
Hart shoots for a double leg takedown but Kiwes sprawls well. He's pushed Hart's face into the mat and manages to get back to his feet relatively easily.
Kiwes fails to land with the punch combination there - jab, cross, hook, miss, miss, miss.

Kiwes tries to keep at a distance but Hart has taken the fight into the clinch.
Hart is working for a takedown up against the cage. He can't get it on this occasion though.
Kirbo Kiwes has stuffed three takedown attempts in the round now. That's going to take a lot out of Chad Hart.
Hart fails to pull guard.

Kiwes manages to break the clinch.
Kirbo Kiwes is looking to keep the fight on the feet at all costs.
Kiwes throws a body punch but Hart moves out of range.
Kiwes misses with an uppercut
and Hart counters with a nice double leg into half guard.
This is a great period of action - very entertaining stuff!
Hart frees up his trapped foot and advances to mount.
Hart prevents Kiwes from getting the reversal.
The crowd applaud the fighters efforts here as the round comes to an end.
Kiwes in a bad spot here, taking shots to the head.
Kiwes wants to hold on but Hart pushes him away.
And thats the end of the round the fighters go back to their corners.
Chad Hart dominated that round.
OK. That's time! The bell goes and we're back to the action.

Hart looks to score with a combo but nothing lands.
Danga de danga de dang - Kiwes scores with a four punch combination!
Kiwes drops Hart with a hook right on the temple. He thinks about going to the ground but Hart looks back up at him and smiles so Kiwes waves him back to his feet - he obviously thinks he can knock him out after that shot landed.

Hart is rocked!
Kiwes throws a lazy uppercut
and Hart counters with a nice shoot takedown that brings the fighters to the ground.
This is a great period of action - very entertaining stuff!
Kiwes wants to stand and escape but Hart is having none of it.
Hart wants to pass the guard but Kiwes is keeping the position.
Hart prevents Kiwes from getting back to his feet.
Kiwes looking for a sweep. Not yet Kiwes, not yet.
Hart passes Kiwes's left leg - he's now in half guard.
Hart is thwarting Kiwes's attempts to control the position.
Both fighters are absolutely exhausted here.
Hart moves nicely into side control.
That's one minute gone in the round.
Hart is looking to take a break and control but Kiwes is keeping him honest, looking to work from the bottom.
Kiwes looking for a sweep but Hart has passed into full mount! Oh no!
Hart jumps to the side looking to secure the arm triangle
. Ooooh, that looks tight
Kiwes is gargling but he's managed to escape! Nice work there by Kiwes and Hart has given up the dominant position trying to land that submission.
Hart in side control lands a decent elbow.
Hart creates some space and throws a big elbow, but Kiwes sees it coming and moves his head just enough to avoid the strike.
Hart is chipping away with strikes.
Hart throws a knee to the body but it doesn't do much damage.
That's two minutes gone in the round.
Hart tries for a kimura but Kiwes is defending well.
Hart is trying to land an Americana. He has the arm isolated but Kiwes is keeping cool and he's avoided the danger for now.
Hart is looking for a kimura. He might have it! No, Kiwes has escaped the position, nice work there.
Chad Hart has got the better of the ground game so far.
Kiwes is not content to let Hart control the position.
Hart cracks Kiwes with a big right hand but Kiwes just smiles back at him and invites him to have another go.
That's three minutes gone in the round.
Kiwes is looking to reverse the position.
Hart works a knee to the body and follows up with a nice elbow to the head.
Hart is looking to finish here, going for an Americana. Kiwes knows the correct defense though, so he's OK.
Kiwes can't do much from the bottom here.
Kiwes knows he needs to get back to his feet asap. He's simply no match for Hart on the ground.
Hart working hard here to secure a kimura but he's not really in the right position for it.
Hart is trying to land an Americana. He has the arm isolated but Kiwes is keeping cool and he's avoided the danger for now.
That's four minutes gone in the round.
Hart just content to control the position.
Kiwes is putting a lot of effort into getting back to his feet here.
Hart trying to control the position but Kiwes is working away.
The crowd applaud the fighters efforts here as the round comes to an end.
Kiwes is pushing Hart's head away, looking to escape. Hart manages to hold on to the position though.
And thats the end of the round the fighters go back to their corners.
Chad Hart showed his class in that round. I'd imagine he'll take it on all the scorecards.
The referee calls time. The cornermen exit stage left and we're back to business. This is the final round!

Kiwes throws a right hand that misses
and Hart connects with a straight left hand counter down the middle.
Kiwes misses with a wild body shot.
Kiwes darts in and out, connecting with a jab.
Kiwes gets cracked there but stands up to it.
A right-left combo lands from Kiwes.
Kiwes misses with a left hand
and Hart counters with a shoot takedown. Kiwes fights it but they end up in guard.
We've seen a great period of action over the last minute or so - credit to both fighters for leaving it all in the cage!
Hart postures up.
Hart pushes down on Kiwes's leg and manages to get into half guard.
Hart is looking for an arm triangle, whilst trying to pass to side control. Kiwes doesn't seem that keen to cooperate though. No luck this time Hart.
Kiwes is refusing to be controlled, as Hart sits in half guard.
Both fighters are breathing heavily.
That's one minute gone in the round.
Hart is looking for a kimura but Kiwes is holding onto that half guard position, so it's hard for Hart to get the leverage.
Kiwes is staying active underneath Hart, who seems content to just control the action from this position.
Kiwes trying to control but Hart postures up.
Nice strikes from Hart there.
Hart is trying for a kimura here. Kiwes looks like he's in a lot of pain... and he's tapping out! Hart wins by kimura!
Ladies and gentlemen, after 1:52 of round 3, we have a winner by way of Submission (Kimura). Chad Hart!
|
|
|
|
|
|
|
|
|
|
|
|
|
|
|
|
|
|
|
|
|
|
|
| S |
C
A |
G |
S |
C
B |
G |
|
S |
C |
G |
|
energy
A | B |
|
hype
A | B |
|
pop
A | B |
|
mgr
A | B |
|
FIGHT
RATING
100% |
|
|
|
|
|
|
