|
|
PBP Commentary |
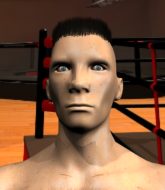
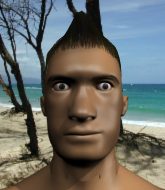
Coming up we have a bantamweight MMA rules bout between Frodo Baggins (ranked 0 p4p, 0 weight class) and Cameron St James (ranked 0 p4p, 0 weight class). Both fighters look fresh as a daisy as they make their way towards the ring.
 |
|
 |
| 150 cm
33
135 lbs
22 - 13 - 0 |
|
177 cm
29
145 lbs
21 - 10 - 1 |
Good wrestling
Excellent boxer
Very strong |
|
Olympic wrestler
Good low kicks
Good gas tank |
|
| |
|
Ladies and gentlemen. This fight is 3 rounds, in the bantamweight division.
Introducing the fighter to my left, fighting out of the red corner.
With a record of
22 - 13 - 0, fighting out of Las Vegas, Frodo Baggins!
And introducing the fighter to my right, fighting out of the blue corner.
With a record of
21 - 10 - 1, fighting out of Las Vegas, Cameron St James!
The judges for this bout are Daniel Franklin, Gwen Towbar and Robert Twigg.

The bell rings for round one and we are underway!

Baggins throws a loose over hand right and dives in with a double leg takedown. St James tries to sprawl but it's too late and the fighters hit the mat. Baggins is in St James's guard.
St James has control of Baggins's left arm, preventing Baggins from doing any damage.
St James keeping moving, preventing Baggins from controlling successfully.
St James is working an open guard here, looking to improve his position. No doubt that will leave him open to counters but at least he's being more offensive.
St James wants to stand and escape but Baggins is having none of it.
St James managing to control the position.
St James looking to control.

OK we're going to have a standup here. Cameron St James hasn't been effective enough on the ground and the referee wants a restart.
St James walks into a stiff left hand from Baggins.
St James tries to sprawl but Baggins drives through with a takedown into half guard.
The fans in attendance giving it up for the two fighters, who have really let it all hang out in the last minute or so!

Baggins is thinking about going for an arm triangle but he can't free his leg.

That's one minute gone in the round.
Baggins wants to pass the guard but St James is defending well.
St James tries to strike from the bottom but it doesn't land.
The fighters are tangled up in the ropes here. We might need a restart if the fighters can't break free themselves.
St James is trying to get back to full guard.
Baggins is thinking about going for an arm triangle but he can't free his leg.
St James is looking to regain full guard. Not this time though.
Baggins lands strikes from half guard.
Baggins is trying a forearm choke
I don't think that's going to do much at this level of the game.
Baggins is sneakily working for an arm triangle but St James sees it coming and defends easily.

That's two minutes gone in the round.
St James is positioning himself well to prevent Baggins advancing to mount.
Baggins is working for a kimura but St James is defending it quite comfortably.
The fighters are trapped in the ropes so we're going to have a reposition here. The ref calls for a break and repositions the fighters in the center of the ring.
Baggins is trying a forearm choke
I don't think that's going to do much at this level of the game.
Baggins is keen to just control but St James is a slippery customer.

That's three minutes gone in the round.
Baggins is sneakily working for an arm triangle but St James sees it coming and defends easily.
St James trying to control here.
St James preventing any damage for now, controlling his opponent's head.
St James is trying to maintain the position but Baggins is very close to passing his half guard.
Baggins throwing shots but St James is blocking nicely.
Baggins is thinking about going for an arm triangle but he can't free his leg.
St James wants to control but Baggins is keeping busy.

That's four minutes gone in the round.
The referee is pacing around the two fighters - he looks like he's thinking about a standup.
Baggins is trying to work for a kimura. This could be trouble! No, St James has managed to free his arm - good work.
Baggins seems to be looking for submissions.
St James is on the bottom, trying to hold on to half guard. He's throwing a few small shots here, to keep his opponent honest.
St James has no desire to be mounted, so is trying to control. Baggins is working away from the top position though.
The crowd applaud the fighters efforts here as the round comes to an end.
St James is pressing down on Baggins's left leg trying to get back to full guard. He's managed it.
St James wants to stand up but Baggins is controlling him.
St James is trying to control the position from the bottom.
And thats the end of the round the fighters go back to their corners.
Frodo Baggins dominated that round.
Well, the break between rounds is over. Let's get back to the scrappin!

Baggins shoots in with a takedown attempt and he has St James pinned against the ropes. St James gets the underhooks and manages to circle away.
St James keeps the fight on the outside.
Baggins fails with a takedown attempt from distance.
We've had a slow start to the round here - hopefully the action picks up.
Baggins takes a thudding leg kick, right into the meat of the thigh.
Baggins misses with a takedown attempt
and St James finishes the little exchange by landing a big kick to the body.
That's three failed takedown attempts in the round for Frodo Baggins. That's going to take a lot out of him.
Baggins shoots for a takedown but St James saw that one coming a mile off and avoided it easily.
That's one minute gone in the round.
St James misses the shot to the body.
Baggins tries to score with a leg kick but it misses it's target.
St James gets caught on his heels momentarily as he allows Baggins to score an easy takedown into full guard.
A real slowdown in the pace of the fight for a moment, as St James holds on and takes a little breather.
St James looking for a sweep. Not yet St James, not yet.
St James doesn't do any damage with a couple of strikes from the bottom.
Baggins wants to pass the guard but St James is keeping the position.
St James is working the butterfly guard. He manages to land a nice scissor sweep and is now in half guard on the top. Nice move.
That's two minutes gone in the round.
St James is taking a breather. Baggins says something to him but it's hard to make out. Perhaps he's telling him to get on with it and actually do something.
St James drops an elbow to the side of Baggins's head.
Baggins is refusing to be controlled, as St James sits in half guard.
St James looks towards his corner to check for any instructions. The corner give him nothing to work with, so he cracks Baggins with a short hammerfist. I guess that's as good as any advice he could get in this position.
The crowd are loving this. Great action here.
St James lands with an elbow from half guard - that looked like it hurt.
St James seems very keen to just sit and control from half guard but Baggins does not like that idea so much and is remaining active off his back.
Baggins wants to get back to his feet.
Still in half guard, St James seems content to control.
That's three minutes gone in the round.
St James trying to control the action but Baggins is working from the bottom.
St James is in a good position here but he's just trying to control... And he's not even managing to do that successfully.
We may be looking at a referee standup if the pace doesn't pick up soon.
St James prevents Baggins from standing back up.
The ref stands the fighters back up, due to lack of action by Cameron St James.
Baggins bobs and weaves into range and then changes levels and scores with a nice takedown into side control.
St James is looking for a sweep.
St James gets one leg under and gets the fight to half guard.
St James is trying to control but can't.
Baggins tries to pass the half guard into mount. St James knows what he's doing though and prevents the attempt.
Baggins winds up and cracks St James with a swinging punch to the side of the head.
That's four minutes gone in the round.
St James moves his hips nicely and gets into full guard.
St James is working the butterfly guard. He manages to land a nice scissor sweep and is now in half guard on the top. Nice move.
The crowd cheering loudly, showing their appreciation for the quality fight we're seeing here.
St James is keen to just control but Baggins is a slippery customer.
Baggins is looking for a sweep. St James is wise to his cunning plan and keeps the top position.
Baggins might be looking to lock onto one of his opponent's long limbs for a submission, whilst we're on the ground.
Baggins moves his hips nicely and gets into full guard.
St James trying to control but Baggins is working from the bottom.
As the round comes to an end the crowd are showing their appreciation for a great round of action.
St James sitting in guard here, content to control.
St James pressing down on his opponent's thigh, looking to pass guard. Baggins is keeping the position for now.
And thats the end of the round the fighters go back to their corners.
Cameron St James showed his class in that round. I'd imagine he'll take it on all the scorecards.
The corners get their ten second warning. Both fighters stand from their stools and stare eachother down, ready to get back to the action. This is the final round!

Baggins will have to do better than that with his takedown attempts.
St James keeps the fight on the outside.
Nice takedown defense from St James. No joy for Baggins on that attempt.

St James looking to shoot here. He's gone for it and he's landed a takedown into mount! Oh, that's bad for Baggins!
St James landing strikes, looking to finish!
A nice elbow there by St James.
St James tries to control but Baggins wriggling away.
St James is landing with some decent strikes but Baggins is trying to advance his position so the referee is letting the fight continue.
That's one minute gone in the round.
Baggins is squirming around, avoiding St James's attempts to control the action.
St James putting on the heat here with some good ground and pound!
St James breaks from Baggins's wrist control and lands an elbow.
St James tries to control but Baggins wriggling away.
St James controlling from the full mount.
Baggins can't escape the position.
St James looking to control but Baggins is working nicely, looking to advance position himself.
St James lands a shot to the body, followed up by a shot to the exposed head of his trapped opponent.
That's two minutes gone in the round.
St James scoring with strikes but Baggins is staying in there.
This has been an exciting period of action!
St James controlling the pace for now.
St James breaks from Baggins's wrist control and lands an elbow.
St James landing strikes, looking to finish!
St James looking to control but Baggins is working nicely, looking to advance position himself.
Baggins wants to control but St James is having none of it.
Baggins takes a big shot to the head but keeps on trying to improve his position.
St James takes a little breather and maintains the position. The referee will be looking for him to stay active from such a dominant position though.
Baggins tries to hold on but St James pushes him away.
That's three minutes gone in the round.
St James can't quite control the action as he would like just now, as Baggins is looking to escape.
St James is landing with some decent strikes but Baggins is trying to advance his position so the referee is letting the fight continue.
St James content just to control the position here.
Baggins is in all sorts of trouble here.
St James pausing momentarily but resumes with a couple of decent strikes that do a bit of damage.
St James fakes a shot to the body and cracks his opponent in the head. Nice ground and pound there!
Baggins working to try and regain half guard.
St James scoring with some good ground and pound from mount here. Will he manage to finish Baggins?
That's four minutes gone in the round.
St James working Baggins over with strikes here.
We've seen a great period of action over the last minute or so - credit to both fighters for going all out!
Baggins can't escape the position.
St James tucks in and makes sure he doesn't lose the dominant position.
St James unloading with bombs!
St James working the ground and pound effectively.

Baggins is rocked!
St James sitting in mount, just looking to control for the moment.
The crowd are going absolutely nuts as the round comes to an end - what a fantastic round of action!
St James raining down shots from the mount!
St James lands with some vicious ground and pound - can Baggins hang on?
And that's the end of the fight!
Cameron St James comfortably won the final round on my scorecard.
I think St James has won this one but let's see whether the judges agree with me. Over to the ring announcer for the scorecards.
Ladies and gentlemen, after 3 rounds of action, we go to the scorecards for a decision.
Judge Daniel Franklin scores the fight 28:29
Judge Gwen Towbar scores the fight 28:29
Judge Robert Twigg scores the fight 28:29
In favor of your winner, by unanimous decision... Cameron St James!
|
|
|
|
|
|
|
|
|
|
|
|
|
|
|
|
|
|
|
|
|
|
|
| S |
C
A |
G |
S |
C
B |
G |
|
S |
C |
G |
|
energy
A | B |
|
hype
A | B |
|
pop
A | B |
|
mgr
A | B |
|
FIGHT
RATING
87% |
|
|
|
|
|
|

