|
|
PBP Commentary |
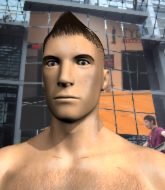
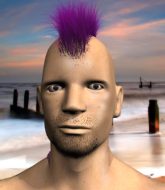
Coming up we have a lightweight MMA rules bout between Kenichi Atoshi (ranked 0 p4p, 0 weight class) and Norifumi Yamamoto (ranked 0 p4p, 0 weight class). Atoshi comes to the cage accompanied by Samourai. Kenichi Atoshi has the edge in experience - let's see if he can make that count tonight.
 |
|
 |
| 168 cm
23
162 lbs
5 - 1 - 0 |
|
165 cm
23
154 lbs
4 - 0 - 0 |
BJJ Purple Belt
Brawler
Experienced |
|
Good takedowns
Good kicks
Solid chin |
|
| |
|
Ladies and gentlemen. This fight is 3 rounds, in the lightweight division.
Introducing the fighter to my left, fighting out of the red corner.
With a record of
5 - 1 - 0, fighting out of Tokyo, Kenichi Atoshi!
And introducing the fighter to my right, fighting out of the blue corner.
With a record of
4 - 0 - 0, fighting out of Tokyo, Norifumi Yamamoto!
The judges for this bout are Yuuki Gou, Tatsuya Matsuyama and Yasuomi Hirokawa.

The bell rings for round one and we are underway!
Yamamoto tries a switch kick but it misses it's target.
Yamamoto slaps away a takedown attempt from Atoshi, before circling back to the center of the mat.

Yamamoto scores with a takedown into Atoshi's guard.
The referee is asking the fighters to pick up the pace.
Yamamoto looking to control the position here, rather than advance.

Yamamoto postures up as if he's going to throw some strikes but drops back for an ankle! Atoshi is in big trouble! He looks ready to tap! But no, he's escaped and dives on top of Yamamoto, into his guard.
Atoshi is just sitting in guard, looking to avoid any submissions.
Atoshi trying to control but Yamamoto is working from the bottom.
Atoshi wants to stand but Yamamoto has a closed guard, so he can't escape.

That's one minute gone in the round.
Yamamoto keeping full guard, as Atoshi tries to pass.
Yamamoto throwing his legs up looking for a triangle.
Yamamoto is active off his back here, looking for submissions.
Yamamoto escapes his hips to the side and looks to be working for an armbar. Atoshi gives him a little smile and shakes his head. No chance.
Yamamoto throws his legs up looking for a submission but Atoshi uses it to pass to side control.
Atoshi looking to punish the body of his opponent here but Yamamoto is avoiding damage well.

That's two minutes gone in the round.
Atoshi is pausing for a moment. What's he doing? It looks like he's clearing his nose. Oh dude! He's shot a load of snot all down Yamamoto's shoulder. That is not cool.
Atoshi is looking to take a break and control but Yamamoto is keeping him honest, looking to work from the bottom.
Yamamoto tries to work a leg under to get back to half guard but Atoshi wriggles his own leg back out and remains in side control.
We get told so often about how wrestlers don't like to be on their backs. Let's see if Yamamoto can do anything to dispel that myth.

Atoshi has had enough of the ground for now and decides to stand.
Sloppy strikes from Atoshi. Those never looked like landing.
Norifumi Yamamoto seems to be the more aggressive standup fighter in this bout.

Atoshi pushes Yamamoto up against the cage in a clinch.
Yamamoto turns his hips and lands a very nice judo throw into side control!
The crowd are loving this. Great action here.
Yamamoto wants to work for a kimura but he's foiled early by Atoshi, who protects the arm well.

That's three minutes gone in the round.
Atoshi struggling a bit here.
Atoshi holds on to Yamamoto's head and controls the position momentarily.
Yamamoto wants to control for a moment but Atoshi uses the opportunity to move back to half guard.
Atoshi is trying to stand.
Yamamoto is looking for an arm triangle, whilst trying to pass to side control. Atoshi doesn't seem that keen to cooperate though. No luck this time Yamamoto.

That's four minutes gone in the round.
Yamamoto thows a wild elbow that connects with the canvas.
Yamamoto is looking for a kimura here.
Atoshi manages to get to full guard.
The crowd applaud the fighters efforts here as the round comes to an end.
Yamamoto looking to sit in guard and control but Atoshi gets the butterfly guard and sweeps. He's now in the guard on the top.
And thats the end of the round the fighters go back to their corners.
That was a close round but I would say that Kenichi Atoshi will probably get the nod.
That's time! Atoshi's corner gives him a slap on the ass as he gets ready to fight.

Yamamoto misses with a head kick.
Yamamoto avoids the clinch attempt nicely.
Yamamoto looks for a takedown. He's got it. We're now in half guard.
Yamamoto is actively looking for submissions here but good counter grappling here from Atoshi as he works his way to full guard.
Yamamoto trying to control but Atoshi is working from the bottom.
Atoshi thows some rabbit punches from the bottom but they don't do any damage.
Atoshi preventing the ground and pound from doing any damage.
Yamamoto trying to control but Atoshi is working from the bottom.
That's one minute gone in the round.
Yamamoto looking to sit in guard and control but Atoshi gets the butterfly guard and sweeps. He's now in the guard on the top.
Atoshi slows down the pace of the fight for a moment. He'll need to remain active if he doesn't want to see the fight stood back up.
Yamamoto is looking for a guillotine. You can't force these things though and Atoshi defends well.
Atoshi is working Yamamoto over from the guard. He should look to pass the guard and do a little more damage with these strikes.
Atoshi is sitting in guard, working some ground and pound.
Yamamoto really doesn't want to stay on the ground with Atoshi. If he can't get it back to his feet, it's only a matter of time before he'll be tapping out.
Yamamoto isolates an arm and boxes in a triangle. Atoshi stacks Yamamoto on his neck as he steps over and passes to the side. He's now in a much more dominant position where he can look to do some serious damage. Nice move by Atoshi!
Yamamoto is breathing heavily.
That's two minutes gone in the round.
Yamamoto tries to get back to half guard but can't.
Atoshi cracks Yamamoto with a big right hand but Yamamoto just smiles back at him and invites him to have another go.
Atoshi stands up and beckons Yamamoto to his feet.
Yamamoto throws a head kick that misses.
No luck for Atoshi with that takedown attempt.
Yamamoto will need to tighten up his combinations if he doesn't want to gas himself out, swinging at thin air.
The fans in attendance giving it up for the two fighters, who have really let it all hang out in the last minute or so!
Yamamoto misses with a half-hearted attempt at a head kick.
A head kick by Yamamoto misses
and Atoshi counters with a nice leg kick.
That's three minutes gone in the round.
Yamamoto avoids the clinch attempt nicely.
Atoshi will need to tighten up his combinations if he doesn't want to gas himself out, swinging at thin air.
Atoshi dives in and grabs Yamamoto's left leg, looking for a takedown. Yamamoto pushes down on Atoshi's head and hops out.
Yamamoto throws a head kick that misses.
Atoshi throws a looping left and ducks down for a takedown. He's got his arms around Yamamoto's waist but Yamamoto gets an underhook and avoids the takedown by throwing Atoshi off to one side.
That's three failed takedown attempts in the round for Kenichi Atoshi. That's going to take a lot out of him.
Yamamoto tries a head kick but it misses.
Atoshi misses with a wild combination.

Atoshi shoots in for a takedown and gets it. Let's see what he's got on the mat.
Atoshi wants to control from the top but Yamamoto keeps moving.
Kenichi Atoshi overall seems to be getting the better of the ground position in the fight so far.
That's four minutes gone in the round.
Atoshi stands up from guard. Let's bang!
Yamamoto misses with a two punch combination.
Yamamoto pulls out of a head kick attempt.
Atoshi misses with a takedown attempt. He shot from a bit too far out.
Yamamoto goes for a high kick. It partially lands.
This has been an exciting period of action!
Yamamoto scores with a head kick.
Yamamoto throws a head kick but Atoshi moves out of range.
As the round comes to an end the crowd are showing their appreciation for a great round of action.
Atoshi blocks a head kick by Yamamoto.
Atoshi clinches up against the cage.
Yamamoto tries to take the fight to the ground by pulling guard but can't manage it.
And thats the end of the round the fighters go back to their corners.
That was a close second round but I would say that Kenichi Atoshi will probably get the nod.
That's time! Back to the action! This is the final round!

Atoshi darts in and clinches Yamamoto up against the cage.
Yamamoto is pressed up against the cage. Atoshi has hold of a leg and is looking to drag Yamamoto down to the mat. Yamamoto avoids the attempt though and has circled away. We're back to striking at a distance.
Atoshi tries to clinch but is not successful on this occasion.
Yamamoto darts in and lands a nice takedown into half guard.
Yamamoto is looking for a kimura here.
Yamamoto is trying to control. Atoshi wants to improve his position but can't escape this time.
Yamamoto is trying to work for a kimura. This could be trouble! No, Atoshi has managed to free his arm - good work.
Yamamoto seems to be looking for submissions.
The fighters are pressed up against the cage, both looking to find a bit of space to work.
Yamamoto takes a big intake of breath there - he's definitely tired.
That's one minute gone in the round.
Yamamoto is working for a submission of some sort.
Yamamoto is trying to work for a kimura but Atoshi is defending well.
Atoshi is pressing down on Yamamoto's left leg trying to get back to full guard. He's managed it.
Atoshi is trying to control the position from the bottom.
That's two minutes gone in the round.
Atoshi pushes Yamamoto off and gets back to his feet.
Atoshi tries to clinch up but Yamamoto circles away and keeps his distance.
Atoshi misses with a half-hearted attempt at a head kick.
Atoshi fails with a takedown attempt.
Atoshi fails miserably with a takedown attempt.
That's three failed takedown attempts in the round for Kenichi Atoshi. That's going to take a lot out of him.
Yamamoto shoots in and gets a takedown into Atoshi's guard.
Atoshi wants to stand and escape but Yamamoto is having none of it.
That's three minutes gone in the round.
Yamamoto drops back for a leg! It's a sloppy attempt though and Yamamoto jumps back into guard quickly, to retain the dominant position.
Yamamoto trying to pass the guard but can't manage it just yet.
Yamamoto trying to control the position from guard on top but Atoshi is wriggling around, looking for whatever he can.
Yamamoto looking to pass the guard.
Yamamoto is persisting with the attempt to improve his position.
Atoshi is working from a closed guard but he's struggling to control his opponent.
Atoshi throws a couple of shots from the bottom but they don't land.
That's four minutes gone in the round.
Atoshi looking to control.
Atoshi throwing strikes off his back to little effect.
Yamamoto trying to control but Atoshi is working from the bottom.

It looks like we're going to have a standup here. Neither fighter is doing enough on the ground.
Atoshi throws a push kick but Yamamoto slaps the foot to one side.
Yamamoto lands a high kick!
Yamamoto shoots in for a takedown. "Ole!" shouts Atoshi as he jumps to the side.
Atoshi looks to score with a jab to the body but Yamamoto is just out of range.
Norifumi Yamamoto has stepped it up - he knows he needs a finish here!
The crowd applaud the fighters efforts here as the round comes to an end.
Atoshi shoots in and scores a nice double leg takedown into half guard.
Kenichi Atoshi is fighting for a decision here - he's started to take the cautious approach.
Atoshi stalling.
And that's the end of the fight!
I would just about give that final round to Norifumi Yamamoto.
I think Atoshi has won this one but let's see what the judges have to say. Over to the ring announcer for the scorecards.
Ladies and gentlemen, after 3 rounds of action, we go to the scorecards for a decision.
Judge Yuuki Gou scores the fight 30:28
Judge Tatsuya Matsuyama scores the fight 30:28
Judge Yasuomi Hirokawa scores the fight 29:29
In favor of your winner, by majority decision... Kenichi Atoshi!
A very excited looking Kenichi Atoshi made sure he remembered to thank all the fans both in the arena and on the internet. He said all the coolest people spend all day on MMA websites, which got a big reaction.
|
|
|
|
|
|
|
|
|
|
|
|
|
|
|
|
|
|
|
|
|
|
|
| S |
C
A |
G |
S |
C
B |
G |
|
S |
C |
G |
|
energy
A | B |
|
hype
A | B |
|
pop
A | B |
|
mgr
A | B |
|
FIGHT
RATING
57% |
|
|
|
|
|
|
