|
|
PBP Commentary |
Coming up we have a middleweight MMA rules bout between Bon Kenneth Fitzgibbon (ranked 0 p4p, 0 weight class) and Paul Ooka (ranked 0 p4p, 0 weight class). Over to our ring announcer for the fighter introductions!
 |
|
 |
| 179 cm
28
189 lbs
16 - 13 - 0 |
|
180 cm
29
202 lbs
11 - 13 - 0 |
Good wrestling
World class boxer
Very strong |
|
Good wrestler
Excellent boxer
Good gas tank |
|
| |
|
Ladies and gentlemen. This fight is 3 rounds, in the middleweight division.
Introducing the fighter to my left, fighting out of the red corner.
With a record of
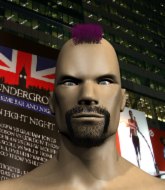
16 - 13 - 0, fighting out of Montreal, Bon Kenneth Fitzgibbon!
And introducing the fighter to my right, fighting out of the blue corner.
With a record of
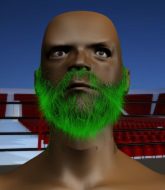
11 - 13 - 0, fighting out of Montreal, Paul Ooka!
The judges for this bout are Robert Douchet, Trevor Gratis and Alec Ball.

The bell rings for round one and we are underway!
Fitzgibbon lands with a hook. Ooka tried to avoid it but it clipped the top of his head.
Some wild striking there from Ooka.
Fitzgibbon throws out a loose jab but Ooka uses good head movement to avoid it.
Fitzgibbon throws a shot to the body.
Fitzgibbon throws a hook to the body but it doesn't connect.
Fitzgibbon ducks under a wild hook from Ooka.
Fitzgibbon misses with a jab, cross combination.
Ooka scores with a jab to the jaw.
A big right from Fitzgibbon misses.
Ooka fakes with the hands and throws a leg kick but Fitzgibbon is out of range.
A leg kick checked by Fitzgibbon.
Ooka thows a body shot but no joy.
Bon Kenneth Fitzgibbon seems to be the more aggressive standup fighter in this bout.
Fitzgibbon scores with a nice head shot.
Ooka shoots in for a takedown but doesn't get it.
Fitzgibbon swings and misses with a hook to the body.
Fitzgibbon misses with a jab and misses with a cross straight after too.
Ooka connects with a body shot that sends Fitzgibbon's belly button to the back.

That's one minute gone in the round.
Fitzgibbon lands with a cross to side of his opponent's head.
Ooka on the wrong end of a decent looking cross there.

Ooka closes the distance and pushes Fitzgibbon back into the cage.
Ooka is looking for a takedown.
Fitzgibbon wants to push off and get back to the center of the mat but Ooka has him pressed against the cage.
Fitzgibbon blocks an elbow strike from Ooka.
Fitzgibbon looks like he'd prefer to be striking at range right now.
Fitzgibbon wants to break free. God knows he wants to breaaaak freeee.
Fitzgibbon throws a punch but it's blocked by Ooka.
Ooka is working on a leg, looking for a takedown but Fitzgibbon is defending well.
Bon Kenneth Fitzgibbon has stuffed three takedown attempts in the round now. That's going to take a lot out of Paul Ooka.
Ooka tries to land a shot to the body but it's blocked.
Ooka has hold of a leg and is looking for a trip takedown. Fitzgibbon avoids it nicely though and we remain in the clinch.
Fitzgibbon is trying to break the clinch but Ooka is controlling him.
Fitzgibbon is trying to break the clinch but Ooka is controlling him.
Ooka drops down looking for an ankle pick but Fitzgibbon pulls his leg out and moves away.

That's two minutes gone in the round.
Fitzgibbon misses with a two punch combination.
Fitzgibbon lands a slapping body shot.
Ooka throws a sloppy head kick and Fitzgibbon moves out of range easily.
Fitzgibbon throws a jab to the body, straight down the pipe. Boom. That sent Ooka stumbling backwards but he manages to regain his composure quickly.
Fantastic stuff here - a very entertaining period of action, which has drawn cheers from the crowd.
Sloppy strikes from Fitzgibbon. Those never looked like landing.
Ooka misses with an attempted mid kick.
Fitzgibbon blocks a head kick by Ooka.
Ooka misses with a double jab.
Fitzgibbon swings for the body but Ooka moves out of range.
Ooka moves into the clinch.
Ooka has had enough of the clinch but Fitzgibbon keeps him there for the moment.
A body shot lands from Fitzgibbon.
Fitzgibbon gets underhooks to prevent Ooka's takedown attempt.

That's three minutes gone in the round.
Fitzgibbon can't find room to land a body shot as Ooka controls the action.
Fitzgibbon is trying to break the clinch but Ooka has him pressed against the cage.
Ooka prevents a takedown attempt there.
Fitzgibbon wants to break free but Ooka has control.
Fitzgibbon taking a break, stalling in the clinch.
Fitzgibbon is trying to push Ooka away but Ooka has him pressed against the cage, so he's going nowhere.
Ooka is working on a leg, looking for a takedown but Fitzgibbon is defending well.
The fighters are pressed against the cage, as the pace of the fight slows.
Ooka has a body lock and is looking for a takedown. Fitzgibbon is bouncing around trying to prevent the takedown and somehow he has indeed managed to stay on his feet.

Fitzgibbon lands a takedown into guard.
It looks like the ref is thinking about a standup.
Fitzgibbon looking to pass the guard.

That's four minutes gone in the round.
Fitzgibbon is just sitting in guard, looking to avoid any submissions.
Fitzgibbon keeps in close for a moment and lands a decent shot to the side of Ooka's head.

Ooka has his foot on Fitzgibbon's thigh. He's trying to push off and get in position for a triangle, I think. Fitzgibbon works his way back into a safe position though.
Fitzgibbon pressing down on his opponent's thigh, looking to pass guard. Ooka is keeping the position for now.
The crowd cheering loudly, showing their appreciation for the quality fight we're seeing here.
Ooka working from the bottom, still in full guard. He's managed to get a loose triangle. Fitzgibbon doesn't seem to be doing much to defend here, obviously he feels comfortable in the position. Fitzgibbon manages to throw the legs off his shoulder and he's back into guard - no problem.
Fitzgibbon postures up.
As the round comes to an end the crowd are showing their appreciation for a great round of action.
Ooka has an active guard here but Fitzgibbon has managed to pass into half guard.
And thats the end of the round the fighters go back to their corners.
Bon Kenneth Fitzgibbon dominated that round.
OK. That's time! The bell goes and we're back to the action.

Fitzgibbon takes a kick to the side of the head.
Fitzgibbon moves into range and throws a lovely three punch combination.
Ooka throws a wild combination but nothing lands.
Fitzgibbon scores with a big left there. The judges will like that one.
Ooka shoots and misses
and Fitzgibbon counters with a three punch combination, finished off with a leg kick. Nice work.

It looks like Paul Ooka has been cut.
Ooka uses decent footwork to sidestep a right hand from Fitzgibbon.
Ooka throws an uppercut from half a mile away. Fitzgibbon sees it coming and avoids it easily.
Fitzgibbon shoots in for a takedown. "I don't think so" says Ooka as he avoids it easily.
Ooka throws a monster uppercut resembling something out of street fighter but it doesn't land.
Ooka throws a two punch combo that lands nicely.
This has been an exciting period of action!
Fitzgibbon steps to the side to avoid the strikes from Ooka.

Fitzgibbon moves into range and clinches up with Ooka.
The fighters are starting to get sweaty, which will make takedowns a bit more tricky.
Ooka misses with a shot to the kidneys.
That's one minute gone in the round.
Fitzgibbon has had enough of the clinch but Ooka keeps him there for the moment.
Ooka drops to a knee looking for a takedown but Fitzgibbon gets the underhooks and prevents it.
A frustrated look appears on Fitzgibbon's face as he tries to break the clinch.
Ooka changes levels and goes for a takedown here. Fitzgibbon fights it off and pushes away nicely.
Bon Kenneth Fitzgibbon has stuffed three takedown attempts in the round now. That's going to take a lot out of Paul Ooka.
Fitzgibbon throws a combination but comes up with nothing but fresh air.
Ooka takes a shot right to the liver - Bas would have been proud of that punch.
Fitzgibbon changes levels and scores with a jab to the body.
Ooka misses with a two punch combination.
No joy there for Ooka, who threw a few shots but didn't land.
Fitzgibbon throws an off balance right hand
and Ooka counters with a nice jab to the body that keeps Fitzgibbon thinking.
Nice shot by Fitzgibbon.
That's two minutes gone in the round.
Fitzgibbon shoots in but Ooka avoids the takedown attempt easily.
Ooka misses with a half-hearted attempt at a head kick.
Fitzgibbon bobs and weaves well there to avoid the strikes.
Ooka ducks under a wild hook from Fitzgibbon.
Fitzgibbon looks to land a combination but Ooka avoids it well.
Bon Kenneth Fitzgibbon is winning the standup battle so far.
Fitzgibbon throws a predictable looking body shot
and Ooka counters with a lovely shot to the body.
Ooka pulls out of a head kick attempt.
Fitzgibbon scores with a crisp jab that stopped Ooka in his tracks.
Fantastic stuff here - a very entertaining period of action, which has drawn cheers from the crowd.
Fitzgibbon swinging wildly here.
Fitzgibbon throws a right hand that Ooka ducks under and follows up with a left that Ooka also avoids with ease.
Ooka shoots in for a takedown but Fitzgibbon shows good takedown defense.
Ooka misses with a wild body shot.
That's three minutes gone in the round.
Ooka shoots in but Fitzgibbon avoids the takedown attempt easily.
Ooka is breathing heavily.
Ooka takes a shot to the eye socket. That's gotta hurt.
Ooka loads up on a big right hand but Fitzgibbon slips the punch.
Fitzgibbon misses with a telegraphed body shot
and Ooka counters with a straight right hand.
Ooka clinches with his opponent.
Fitzgibbon tries to break free but Ooka pushes him back against the cage.
Ooka is looking to control Fitzgibbon's arms but Fitzgibbon gets an underhook and turns him. Now Ooka has his back to the cage.
Fitzgibbon wants to break free. God knows he wants to breaaaak freeee.
Fitzgibbon is trying to force a seperation but Ooka has the dominant position.
Ooka is looking for a takedown up against the cage. Fitzgibbon gets underhooks though and prevents the takedown attempt.
Ooka keeps the fight in the clinch, despite Fitzgibbon's efforts to push away.
Ooka wants to take the fight to the mat but Fitzgibbon manages to get underhooks and keep the fight in the clinch.
That's four minutes gone in the round.

Fitzgibbon breaks from the clinch.
Ooka scores with a reasonable looking shot to the body. Fitzgibbon doesn't seem bothered though.
Fitzgibbon checks a leg kick.
Some wild striking there from Fitzgibbon.
Fitzgibbon jabs Ooka to the body, keeping him at a distance.
The crowd cheering loudly, showing their appreciation for the quality fight we're seeing here.
Ooka drops his hands and takes a jab to the jaw for his troubles.
Ooka throws a shot from downtown. Fitzgibbon moves away and avoids it.
Fitzgibbon throws a nice hook to the body that draws an oooh from the crowd.
Ooka with poor footwork there. He got himself in a bit of a tangle, enabling Fitzgibbon to score with a decent uppercut.
Ooka drives through and clinches with Fitzgibbon against the cage.
The crowd are going absolutely nuts as the round comes to an end - what a fantastic round of action!
Fitzgibbon has Ooka pressed up against the cage. He's trying to work for a single leg takedown. Fitzgibbon pulls back from the cage and twists to the side, sending Ooka tumbling to the mat - Fitzgibbon dives into Ooka's guard.
Ooka working for a triangle but Fitzgibbon defends it easily.
And thats the end of the round the fighters go back to their corners.
Bon Kenneth Fitzgibbon dominated that second round.
The cut man is working on Paul Ooka's cut.
The minute break is over - no more time for sponges and pep talks - back to the action! This is the final round!

Fitzgibbon works Ooka's body with a nice hook.
Fitzgibbon throws a monster uppercut resembling something out of street fighter but it doesn't land.
Fitzgibbon just misses with a punch to the body.
Fitzgibbon lands with a good body shot.
Fitzgibbon looks to score with a jab to the body but Ooka is just out of range.
Fitzgibbon lands a jab to Ooka's midsection.
Ooka misses the jab.
Fitzgibbon throws a hard body shot but it just misses.
Fitzgibbon swings for the body but Ooka moves out of range.

Fitzgibbon gets caught on his heels momentarily as he allows Ooka to score an easy takedown into full guard.
Fitzgibbon avoiding any damage from the ground and pound.
That's one minute gone in the round.
There's a bit of a scramble here and now Fitzgibbon is on top in guard.
Ooka had isolated an arm as going for a kimura. Fitzgibbon defends it easily.
Ooka is looking for a triangle but Fitzgibbon pushes his legs off easily.
Ooka takes a big intake of breath there - he's definitely tired.
Ooka has a loose triangle. He'll be looking to tighten that up but Fitzgibbon can see exactly what he's planning and manages to posture up and free himself.
Fitzgibbon stands and throws Ooka's legs to the side, diving into side control.
Paul Ooka has stepped it up - he knows he needs a finish here!
That's two minutes gone in the round.
Ooka struggling a bit here.

Fitzgibbon working hard here to secure a kimura but he's not really in the right position for it.
Ooka is sneaking out the side here. He's bucked Fitzgibbon off and has taken his back!
Ooka doesn't have the hooks in and Fitzgibbon manages to turn into his guard.
Fitzgibbon passes Ooka's right leg, so he's now in half guard.
That's three minutes gone in the round.
Fitzgibbon trying to pass the guard but Ooka defending well.
Ooka gets full guard.
Ooka bucks up whilst keeping hold of a body lock, managing to reverse the position. Now he's in top in Fitzgibbon's guard.
Fitzgibbon is working an open guard here, looking to improve his position. No doubt that will leave him open to counters but at least he's being more offensive.
Fitzgibbon escapes his hips to the side and looks to be working for an armbar. Ooka gives him a little smile and shakes his head. No chance.
Ooka wants to pass the guard but Fitzgibbon is keeping the position.
That's four minutes gone in the round.
Fitzgibbon is trying to control the position but Ooka postures up.
Ooka passes into half guard.
Ooka is trying to work for a kimura but Fitzgibbon is defending well.
Fitzgibbon gets full guard.
And that's the end of the fight!
That was a close round. You could make an argument for either fighter but I would give it to Bon Kenneth Fitzgibbon.
Well Fitzgibbon has outscored his opponent in every aspect of the fight today. Only a scarily incompetent judge or two will keep him from a well deserved win... Over to the ring announcer for the scorecards.
Ladies and gentlemen, after 3 rounds of action, we go to the scorecards for a decision.
Judge Robert Douchet scores the fight 30:28
Judge Trevor Gratis scores the fight 29:28
Judge Alec Ball scores the fight 30:27
In favor of your winner, by unanimous decision... Bon Kenneth Fitzgibbon!
A victorious Bon Kenneth Fitzgibbon thanked his army of followers in his post fight interview, telling people to make sure they follow him on Twitter.
|
|
|
|
|
|
|
|
|
|
|
|
|
|
|
|
|
|
|
|
|
|
|
| S |
C
A |
G |
S |
C
B |
G |
|
S |
C |
G |
|
energy
A | B |
|
hype
A | B |
|
pop
A | B |
|
mgr
A | B |
|
FIGHT
RATING
71% |
|
|
|
|
|
|
