|
|
PBP Commentary |
Coming up we have a featherweight MMA rules bout between Faulton Hardstaff (ranked 0 p4p, 0 weight class) and Mack Smashface (ranked 0 p4p, 0 weight class). Well, I have no idea who's going to take this one!
 |
|
 |
| 168 cm
18
145 lbs
1 - 3 - 0 |
|
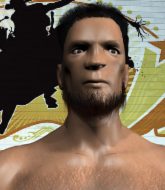
175 cm
20
155 lbs
0 - 0 - 0 |
BJJ Blue Belt
Brawler
Good chin |
|
Good wrestler
Counter striker
Solid chin |
|
| |
|
Ladies and gentlemen. This fight is 3 rounds, in the featherweight division.
Introducing the fighter to my left, fighting out of the red corner.
With a record of
1 - 3 - 0, fighting out of Las Vegas, Faulton Hardstaff!
And introducing the fighter to my right, fighting out of the blue corner.
With a record of
0 - 0 - 0, fighting out of Las Vegas, Mack Smashface!
The judges for this bout are Stewart Dunkirk, Cecil Peabody and Frank Dennis.

The bell rings for round one and we are underway!
Hardstaff feints with a shoulder and throws a nice leg kick to Smashface's calf.
Hardstaff shoots in for a takedown but Smashface shows good takedown defense.

Hardstaff shoots in for a takedown! He's got it and he's managed to land in full mount! That's better than Hardstaff was expecting from the takedown attempt, I'm sure!
Smashface is working to get back to half guard.
Smashface sneaks a leg under to get to half guard.
Hardstaff is breathing heavily.
Smashface is pressing down on Hardstaff's left leg trying to get back to full guard. He's managed it.
Smashface lands a couple of shots from the bottom.
Hardstaff preventing the sweep.
Smashface is working the butterfly guard. He manages to land a nice scissor sweep and is now in half guard on the top. Nice move.
Smashface winds up and cracks Hardstaff with a swinging punch to the side of the head.
Smashface seems to be taking a bit of a break to think of his next move. He lands a short punch in the meantime.
Nice strikes from Smashface there.
The ref warns both fighters not to hold the cage as they work up against the meshing.
Smashface takes advantage of the dominant position to land a couple of big hammer fists.
Smashface looks towards his corner to check for any instructions. The corner give him nothing to work with, so he cracks Hardstaff with a short hammerfist. I guess that's as good as any advice he could get in this position.

That's one minute gone in the round.
Smashface lands strikes from half guard.
Smashface wants to pass to mount but Hardstaff is defending the position.
Smashface lands with an elbow from half guard - that looked like it hurt.
Smashface wants to pass the guard but Hardstaff is defending well.
Smashface working the head and body with strikes.
Smashface lands with a punch from half guard.
Smashface wants to free his trapped foot but Hardstaff is holding on for dear life with his legs.
Smashface looks towards his corner to check for any instructions. The corner give him nothing to work with, so he cracks Hardstaff with a short hammerfist. I guess that's as good as any advice he could get in this position.

It looks like we're going to have a standup here. Neither fight is doing enough on the ground.
Smashface blocks the body kick.
Hardstaff will have to do better than that with his takedown attempts.
Hardstaff rushes forward with a series of wild hooks but Smashface moves out of range and avoids them all easily.

That's two minutes gone in the round.
My god... these two guys really need to pick up the pace or everyone will leave to go get a beer.
Excellent takedown into side control there by Smashface.
Smashface working the ground and pound.
Smashface working the ground and pound from side control.
Smashface lands a knee to the body and a forearm to the face.
Hardstaff takes a couple of big shots there - the referee warns him that he has to defend himself better.
Smashface lands a knee to the body and follows it up with some ground and pound to the head. That will wear Hardstaff down.
Smashface creates a bit of distance and throws down some hard shots.
The fighters are starting to perspire pretty heavily.
Smashface cracks Hardstaff with a big elbow.
Hardstaff is looking to reverse the position.
Smashface lands a knee to the body and follows it up with some ground and pound to the head. That will wear Hardstaff down.
Smashface cracks Hardstaff with a big right hand but Hardstaff just smiles back at him and invites him to have another go.
You can see the frustration on Hardstaff's face, being in this tough position on the bottom.
Smashface creates a bit of distance and throws down some hard shots.
Smashface scores with punches from side control.
Smashface is chipping away with strikes.
Smashface scoring with punches and elbows.
Smashface scores with a couple of short elbows.
Hardstaff gets back to half guard.
The fighters are pressed up against the cage, both looking to find a bit of space to work.

That's three minutes gone in the round.
Hardstaff works his way to full guard. Good work.
Smashface scoring with punches to the head and body.
Hardstaff wants to sweep here but Smashface controlling him for the moment.
A big thud reverberates around the arena there as Smashface accidentally thumps the mat. Hopefully he's not broken his hand.
Smashface lands a couple of digs.
Hardstaff working the defensive guard well to avoid strikes from Smashface.
Hardstaff avoiding any damage from the ground and pound.
Smashface makes a bit of distance and scores with some ground and pound, still in guard.
Smashface scores with a decent looking elbow strike.
Smashface chips away with some ground and pound.
Smashface is in close to Hardstaff's body, working some short punches and elbows.
Hardstaff is working an open guard here, looking to improve his position. No doubt that will leave him open to counters but at least he's being more offensive.
Smashface keeps in close for a moment and lands a decent shot to the side of Hardstaff's head.
Smashface works over Hardstaff with some ground and pound from guard.
Smashface scoring with punches to the head and body.
Smashface content to strike from guard, landing some decent shots.
Hammerfist, elbow! yells Smashface's corner. There ya go! There ya go!

Hardstaff is rocked!

That's four minutes gone in the round.
Smashface postures up and scores with a shot to the body and a follow up elbow to the head.
Oh Hardstaff is still in real trouble! Will he be able to recover?!!
Smashface must be cautious of submissions here, given that his opponent has the superior Jiu Jitsu.
Smashface postures up and scores with a shot to the body and a follow up elbow to the head.
Smashface with a nice head shot there.
Smashface chips away with some ground and pound.
Smashface working from the guard for now, landing some ground and pound.
Hardstaff seems to have got his legs back now.
Smashface scores with a decent looking elbow strike.
Smashface is in close to Hardstaff's body, working some short punches and elbows.

Hardstaff looking for submissions off his back, moving his hips, looking for an opening.
Hardstaff looking to hit a scissor sweep but Smashface is one step ahead there.
Hardstaff bucks up whilst keeping hold of a body lock, managing to reverse the position. Now he's in top in Smashface's guard.
Hardstaff stopping the sweep attempt from Smashface.
Smashface has a butterfly guard looking to sweep but Hardstaff has passed into side control.
As the round comes to an end the crowd are showing their appreciation for a great round of action.
Hardstaff has knee on belly and moves into mount.
Smashface gets back to half guard.
And thats the end of the round the fighters go back to their corners.
Mack Smashface dominated that round.
That's the end of the interval. I'm sure that seemed a lot quicker than a minute for our two fighters! Back to the action.

Hardstaff misses with a takedown
so Smashface counters with a double leg into guard. Good agility.
Smashface is sitting in guard, working some ground and pound.
Smashface distracts Hardstaff with his right hand and drops a big elbow with his other arm.
Smashface cracks Hardstaff with a solid left hand.
Smashface scoring with punches to the head and body.
Smashface working in close now, lands a nice elbow to the side of Hardstaff's head.
Smashface makes a bit of distance and scores with some ground and pound, still in guard.
Smashface loading up with the ground and pound but he's missing more than he's landing in this flurry.
There's a bit of a scramble here and now Hardstaff is on top in guard.
Smashface tries to strike from the bottom.
Smashface keeping full guard, as Hardstaff tries to pass.
Mack Smashface has got the better of the ground game so far.
Hardstaff stopping the sweep attempt from Smashface.
Both fighters are absolutely exhausted here.
Smashface is striking but Hardstaff is not phased and passes to half guard.
That's one minute gone in the round.

Hardstaff stands, ready to strike. The ref makes him back up and allows Smashface to get to his feet.
Smashface fails with a rather predictable takedown attempt.
Faulton Hardstaff is looking to throw some combinations by the looks of things.
Hardstaff gets his takedown attempt stuffed easily
and Smashface counters with a single leg into guard. Hardstaff didn't expect that.
Smashface lands a couple of decent looking shots.
Smashface postures up and scores with a shot to the body and a follow up elbow to the head.
Smashface trying to pass the guard but can't manage it just yet.
Smashface is sitting in guard, working some ground and pound.
Smashface with a couple of shots to the head there. Not particularly brutal.
Smashface is working the ground and pound from guard. He might want to try advancing position though to get more of an impact.
Smashface landing some decent shots from guard.
Smashface is working Hardstaff over from the guard. He should look to pass the guard and do a little more damage with these strikes.
Hardstaff tries to land a sweep but no joy.
That's two minutes gone in the round.
Hardstaff preventing the ground and pound from doing any damage.
Smashface throwing elbows and punches but not connecting, as Hardstaff works some decent striking defense from the bottom.
Hardstaff preventing the ground and pound from doing any damage.
Hardstaff looking to hit a scissor sweep but Smashface is one step ahead there.
The referee has ruled that neither fighter is active enough on the ground and has stood them back up.
Hardstaff is looking to take this fight into the clinch.
Nice cross by Hardstaff.
We've seen a great period of action over the last minute or so - credit to both fighters for leaving it all in the cage!
Hardstaff scores with a punch to the gut of his opponent.
Hardstaff lands a nice leg kick that just misses Smashface's sensitive parts.
Smashface avoids a punch combination nicely.
Smashface keeps the fight standing with a nice sprawl.
That's three failed takedown attempts in the round for Faulton Hardstaff. That's going to take a lot out of him.
That's three minutes gone in the round.
Smashface gets the takedown into side control.
The strikes coming from Smashface are missing the target in this wave of attacks.
Smashface lands some shots froms side control.
Hardstaff is sneaking out the side here. He's bucked Smashface off and has taken his back!
Hardstaff has the hooks in. Smashface is trying to push off one leg but he has to do so cautiously to avoid being submitted.
Smashface tries to escape the position - he's now mounted. Is that better or worse? Hard to tell!
Smashface is looking to get to half guard.
Smashface is persisting with the attempt to improve his position.
Hardstaff tries to control but Smashface wriggling away.
Smashface tries to reverse the position but Hardstaff maintains control.
Hardstaff wants to control the pace but Smashface is squirming around nicely.
We get told so often about how wrestlers don't like to be on their backs. Let's see if Smashface can do anything to dispel that myth.
Smashface throwing hammer fists to the chest of Hardstaff. What's that going to do exactly?
That's four minutes gone in the round.
Smashface is in all sorts of trouble here.
Smashface sneaks a leg under to get to half guard.
Smashface is looking for a sweep. Hardstaff is wise to his cunning plan and keeps the top position.
Hardstaff working some ground and pound from close in. He's looking to maintain this position and strike for a while by the looks of things... although he'll probably advance to full mount in a minute now I've said that.
Smashface makes his way to full guard. A much better position for Smashface.
Smashface punching to the body, from the bottom.
The crowd applaud the fighters efforts here as the round comes to an end.
Hardstaff stopping the sweep attempt from Smashface.
Smashface throwing strikes off his back to little effect.
Hardstaff pushing down on Smashface's thigh, trying to pass to half guard. He's managed it... Nice work.
And thats the end of the round the fighters go back to their corners.
Mack Smashface showed his class in that round. I'd imagine he'll take it on all the scorecards.
Well, the break between rounds is over. Let's get back to the scrappin! This is the final round!

A decent looking body kick lands there for Hardstaff.
Hardstaff scores with a nice one two combo and darts back out of range to avoid anything coming in the opposite direction.
Hardstaff throws a body kick but he was well out of range there.
Hardstaff scores a trip takedown into side control. Nice.
Smashface taking a bit of punishment here - Hardstaff scoring with strikes.
Smashface is looking to reverse the position.
Hardstaff is looking to take a break and control but Smashface is keeping him honest, looking to work from the bottom.
Smashface manages to get one leg in to regain half guard.
Both fighters are breathing heavily.
Smashface is trying to get back to full guard.
The referee decides to stand the fighters back up.
Smashface misses with a takedown attempt
and Hardstaff counters nicely by changing levels and landing a hook to the body.
Hardstaff throws out a leg kick but Smashface moves out of range and Hardstaff only half commits.
That's one minute gone in the round.
Hardstaff feints and then dives in with a takedown. That was a long way out but the feint bought him enough time to close the distance and complete the takedown. Now we'll play guard for a bit and see who can get the better of that position.
Smashface trying to punch from his back but it's not doing any damage.
Smashface is striking from the bottom but Hardstaff uses the opportunity to pass into half guard.
Hardstaff wants to lay and pray for a moment but Smashface keeps working.
Smashface misses with some strikes from the bottom.
Smashface is refusing to be controlled, as Hardstaff sits in half guard.
Smashface tries to strike from the bottom but it doesn't land.
Smashface is working for an escape here. He's hooked one of Hardstaff's legs and he's managed to sneak out and take Hardstaff's back!
Hardstaff rolls and manages to get back to half guard. Nicely done.
Hardstaff is trying to get back to full guard.
Hardstaff is trying to defend against the ground and pound but Smashface scores with a couple of nice shots.
Smashface landing with strikes to the body and head, softening up his opponent.
Smashface is nestled in close to Hardstaff, controlling him well. He's worked in a nice elbow to the side of the head as well, for good measure.
That's two minutes gone in the round.
Smashface winds up and cracks Hardstaff with a swinging punch to the side of the head.
Smashface is nestled in close to Hardstaff, controlling him well. He's worked in a nice elbow to the side of the head as well, for good measure.
Smashface scoring with strikes to the body and head.
Smashface passes to side control.
Smashface in side control lands a decent elbow.
Hardstaff is not in a great position here, taking some shots.
Hardstaff sneaks back into half guard.
Smashface sitting in half guard, looking to land shots. Hardstaff defending well though.
Smashface looks towards his corner to check for any instructions. The corner give him nothing to work with, so he cracks Hardstaff with a short hammerfist. I guess that's as good as any advice he could get in this position.
Smashface sitting in half guard, looking to land shots. Hardstaff defending well though.
Hardstaff is trying to control but can't.
Smashface winds up and cracks Hardstaff with a swinging punch to the side of the head.
The crowd are loving this. Great action here.
Smashface working the head and body with strikes.
Smashface is keeping good posture, landing some ground and pound.
Smashface moves into full mount! Hardstaff won't be happy about that!
Smashface loads up on a couple of big shots to the head that have Hardstaff scrambling to escape. He can't get free though and several more unanswered shots from Smashface land to the head. The referee has no choice but to stop the fight. Smashface stands and salutes the crowd.
Ladies and gentlemen, after 3:01 of round 3, we have a winner by way of TKO (Strikes). Mack Smashface!
|
|
|
|
|
|
|
|
|
|
|
|
|
|
|
|
|
|
|
|
|
|
|
| S |
C
A |
G |
S |
C
B |
G |
|
S |
C |
G |
|
energy
A | B |
|
hype
A | B |
|
pop
A | B |
|
mgr
A | B |
|
FIGHT
RATING
100% |
|
|
|
|
|
|
