|
|
PBP Commentary |
Coming up we have a middleweight MMA rules bout between Ryan Taylor (ranked 0 p4p, 0 weight class) and Tom White (ranked 0 p4p, 0 weight class). Taylor comes to the cage accompanied by 'The Ripper' by Chinchilla. Both fighters look fresh as a daisy as they make their way towards the cage.
 |
|
 |
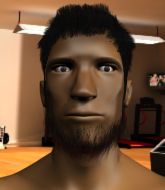
| 190 cm
19
187 lbs
2 - 3 - 0 |
|
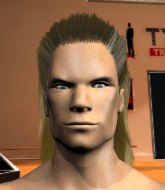
178 cm
18
195 lbs
1 - 0 - 0 |
BJJ Blue Belt
Basic striking
Very strong |
|
BJJ Blue Belt
Brawler
Tends to cut |
|
| |
|
Ladies and gentlemen. This fight is 3 rounds, in the middleweight division.
Introducing the fighter to my left, fighting out of the red corner.
With a record of
2 - 3 - 0, fighting out of London, Ryan Taylor!
And introducing the fighter to my right, fighting out of the blue corner.
With a record of
1 - 0 - 0, fighting out of London, Tom White!
The judges for this bout are Steven Brown, Sam Margolis and Andrew Berry.

The bell rings for round one and we are underway!
White misses with the combination.
No joy there for White, who threw a few shots but didn't land.
Taylor connects with a body shot that sends White's belly button to the back.
Taylor lands a jab followed by a nice looking cross.
White cracks Taylor with a good shot that sees him stumbling back into the cage.

Taylor pushes White up against the cage in a clinch.
White lands with a quick shot inside that doesn't really do much damage.

Taylor breaks the clinch and we're back to striking at distance.
White misses with a jab and misses with a cross straight after too.
Taylor's hands are dropping dangerously low here and White connects clean with a right hook that sends him down to one knee! Taylor scrambles back to his feet.
We've seen a great period of action over the last minute or so - credit to both fighters for going all out!
Taylor shoots for a double leg takedown but White sprawls well. He's pushed Taylor's face into the mat and manages to get back to his feet relatively easily.
Taylor lands a nice shot to the body.

White shoots in and gets a takedown into Taylor's guard.
White postures up and scores with a shot to the body and a follow up elbow to the head.

White drops back for a leg! It's a sloppy attempt though and White jumps back into guard quickly, to retain the dominant position.
White stops Taylor from standing up.

That's one minute gone in the round.

Taylor wriggles free and stands up.
Taylor tries to close the distance and clinch up against the cage but White paws at him with a jab and circles away.
Taylor moves forwards but White connects with a nice, crisp jab.
White fails to land with the punch combination there - jab, cross, hook, miss, miss, miss.
White misses with a left hand
and Taylor counters with an outside leg kick.
Taylor scores to the head and body with a nice combination!
Taylor lands a jab, followed by a cross and another cross, as White backs up against the cage.
Taylor misses with a jab, cross combination.
Taylor misses with a double jab.
Taylor is looking to take this fight into the clinch.
Taylor throws a nice hook to the body that draws an oooh from the crowd.
The fans in attendance giving it up for the two fighters, who have really let it all hang out in the last minute or so!
White throws a jab when Taylor was well out of range.
White tries to shoot in for a takedown. He's got hold of a leg but Taylor swivels and escapes.
White looks gassed!
Taylor throws a head kick that looked like it stung.

It looks like Tom White has been cut.
Taylor moves into the clinch.

That's two minutes gone in the round.
White fails to land with a short punch on the inside.
Taylor breaks the clinch and we return to the middle of the mat.
White throws a leg kick that misses.
White misses with a jab, cross combination.
White throws a leg kick that is checked
and Taylor counters with a crisp hook to the side of the head.
White misses with an uppercut. Taylor saw that one coming.
White misses with a lunging right hand
and Taylor counters with a shot to the ribs. That looked like it hurt.
Taylor lands a nice looking kick to the body. White takes a step back to recover.
Taylor fakes high and shoots in for a takedown but White avoids it really well and circles away.
Taylor lands a leg kick and bounces back out of range.
Tom White seems to be the more aggressive standup fighter in this bout.
White misses with a double jab.
Taylor is looking to clinch but White is avoiding it.
No luck with that takedown attempt from Taylor.
That's three failed takedown attempts in the round for Ryan Taylor. That's going to take a lot out of him.
Taylor moves into the clinch.

That's three minutes gone in the round.
Taylor is trying to break the clinch but White is controlling him.
Taylor is trying to force a seperation but White has the dominant position.
White lands a right hand.
White is looking to break free of the clinch but Taylor has double underhooks.
White tries to stall but Taylor uses the opportunity to gain a better position.

White breaks the clinch.
White takes one to the side of the head.
Taylor closes the distance and lands a one-two.
Taylor stuns White with a nice body shot, before stepping back out of range.

Taylor closes the distance and clinches up, looking for a takedown. He shifts his weight and gets a nice trip into half guard.
Taylor is looking to stand up but he'll have to free his leg first. Instead, White manages to get to full guard.
Taylor tries to stand but White is controlling from the bottom.
White throwing his legs up looking for a triangle.

That's four minutes gone in the round.
The crowd cheering loudly, showing their appreciation for the quality fight we're seeing here.
White preventing the ground and pound from doing any damage.
Taylor stands and steps away. White gets to his feet too and we're back to the striking game.
White tries for a takedown but Taylor sees it coming a mile off and avoids it easily.
Taylor lands with a nice combination. White backs away looking to recover.
Taylor displays some good footwork, moving neatly out of range as White throws out the jab.
Taylor lands a nice looking body kick.
Taylor lands with a head kick! That's gotta hurt.
White misses with a right hand
and Taylor counters with a right hand to the body.
Sloppy strikes from Taylor. Those never looked like landing.
Taylor lands a jab, followed by a cross and another cross, as White backs up against the cage.
The crowd are going absolutely nuts as the round comes to an end - what a fantastic round of action!
A looping hook to the body misses from White. Taylor does a little dance to reset his feet.
Left hook, right uppercut from Taylor.
White avoids the clinch attempt nicely.
White leaves Taylor with his face pressed against the mat as he sprawls beautifully, defending against a solid takedown attempt.
And thats the end of the round the fighters go back to their corners.
Ryan Taylor dominated that round.
The cut man is working on Tom White's cut.
The corners get their ten second warning. Both fighters stand from their stools and stare eachother down, ready to get back to the action.

Taylor moves into range and lands a nice body kick.
Taylor fails with an attempt to clinch.
Taylor lands a straight punch to the body, keeping White at a distance.
White misses with a lunging right hand
and Taylor counters with a good, hard body kick but White shrugs it off.
Ryan Taylor is looking to throw some combinations by the looks of things.
White misses with a jab and misses with a cross straight after too.
Taylor scores with a nice looking left hook and follows it up with an uppercut!
White throws a low kick but it's checked well by Taylor.
Taylor misses with a series of wild punches.
Taylor shoots in looking for a single leg takedown. White is trying to defend but Taylor finishes it well and ends up in half guard. Let's see if he can advance position further.
White is controlling Taylor's position as best he can from this difficult position.
White is breathing heavily.
White is looking to control Taylor's leg but it's slowly edging free. Can White avoid being mounted?
That's one minute gone in the round.
Taylor stands up out of the half guard.
Taylor fails with a takedown attempt from distance.
Taylor is looking to wear down White with body shots, infact he's throwing more body shots than head shots at the moment.
Taylor misses with a takedown attempt - White sprawls well and throws a nice strike on the way out which just misses.
Taylor avoids a lazy jab quite easily.
Taylor lands a nice looking body kick.
Taylor moves into range and throws a lovely three punch combination.
A left and a right from Taylor both land. Nice combination.
Wow, both these guys are really going for it!
Taylor throws a combination but comes up with nothing but fresh air.
White cracks Taylor with a right hand to the side of the head.
White misses with a hook. Taylor ducked under it nicely.
Taylor uses decent footwork to sidestep a right hand from White.
White looks to score with a combo but nothing lands.
Fantastic stuff here - a very entertaining period of action, which has drawn cheers from the crowd.
White looks to land a right hand but Taylor moved out of range.
That's two minutes gone in the round.
A nice combination there by Taylor.
White misses with a left hand
and Taylor makes him pay by landing a nice hook to the body before moving out of range.
White swats away the attempt to clinch by Taylor.
Taylor throws a head kick that looked like it stung.
Taylor displaying good standup as he scores with a three punch combination.
Taylor's corner calls for a 1, 2 combination and Taylor duly obliges.

White is rocked!
Taylor tries to clinch there but White circles away.
Taylor works White's body with a nice hook.
Taylor moves away from the strike by White.
White misses with an uppercut.
Jab, cross, leg kick. Nice combination by Taylor!
Taylor moves into range and throws a lovely three punch combination.
White is still on wobbly legs! Can Taylor finish him?
Taylor lands with a shot to the body.
White misses with a hook to the body
and Taylor moves into the clinch.
White seems to have recovered his senses.
Taylor is trying to force a seperation but White has the dominant position.
Taylor trying to control the position but instead, White has worked for underhooks and has pushed Taylor into the cage.
That's three minutes gone in the round.
White misses with a hook from the clinch.
White has picked Taylor up - he's going for a ride! White dumps his opponent to the mat with a thud and settles into half guard.
White seems very keen to just sit and control from half guard but Taylor does not like that idea so much and is remaining active off his back.
White tries to pass to full mount but Taylor defends it.
Taylor tries to kick White off but White keeps his base steady and stays in half guard.
White wants to control but Taylor is keeping him busy.
White is in a good position here but he's just trying to control... And he's not even managing to do that successfully.

The ref calls for a clean break and stands the fighters back up. Tom White wasn't active enough on the ground.
Taylor lands a beauty of a right hand that gets the crowd cheering.
A jab from White misses.
A really sloppy takedown attempt there from Taylor.
That's three failed takedown attempts in the round for Ryan Taylor. That's going to take a lot out of him.
That's four minutes gone in the round.
White uses good footwork to get in and out and land a nice right hand before Taylor has time to react.
Taylor shoots in looking for a takedown but White manages to keep the fight standing, pushing Taylor's face into the canvas for good measure before circling away.
White misses with an uppercut.
White throws a wild combination but nothing lands.
The crowd are loving this. Great action here.
Taylor moves into the clinch.
A right hook to the body lands for Taylor.
Taylor blocks a couple of punches on the inside.
Taylor wants to strike at distance but he can't break free of the clinch.
An uppercut on the inside fails to land for White.
An uppercut to the body lands inside from Taylor.
Taylor manages to break the clinch.
The crowd are going absolutely nuts as the round comes to an end - what a fantastic round of action!
Taylor misses with a few strikes there.
Taylor wants to clinch.
White shoots in with a takedown attempt and he has Taylor pinned against the cage. Taylor gets the underhooks and manages to circle away.
And thats the end of the round the fighters go back to their corners.
Ryan Taylor dominated that second round.
The cut man is working on Tom White's cut.
Well, the break between rounds is over. Let's get back to the scrappin! This is the final round!

Taylor clinches up against the cage.
A left hand lands to the body for Taylor.
Taylor can't break the clinch.
White pushes off and fires off an elbow that misses, before clinching up again, against the cage.
Taylor has had enough of the clinch but White keeps him there for the moment.
Taylor blocks a body shot from White.
White wants to strike at distance but he can't break free of the clinch.
White misses with some punches.
Taylor tried to land a shot to the body but connects with White's elbow.
Taylor is trying to slow down the pace of the fight but White is keeping busy.
White avoiding damage.
Taylor's corner calls for him to break the clinch, which he does.
Taylor lands with a two punch combination before moving back out of range.
A telegraphed right hand from White misses the target.
That's one minute gone in the round.
White swings widly with a right hand
and Taylor counters with a left and a right that stings White.
White takes a swing at Taylor's ribcage but misses.
White takes a big intake of breath there - he's definitely tired.
The fighters circling - White throws out the jab but it was never going to land.
Taylor lands a two punch combo.
Taylor tries to clinch up against the cage, rushing in the close the distance. White manages to break the clinch and circles back to the middle of the mat.
Taylor shoots in looking for a double leg takedown. White defends it nicely.
Ryan Taylor is winning the standup battle so far.
White has his head slapped from side to side by a 3 punch combination. That must have hurt him.
White throws a leg kick that is checked
and Taylor counters with a left and a right that stings White.
White attempts a low kick but it misses it's target.
White avoids a punch combination nicely.
White looks to score with a combo but nothing lands.
Left hook, right uppercut from Taylor.
White misses with a left hand
and Taylor counters with a series of strikes. White will be more careful next time no doubt.
That's two minutes gone in the round.
The crowd cheering loudly, showing their appreciation for the quality fight we're seeing here.
White jabbing away but nothing is landing.
White throws a jab when Taylor was well out of range.
Taylor uses good head movement to avoid the hook from White.
Taylor lands a jab. Then a cross. Then finally a nice hook to the body. Good work there by Taylor.
Taylor misses with a wild combination.
Taylor is looking to take this fight into the clinch.
White throws a body kick, spinning off balance
and Taylor counters with a two punch combo.
Taylor throws the kick towards the body but White avoids it.
Taylor lets the fists fly and connects with a left straight followed by a right hook.
White throws a poor cross that misses
and Taylor counters with a left right combination that sends White crashing to the mat - Taylor wastes no time in diving on top of him and pounding White out for a TKO! Devastating finish!
Ladies and gentlemen, after 2:43 of round 3, we have a winner by way of TKO (Strikes). Ryan Taylor!
Ryan Taylor really struggled to get his t-shirt on before his hand was raised. Making sure that Broken Halo Pride Nutrition logo gets some air time is pretty tricky when you're all sweaty.
|
|
|
|
|
|
|
|
|
|
|
|
|
|
|
|
|
|
|
|
|
|
|
| S |
C
A |
G |
S |
C
B |
G |
|
S |
C |
G |
|
energy
A | B |
|
hype
A | B |
|
pop
A | B |
|
mgr
A | B |
|
FIGHT
RATING
100% |
|
|
|
|
|
|
