|
|
PBP Commentary |
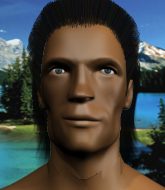
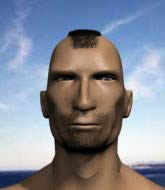
Coming up we have a welterweight MMA rules bout between Tony Jaa (ranked 0 p4p, 0 weight class) and Harry Mcalister (ranked 0 p4p, 0 weight class). Over to our ring announcer for the fighter introductions!
 |
|
 |
| 175 cm
25
173 lbs
0 - 0 - 0 |
|
170 cm
25
175 lbs
0 - 1 - 0 |
BJJ White Belt
Excellent MT
Prefers standup |
|
BJJ White Belt
Dangerous knees
Heavy handed |
|
| |
|
Ladies and gentlemen. This fight is 3 rounds, in the welterweight division.
Introducing the fighter to my left, fighting out of the red corner.
With a record of
0 - 0 - 0, fighting out of London, Tony Jaa!
And introducing the fighter to my right, fighting out of the blue corner.
With a record of
0 - 1 - 0, fighting out of London, Harry Mcalister!
The judges for this bout are Daniel Bishop, Donald Grub and James Atkins.

The bell rings for round one and we are underway!
Jaa jabs Mcalister right on the nose. Mcalister blinks but takes it well.
Mcalister shoots in for a takedown but doesn't get it.

Jaa has Mcalister up against the cage in a clinch.

Jaa pushes off and circles away, back to the middle of the mat.
Mcalister throws a sloppy head kick and Jaa moves out of range easily.

Mcalister shoots in with a lovely double leg takedown. Jaa manages to land in full guard to minimise the damage.
Jaa is looking to get back to his feet but can't, whilst Mcalister is controlling him.
Mcalister trying to control but Jaa is working from the bottom.
Jaa is looking to stand up but Mcalister isn't so interested in that idea.

That's one minute gone in the round.
Jaa utilising some decent striking defenses from the guard, preventing the ground and pound.
Mcalister tries to free his leg and advance position but Jaa is retaining full guard.
Mcalister is persisting with the attempt to improve his position.

It looks like we're going to have a standup here. Neither fighter is doing enough on the ground.
Mcalister lunges in with swinging rights and lefts but Jaa circles away quickly and effectively.
Jaa stuffs the takedown.
Jaa tries to close the distance and clinch but Mcalister swats him to one side with an open hand palm strike and circles away.

That's two minutes gone in the round.
Jaa pushes Mcalister away with a front kick.
Mcalister keeps the fight on the outside.
Mcalister is looking to clinch but Jaa is avoiding it.
Jaa stuffs the takedown attempt from Mcalister. Mcalister gets slowly back to his feet.
Tony Jaa has stuffed three takedown attempts in the round now. That's going to take a lot out of Harry Mcalister.
Mcalister throws a nice looking combination but Jaa bobs and weaves to avoid any damage.
Jaa moves in looking to clinch but Mcalister pushes him off.
Jaa scores with a head kick. Mcalister tried to block it but didn't get his arm up in time.
Jaa fakes with an overhand right and moves in to clinch with Mcalister, pushing him back against the cage.
Mcalister wants to break the clinch but can't.
Jaa wants to break the clinch but can't.
Nice body punch from Jaa - that landed with a thud.
Mcalister drops down looking for an ankle pick but Jaa pulls his leg out and moves away.
This is a great period of action - very entertaining stuff!
Jaa scores with a nice looking left hook and follows it up with an uppercut!

That's three minutes gone in the round.
Jaa's corner calls for a 1, 2 combination and Jaa duly obliges.
Jaa scores with a reasonable looking shot to the body. Mcalister doesn't seem bothered though.
Jaa dips down and scores with a jab to the body.
Jaa feints and then cracks Mcalister's leading leg with a nice low kick. He's obviously looking to slow Mcalister down.
Mcalister misses with an attempted mid kick.
Mcalister fails to land with the punch combination there - jab, cross, hook, miss, miss, miss.
Mcalister takes an uppercut right on the jaw but it doesn't phase him.
A good leg kick by Jaa.
Jaa scores with a kick to the body.
Mcalister takes one to the chin there.
Mcalister tries to grapple but his opponent circles
and Jaa counters with a body kick that brings a smile to the face of both fighters.

That's four minutes gone in the round.
Mcalister is on the wrong end of a nice combination from Jaa.
Jaa defends well against a solid takedown attempt from Mcalister.
Mcalister looks gassed!
The fans in attendance giving it up for the two fighters, who have really let it all hang out in the last minute or so!
Mcalister throws a jab, cross combination which is slipped
letting Jaa counter with a right hand.
Jaa instigates a clinch.
Come on Jaa - let's have some action - none of this stalling nonsense.
The crowd are getting pretty annoyed with Jaa for his constant stalling in the clinch and are voicing their displeasure.
A frustrated look appears on Mcalister's face as he tries to break the clinch.
A frustrated look appears on Mcalister's face as he tries to break the clinch.
Jaa tries to break the clinch but Mcalister is controlling the position.
As the round comes to an end the crowd are showing their appreciation for a great round of action.
Jaa holding his opponent close, against the cage.
Both guys are working to get underhooks.
And thats the end of the round the fighters go back to their corners.
Tony Jaa dominated that round.
OK. That's time! The bell goes and we're back to the action.

Jaa drives through and clinches with Mcalister against the cage.
Some stalling of biblical proportions here from Jaa.
A knee to the head by Jaa.
Jaa breaks from the clinch.
Jaa fails in his attempt to clinch.
Mcalister lands the left hand.
The fight stays on the outside here - Jaa looks like he's thinking about clinching though.
Mcalister shoots in for a takedown but doesn't get it.
Mcalister looks to land a combination but Jaa avoids it well.
Mcalister shoots in looking for a takedown but Jaa manages to keep the fight standing, pushing Mcalister's face into the canvas for good measure before circling away.
A nice leg kick lands there from Jaa.
Jaa throws a shot to the body.
Jaa rushes Mcalister and presses him up against the cage.
Jaa lands a nice elbow from the clinch.
That's one minute gone in the round.
Mcalister utilising his Muay Thai to score with a knee to the body.
Jaa lands on the inside with an uppercut.
Jaa is trying to wear down his opponent with knees to the body.
Jaa stalling in the clinch.
Mcalister taking a breather.
Jaa wants to push off and get back to the center of the mat but Mcalister has him pressed against the cage.
Jaa pushes off and circles away, back to the middle of the mat.
The crowd cheers as Mcalister lands an impressive looking overhand right. Jaa doesn't seem phased though.
Mcalister looks for a takedown but Jaa sprawls well.
Tony Jaa has stuffed three takedown attempts in the round now. That's going to take a lot out of Harry Mcalister.
Jaa has closed the distance and engaged Mcalister in a clinch.
That's two minutes gone in the round.
The crowd are loving this. Great action here.
Jaa connects with a knee to the head.
Jaa is trying to break free.
Jaa landing knees to the head.
Come on Jaa - let's have some action - none of this stalling nonsense.
Jaa pushes off and circles away, back to the middle of the mat.
Jaa has taken the fight to the clinch.
Mcalister misses with a knee to the head.
Jaa has had enough of the clinch and is looking to separate.
Mcalister tries to circle away but Jaa has him pinned against the cage.
Jaa's corner calls for him to break the clinch, which he does.
Jaa takes a punch to the jaw and another one to the bread basket.
Jaa tries to clinch but is not successful on this occasion.
A really sloppy takedown attempt there from Mcalister.
That's three minutes gone in the round.
Jaa scores to the head and body with a nice combination!
Jaa scores with a head kick.
Mcalister throws a series of punches but Jaa avoids them all with ease.
Mcalister is breathing heavily.
Nice takedown defense from Jaa. No joy for Mcalister on that attempt.
Harry Mcalister seems to be the more aggressive standup fighter in this bout.
Mcalister looking to land some kicks to the body here.
Mcalister with poor footwork there. He got himself in a bit of a tangle, enabling Jaa to score with a decent uppercut.
Tony Jaa is winning the standup battle so far.
Jaa rushes Mcalister and pushes him back against the cage in a clinch.
Jaa scores with a hook to the body.
Mcalister wants to get back to striking at distance but Jaa won't allow it.
Mcalister is trying to pull guard but Jaa has him pressed against the cage.
Mcalister jumps guard but Jaa turns him against the cage and keeps the fight standing.
Mcalister prevents Jaa from breaking the clinch.
That's four minutes gone in the round.
Jaa breaks the clinch and we return to the middle of the mat.
Jaa wants to clinch up but Mcalister keeps it at a distance.
Jaa drives through and clinches with Mcalister against the cage.
Jaa manages to get underhooks and slows down the pace for a moment.
Mcalister can't get the takedown.
Wooooo! Give it up for these two warriors! They are putting on a show!
Mcalister working hard to break the clinch.
Jaa escapes the clinch and we're back to striking.
Jaa throws a head kick but Mcalister moves out of range.
The crowd are going absolutely nuts as the round comes to an end - what a fantastic round of action!
Mcalister tries to clinch up but Jaa circles away and keeps his distance.
Mcalister is trying hard to land a takedown here. Jaa sprawls well and keeps this one on the feet.
Jaa closes the distance and clinches.
And thats the end of the round the fighters go back to their corners.
Tony Jaa dominated that second round.
That's time! Back to the action! This is the final round!

A kick lands to the mid section there for Jaa.
Jaa scores with a big left there. The judges will like that one.
Jaa tries to close the distance and clinch up against the cage but Mcalister paws at him with a jab and circles away.
Jaa misses with a head kick.
Jaa shuffles to his left behind two crisp jabs. Mcalister eats them both and turns towards Jaa to reposition himself and eats a stinging right hand-left hook combo.
Jaa moves into the clinch successfully.
The referee calls for Jaa to work.
Mcalister taking a breather.
Jaa trying to control the position but instead, Mcalister has worked for underhooks and has pushed Jaa into the cage.
A real battle for position is taking place between these two warriors.
Jaa stalling.
That's one minute gone in the round.
Jaa presses Mcalister against the cage and delivers a mid-strength body shot.
Jaa has had enough of the clinch and is looking to separate.
Mcalister jumps guard but Jaa stands there with Mcalister around his waist. Mcalister gives up and drops back to his feet. We remain in the clinch.
Mcalister is trying to force a seperation but Jaa has the dominant position.

Mcalister breaks from the clinch.
Jaa swings away but doesn't land with a series of punches.
Jaa fakes with an overhand right and moves in to clinch with Mcalister, pushing him back against the cage.
A frustrated look appears on Jaa's face as he tries to break the clinch.
Mcalister tries to pull guard but Jaa forces him back to his feet, against the cage.
Mcalister tries to pull guard but Jaa won't allow it.
Tony Jaa has stuffed three takedown attempts in the round now. That's going to take a lot out of Harry Mcalister.
A battle for position here, against the cage.
Mcalister takes a big intake of breath there - he's definitely tired.
Jaa pushes off and circles away, back to the middle of the mat.
That's two minutes gone in the round.
No luck with that takedown attempt from Mcalister.
Mcalister shoots in for a takedown but Jaa shows good takedown defense.
Jaa clinches up with Mcalister and pushes him back against the cage.
Jaa wants to break free. God knows he wants to breaaaak freeee.
Mcalister tries to score a body lock takedown but Jaa shows good agility there to stay on his feet.
Jaa has Mcalister pressed against the cage, preventing Mcalister from circling away and getting back to striking at range.
Jaa breaks from the clinch.
Jaa lands a nice shot to the body.
Wooooo! Give it up for these two warriors! They are putting on a show!
Jaa drives through and clinches with Mcalister against the cage.
Jaa wants to break free but Mcalister has control.
Mcalister jumps guard but Jaa stands there with Mcalister around his waist. Mcalister gives up and drops back to his feet. We remain in the clinch.
Jaa manages to get underhooks and slows down the pace for a moment.
That's three minutes gone in the round.
Mcalister misses with an elbow strike.
Mcalister fails to pull guard.
Jaa's corner calls for him to break the clinch, which he does.
Jaa lands a body shot.
Jaa lands with a head kick! That's gotta hurt.
Jaa scores with a head kick. Mcalister tried to block it but didn't get his arm up in time.
Mcalister takes a head kick and keeps coming.
Mcalister tries to shoot in for a takedown. He's got hold of a leg but Jaa swivels and escapes.
Jaa pulls out of a head kick attempt.
Jaa has closed the distance and engaged Mcalister in a clinch.
Harry Mcalister has stepped it up - he knows he needs a finish here!
That's four minutes gone in the round.
Mcalister is looking for a takedown.
Mcalister manages to break the clinch.
Mcalister gets his takedown attempt stuffed easily
and Jaa counters with a body kick.
Jaa lands with a two punch combination before moving back out of range.
This has been an exciting period of action!
Jaa lands a head kick. Mcalister smiles back at him and beckons him forward.
A head kick from Jaa lands but Mcalister takes it in his stride.
Jaa avoids the head kick by Mcalister.
Jaa scores with a nice one two combo and darts back out of range to avoid anything coming in the opposite direction.
As the round comes to an end the crowd are showing their appreciation for a great round of action.
Jaa fakes with an overhand right and moves in to clinch with Mcalister, pushing him back against the cage.
Jaa has had enough of the clinch but Mcalister keeps him there for the moment.
Tony Jaa has scored more points in the clinch so far.
Mcalister tries to pull guard but Jaa forces him back to his feet, against the cage.
And that's the end of the fight!
Tony Jaa showed his dominance in that final round.
Well I reckon that's a shut out for Jaa, winning every round. Will the judges agree? They are the ones who matter, even if they are often depressingly incompetent. Over to the ring announcer for the scorecards.
Ladies and gentlemen, after 3 rounds of action, we go to the scorecards for a decision.
Judge Daniel Bishop scores the fight for Tony Jaa!
Judge Donald Grub scores the fight for Tony Jaa!
Judge James Atkins scores the fight for Tony Jaa!
Tony Jaa wins by unanimous decision!
Tony Jaa managed to slip a mention for his sponsors, Punishment Nutrition - All 159Q products now $75, into his post fight interview.
|
|
|
|
|
|
|
|
|
|
|
|
|
|
|
|
|
|
|
|
|
|
|
| S |
C
A |
G |
S |
C
B |
G |
|
S |
C |
G |
|
energy
A | B |
|
hype
A | B |
|
pop
A | B |
|
mgr
A | B |
|
FIGHT
RATING
56% |
|
|
|
|
|
|

