|
|
PBP Commentary |
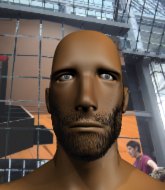
Coming up we have a super heavyweight MMA rules bout between Brandon Bulk (ranked 0 p4p, 0 weight class) and Morula Halo II (ranked 0 p4p, 0 weight class). Both fighters look fresh as a daisy as they make their way towards the cage.
 |
|
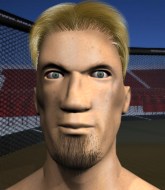 |
| 178 cm
18
145 lbs
1 - 0 - 0 |
|
185 cm
18
184 lbs
0 - 0 - 0 |
BJJ Blue Belt
Counter striker
Cuts easily |
|
BJJ Purple Belt
Brawler
Determined |
|
| |
|
Ladies and gentlemen. This fight is 3 rounds, in the super heavyweight division.
Introducing the fighter to my left, fighting out of the red corner.
With a record of
1 - 0 - 0, fighting out of Los Angeles, Brandon Bulk!
And introducing the fighter to my right, fighting out of the blue corner.
With a record of
0 - 0 - 0, fighting out of Los Angeles, Morula Halo II!
The judges for this bout are Don Winkell, Jack Bonds and .

The bell rings for round one and we are underway!
Halo II tries to clinch up but Bulk circles away and keeps his distance.
Halo II doesn't manage to clinch there - Bulk circles away.
Halo II misses with a takedown
and Bulk makes him pay by landing a nice hook to the body before moving out of range.
Halo II throws a head kick but Bulk moves out of range.
Halo II looks for a takedown here. Will he get it? Bulk is fending him off so far but Halo II persists. Nope, Bulk circles away and we're back to standing.
Halo II closes the distance and clinches up with Bulk, looking for a takedown. Halo II pushes Bulk against the cage but Bulk circles to the side and manages to break the clinch.
Brandon Bulk has stuffed three takedown attempts in the round now. That's going to take a lot out of Morula Halo II.
Bulk feints a straight left to the body, then turns around with a flashy move and hits Halo IIs jaw with a dramatic spinning back fist!
Halo II shoots in but doesn't get the takedown
and Bulk counters with a shot to the ribs. That looked like it hurt.
Bulk staying out of range there.
Halo II misses with a takedown
and Bulk counters with a body kick that stops Halo II in his tracks momentarily.

That's one minute gone in the round.
Halo II shoots in for a takedown but Bulk shows good takedown defense there and keeps this one on the feet.
Bulk scores with a body shot.
Bulk thuds his right hand into Halo II's forehead from close range. That could be painful for both fighters.
Brandon Bulk is looking to keep the fight on the feet at all costs.
Bulk cracks Halo II with an open hand slap.
Halo II throws a head kick that misses and slips in the process. He scrambles back to his feet and the fighters circle.
The crowd cheers as Bulk lands an impressive looking overhand right. Halo II doesn't seem phased though.
Halo II is pinned up against the cage taking some big shots here. The referee is looking closely deciding whether he should stop the fight.
Halo II tries to close the distance and clinch up but Bulk swats him away and circles back towards the center.
Bulk lands a two punch combo.
Bulk throws a good cross that connects.
Halo II tries to land with a swinging hook to the body but Bulk was well out of range. Poor timing from Halo II.

That's two minutes gone in the round.
Halo II tries a head kick but it misses.
A chopping leg kick lands by Bulk.
Halo II misses with a two punch combination.
Bulk misses with a body shot.
Halo II shoots in with a takedown attempt and he has Bulk pinned against the cage. Bulk gets the underhooks and manages to circle away.
No luck with that takedown attempt from Halo II.
Halo II shoots in with a takedown attempt and he has Bulk pinned against the cage. Bulk gets the underhooks and manages to circle away.

That's three minutes gone in the round.
Bulk paws at his opponent with the jab and then lunges in with a straight, right on the button.
Bulk lands a nice shot that snaps Halo II's head back.
Bulk lands a slapping body shot.
Bulk stuffs the takedown attempt from Halo II. Halo II gets slowly back to his feet.
Halo II shoots in but doesn't get the takedown
and Bulk counters with a nice leg kick.
That kick from Bulk tenderised Halo II's leg. Halo II is trying to keep his angry face on.
Halo II on the wrong end of an overhand right that came out of nowhere.

That's four minutes gone in the round.
Bulk lands a nice hook to Halo II's body. Halo II takes it in his stride and looks to land his own strikes.
Bulk throws a series of punches but Halo II avoids them all with ease.
Halo II shoots in for a takedown. "Ole!" shouts Bulk as he jumps to the side.
Bulk throws a shot to the body.
Halo II wants to clinch.
Bulk comes forward and lands a shot to the body, then darts back out of range.
The crowd applaud the fighters efforts here as the round comes to an end.
A kick lands to the mid section there for Bulk.
And thats the end of the round the fighters go back to their corners.
Brandon Bulk dominated that round.
OK. That's time! The bell goes and we're back to the action.

Halo II misses with a takedown attempt
and Bulk counters with a straight punch to the midsection.
Halo II misses with a takedown attempt
and Bulk counters with a quick right hand to the jaw.
Bulk with a body punch. A glancing blow.
Bulk scores with a hook.
Bulk swings and misses with a hook to the body.

Bulk gets caught on his heels momentarily as he allows Halo II to score an easy takedown into full guard.
If this pace continues, the referee will definitely step in and force a standup.
Bulk wants to get back to his feet but Halo II is in a dominant position and won't allow it.
Bulk working a defensive guard here.
That's one minute gone in the round.

Bulk scrambles and gets back to his feet.
Halo II throws a head kick that misses and slips in the process. He scrambles back to his feet and the fighters circle.
Halo II throws a sloppy head kick and Bulk moves out of range easily.
Bulk leaves Halo II with his face pressed against the mat as he sprawls beautifully, defending against a solid takedown attempt.
Brandon Bulk has stuffed three takedown attempts in the round now. That's going to take a lot out of Morula Halo II.
Halo II misses with a few strikes there.
That's two minutes gone in the round.
Nice sprawl there from Bulk as Halo II shoots in.
Well, he's not going to score with shots like that. A lazy body kick attempt from Bulk.
Bulk fakes a head punch and goes low to the body. Nicely done.
Halo II throws a half hearted mid kick.
Bulk displays good takedown defense there as he swats away a double leg from Halo II.
Bulk throws a quick head kick that skims the top of Halo II's head.
Halo II fails with the takedown.
Bulk slaps away a takedown attempt from Halo II, before circling back to the center of the mat.
Halo II is breathing heavily.
That's three minutes gone in the round.
Halo II swings away but doesn't land with a series of punches.
A combination from Bulk does no damage.
Bulk scores with a reasonable looking shot to the body. Halo II doesn't seem bothered though.
Halo II shoots in and drives through. Bulk sprawls well.
A solid leg kick lands there for Bulk.
Halo II tries to clinch but Bulk moves away
and Bulk cracks him with a counter punch right on the button.
Halo II keeping a good distance there, avoiding the body shot.
Halo II shoots in for a takedown and gets it. Oh and he's advanced to full mount straight away.
That's four minutes gone in the round.
Halo II tries to control but Bulk wriggling away.
The ref warns both fighters not to hold the cage as they work up against the meshing.
Bulk is not a happy chappy
he wants out of there.
Halo II looking to control and managing it successfully.
And thats the end of the round the fighters go back to their corners.
A close second round but Morula Halo II will probably get the nod - 10:9.
That's time! Back to the action! This is the final round!

Bulk swinging wildly here.
The fighters circling - Bulk throws out the jab but it was never going to land.
Brandon Bulk is winning the standup battle so far.
Halo II shoots in for a takedown but Bulk shows good takedown defense.
Halo II closes the distance but Bulk moves to the side
and Bulk cracks him with a counter punch right on the button.
We've had a slow start to the round here - hopefully the action picks up.
Halo II fakes a strike and closes the distance, dragging Bulk to the ground. Halo II is now in Bulk's guard.
Halo II stays in close to Bulk's body and controls the position.
That's one minute gone in the round.
Halo II wants to stand but Bulk is controlling his posture from full guard.
Halo II controls from within his opponent's guard.
We must be close to a standup if these guys don't pick up the pace.
Halo II wants to control from the top but Bulk keeps moving.
That's two minutes gone in the round.
A few boos can be heard. I'm sure they will multiply if the fighters don't pick up the pace.

The ref stands the fighters back up. Morula Halo II was stalling too much, according to the referee.
Bulk displays good takedown defense there as he swats away a double leg from Halo II.
Bulk avoids the clinch attempt nicely.
Halo II tries to move into range but Bulk moves to the side and lands with a nice right hand.
Halo II is looking to clinch.
Halo II fails to land the takedown.
Brandon Bulk has stuffed three takedown attempts in the round now. That's going to take a lot out of Morula Halo II.
Bulk swings away but doesn't land with a series of punches.
That's three minutes gone in the round.
Halo II shoots in looking for a takedown but Bulk manages to keep the fight standing, pushing Halo II's face into the canvas for good measure before circling away.
Halo II misses with a half-hearted attempt at a head kick.
Halo II takes a big intake of breath there - he's definitely tired.
Bulk works his jab well there, keeping his opponent at a distance.
Bulk tries to score with a low kick but Halo II moves his leg out of the way.
Halo II throws a nice looking combination but Bulk bobs and weaves to avoid any damage.
Bulk throws a leg kick but Halo II checks it.
Horrible takedown by Halo II or perhaps it was just good defense by Bulk which made him look bad.
Bulk's corner calls for a 1, 2 combination and Bulk duly obliges.
Bulk connects with a body shot.
That's four minutes gone in the round.

Halo II gets a clinch.
Halo II is working on a single leg takedown against the cage. Bulk can't fight it off and eventually Halo II manages to take the fight to the floor. Bulk looks annoyed but at least he's managed to land in guard.
Halo II trying to pass the guard but can't manage it just yet.
Bulk wants to stand but Halo II is controlling the position.
Halo II looking to pass the guard.
And that's the end of the fight!
Morula Halo II comfortably won the final round on my scorecard.
I think Halo II has won this one but let's see whether the judges agree with me. Over to the ring announcer for the scorecards.
Ladies and gentlemen, after 3 rounds of action, we go to the scorecards for a decision.
Judge Don Winkell scores the fight 28:29
Judge Jack Bonds scores the fight 28:29
Judge Percy O'Donnell scores the fight 28:29
In favor of your winner, by unanimous decision... Morula Halo II!
|
|
|
|
|
|
|
|
|
|
|
|
|
|
|
|
|
|
|
|
|
|
|
| S |
C
A |
G |
S |
C
B |
G |
|
S |
C |
G |
|
energy
A | B |
|
hype
A | B |
|
pop
A | B |
|
mgr
A | B |
|
FIGHT
RATING
35% |
|
|
|
|
|
|

