|
|
PBP Commentary |
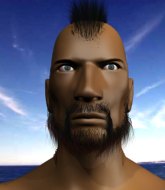
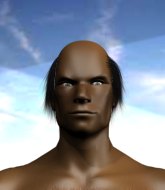
Coming up we have a middleweight MMA rules bout between Nick Rayez (ranked 0 p4p, 0 weight class) and Yoto Haramushi (ranked 0 p4p, 0 weight class). Well, I have no idea who's going to take this one!
 |
|
 |
| 183 cm
21
192 lbs
3 - 1 - 0 |
|
180 cm
23
190 lbs
4 - 3 - 0 |
BJJ Purple Belt
Brawler
Prefers ground |
|
BJJ Blue Belt
Brawler
Solid chin |
|
| |
|
Ladies and gentlemen. This fight is 3 rounds, in the middleweight division.
Introducing the fighter to my left, fighting out of the red corner.
With a record of
3 - 1 - 0, fighting out of Tokyo, Nick Rayez!
And introducing the fighter to my right, fighting out of the blue corner.
With a record of
4 - 3 - 0, fighting out of Tokyo, Yoto Haramushi!
The judges for this bout are Sosuke Kotani, Shirou Masuda and Taro Takaoka.

The bell rings for round one and we are underway!
Rayez closes the distance and clinches up with Haramushi, looking for a takedown. Rayez pushes Haramushi against the cage but Haramushi circles to the side and manages to break the clinch.
Rayez shoots for a takedown but Haramushi saw that one coming a mile off and avoided it easily.
Haramushi keeps the fight standing with a nice sprawl.
That's three failed takedown attempts in the round for Nick Rayez. That's going to take a lot out of him.

Rayez shoots in and bounces Haramushi off the cage to secure the takedown into guard.
Rayez stands up and looks to throw the legs aside to pass to side control. Haramushi swivels though and keeps the full guard.
Haramushi looking to control.
Haramushi keeping moving, preventing Rayez from controlling successfully.

Rayez stands up and waves to Haramushi to follow him.
Haramushi feints and then dives in with a takedown. That was a long way out but the feint bought him enough time to close the distance and complete the takedown. Now we'll play guard for a bit and see who can get the better of that position.
Rayez keeping moving, preventing Haramushi from controlling successfully.
Haramushi trying to pass the guard but can't manage it just yet.

That's one minute gone in the round.

Haramushi drops back for a leg! It's a sloppy attempt though and Haramushi jumps back into guard quickly, to retain the dominant position.
Rayez has his hands on Haramushi's head, controlling the position.
The ref warns both fighters not to hold the cage as they work up against the meshing.
Rayez is active off his back here, looking for submissions.
Rayez keeping moving, preventing Haramushi from controlling successfully.
Rayez looking for a sweep. Not yet Rayez, not yet.
Haramushi stands up and looks to throw the legs aside to pass to side control. Rayez swivels though and keeps the full guard.
Hammerfist, elbow! yells Haramushi's corner. There ya go! There ya go!

That's two minutes gone in the round.
A lull in the action here being met with boos from the crowd.
Haramushi tries to free his leg and advance position but Rayez is retaining full guard.
The fighters are pressed up against the cage, both looking to find a bit of space to work.
Haramushi is persisting with the attempt to improve his position.
Rayez throwing his legs up looking for a triangle.
Rayez is breathing heavily.
Rayez is working the butterfly guard. He manages to land a nice scissor sweep and is now in half guard on the top. Nice move.
Rayez is stalling here. Haramushi is in no mood to hang around though. He's locked up a kimura from the bottom! Rayez seems to be keeping calm but he's forced to roll out of the hold and Haramushi has ended up in side control on the top. Nice work.
Rayez is not content to let Haramushi control the position.
Rayez tries to buck Haramushi off but Haramushi is having none of it.
Rayez wants to get back to his feet.

That's three minutes gone in the round.
Rayez is trying to improve his position.
Haramushi thinks about going for a far side armbar but bails out and retains the dominant position instead.
Haramushi wants to work for a kimura but he's foiled early by Rayez, who protects the arm well.
Haramushi working the ground and pound.
Rayez is moving his hips around well on the bottom and has managed to get back to half guard.
Rayez trying to hold on to Haramushi's head to control him but Haramushi postures up.
Haramushi is looking for a kimura but Rayez is holding onto that half guard position, so it's hard for Haramushi to get the leverage.

That's four minutes gone in the round.
There's not a lot going on here and the crowd are letting the fighters know they're not willing to tolerate a lack of action.
Haramushi is trying a forearm choke
I don't think that's going to do much at this level of the game.
Rayez gets back to full guard.
Haramushi slips effortlessly into side control - very nice.
Haramushi wants to lay and pray for a moment but Rayez keeps working.
Haramushi works to advance to full mount. Rayez defends for a few seconds but eventually he succumbs.
Haramushi looking to control and managing it successfully.
Both fighters really going for it on the ground here!
Haramushi looks like he's working for a submission but he's not found anything just yet.
And thats the end of the round the fighters go back to their corners.
A close round but Yoto Haramushi will probably get the nod.
Well, the break between rounds is over. Let's get back to the scrappin!

Rayez gets his takedown attempt stuffed easily
and Haramushi counters with a nice double leg into half guard.
Haramushi is keen to just control but Rayez is a slippery customer.
Haramushi content to control rather than advance.
Haramushi wants to pass the guard but Rayez is defending well.
Haramushi is trying for a guillotine from the top but the pressure isn't in the right place so Rayez is just riding it out for now. Haramushi eventually gives up the hold.
Haramushi is trying to work for a kimura. He's got his hands clasped together - this could be trouble! No, Rayez has managed to free his arm - good work.
Rayez manages to get to full guard.
Both fighters are absolutely exhausted here.
That's one minute gone in the round.
Haramushi trying to control but Rayez is working from the bottom.
Rayez is active off his back here, looking for submissions.
Rayez not looking particularly offensive just at the moment.
Haramushi trying to control the position from guard on top but Rayez is wriggling around, looking for whatever he can.
Rayez working for a triangle but Haramushi defends it easily.
Haramushi wants to control from the top but Rayez keeps moving.
That's two minutes gone in the round.
The crowd are starting to boo a lack of action.
Rayez trying to keep a closed guard but Haramushi is proving a slippery customer.
Rayez had isolated an arm as going for an omaplata. Haramushi is defending the submission well but is in a very vulnerable position. Rayez Is leaning forward trying to finish the omaplata but decides to abandon it, and take Haramushi's back instead.
Haramushi fending off the submission attempt from Rayez.
Rayez looking to break Haramushi's wrist control so he can sink in the choke. Haramushi remaining controlled and patient though - he really has to keep calm otherwise Rayez will wrap this one up with the rear naked choke!
Rayez has both hooks in and is working for a choke. Haramushi is in real trouble here. Rayez gets an arm under the chin and tightens the submission attempt... is this the end? Yes, Haramushi is tapping out! Rayez wins by rear naked choke!
Ladies and gentlemen, after 3:02 of round 2, we have a winner by way of Submission (RNC). Nick Rayez!
|
|
|
|
|
|
|
|
|
|
|
|
|
|
|
|
|
|
|
|
|
|
|
| S |
C
A |
G |
S |
C
B |
G |
|
S |
C |
G |
|
energy
A | B |
|
hype
A | B |
|
pop
A | B |
|
mgr
A | B |
|
FIGHT
RATING
44% |
|
|
|
|
|
|
