|
|
PBP Commentary |
Coming up we have a super heavyweight MMA rules bout between Hassan Al Aziz (ranked 0 p4p, 0 weight class) and Tom Byron (ranked 0 p4p, 0 weight class). Byron has chosen Roky Erickson - Click your Fingers Applauding the Play as his entrance music. Over to our ring announcer for the fighter introductions!
 |
|
 |
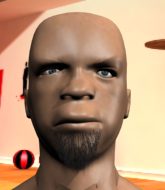
| 190 cm
29
282 lbs
28 - 11 - 0 |
|
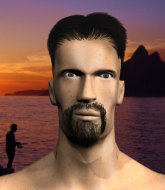
175 cm
29
282 lbs
15 - 9 - 0 |
Good wrestling
Excellent boxer
Very quick |
|
Olympic wrestler
Great elbows
Powerful |
|
| |
|
Ladies and gentlemen. This fight is 5 rounds, for the super heavyweight championship of the world!
Introducing the champion to my left, fighting out of the red corner.
With a record of
28 - 11 - 0, fighting out of London, Hassan Al Aziz!
And introducing the challenger to my right, fighting out of the blue corner.
With a record of
15 - 9 - 0, fighting out of London, Tom Byron!
The judges for this bout are James Ackerman, Donald Grub and Paul Tew.

The bell rings for round one and we are underway!
Al Aziz throws a hook to the side of Byron's head but Byron sees it coming and ducks under it beautifully.

Byron gets in close and instigates a clinch.
Al Aziz wants to strike at distance but he can't break free of the clinch.
Byron misses with an elbow over the top.

Al Aziz has double underhooks and is working for a body lock takedown. He's got it. The fighters land in half guard but Byron regains guard immediately.
Al Aziz throws a big right hand that misses.
Byron really doesn't want to stay on the ground with Al Aziz. If he can't get it back to his feet, it's only a matter of time before he'll be tapping out.
Al Aziz throws a big right hand that misses.
Al Aziz chips away with some ground and pound.
Al Aziz throws a big elbow that misses.
Al Aziz throwing strikes from guard but Byron blocks nicely.
Al Aziz is taking a break and basically stalling. The referee will not allow him to do that for long.
Al Aziz throwing elbows and punches but not connecting, as Byron works some decent striking defense from the bottom.

That's one minute gone in the round.
Al Aziz tries to free his leg and advance position but Byron is retaining full guard.
Byron can't do much from the bottom at the moment, as Al Aziz controls the pace.
Al Aziz trying to control the position from guard on top but Byron is wriggling around, looking for whatever he can.

The ref stands the fighters back up. Hassan Al Aziz wasn't doing enough on the ground.
Al Aziz misses with a hook.
Byron wants to clinch up but Al Aziz keeps it at a distance.
Al Aziz lands with a right hand.

That's two minutes gone in the round.
Byron wants to clinch up but Al Aziz keeps it at a distance.
Byron uses some good footwork to avoid the body shot by Al Aziz.
Al Aziz looks for a takedown but Byron sprawls well.
Byron is looking to clinch but Al Aziz is avoiding it.
Byron walks into a straight right hand from Al Aziz.
This is a great period of action - very entertaining stuff!
Al Aziz swings for the body but Byron moves out of range.
Al Aziz misses with a hook to the body
and Byron moves into the clinch.
Byron trying to control the position but instead, Al Aziz has worked for underhooks and has pushed Byron into the cage.
Byron gets underhooks to prevent Al Aziz's takedown attempt.
Al Aziz looking for a takedown.
That's three failed takedown attempts in the round for Hassan Al Aziz. That's going to take a lot out of him.
Byron is looking to score with knees to the body. Maybe he'll change it up and go body then head. Al Aziz is defending well for now.

That's three minutes gone in the round.
Byron missing with knees to the body.

Al Aziz's corner calls for him to break the clinch, which he does.
Byron looks for a takedown but Al Aziz sprawls well.
Al Aziz shoots in for a takedown - he's clinched up with Byron but Byron pushes him off and we're back to square one.
Byron shoots in for a takedown. "Ole!" shouts Al Aziz as he jumps to the side.
A shot to the liver by Al Aziz. Beautiful body shot.
A big right from Al Aziz misses.
Byron tries to clinch but Al Aziz is having none of it.
Byron closes the distance but Al Aziz moves to the side
and Al Aziz counters with a nice uppercut.

That's four minutes gone in the round.
We've seen a great period of action over the last minute or so - credit to both fighters for going all out!
Al Aziz dips down and scores with a jab to the body.
Byron looks gassed!
Byron is pinned up against the cage taking some big shots here. The referee is looking closely deciding whether he should stop the fight.
Al Aziz feints and then dives in with a takedown. That was a long way out but the feint bought him enough time to close the distance and complete the takedown. Now we'll play guard for a bit and see who can get the better of that position.
Byron keeping moving, preventing Al Aziz from controlling successfully.
Al Aziz scoring with punches to the head and body.
Al Aziz wants to pass the guard but Byron is keeping the position.
The crowd are going absolutely nuts as the round comes to an end - what a fantastic round of action!
Al Aziz postures up to throw the ground and pound strikes but they don't connect.
And thats the end of the round the fighters go back to their corners.
Hassan Al Aziz dominated that round.
The fighters' corners scream their final instructions, as the referee calls time. Here we go, back to the action!

Al Aziz will need to tighten up his combinations if he doesn't want to gas himself out, swinging at thin air.
Al Aziz looks to throw the jab but Byron is out of range.
Al Aziz keeps the fight on the outside.
Byron tries to clinch up against the cage, rushing in the close the distance. Al Aziz manages to break the clinch and circles back to the middle of the mat.
Byron tries to clinch but Al Aziz is having none of it.
Al Aziz fails with the takedown.
Al Aziz swings widly with a right hand

and Byron counters with a shoot takedown. Al Aziz fights it but they end up in guard.
Al Aziz is trying to stand up but he's not managed so far.

Al Aziz pushes Byron off and scrambles back to his feet.
That's one minute gone in the round.
Byron bobs and weaves well there to avoid the strikes.
Hassan Al Aziz is winning the standup battle so far.
Al Aziz swings and misses with a hook to the body.
Al Aziz throws a looping left and ducks down for a takedown. He's got his arms around Byron's waist but Byron gets an underhook and avoids the takedown by throwing Al Aziz off to one side.
Byron ducks under a wild hook from Al Aziz.
Byron keeping a good distance there, avoiding the body shot.
Al Aziz misses with a double jab.
Al Aziz throws a hook but Byron blocks it.
Al Aziz is using his reach advantage well here, landing the more effective single shots from range.
Byron tries to clinch there but Al Aziz circles away.
The fighters circling - Al Aziz throws out the jab but it was never going to land.
That's two minutes gone in the round.
Byron gets taken down but at least he's managed to land in guard.
Byron looking for a sweep. Not yet Byron, not yet.
The fighters are pressed up against the cage, both looking to find a bit of space to work.
Al Aziz trying to control but Byron is working from the bottom.
Al Aziz trying to land body shots but he keeps hitting the mat.
Hassan Al Aziz overall seems to be getting the better of the ground position in the fight so far.
Byron keeping full guard, as Al Aziz tries to pass.
Al Aziz has been looking to land a fair amount of strikes on the ground. He might be looking to soften his opponent up in order to work for a submission.
Byron working the defensive guard well to avoid strikes from Al Aziz.
Al Aziz wants to pass the guard but Byron is keeping the position.
That's three minutes gone in the round.
Al Aziz postures up in Byron's guard and throws a big left but Byron blocks it.
Al Aziz with a couple of shots to the head there. Not particularly brutal.
Al Aziz throwing elbows and punches but not connecting, as Byron works some decent striking defense from the bottom.
Byron trying to control the position.
Al Aziz throws a big elbow that misses.
Al Aziz loading up with the ground and pound but he's missing more than he's landing in this flurry.
Al Aziz is really dominating this fight. Is there anything that Byron can do to turn this around?
Al Aziz wants to pass the guard but Byron is keeping the position.
Al Aziz working some ground and pound from guard but it's not doing any damage.
That's four minutes gone in the round.
A big thud reverberates around the arena there as Al Aziz accidentally thumps the mat. Hopefully he's not broken his hand.
Byron keeping moving, preventing Al Aziz from controlling successfully.
Byron is avoiding any damage by keeping wrist control.
Al Aziz is looking to work some ground and pound but Byron has wrist control.
Al Aziz sitting in guard here, content to control.
The crowd applaud the fighters efforts here as the round comes to an end.

The referee decides to stand the fighters back up.
Al Aziz connects with a slap. Keep your fist closed son.
And thats the end of the round the fighters go back to their corners.
Hassan Al Aziz dominated that second round.
Well, the break between rounds is over. Let's get back to the scrappin!

Al Aziz swats away the attempt to clinch by Byron.
Byron closes the distance and pushes Al Aziz back into the cage.
Al Aziz wants a takedown but no success here.
Al Aziz drops to a knee looking for a takedown but Byron gets the underhooks and prevents it.
Al Aziz on the defensive, avoiding the knees to the body.
Al Aziz takes an elbow to the temple.
Al Aziz lands a nice trip takedown into half guard.
Al Aziz wants to lay and pray for a moment but Byron keeps working.
The ref warns both fighters not to hold the cage as they work up against the meshing.
Byron is trying to control but can't.
Byron is not content to let Al Aziz control the position.
That's one minute gone in the round.
Al Aziz controlling the action here.
It looks like the ref is thinking about a standup.
Al Aziz takes advantage of the dominant position to land a couple of big hammer fists.
Al Aziz lands strikes from half guard.
Al Aziz throwing shots but they're hitting the canvas more than the man.
Al Aziz trying to control from Byron's half guard. Byron has other ideas though and has regained full guard.
Byron avoiding any damage from the ground and pound.
That's two minutes gone in the round.
Al Aziz loading up with the ground and pound but he's missing more than he's landing in this flurry.
Al Aziz wants to pass the guard but Byron is keeping the position.
Al Aziz throws a big right hand that misses.
Al Aziz trying to control the position from guard on top but Byron is wriggling around, looking for whatever he can.
Al Aziz throwing strikes but missing.
Byron is working an open guard here, looking to improve his position. No doubt that will leave him open to counters but at least he's being more offensive.
That's three minutes gone in the round.
Byron keeping moving, preventing Al Aziz from controlling successfully.
Al Aziz stands up and looks to throw the legs aside to pass to side control. Byron swivels though and keeps the full guard.
The ref stands the fighters back up. Hassan Al Aziz wasn't doing enough on the ground.
Al Aziz takes a swing at Byron's ribcage but misses.
Al Aziz misses with a straight left.
That's four minutes gone in the round.
Byron clinches up with Al Aziz and pushes him back against the cage.
Al Aziz is working on a leg, looking for a takedown but Byron is defending well.
That's three failed takedown attempts in the round for Hassan Al Aziz. That's going to take a lot out of him.
Byron misses with an elbow strike.
With the fighters up against the cage, Byron throws an elbow but misses.
Byron lands a damaging elbow.

It looks like Hassan Al Aziz has been cut.
Al Aziz wants a takedown.
Al Aziz blocks an elbow strike from Byron.
Al Aziz is working for a takedown up against the cage. He can't get it on this occasion though.
Byron misses with an elbow strike.
Byron is pushing Al Aziz up against the cage, for a bit of lean and pray action. Action being used the in the loosest possible sense of the word.
Byron prevents a takedown attempt there.
The crowd applaud the fighters efforts here as the round comes to an end.
Al Aziz is looking for a takedown up against the cage. Byron gets underhooks though and prevents the takedown attempt.
Al Aziz gets a nice trip takedown into half guard.
Both fighters are breathing heavily.
Wooooo! Give it up for these two warriors! They are putting on a show!
Byron pushes Al Aziz off looking to stand but Al Aziz dives back in and keeps control.
And thats the end of the round the fighters go back to their corners.
Hassan Al Aziz clearly takes that round.
The cut man is working on Hassan Al Aziz's cut.
The fighters get back to their feet, the hooter sounds and we're back to the action!

Byron moves in looking to clinch but Al Aziz pushes him off.
Al Aziz lands with an overhand left.
Al Aziz connects with a looping right hand.
Byron is looking to take this fight into the clinch.
Byron uses some good footwork to avoid the body shot by Al Aziz.
Al Aziz shoots in for a takedown but doesn't get it.
Al Aziz drives through with a takedown into guard.
This is a great period of action - very entertaining stuff!
Al Aziz trying to control but Byron is working from the bottom.
A big thud reverberates around the arena there as Al Aziz accidentally thumps the mat. Hopefully he's not broken his hand.
That's one minute gone in the round.
Al Aziz stays in close to Byron's body and controls the position.
Al Aziz pressing down on his opponent's thigh, looking to pass guard. Byron is keeping the position for now.
Al Aziz trying to land body shots but he keeps hitting the mat.
Al Aziz is fighting to break Byron's control of his arms but Byron is doing a good job of controlling the position at the moment.
The referee is asking the fighters to pick up the pace.
The referee decides to stand the fighters back up.
Al Aziz connects with a looping right hand.
Al Aziz feints a straight left to the body, then turns around with a flashy move and hits Byrons jaw with a dramatic spinning back fist!
That's two minutes gone in the round.
Al Aziz misses the jab.
Byron fails in his attempt to clinch.
Al Aziz misses with an uppercut. Byron saw that one coming.
A punch lands to the side of Byron 's head but he takes it in his stride.
The crowd are loving this. Great action here.
Al Aziz tries to land with a swinging hook to the body but Byron was well out of range. Poor timing from Al Aziz.
Byron keeping a good distance there, avoiding the body shot.
Al Aziz scores with a punch to the head.
Al Aziz looks to score with a jab to the body but Byron is just out of range.
Al Aziz clobbers Byron with an overhand right that has the crowd gasping. That made a horrendous noise.
Byron uses some good footwork to avoid the body shot by Al Aziz.
That's three minutes gone in the round.
Al Aziz fakes high and swings low for a body shot but Byron manages to avoid it.
Byron is looking to take this fight into the clinch.
Tom Byron is looking to throw some combinations by the looks of things.
Byron tries to clinch but fails miserably
and Al Aziz cracks him with a counter punch right on the button.
Al Aziz misses the shot to the body.
Hassan Al Aziz seems to be the more aggressive standup fighter in this bout.
Nice takedown defense from Byron. No joy for Al Aziz on that attempt.
Al Aziz cracks a nice hook into Byron's ribs.
Byron is absolutely dripping with sweat - he looks exhausted.
Al Aziz throws a hook to the body but it doesn't connect.
Al Aziz throws a looping overhand right but Byron ducks down to avoid it.
Al Aziz throws a shot from downtown. Byron moves away and avoids it.
Al Aziz shoots in for a double leg but Byron sprawls well. That's going to sap some energy.
That's three failed takedown attempts in the round for Hassan Al Aziz. That's going to take a lot out of him.
That's four minutes gone in the round.
Byron tries to clinch but Al Aziz moves out of range.
Byron wants to clinch.
Byron tries to close the distance and clinch but Al Aziz swats him to one side with an open hand palm strike and circles away.
Byron slips under a jab from Al Aziz.
Al Aziz pushing out the jab but it's not landing.
The crowd are going absolutely nuts as the round comes to an end - what a fantastic round of action!
Al Aziz misses with a hook. Byron ducked under it nicely.
We've seen a great period of action over the last minute or so - credit to both fighters for going all out!
Byron takes a shot right to the bread basket.
Al Aziz bobs and weaves and unloads with a good uppercut.
And thats the end of the round the fighters go back to their corners.
Hassan Al Aziz had his way with Tom Byron in that round.
The cut man is working on Hassan Al Aziz's cut.
The corners get their ten second warning. Both fighters stand from their stools and stare eachother down, ready to get back to the action. The crowd applaud as we get ready to start the final round!

Byron tries to close the distance and clinch but Al Aziz swats him to one side with an open hand palm strike and circles away.
Al Aziz shoots in for a double leg but Byron sprawls well. That's going to sap some energy.
Al Aziz lands a glancing blow to the side of Byron's head.
Byron tries to move into range but Al Aziz moves to the side and lands with a nice right hand.
Byron takes a jab on the nose. He smiles like he loves it and keeps coming.
The fight stays on the outside here - Byron looks like he's thinking about clinching though.
A big right from Al Aziz misses.
Byron tries to clinch up
and Al Aziz makes him pay by landing a nice hook to the body before moving out of range.
That's one minute gone in the round.
Al Aziz lands a powerful looking uppercut that connected with his opponent's jaw.
A looping hook to the body misses from Al Aziz. Byron does a little dance to reset his feet.
Byron wants to clinch up but Al Aziz keeps it at a distance.
Byron is looking to take this fight into the clinch.
Al Aziz jabs at Byron's body.
Nice sprawl there from Byron as Al Aziz shoots in.
Byron takes a shot to the body in his stride.
Byron is wobbling all over the place through exhaustion. Will he make it to the final bell?
Al Aziz scores with a jab to the jaw of his opponent.
Hassan Al Aziz is fighting for a decision here - he's started to take the cautious approach.
That's two minutes gone in the round.
The crowd are loving this. Great action here.
A slow jab from Al Aziz misses its intended target.
Al Aziz tries to land with a swinging hook to the body but Byron was well out of range. Poor timing from Al Aziz.
Al Aziz scores with a nice head shot.
Al Aziz shoots for a takedown but Byron saw that one coming a mile off and avoided it easily.
That's three failed takedown attempts in the round for Hassan Al Aziz. That's going to take a lot out of him.
Al Aziz lands a jab.
A big left from Al Aziz misses.
Byron tries to clinch but fails miserably
and Al Aziz counters with a straight right hand.
Al Aziz is using his height advantage well here, landing a good percentage of his punches.
Al Aziz scores with a body shot.
Al Aziz throws a body punch but Byron moves out of range.
That's three minutes gone in the round.
Byron darts in trying to clinch
and Al Aziz counters with a lovely shot to the body.
Byron on the wrong end of a nice jab.
Byron walks into a stiff left hand from Al Aziz.
Tom Byron has stepped it up - he knows he needs a finish here!
Al Aziz lands a nice shot to the body.
Al Aziz comes forward and lands a shot to the body, then darts back out of range.
Al Aziz uses good footwork to get in and out, landing a nice hook.
Byron walks into a left hand.
Al Aziz scores with a nice takedown into half guard. Let's see what he's got on the ground.
That's four minutes gone in the round.
Byron is trying to get back to full guard.
Al Aziz is controlling the pace.
Al Aziz wants to take a breather but Byron is having none of it.
Fantastic stuff here - a very entertaining period of action, which has drawn cheers from the crowd.
As the round comes to an end the crowd are showing their appreciation for a great round of action.
Al Aziz controlling the pace.
Al Aziz will need to keep those long limbs tucked in whilst he's on the ground, to prevent any submissions.
Al Aziz passes the half guard and he's now in mount! Big trouble for Byron!
And that's the end of the fight!
Hassan Al Aziz showed his dominance in that final round.
Well I reckon that's a shut out for Al Aziz, winning every round. Will the judges agree? They are the ones who matter, even if they are often depressingly incompetent. Over to the ring announcer for the scorecards.
Ladies and gentlemen, after 5 rounds of action, we go to the scorecards for a decision.
Judge James Ackerman scores the fight for Hassan Al Aziz!
Judge Donald Grub scores the fight for Hassan Al Aziz!
Judge Paul Tew scores the fight for Hassan Al Aziz!
Hassan Al Aziz wins by unanimous decision!
Hassan Al Aziz retains his super heavyweight title!
Hassan Al Aziz made sure to mention his sponsor, Fossington & Blythe: Gentlemen's Fight Attire in his post fight interview.
|
|
|
|
|
|
|
|
|
|
|
|
|
|
|
|
|
|
|
|
|
|
|
| S |
C
A |
G |
S |
C
B |
G |
|
S |
C |
G |
|
energy
A | B |
|
hype
A | B |
|
pop
A | B |
|
mgr
A | B |
|
FIGHT
RATING
66% |
|
|
|
|
|
|
