|
|
PBP Commentary |
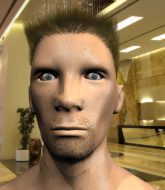
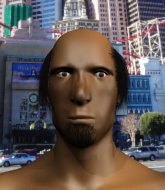
Coming up we have a lightweight MMA rules bout between Ryo Sakazaki (ranked 0 p4p, 0 weight class) and Who Da (ranked 0 p4p, 0 weight class). Both these guys have solid standup skills and neither is particularly fantastic on the ground, so let's hope for a nice standup war!
 |
|
 |
| 179 cm
19
165 lbs
4 - 8 - 0 |
|
170 cm
19
155 lbs
1 - 2 - 0 |
BJJ White Belt
Solid Muay Thai
Granite chin |
|
BJJ Blue Belt
Excellent boxer
Granite chin |
|
| |
|
Ladies and gentlemen. This fight is 3 rounds, in the lightweight division.
Introducing the fighter to my left, fighting out of the red corner.
With a record of
4 - 8 - 0, fighting out of Sydney, Ryo Sakazaki!
And introducing the fighter to my right, fighting out of the blue corner.
With a record of
1 - 2 - 0, fighting out of Sydney, Who Da!
The judges for this bout are Donatello Bradman, Hugh Johnson and Bruno Hogan.

The bell rings for round one and we are underway!
Sakazaki shakes his hands off, looking to compose himself, but takes a jab to the jaw whilst he does it.
A head kick from Sakazaki lands but Da takes it in his stride.
Da lands a slapping body shot.
Sakazaki scores with a nice body kick.
Da tries to bum rush Sakazaki with a series of wild strikes but Sakazaki uses good footwork to avoid the assault.
Sakazaki misses with a half-hearted attempt at a head kick.
Sakazaki stuffs the takedown attempt from Da. Da gets slowly back to his feet.
Sakazaki looking to take his opponent's legs away with the low kicks.

Da drops down and drives through with a powerful takedown into guard.
Sakazaki wants to stand up but Da is controlling him.
Da throws a big elbow that misses.
This has been an exciting period of action!
Sakazaki keeping moving, preventing Da from controlling successfully.

That's one minute gone in the round.
Sakazaki is looking to stand back up... there's a bit of a scramble and Da dives into side control.
Sakazaki tries to work a leg under to get back to half guard but Da wriggles his own leg back out and remains in side control.
Sakazaki managing to avoid any damage from the strikes thrown by Da.

Da tries for an arm triangle. That looks pretty tight to me. Is this one over!?! Possibly, maybe, no Da has let go of the choke. Obviously it wasn't as tight as we thought!
Sakazaki avoids any damage from the ground and pound of Da.

That's two minutes gone in the round.
Da working the ground and pound but he's contacting the mat, not the fighter.
Da is looking to take a break and control but Sakazaki is keeping him honest, looking to work from the bottom.
The referee asks Da politely if he wouldn't mind getting on with it and actually doing something. Da prefers to stall for the moment though.
Sakazaki knows he needs to get back to his feet asap. He's simply no match for Da on the ground.
Sakazaki takes a nasty elbow to the side of the head.
Da has the superior BJJ but he's also working some ground strikes into his gameplan.

Sakazaki explodes and escapes back to his feet! Nice escape there!

That's three minutes gone in the round.
Da misses the shot to the body.
Da fails to land the takedown.
Sakazaki takes a shot to the body in his stride.
Da catches Sakazaki with a nice straight right. He seems pissed - ooooh, it's on now! On like donkey kong!
Sakazaki connects with a solid leg kick.
Da throws a nice looking combination but Sakazaki bobs and weaves to avoid any damage.
Da shoots in looking for a takedown. Sakazaki tries to sprawl out of it but Da keeps driving through. The fighters are pinned against the cage. Sakazaki manages to get underhooks and after a bit of a struggle, circles away and we're back to standing.
Ryo Sakazaki has stuffed three takedown attempts in the round now. That's going to take a lot out of Who Da.
Sakazaki misses with a head kick.
Who Da seems to be the more aggressive standup fighter in this bout.
Sakazaki throws a right high kick that is partially blocked by Da.

It looks like Who Da has been cut.
Da closes the distance and scores a nice trip takedown into half guard. Sakazaki did well to prevent Da getting side control.
Da not throwing his punches with enough precision this time.

That's four minutes gone in the round.
Fantastic stuff here - a very entertaining period of action, which has drawn cheers from the crowd.
Da is trying to control. Sakazaki wants to improve his position but can't escape this time.
Sakazaki wants to get back to his feet.
The fighters are starting to get a bit slippery now, which will make submissions a bit more difficult.
Da is thinking about going for an arm triangle but he can't free his leg.
Da throwing punches and elbows but they're not doing any damage.
As the round comes to an end the crowd are showing their appreciation for a great round of action.
Da thows a wild elbow that connects with the canvas.
And thats the end of the round the fighters go back to their corners.
Who Da dominated that round.
The cut man is working on Who Da's cut.
That's time! Back to the action!

Da closes the distance and clinches up with Sakazaki, looking for a takedown. Da pushes Sakazaki against the cage but Sakazaki circles to the side and manages to break the clinch.
Sakazaki throws a hook to the body but it doesn't connect.
No luck for Da with that takedown attempt.
Da fails with a takedown attempt.
Ryo Sakazaki has stuffed three takedown attempts in the round now. That's going to take a lot out of Who Da.
Sakazaki gets caught on his heels momentarily as he allows Da to score an easy takedown into full guard.
Da throwing elbows and punches but not connecting, as Sakazaki works some decent striking defense from the bottom.
Sakazaki wants to stand up but Da is controlling him.
That's one minute gone in the round.
Sakazaki preventing the ground and pound from doing any damage.
Da missing there with some ground and pound from the guard.
Da is working the ground and pound from guard. He might want to try advancing position though to get more of an impact.
Sakazaki pushes Da off and gets back to his feet.
Da throws a nice looking combination but Sakazaki bobs and weaves to avoid any damage.
Sakazaki misses with a head kick.
Da fakes a head punch and goes low to the body. Nicely done.
Da fails with a takedown attempt.
Sakazaki throws a right hand that misses
and Da counters with a stiff right hand.
That's two minutes gone in the round.
Da takes a kick to the side of the head.
Da lands the left hand.
Da connects with a lovely jab that went straight through the gap between Sakazaki's hands.
We've seen a great period of action over the last minute or so - credit to both fighters for going all out!
Da drives through with a takedown into guard.
Da stops Sakazaki from standing up.
Sakazaki avoiding any damage from the ground and pound.
Da looking to pass the guard.
Sakazaki has control of Da's left arm, preventing Da from doing any damage.
The referee claps his hands together and tells the fighters to work.
Da tries to free his leg and advance position but Sakazaki is retaining full guard.
That's three minutes gone in the round.
Da in full guard, throwing the ground and pound. No damage this time.
Sakazaki pushes Da off and gets back to his feet.
Sakazaki lands a leg kick that knocks Da off balance momentarily.
Da shoots in for a takedown - he's clinched up with Sakazaki but Sakazaki pushes him off and we're back to square one.
Sakazaki takes a shot to the body in his stride.
Sakazaki throws a sloppy head kick and Da moves out of range easily.
Da displaying good standup as he scores with a three punch combination.
That's four minutes gone in the round.
Sakazaki throws a sloppy head kick and Da moves out of range easily.
Da shoots in with a takedown attempt and he has Sakazaki pinned against the cage. Sakazaki gets the underhooks and manages to circle away.
Da shoots in looking for a takedown but Sakazaki manages to keep the fight standing, pushing Da's face into the canvas for good measure before circling away.
Da avoids a punch combination nicely.
Sakazaki feints a jab promting Da to slip. Sakazaki then demonstrates his capabilities by jabbing again. Da slips again and ducks right into an uppercut.
Da's corner calls for a 1, 2 combination and Da duly obliges.
The fans in attendance giving it up for the two fighters, who have really let it all hang out in the last minute or so!
Da shoots in for a takedown but doesn't get it.
As the round comes to an end the crowd are showing their appreciation for a great round of action.
Da shoots in for a takedown. He's persisting with it as Sakazaki sprawls well. Sakazaki wins this battle and keeps the fight standing. Da gets slowly back to his feet.
A combination from Sakazaki does no damage.
And thats the end of the round the fighters go back to their corners.
A close second round but Who Da will probably get the nod - 10:9.
The cut man is working on Who Da's cut.
That's time! Back to the action! This is the final round!

Sakazaki misses with a shot to the body
and Da counters with a shot to the ribs. That looked like it hurt.
Da lands with a cross to side of his opponent's head.
Sakazaki dodges the punch combination from Da.
Da wings a very wild body shot but it does the job and lands to the midsection.
Da throws a combination but comes up with nothing but fresh air.
Sakazaki throws a wild combination but nothing lands.
Da lands a lovely overhand right.
Da drives through with a takedown into guard.
Sakazaki is working an open guard here, looking to improve his position. No doubt that will leave him open to counters but at least he's being more offensive.
Who Da has got the better of the ground game so far.
Sakazaki manages to escape and get back to his feet.
That's one minute gone in the round.
Da lands a nice shot to the body.
A head kick misses from Sakazaki.
Da shoots in for a takedown - he's clinched up with Sakazaki but Sakazaki pushes him off and we're back to square one.
Da avoids a lazy jab quite easily.
Sakazaki looks for the body kick but Da saw that one coming.
Ryo Sakazaki is winning the standup battle so far.
Sakazaki takes a shot right to the liver - Bas would have been proud of that punch.
Da shoots in and drives through. Sakazaki sprawls well.
Da throws a right and a left that Sakazaki avoids nicely.
Ryo Sakazaki is looking to throw some combinations by the looks of things.
Da avoids the head kick by Sakazaki.
Da takes a swing at Sakazaki's ribcage but misses.
A punch combination from Sakazaki misses.
Both fighters are breathing heavily.
Sakazaki throws a series of punches but Da avoids them all with ease.
Da fails with a takedown attempt from distance.
Ryo Sakazaki has stuffed three takedown attempts in the round now. That's going to take a lot out of Who Da.
That's two minutes gone in the round.
Da shoots in looking for a takedown but Sakazaki manages to keep the fight standing, pushing Da's face into the canvas for good measure before circling away.
Da works Sakazaki's body with a nice hook.
Sakazaki throws a half hearted mid kick.
Da shoots in but no luck this time.
Sakazaki tries to close the distance and clinch up against the cage but Da paws at him with a jab and circles away.
Da throws a right and a left that Sakazaki avoids nicely.
Da lands with a cross.
Sakazaki throws a head kick that half lands.
We've seen a great period of action over the last minute or so - credit to both fighters for going all out!
Sakazaki misses with an attempted mid kick.
Da lunges in with swinging rights and lefts but Sakazaki circles away quickly and effectively.
Sakazaki tries to land a front kick but Da steps back. That was a bit too telegraphed.
Da connects with a looping right hand.
Da paws at his opponent with the jab and then lunges in with a straight, right on the button.
Ryo Sakazaki is looking to keep the fight on the feet at all costs.
That's three minutes gone in the round.
Sakazaki connects with a solid leg kick.
Da lands a slapping body shot.
Sakazaki tries a head kick but it misses.
Da dips down and scores with a jab to the body.
Sakazaki is looking to take this fight into the clinch.
Da scores to the head and body with a nice combination!
Ryo Sakazaki has stepped it up - he knows he needs a finish here!
Da is throwing a lot of body shots here, looking to wear down Sakazaki rather than just go for the knockout.
Da blocks the body kick.
Da throws a combination. Sakazaki tries to block but a couple of punches get through.
Sakazaki takes a body punch that cleary hurt but he's trying not to show any weakness.
Da tries for a takedown but Sakazaki sees it coming a mile off and avoids it easily.
Da rushes forward with a series of wild hooks but Sakazaki moves out of range and avoids them all easily.
The sound of bone on bone echoes around the arena as Da checks a leg kick.
Sakazaki throws a head kick that misses and slips in the process. He scrambles back to his feet and the fighters circle.
That's four minutes gone in the round.
Sakazaki misses with a low kick.
Sakazaki connects nicely with a jab. Noted by the judges no doubt.
Da moves out of range as Sakazaki throws a body kick.
Da fails with a takedown attempt.
Sakazaki throws a nice looking combination but Da bobs and weaves to avoid any damage.
Da connects with a right hand. Sakazaki shakes it off.
Wooooo! Give it up for these two warriors! They are putting on a show!
Da shuffles to his left behind two crisp jabs. Sakazaki eats them both and turns towards Da to reposition himself and eats a stinging right hand-left hook combo.
Da slips under a jab from Sakazaki.
As the round comes to an end the crowd are showing their appreciation for a great round of action.
Da scores with a three punch combo!
Sakazaki throws a decent looking leg kick but it doesn't land clean.
Sakazaki lands a leg kick and bounces back out of range.
Who Da is fighting for a decision - hopefully he's judged it right and he's actually winning the fight.
Da fails with the takedown.
And that's the end of the fight!
I would just about give that final round to Who Da.
I've got Da winning every round here. Surely the decision will go his way and he'll pick up a well deserved decision victory. Over to the ring announcer for the scorecards.
Ladies and gentlemen, after 3 rounds of action, we go to the scorecards for a decision.
Judge Donatello Bradman scores the fight 27:30
Judge Hugh Johnson scores the fight 27:30
Judge Bruno Hogan scores the fight 27:30
In favor of your winner, by unanimous decision... Who Da!
Who Da decided to thank the fans in attendance for making a great atmosphere. It seemed to go down pretty well.
|
|
|
|
|
|
|
|
|
|
|
|
|
|
|
|
|
|
|
|
|
|
|
| S |
C
A |
G |
S |
C
B |
G |
|
S |
C |
G |
|
energy
A | B |
|
hype
A | B |
|
pop
A | B |
|
mgr
A | B |
|
FIGHT
RATING
63% |
|
|
|
|
|
|
