|
|
PBP Commentary |
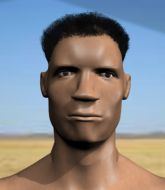
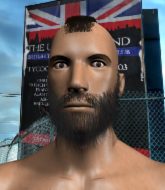
Coming up we have a super heavyweight MMA rules bout between Chandlerr Chance (ranked 0 p4p, 0 weight class) and David Amod (ranked 0 p4p, 0 weight class). We have two fighters making their debuts here, so let's see who comes out of this one with their first professional victory.
 |
|
 |
| 225 cm
18
300 lbs
0 - 0 - 0 |
|
218 cm
23
284 lbs
0 - 0 - 0 |
BJJ Blue Belt
Brawler
Intelligent |
|
BJJ Blue Belt
Brawler
Determined |
|
| |
|
Ladies and gentlemen. This fight is 3 rounds, in the super heavyweight division.
Introducing the fighter to my left, fighting out of the red corner.
With a record of
0 - 0 - 0, fighting out of Sydney, Chandlerr Chance!
And introducing the fighter to my right, fighting out of the blue corner.
With a record of
0 - 0 - 0, fighting out of Sydney, David Amod!
The judges for this bout are Bruno Hogan, John Mangel and Skip Squint.

The bell rings for round one and we are underway!
Amod doesn't manage to clinch there - Chance circles away.
Amod tries to score a power double leg takedown but Chance sees that one coming and sprawls well. That will dishearten Amod somewhat.
Amod tries for a takedown but Chance sees it coming a mile off and avoids it easily.
Chance pivots as if he's going to throw a leg kick but stops half way.

Amod scores a takedown into full mount!
If this pace continues, the referee will definitely step in and force a standup.
Chance tries to lock up and control but Amod gives him a forearm to the face and pushes him away.
Chance bucks up and manages to get a nice reversal! He's in guard on the top - nicely done!
Chance is looking to stand up but Amod won't let him.
Amod looking to sweep using the butterfly guard but Chance puts pay to that idea as he passes nicely into half guard.
The fighters are pressed up against the cage, both looking to find a bit of space to work.

Amod looking for submissions from an awkward position here.

Amod kicks Chance off and gets back to his feet.

That's one minute gone in the round.
Amod tries to clinch up.
Amod shoots in but no luck this time.
Chandlerr Chance has stuffed three takedown attempts in the round now. That's going to take a lot out of David Amod.
Amod is on the wrong end of a nice combination from Chance.
Chance stuffs a takedown. It's all about dictating where the fight takes place and Chance wants it to stay on the feet.
Amod shoots in for a double leg but Chance sprawls well. That's going to sap some energy.
Amod looks gassed!
A big left from Amod misses.
Chance shoots in but no luck this time.
Amod displays good takedown defense there as he swats away a double leg from Chance.
Amod shoots in for a takedown. "Ole!" shouts Chance as he jumps to the side.
Amod fakes high and shoots in for a takedown but Chance avoids it really well and circles away.

That's two minutes gone in the round.
A head kick misses from Chance.
Chance looking to land some kicks to the body here.

Chance closes the distance and clinches.
Chance tries to break the clinch but Amod is controlling the position.
Amod taking a breather.
Chance tries to circle away but Amod has him pinned against the cage.
Fantastic stuff here - a very entertaining period of action, which has drawn cheers from the crowd.
Chance tries to score a body lock takedown but Amod shows good agility there to stay on his feet.
Chance misses with a body punch.

Amod breaks the clinch and we're back to striking at distance.

That's three minutes gone in the round.
Chance displays good takedown defense there as he swats away a double leg from Amod.
Chance tries to clinch but is not successful on this occasion.
Chance shoots in for a takedown but Amod shows good takedown defense.
Chance shoots in looking for a takedown. Amod tries to sprawl out of it but Chance keeps driving through. The fighters are pinned against the cage. Amod manages to get underhooks and after a bit of a struggle, circles away and we're back to standing.
Chance misses with a wild combination.
Chance shoots in but Amod avoids the takedown attempt easily.
Chance tries to sprawl but Amod drives through with a takedown into half guard.

That's four minutes gone in the round.
Amod decides he's had enough of the ground and stands up.
Chance wants to clinch up but Amod keeps it at a distance.
Chance tries to clinch up but Amod circles away and keeps his distance.
Amod connects with a body shot that sends Chance's belly button to the back.
Chance fails miserably with a takedown attempt.
A looping hook to the body misses from Amod. Chance does a little dance to reset his feet.
As the round comes to an end the crowd are showing their appreciation for a great round of action.
A kick lands to the mid section there for Amod.
This is a great period of action - very entertaining stuff!

Amod clinches up with Chance and pushes him back against the cage.
And thats the end of the round the fighters go back to their corners.
A close round but David Amod will probably get the nod.
The referee calls time. The cornermen exit stage left and we're back to business.

Chance stuffs the takedown attempt from Amod. Amod gets slowly back to his feet.
Chance looks for a takedown here. Will he get it? Amod is fending him off so far but Chance persists. Nope, Amod circles away and we're back to standing.
Amod tries to close the distance and clinch up but Chance swats him away and circles back towards the center.
Amod wants to clinch up but Chance keeps it at a distance.
Nice sprawl there from Amod as Chance shoots in.
Amod stuffs the takedown.
That's three failed takedown attempts in the round for Chandlerr Chance. That's going to take a lot out of him.
Amod shoots in for a takedown but Chance shows good takedown defense.
Amod lands a front kick.
Amod scores with a jab to the jaw of his opponent.
Both fighters are absolutely exhausted here.
Amod buckles his opponent's knee momentarily with a nice leg kick.
Amod decides to change it up a bit and drives through with a nice takedown into half guard.
That's one minute gone in the round.
Chance trying to control here.
Amod sitting and controlling from the half guard.
Amod stands up and beckons Chance to join him on the feet.
Amod throws a looping left and ducks down for a takedown. He's got his arms around Chance's waist but Chance gets an underhook and avoids the takedown by throwing Amod off to one side.
Chance doesn't succeed with the takedown
and Amod counters with a takedown into full mount! That could mean trouble for Chance!
That's two minutes gone in the round.
Amod content just to control the position here.
The crowd cheering loudly, showing their appreciation for the quality fight we're seeing here.
Chance throwing hammer fists to the chest of Amod. What's that going to do exactly?
Chance is looking to improve his position but Amod isn't that keen on the idea.
Chance has worked his way to half guard, taking advantage of Amod's lack of action.
Amod is figuring out what he wants to do next.
That's three minutes gone in the round.
The referee is asking the fighters to pick up the pace.
Amod prevents Chance from standing back up.

The ref stands the fighters back up, due to lack of action by David Amod.
Amod tries to clinch up against the cage, rushing in the close the distance. Chance manages to break the clinch and circles back to the middle of the mat.
Amod has a takedown stuffed.
Chance shoots in looking for a takedown but Amod manages to keep the fight standing, pushing Chance's face into the canvas for good measure before circling away.
Chandlerr Chance is looking to throw some combinations by the looks of things.
That's four minutes gone in the round.
Amod feints and then cracks Chance's leading leg with a nice low kick. He's obviously looking to slow Chance down.
Chance misses with a takedown attempt. He shot from a bit too far out.
Chance gets caught napping as Amod dives in and scores a takedown. Chance manages to retain guard.
Amod slows down the pace of the fight, as he sits in guard.
Chance throws a couple of weedy looking strikes off his back.
David Amod has got the better of the ground game so far.
As the round comes to an end the crowd are showing their appreciation for a great round of action.
Chance controlling Amod's posture.
And thats the end of the round the fighters go back to their corners.
David Amod showed his class in that round. I'd imagine he'll take it on all the scorecards.
The minute break is over - no more time for sponges and pep talks - back to the action! This is the final round!

Amod just misses with a punch to the body.
Amod tries to close the distance and clinch up but Chance swats him away and circles back towards the center.
Chance has managed to clinch.
Amod manages to pull guard.
Amod has a closed guard, preventing Chance from standing up.
Amod is working actively from the bottom, looking for submissions. He's escaped his hips to the side and he's going for an armbar! Chance has his hands clasped together but Amod extends an breaks Chance's desperate grasp, forcing a tap out due to armbar! Nice BJJ displayed there by Amod.
Ladies and gentlemen, after 0:56 of round 3, we have a winner by way of Submission (Armbar). David Amod!
|
|
|
|
|
|
|
|
|
|
|
|
|
|
|
|
|
|
|
|
|
|
|
| S |
C
A |
G |
S |
C
B |
G |
|
S |
C |
G |
|
energy
A | B |
|
hype
A | B |
|
pop
A | B |
|
mgr
A | B |
|
FIGHT
RATING
100% |
|
|
|
|
|
|
