|
|
PBP Commentary |
Coming up we have a bantamweight MMA rules bout between Ra Sa (ranked 0 p4p, 0 weight class) and Death Above (ranked 0 p4p, 0 weight class). Both fighters will be looking to make this an exciting fight for the fans, I'm sure!
 |
|
 |
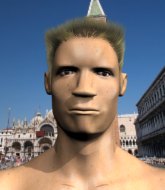
| 160 cm
18
131 lbs
0 - 1 - 0 |
|
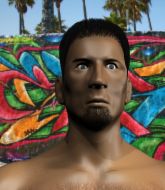
190 cm
25
143 lbs
0 - 0 - 0 |
BJJ Blue Belt
Brawler
Self confident |
|
BJJ Blue Belt
Counter striker
Tends to cut |
|
| |
|
Ladies and gentlemen. This fight is 3 rounds, in the bantamweight division.
Introducing the fighter to my left, fighting out of the red corner.
With a record of
0 - 1 - 0, fighting out of London, Ra Sa!
And introducing the fighter to my right, fighting out of the blue corner.
With a record of
0 - 0 - 0, fighting out of London, Death Above!
The judges for this bout are James Ackerman, James Atkins and James Glass.

The bell rings for round one and we are underway!
Sa pulls out of a head kick attempt.
Sa doesn't manage to clinch there - Above circles away.
Above tries to clinch but is not successful on this occasion.
Sa misses with a body shot. Nice footwork from Above.

Above shoots in and gets a takedown into Sa's guard.
Sa looking to sweep here. No luck so far.
Sa working the defensive guard well to avoid strikes from Above.
Above loading up with the ground and pound but he's missing more than he's landing in this flurry.
Above looking to control the position here, rather than advance.
Above throws a big right hand that misses.
Above looking to pass the guard.
The ref warns both fighters not to hold the cage as they work up against the meshing.

That's one minute gone in the round.
Sa keeping moving, preventing Above from controlling successfully.

Death Above has forced the referee to step in and restart the fight on the feet.
Above tries to close the distance and clinch up against the cage but Sa paws at him with a jab and circles away.
Sa bobs and weaves and then throws a good body kick.
Above throws a head kick that looked like it stung.

Sa rushes Above and presses him up against the cage.
Above prevents the takedown attempt.
Sa wants to take the fight to the mat but Above manages to get underhooks and keep the fight in the clinch.
Sa is breathing heavily.
Above lands a nice elbow.

Sa pulls guard.
Above advances to half guard.
Sa might be looking to lock onto one of his opponent's long limbs for a submission, whilst we're on the ground.
Above passes the guard and advances to mount!
Sa wants to control but Above is having none of it.

That's two minutes gone in the round.
The fans in attendance giving it up for the two fighters, who have really let it all hang out in the last minute or so!
The crowd growing excited in anticipation of a finish here! Right on cue, Above cracks his opponent with a massive right hand that draws loud cheers!

Above with some aggressive grappling here. He's looking for submissions here, rather than waiting for the opportunity to counter.
Above is in the full mount, landing strikes.
Above looks like he's working for a submission but he's not found anything just yet.
Above controlling the position easily from mount.

That's three minutes gone in the round.
Above landing strikes from the mount and Sa is in trouble!
Above working the ground and pound effectively.
Above controlling from mount.
Above scores with a couple of good head shots there.

That's four minutes gone in the round.
Above takes a little breather and maintains the position. The referee will be looking for him to stay active from such a dominant position though.
Above punishing his opponent with strikes.
Above looking to control but Sa is working nicely, looking to advance position himself.
Sa tries to hold on but Above pushes him away.
Above looking to secure an arm triangle but Sa defends it well.
The crowd are loving this. Great action here.
Above controlling the pace for now.
As the round comes to an end the crowd are showing their appreciation for a great round of action.
And thats the end of the round the fighters go back to their corners.
Death Above dominated that round.
The fighters get back to their feet, the hooter sounds and we're back to the action!

Sa misses with a takedown attempt - Above sprawls well and throws a nice strike on the way out which just misses.
Above fails to land the takedown.
Above lands with a two punch combination before moving back out of range.
Sa has a takedown stuffed.
Above shoots in for a takedown but Sa shows good takedown defense there and keeps this one on the feet.
Above circles away from the clinch attempt.
Sa misses with a takedown
and Above counters with a nice double leg into half guard.
That's three failed takedown attempts in the round for Ra Sa. That's going to take a lot out of him.
Both fighters are absolutely exhausted here.
That's one minute gone in the round.
Sa trying to control from the bottom.
Ground and pound from Above.
Above stalling.
Above's corner are shouting for him to control the position and he seems happy to oblige.
Above is working hard to pass the guard. He's done it - he's now in full mount! Trouble for Sa!
Above tucks in and makes sure he doesn't lose the dominant position.
Above has the superior BJJ but he's also working some ground strikes into his gameplan.
The fighters are pressed up against the cage, both looking to find a bit of space to work.
That's two minutes gone in the round.
Above scores with a couple of good head shots there.
Sa is bucking up trying to escape but Above cracks him with another couple of good strikes.
Above tries to control but Sa wriggling away.
Wooooo! Give it up for these two warriors! They are putting on a show!
Above goes for an armbar but he's not got it
Sa turns into him and now he's in Above's guard.
Above working for a triangle but Sa defends it easily.
That's three minutes gone in the round.
Sa trying to control but Above is working from the bottom.
Above pulls Sa in close to his closed guard and prevents Sa from doing any damage or advancing position.

Above is edging up against the cage. He's using the cage to get back to his feet. Nice work there - the fighters are clinched.
That's four minutes gone in the round.
Above gets underhooks to prevent Sa's takedown attempt.

Above breaks the clinch and we return to the middle of the mat.
Above feints and as Sa raises his hands in defense, Above changes levels and drives through with a takedown into guard.
Above is stalling in the full guard.
Sa is trying to control the position but Above postures up.
Above throwing shots from guard but he's hitting more mat than opponent.
As the round comes to an end the crowd are showing their appreciation for a great round of action.
Above passes easily into side control. Nice work.
Above is putting a hurting on Sa here, landing some big shots from side control.
And thats the end of the round the fighters go back to their corners.
Death Above showed his class in that round. I'd imagine he'll take it on all the scorecards.
The minute break is over - no more time for sponges and pep talks - back to the action! This is the final round!

Above shoots in looking for a single leg takedown. Sa is trying to defend but Above finishes it well and ends up in half guard. Let's see if he can advance position further.
Above is trying to work for a kimura but Sa is defending well.
Death Above has got the better of the ground game so far.
Above trying to mount his opponent but Sa defends it.
Above takes a deep breath and rests his weight momentarily on top of his opponent, to control the position.
Above wants to control but Sa is keeping him busy.
Sa has no desire to be mounted, so is trying to control. Above is working away from the top position though.
Above decides to stand and escape the position.
Ra Sa seems to be the more aggressive standup fighter in this bout.
That's one minute gone in the round.
Above shoots in for a takedown! He's got it and he's managed to land in full mount! That's better than Above was expecting from the takedown attempt, I'm sure!
Both fighters are breathing heavily.
Sa takes a big shot to the head but keeps on trying to improve his position.
Above fakes a shot to the body and cracks his opponent in the head. Nice ground and pound there!
Sa wants to get back to his feet.
Above breaks from Sa's wrist control and lands an elbow.
Above tucks in and makes sure he doesn't lose the dominant position.
That's two minutes gone in the round.
Above wants to take his opponent's back but Sa doesn't allow it.
Above controlling his opponent.
This has been an exciting period of action!
Above is working to isolate an arm here. It's a telegraphed submission attempt but he's gone for it anyway - and he's got it! Above extends the arm and Sa is forced to tap!
Ladies and gentlemen, after 2:52 of round 3, we have a winner by way of Submission (Armbar). Death Above!
|
|
|
|
|
|
|
|
|
|
|
|
|
|
|
|
|
|
|
|
|
|
|
| S |
C
A |
G |
S |
C
B |
G |
|
S |
C |
G |
|
energy
A | B |
|
hype
A | B |
|
pop
A | B |
|
mgr
A | B |
|
FIGHT
RATING
90% |
|
|
|
|
|
|

