|
|
PBP Commentary |
Coming up we have a light heavyweight MMA rules bout between Hero Hito (ranked 0 p4p, 0 weight class) and Agung Kang (ranked 0 p4p, 0 weight class). Hito comes into the arena with Follow the leader blaring out of the sound system. Fingers crossed for an exciting fight - I'm sure both fighters are looking for a nice under the table bonus!
 |
|
 |
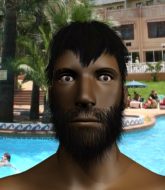
| 185 cm
26
216 lbs
3 - 1 - 0 |
|
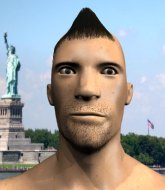
184 cm
27
205 lbs
2 - 0 - 0 |
BJJ Purple Belt
Excellent boxer
Granite chin |
|
Good wrestler
Basic striking
Granite chin |
|
| |
|
Ladies and gentlemen. This fight is 3 rounds, in the light heavyweight division.
Introducing the fighter to my left, fighting out of the red corner.
With a record of
3 - 1 - 0, fighting out of Sydney, Hero Hito!
And introducing the fighter to my right, fighting out of the blue corner.
With a record of
2 - 0 - 0, fighting out of Sydney, Agung Kang!
The judges for this bout are John Mangel, Summer Carpenter and Winston Howard.

The bell rings for round one and we are underway!

Kang is looking for a takedown here. He's shot in and has managed to get it, finishing up in Hito's half guard.

Hito looking for submissions from an awkward position here.

Kang seems to be looking for submissions.
Kang is sneakily working for an arm triangle but Hito sees it coming and defends easily.
Kang throwing shots but Hito is blocking nicely.
Both fighters really going for it on the ground here!
Kang trying to control the action but Hito is working from the bottom.
Hito looking to work for a kimura from the bottom.
The ref warns both fighters not to hold the cage as they work up against the meshing.
Kang controlling the action here.
Hito tries to roll over but Kang keeps him under control.
Kang is taking a breather. Hito says something to him but it's hard to make out. Perhaps he's telling him to get on with it and actually do something.
Kang is trying a forearm choke
I don't think that's going to do much at this level of the game.

That's one minute gone in the round.
Hito looking to work for a kimura from the bottom.
Hito is looking for a sweep. Kang is wise to his cunning plan and keeps the top position.
The fighters are pressed up against the cage, both looking to find a bit of space to work.
Kang seems to be working for a kimura but Hito defends the submission attempt.
Kang is looking to take a break and control but Hito is keeping him honest, looking to work from the bottom.
Hito looking for submissions off his back.
The fighters are going at a pretty good pace and they're both starting to sweat now.
Hito actively working from the bottom here.
Hito looking to work for a kimura from the bottom.
Hito actively working from the bottom here.

That's two minutes gone in the round.
Kang missing with the ground and pound from half guard.
Hito is looking to sinch up a guillotine here but Kang pulls his head out easily.
Kang missing with some ground and pound from the half guard.
Hito avoiding damage under a succession of punches from Kang.
Hito tries to roll over but Kang keeps him under control.
Hito is not content to let Kang control the position.
Kang is taking a breather. Hito says something to him but it's hard to make out. Perhaps he's telling him to get on with it and actually do something.
Hito wants to improve his position but Kang is controlling well.
Kang wants to pass to mount but Hito is defending the position.

That's three minutes gone in the round.
Hito is looking to regain full guard. Not this time though.
Neither fighter is being very active at the moment, with Kang in particular looking to stall.

Agung Kang has forced the referee to step in and restart the fight on the feet.
Kang fails with a takedown attempt.
Hito throws a big shot that misses.
Hito throws a body punch but Kang moves out of range.
Kang decides to change it up a bit and drives through with a nice takedown into half guard.
Hito looking for submissions from an awkward position here.
Kang is looking to take a break and control but Hito is keeping him honest, looking to work from the bottom.
Hito looking for submissions from an awkward position here.
Hito avoiding damage under a succession of punches from Kang.
Hito looking for submissions from an awkward position here.

That's four minutes gone in the round.
Hito looking for submissions from an awkward position here.
Hito is breathing heavily.
Hito is refusing to be controlled, as Kang sits in half guard.
Kang is trying for a guillotine from the top but the pressure isn't in the right place so Hito is just riding it out for now. Kang eventually gives up the hold.
Hito actively working from the bottom here.
Kang is looking to advance position but Hito won't allow it.
This has been an exciting period of action!
Kang throwing shots but they're hitting the canvas more than the man.
As the round comes to an end the crowd are showing their appreciation for a great round of action.
Hito is looking to regain full guard. Not this time though.
Kang throwing punches and elbows but they're not doing any damage.
Hito looking to work for a kimura from the bottom.
And thats the end of the round the fighters go back to their corners.
Agung Kang dominated that round.
The referee calls time. The cornermen exit stage left and we're back to business.

Hito looks to land a right hand but Kang moved out of range.
Hito connects with the punch.
Hito misses with a straight left.
Oooooooooooh, not good. A low kick from Hito lands where it shouldn't have, right in the... well, you know what he did? He kicked him in the penis. He's injured, injured bad. The referee sends both fighters to their corners and Kang has 5 minutes to recover. He's OK now though... a thumbs up from Kang and we're back underway with a touch of gloves.
Some wild striking there from Hito.
Kang has a takedown stuffed.
Kang closes the distance and clinches up, looking for a takedown. He shifts his weight and gets a nice trip into half guard.
Kang is looking to take a break and control but Hito is keeping him honest, looking to work from the bottom.
Hito looking for submissions from an awkward position here.
Agung Kang has got the better of the ground game so far.
Kang is looking for a kimura but he's never going to get it from there.
Hito moves into full guard.
That's one minute gone in the round.
Kang is intent on slowing down the pace of the fight, simply looking to control.
Hito working for a triangle but Kang defends it easily.
Kang advances to half guard.
Kang sitting in half guard, looking to land shots. Hito defending well though.
Kang performing his best blanket impression for a moment.
Hito actively working from the bottom here.
Hito is refusing to be controlled, as Kang sits in half guard.
Hito looking for submissions off his back.
Kang trying to pass the guard but Hito defending well.
That's two minutes gone in the round.
Hito is defending against the submission attempts here by Kang.
Kang wants to lay and pray for a moment but Hito keeps working.
Kang is looking for an arm triangle, whilst trying to pass to side control. Hito doesn't seem that keen to cooperate though. No luck this time Kang.
Kang controlling the action here.
Kang wants to lay and pray for a moment but Hito keeps working.
Hito actively working from the bottom here.
That's three minutes gone in the round.
Kang is looking for a kimura here.
Hito tries to get to full guard but Kang has control of the leg.
Kang thows a huge punch but Hito dodges it nicely.
Kang is working for a submission of some sort.
Hito wants to get back to full guard.
Hito looking to work for a kimura from the bottom.
Kang missing with the ground and pound from half guard.
That's four minutes gone in the round.
Kang seems very keen to just sit and control from half guard but Hito does not like that idea so much and is remaining active off his back.
Kang seems to be looking for submissions.
Kang is looking for a kimura but Hito is holding onto that half guard position, so it's hard for Kang to get the leverage.
Kang is working for a kimura but Hito is defending it quite comfortably.
Hito is looking to regain full guard. Not this time though.
Kang not landing any meaningful shots this time.
Hito moves into full guard.
Hito has a loose triangle. He'll be looking to tighten that up but Kang can see exactly what he's planning and manages to posture up and free himself.
As the round comes to an end the crowd are showing their appreciation for a great round of action.
Kang landing with the ground and pound.
We've seen a great period of action over the last minute or so - credit to both fighters for going all out!
Kang trying to control the position from guard on top but Hito is wriggling around, looking for whatever he can.
And thats the end of the round the fighters go back to their corners.
Agung Kang showed his class in that round. I'd imagine he'll take it on all the scorecards.
The fighters get back to their feet, the hooter sounds and we're back to the action! Ladies and gentlemen, this is the final round!

Hito tries to sprawl but Kang drives through with a takedown into half guard.
Kang missing with some ground and pound from the half guard.
Hito actively working from the bottom here.
Kang throwing shots but they're hitting the canvas more than the man.
Kang is taking a breather. Hito says something to him but it's hard to make out. Perhaps he's telling him to get on with it and actually do something.
Hito works his way to full guard. Good work.
Hito tries to land a sweep but no joy.
Kang forces his way into half guard.
Kang throwing shots but they're hitting the canvas more than the man.
Hito wants to improve his position but Kang is controlling well.
Kang seems to be working for a kimura but Hito defends the submission attempt.
Kang is trying a forearm choke
I don't think that's going to do much at this level of the game.
That's one minute gone in the round.
Kang not landing any meaningful shots this time.
Kang throwing shots but they're hitting the canvas more than the man.
Hito looking to work for a kimura from the bottom.
Hito actively working from the bottom here.
Both fighters are breathing heavily.
Kang wants to pass the guard but Hito is defending well.
Hito is trying to get back to full guard.
Kang with a momentary lay and pray from half guard.
Kang seems to be working for a kimura but Hito defends the submission attempt.
That's two minutes gone in the round.
Kang seems very keen to just sit and control from half guard but Hito does not like that idea so much and is remaining active off his back.
Kang controlling the action here.
Kang thows a huge punch but Hito dodges it nicely.
Kang stalling.
Hito is looking to sinch up a guillotine here but Kang pulls his head out easily.
Hito gets back to full guard.
Hito had isolated an arm as going for a kimura. Kang defends it easily.
Kang throwing strikes but missing.
That's three minutes gone in the round.
Hito is working actively off his back, looking to secure an arm or perhaps work for a triangle.
Kang looking to pass the guard.
Hito throwing his legs up looking for a triangle.
Kang trying to control but Hito is working from the bottom.
Hito is throwing his legs up, looking for submissions. Kang is aware though and is defending well.
Hito being controlled here, momentarily.
Kang forces his way into half guard.
Kang not throwing his punches with enough precision this time.
That's four minutes gone in the round.
Kang is trying to work for a kimura. This could be trouble! No, Hito has managed to free his arm - good work.
Hito is looking for a sweep. Kang is wise to his cunning plan and keeps the top position.
Kang is looking for an arm triangle, whilst trying to pass to side control. Hito doesn't seem that keen to cooperate though. No luck this time Kang.
Hito keeping his head moving to avoid the ground and pound.
Hero Hito has stepped it up - he knows he needs a finish here!
Kang is working for a submission of some sort.
Hito is staying active underneath Kang, who seems content to just control the action from this position.
As the round comes to an end the crowd are showing their appreciation for a great round of action.
Kang is trying for a guillotine from the top but the pressure isn't in the right place so Hito is just riding it out for now. Kang eventually gives up the hold.
We've seen a great period of action over the last minute or so - credit to both fighters for going all out!
Kang seems to be looking for submissions.
And that's the end of the fight!
Agung Kang comfortably won the final round on my scorecard.
I've got Kang winning every round here. Surely the decision will go his way and he'll pick up a well deserved decision victory. Over to the ring announcer for the scorecards.
Ladies and gentlemen, after 3 rounds of action, we go to the scorecards for a decision.
Judge John Mangel scores the fight 27:30
Judge Summer Carpenter scores the fight 27:30
Judge Winston Howard scores the fight 27:30
In favor of your winner, by unanimous decision... Agung Kang!
Agung Kang thanked the fans post fight for their support.
|
|
|
|
|
|
|
|
|
|
|
|
|
|
|
|
|
|
|
|
|
|
|
| S |
C
A |
G |
S |
C
B |
G |
|
S |
C |
G |
|
energy
A | B |
|
hype
A | B |
|
pop
A | B |
|
mgr
A | B |
|
FIGHT
RATING
77% |
|
|
|
|
|
|
