|
|
PBP Commentary |
Coming up we have a featherweight MMA rules bout between Mike Cope (ranked 0 p4p, 0 weight class) and Johnny McBraddish (ranked 0 p4p, 0 weight class). Cope comes to the cage accompanied by I Against I. McBraddish comes into a darkened arena with his song building. Broken by 12 Stones kicks in, the lights come on and the crowd goes wild! What a showman! There are an array of beautiful celebrities at ringside tonight! I wonder if any of them paid for their tickets.
 |
|
 |
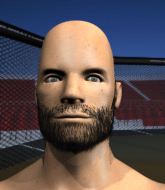
| 176 cm
26
148 lbs
16 - 3 - 0 |
|
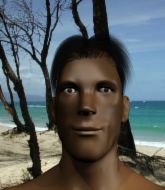
150 cm
31
130 lbs
27 - 6 - 0 |
Abu Dhabi Champ
World class boxer
Cardio machine |
|
BJJ Purple Belt
World class boxer
Good gas tank |
|
| |
|
Ladies and gentlemen. This fight is 5 rounds, for the featherweight championship of the world!
Introducing the champion to my left, fighting out of the red corner.
With a record of
16 - 3 - 0, fighting out of New York, Mike Cope!
And introducing the challenger to my right, fighting out of the blue corner.
With a record of
27 - 6 - 0, fighting out of Sydney, Johnny McBraddish!
The judges for this bout are Konstantin Menshow, Aleksei Zolotukhin and Illya Tyunina.

The bell rings for round one and we are underway!
Cope fails to land with the punch combination there - jab, cross, hook, miss, miss, miss.
McBraddish connects with a solid leg kick.
Cope changes levels and scores with a jab to the body.
A swing and a miss from Cope.
McBraddish avoids the body shot from Cope.
Cope throws out a loose jab but McBraddish uses good head movement to avoid it.
McBraddish connects with a crisp jab.
McBraddish misses with a body punch
and Cope connects with a straight left hand counter down the middle.
Cope misses with a body shot.
Cope jabbing away but nothing is landing.
McBraddish misses with a low kick.
Cope takes a body punch that cleary hurt but he's trying not to show any weakness.
Cope fails to land the takedown.
Cope throws a right and a left that both miss.
McBraddish has a nice red mark on his side after a thudding body kick by Cope.
Well, he's not going to score with shots like that. A lazy body kick attempt from Cope.
Cope scores with the left hand. McBraddish knows he should have avoided that one.
Cope misses with a half-hearted attempt at a head kick.
McBraddish connects with a body shot.

That's one minute gone in the round.
McBraddish throws a hard body shot but it just misses.
Cope takes a shot right to the bread basket.
McBraddish is throwing a lot of body shots here, looking to wear down Cope rather than just go for the knockout.
Cope works the jab nicely.
McBraddish looks to score with a jab to the body but Cope is just out of range.
Cope takes a thudding leg kick, right into the meat of the thigh.
Cope misses with an uppercut.
Cope on the wrong end of a nice low kick. He's acting like it's no big deal but he doesn't want to take many more of those.
Cope is the aggressor but that punch slipped nicely by McBraddish.
Cope misses with a head kick.
McBraddish bobs and weaves well there to avoid the strikes.
McBraddish ducks down and throws a hook to the body but Cope moves away.
Nice defenses there by McBraddish.
McBraddish throws a low kick but Cope moves out of range easily.
Cope just misses with a punch to the body.
Cope looks frustrated there after his takedown attempt is stuffed easily.
McBraddish goes to the watering hole and comes back with a big thumbs up from the judges as he scores a three punch combo.
McBraddish uses good head movement to avoid the hook from Cope.

That's two minutes gone in the round.
Cope looking to land some kicks to the body here.
McBraddish moves out of range of the body kick.
McBraddish tries to clinch up but Cope circles away and keeps his distance.
Cope keeping a good distance there, avoiding the body shot.
Wow, both these guys are really going for it!
A telegraphed right hand from McBraddish misses the target.
Wooooo! Give it up for these two warriors! They are putting on a show!
McBraddish misses with a few strikes there.
McBraddish misses with a low kick.
Cope shoots in for a takedown. "I don't think so" says McBraddish as he avoids it easily.
That's three failed takedown attempts in the round for Mike Cope. That's going to take a lot out of him.
A solid body kick from McBraddish.
McBraddish scores with a punch to the gut of his opponent.
Cope misses with a body shot. Nice footwork from McBraddish.
Cope slips under a jab.
Cope uses some good footwork to avoid the body shot by McBraddish.
Cope lands a slapping body shot.
McBraddish fails in his attempt to clinch.
A nice leg kick lands there from McBraddish.
Cope closes the distance and clinches up with McBraddish, looking for a takedown. Cope pushes McBraddish against the cage but McBraddish circles to the side and manages to break the clinch.

That's three minutes gone in the round.
McBraddish throws a half hearted mid kick.
No luck with that takedown attempt from Cope.
A looping hook to the body misses from Cope. McBraddish does a little dance to reset his feet.
McBraddish slips under a jab from Cope.
Johnny McBraddish is looking to keep the fight on the feet at all costs.
Cope misses with a jab, cross combination.
Cope shoots in and drives through. McBraddish sprawls well.
McBraddish fakes high and swings low for a body shot but Cope manages to avoid it.
McBraddish throws a quick inside leg kick.
McBraddish attempts a leg kick but it's missed by a good margin.
Cope keeping a good distance there, avoiding the body shot.
Cope thuds his right hand into McBraddish's forehead from close range. That could be painful for both fighters.
Good shot there by McBraddish.
McBraddish checks a low kick from Cope.
McBraddish jabbing away but nothing is landing.
McBraddish digs a good hook to Cope's body.
Cope misses with a double jab.
McBraddish swings and misses with a hook to the body.

That's four minutes gone in the round.
McBraddish throws a body kick but he was well out of range there.
McBraddish misses with a body shot.
Cope fails to land with the punch combination there - jab, cross, hook, miss, miss, miss.
McBraddish moves out of range of the body kick from Cope.
McBraddish moves out of range of the body kick.
Cope takes a body punch but keeps moving.
Wooooo! Give it up for these two warriors! They are putting on a show!
McBraddish just misses with a punch to the body.
Cope lands a vicious shot with the stealth of a sniper and the strength of a viper. Are vipers that strong? I can think of lots of things that are stronger than a viper - not many rhyme with sniper though.
McBraddish is looking to take this fight into the clinch.
Cope looks to score with a jab to the body but McBraddish is just out of range.
A low kick from Cope is predictable there
and McBraddish counters with a nice jab to the body that keeps Cope thinking.
As the round comes to an end the crowd are showing their appreciation for a great round of action.
McBraddish misses with a body shot. Nice footwork from Cope.
Cope is using his reach advantage well here, landing the more effective single shots from range.
McBraddish clobbers Cope with an overhand right that has the crowd gasping. That made a horrendous noise.
Cope moves out of range as McBraddish strikes.
McBraddish stuns Cope with a nice body shot, before stepping back out of range.
Cope throws the left hand but McBraddish avoids the punch easily.
And thats the end of the round the fighters go back to their corners.
Johnny McBraddish dominated that round.
That's time! Back to the action!

McBraddish misses with a wild body shot.
Cope looks to throw the jab but McBraddish is out of range.
Johnny McBraddish seems to be getting the better of the standup.
Cope throws a looping overhand right but McBraddish ducks down to avoid it.
Cope uses decent footwork to sidestep a right hand from McBraddish.
Cope throws a body punch but McBraddish moves out of range.
Cope looks to land a body kick but McBraddish moved away.
No joy there for McBraddish, who threw a few shots but didn't land.

McBraddish has closed the distance and engaged Cope in a clinch.
McBraddish keeps the fight in the clinch, despite Cope's efforts to push away.
McBraddish lands a nice looking hook to the body, against the cage.
McBraddish goes for a body shot but it's blocked.
McBraddish is trying to maintain a safe position but Cope gets an underhook and turns McBraddish into the cage.
Cope lands a body shot.
The step up in weight doesn't seem to be a problem for McBraddish. He's performing admirably here against the bigger man.
McBraddish tried to land a shot to the body but connects with Cope's elbow.
McBraddish blocks a couple of punches on the inside.
Cope working hard to break the clinch.

Cope escapes the clinch and we're back to striking.
McBraddish scores with a sloppy punch to the body. Not much technique there but it did the business.
That's one minute gone in the round.
McBraddish throws a nice outside leg kick.
McBraddish fakes a jab and throws a low kick but Cope checks it well.
McBraddish swings and misses with a hook to the body.
McBraddish takes a punch right to his stomach. That took the wind out of him momentarily.
Cope shoots in for a takedown. "Ole!" shouts McBraddish as he jumps to the side.
McBraddish swings and misses with a hook to the body.
Cope closes the distance and clinches up with McBraddish, looking for a takedown. Cope pushes McBraddish against the cage but McBraddish circles to the side and manages to break the clinch.
McBraddish lands with a good body shot.
Nice defenses there by Cope.
Cope avoids a punch combination nicely.
McBraddish thows a body shot but no joy.
McBraddish dips down and scores with a jab to the body.
Cope shoots for a double leg takedown but McBraddish sprawls well. He's pushed Cope's face into the mat and manages to get back to his feet relatively easily.
That's three failed takedown attempts in the round for Mike Cope. That's going to take a lot out of him.
McBraddish avoids the head kick by Cope.
Cope scores with a punch to the head.
That's two minutes gone in the round.
Cope avoids the body shot from McBraddish.
McBraddish blocks a jab.
A slow jab from Cope misses its intended target.
McBraddish misses with a body shot.
McBraddish jabs at Cope's body.
McBraddish swings and misses with a hook to the body.
This has been an exciting period of action!
McBraddish throws a hook to the body but it doesn't connect.
McBraddish tries to clinch up against the cage, rushing in the close the distance. Cope manages to break the clinch and circles back to the middle of the mat.
McBraddish throws a push kick but Cope slaps the foot to one side.
Cope misses with a straight left.
McBraddish jabs Cope right on the nose. Cope blinks but takes it well.
McBraddish throws a body punch but Cope moves out of range.
Cope tries to score with a low kick but McBraddish moves his leg out of the way.
McBraddish throws a body punch but Cope moves out of range.
Cope fakes high and shoots in for a takedown but McBraddish avoids it really well and circles away.
McBraddish's corner calls for a 1, 2 combination and McBraddish duly obliges.
That's three minutes gone in the round.
McBraddish shapes like he's going to throw a leg kick but settles back down.
McBraddish misses with a low kick.
Cope connects nicely with a jab. Noted by the judges no doubt.

Cope fakes a strike and closes the distance, dragging McBraddish to the ground. Cope is now in McBraddish's guard.
McBraddish utilising some decent striking defenses from the guard, preventing the ground and pound.
Cope tries to free his leg and advance position but McBraddish is retaining full guard.
Cope is working hard here to advance position.
Cope working some ground and pound from guard but it's not doing any damage.
Cope pressing down on his opponent's thigh, looking to pass guard. McBraddish is keeping the position for now.
Cope throws a big elbow that misses.
That's four minutes gone in the round.
Cope trying to control the position from guard on top but McBraddish is wriggling around, looking for whatever he can.
Cope working some ground and pound from guard but it's not doing any damage.
Cope pressing down on his opponent's thigh, looking to pass guard. McBraddish is keeping the position for now.
As the round comes to an end the crowd are showing their appreciation for a great round of action.

Well, the referee has seen enough. Neither fighter is active enough on the ground so he's stood them back up.
Cope shoots in for a double leg but McBraddish sprawls well. That's going to sap some energy.
Cope moves out of range of the body kick from McBraddish.
And thats the end of the round the fighters go back to their corners.
A close second round but Johnny McBraddish will probably get the nod - 10:9.
Well, the break between rounds is over. Let's get back to the scrappin!

Cope fails miserably with a takedown attempt.
McBraddish jabbing away but nothing is landing.
Nice cross by Cope.
Cope throws out a token jab with nothing on it.
McBraddish swings for the body but Cope moves out of range.
McBraddish moves in looking to clinch but Cope pushes him off.
A swing and a miss from McBraddish.
Cope motions for McBraddish to come forward. Cope throws a leg kick but it misses it's target.
McBraddish moves into range and lands a nice leg kick.
Cope takes a swing at McBraddish's ribcage but misses.
Cope uses some good footwork to avoid the body shot by McBraddish.
McBraddish scores with a shot to the body.
Cope throws a leg kick but McBraddish moved away.
Cope tries to bum rush McBraddish with a series of wild strikes but McBraddish uses good footwork to avoid the assault.
Nice body punch from McBraddish.
McBraddish stuffs the takedown.
That's one minute gone in the round.
Cope shoots in for a takedown but McBraddish shows good takedown defense.
That's three failed takedown attempts in the round for Mike Cope. That's going to take a lot out of him.
A jab from McBraddish misses.
Cope with a hook.
Cope takes a body punch but keeps moving.
McBraddish misses with a wild body shot.
McBraddish lands with a thumping leg kick.
McBraddish looks to land a combination but Cope avoids it well.
McBraddish lands a beauty of a right hand that gets the crowd cheering.
Cope misses the jab.
Cope closes the distance and looks for a trip takedown... aaaand he's got it - Cope lands in his opponent's guard.
The fighters are pressed up against the cage, both looking to find a bit of space to work.
Both fighters are breathing heavily.
Cope trying to control the position from guard on top but McBraddish is wriggling around, looking for whatever he can.
McBraddish keeping full guard, as Cope tries to pass.
That's two minutes gone in the round.
Cope trying to land body shots but he keeps hitting the mat.
McBraddish really doesn't want to stay on the ground with Cope. If he can't get it back to his feet, it's only a matter of time before he'll be tapping out.
Cope looking to pass the guard.
Cope working some ground and pound from guard but it's not doing any damage.
There's a bit of a scramble here and now McBraddish is on top in guard.
That's three minutes gone in the round.

Cope is looking for a guillotine. You can't force these things though and McBraddish defends well.
McBraddish got a little sloppy there for a moment and Cope has worked his way into a loose triangle - can he finish it?! No, McBraddish has managed to get both his arms back between Cope's legs - danger averted.
McBraddish stopping the sweep attempt from Cope.
That's four minutes gone in the round.
Cope is working actively off his back, looking to secure an arm or perhaps work for a triangle.
Cope is working an open guard here, looking to improve his position. No doubt that will leave him open to counters but at least he's being more offensive.
McBraddish must be cautious of submissions here, given that his opponent has the superior Jiu Jitsu.
The crowd applaud the fighters efforts here as the round comes to an end.
Cope throwing his legs up looking for a triangle.
And thats the end of the round the fighters go back to their corners.
Mike Cope clearly takes that round.
The minute break is over - no more time for sponges and pep talks - back to the action!

Cope on the wrong end of a vicious looking body shot.
Cope misses with a hook.
McBraddish with a body punch. A glancing blow.
Cope fails with a rather predictable takedown attempt.
McBraddish connects with a good right hand that stumbles Cope. Cope circles away out of range and recomposes himself.
Cope ducks down and throws a hook to the body.
McBraddish avoids the head kick by Cope.
McBraddish takes a jab on the nose. He smiles like he loves it and keeps coming.
Cope shoots for a double leg takedown but McBraddish sprawls well. He's pushed Cope's face into the mat and manages to get back to his feet relatively easily.
McBraddish connects with an inside leg kick.
A jab from McBraddish misses.
Jab, jab by Cope - just one landing.
McBraddish misses the shot to the body.
A looping hook to the body misses from McBraddish. Cope does a little dance to reset his feet.
That's one minute gone in the round.
Cope looks to land a combination but McBraddish avoids it well.
Cope misses with a double jab.
It's got to the stage where if one of these guys blows hard enough, the other might fall over.
Cope throws a leg kick that misses.
Cope lunges at McBraddish with a hook that half lands and is half blocked by McBraddish's hand.
Cope uses some good footwork to avoid the body shot by McBraddish.
A combination from Cope does no damage.
McBraddish misses with a body shot. Nice footwork from Cope.
Cope takes a body punch that cleary hurt but he's trying not to show any weakness.
McBraddish looks to score with a jab to the body but Cope is just out of range.
Cope keeping a good distance there, avoiding the body shot.
Cope looks to score with a jab to the body but McBraddish is just out of range.
Cope misses with a body shot.
McBraddish swings away but doesn't land with a series of punches.
McBraddish moves away from the strike by Cope.
McBraddish blocks a jab.
Cope waving his hands out in front of him, looking to distract McBraddish.
That's two minutes gone in the round.
McBraddish clinches up with Cope and pushes him back against the cage.
McBraddish lands a short shot on the inside that snaps the head of Cope backwards.
McBraddish presses Cope against the cage and delivers a mid-strength body shot.
McBraddish taking a breather.
McBraddish tries a body shot but Cope blocks it.
Cope can't find room to land a body shot as McBraddish controls the action.
Cope blocks a body shot from McBraddish.
McBraddish lands with a short head shot on the inside.
Fantastic stuff here - a very entertaining period of action, which has drawn cheers from the crowd.
Cope tries to land a shot to the body but it's blocked.
Cope wants to push off and get back to the center of the mat but McBraddish has him pressed against the cage.
Cope fails to land with a short punch on the inside.
Cope tries to circle away but McBraddish has him pinned against the cage.
McBraddish lands a body shot in the clinch.
Cope tries to take the fight to the ground by pulling guard but can't manage it.
That's three failed takedown attempts in the round for Mike Cope. That's going to take a lot out of him.
McBraddish lands a body punch - he's looking to wear down Cope.
McBraddish misses with a shot to the kidneys.
McBraddish is trying to maintain a safe position but Cope gets an underhook and turns McBraddish into the cage.
That's three minutes gone in the round.
McBraddish misses with a body punch.
McBraddish lands a nice looking hook to the body, against the cage.
McBraddish has Cope pressed against the cage, preventing Cope from circling away and getting back to striking at range.
Cope is looking to break free of the clinch but McBraddish has double underhooks.
Cope tries to land a shot to the body but it's blocked.
Cope swings wildly with an uppercut but McBraddish uses good head movement to avoid it.
McBraddish goes for a body shot but it's blocked.
McBraddish struggles to land a body shot inside as Cope controls his hands.
Cope is trying to break the clinch but McBraddish is controlling him.
McBraddish tries a body shot but Cope blocks it.
Cope pushes off and circles away, back to the middle of the mat.
Cope blocks a jab.
McBraddish lands a body shot.
Cope keeping a good distance there, avoiding the body shot.
Cope uses some good footwork to avoid the body shot by McBraddish.
McBraddish ducks down and throws a hook to the body but Cope moves away.
That's four minutes gone in the round.
McBraddish uses good head movement to avoid the hook from Cope.
Cope scores with a reasonable looking shot to the body. McBraddish doesn't seem bothered though.
Cope throws a hook to the side of McBraddish's head but McBraddish sees it coming and ducks under it beautifully.
Cope is hobbling a little on that front leg after taking quite a few leg kicks so far in this fight.
Cope throws the left hand but McBraddish avoids the punch easily.
McBraddish connects with a hook to the side of his opponent's head.
Cope throws a right and a left that both miss.
Cope scores with a shot to the body.
McBraddish takes a swing at Cope's ribcage but misses.
Cope digs a good body shot into McBraddish's ribs.
This is a great period of action - very entertaining stuff!
Jab, cross, leg kick. Nice combination by Cope!
McBraddish uses good footwork to avoid the strikes from Cope.
Cope throws a low kick but McBraddish avoids it.
As the round comes to an end the crowd are showing their appreciation for a great round of action.
McBraddish just misses with a punch to the body.
McBraddish loads up on a big right hand but Cope slips the punch.
McBraddish scores with a reasonable looking shot to the body. Cope doesn't seem bothered though.
And thats the end of the round the fighters go back to their corners.
Johnny McBraddish dominated that fourth round.
The corners get their ten second warning. Both fighters stand from their stools and stare eachother down, ready to get back to the action. This is the final round!

McBraddish uses some good footwork to avoid the body shot by Cope.
Cope misses with a two punch combination.
McBraddish just misses with a punch to the body.
Cope shoots in for a takedown and gets it.
Cope wants to pass to mount but McBraddish is defending the position.
McBraddish keeping his head moving to avoid the ground and pound.
Cope thows a huge punch but McBraddish dodges it nicely.
Cope is working hard to pass the guard. He's done it - he's now in full mount! Trouble for McBraddish!
That's one minute gone in the round.
Cope looking to ground and pound but McBraddish is blocking nicely.
McBraddish avoids a series of strikes thrown by Cope.
Cope looking to ground and pound his opponent to a finish here.
McBraddish wriggling around on the bottom manages to avoid the strikes thrown by Cope.
Cope thowing strikes but they're hitting the gloves, not doing any damage.
Cope throwing sloppy strikes here. Perhaps if he tightened up his striking from such a dominant position, he'd be able to finish easier.
Cope sends his fist crashing into the mat - the crowd let out a collective ooooooh. Let's hope he's not broken it!
That's two minutes gone in the round.
Cope looking to ground and pound his opponent to a finish here.
McBraddish holding onto his opponent's waist for dear life, as Cope tries to land some strikes to get him to release his grip.
Cope unloads with some shots from mount but McBraddish bucks and avoids them well.
McBraddish gets back to half guard.
McBraddish avoiding damage under a succession of punches from Cope.
The crowd cheering loudly, showing their appreciation for the quality fight we're seeing here.
Cope is looking to advance position but McBraddish won't allow it.
McBraddish avoiding damage under a succession of punches from Cope.
That's three minutes gone in the round.
Cope looks towards his corner to check for any instructions. The corner give him nothing to work with, so he cracks McBraddish with a short hammerfist. I guess that's as good as any advice he could get in this position.
McBraddish is trying to control but can't.
Cope not throwing his punches with enough precision this time.
Cope passes to full mount!
The ref warns both fighters not to hold the cage as they work up against the meshing.
McBraddish wriggling around on the bottom manages to avoid the strikes thrown by Cope.
Cope looking to finish with strikes here!
Cope has been looking to land a fair amount of strikes on the ground. He might be looking to soften his opponent up in order to work for a submission.
That's four minutes gone in the round.
Cope has control of McBraddish's right arm, working for a kimura. It's a bit of a token attempt though and McBraddish regains control of the situation pretty easily.
Cope throwing sloppy strikes here. Perhaps if he tightened up his striking from such a dominant position, he'd be able to finish easier.
Mike Cope has stepped it up - he knows he needs a finish here!
The crowd applaud the fighters efforts here as the round comes to an end.
Cope lands a heavy elbow.
Johnny McBraddish is fighting for a decision - hopefully he's judged it right and he's actually winning the fight.
Cope throwing shots from mount but they're not landing.
And that's the end of the fight!
Mike Cope showed his dominance in that final round.
I think McBraddish has won this one but let's see whether the judges agree with me. Over to the ring announcer for the scorecards.
Ladies and gentlemen, after 5 rounds of action, we go to the scorecards for a decision.
Judge Konstantin Menshow scores the fight 47:48
Judge Aleksei Zolotukhin scores the fight 47:48
Judge Illya Tyunina scores the fight 48:48
In favor of your winner, by majority decision... Johnny McBraddish!
Johnny McBraddish is the new featherweight champion!
Johnny McBraddish really struggled to get his t-shirt on before his hand was raised. Making sure that Milwaukee's Best 159's - $45 logo gets some air time is pretty tricky when you're all sweaty.
|
|
|
|
|
|
|
|
|
|
|
|
|
|
|
|
|
|
|
|
|
|
|
| S |
C
A |
G |
S |
C
B |
G |
|
S |
C |
G |
|
energy
A | B |
|
hype
A | B |
|
pop
A | B |
|
mgr
A | B |
|
FIGHT
RATING
100% |
|
|
|
|
|
|
