|
|
PBP Commentary |
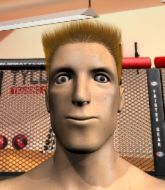
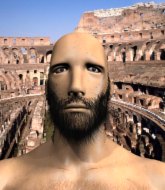
Coming up we have a super heavyweight MMA rules bout between Brain Damage (ranked 0 p4p, 0 weight class) and Palmer Ward (ranked 0 p4p, 0 weight class). Damage comes to the cage accompanied by Notorious B.I.G - Kick In The Door . Both these guys have really solid chins. Will we see a standup war or will they both decide that a knockout is unlikely and try to win the fight elsewhere?
 |
|
 |
| 215 cm
27
308 lbs
6 - 2 - 0 |
|
215 cm
25
309 lbs
7 - 9 - 0 |
Decent wrestler
Excellent boxer
KO power |
|
Decent wrestler
Excellent boxer
Granite chin |
|
| |
|
Ladies and gentlemen. This fight is 3 rounds, in the super heavyweight division.
Introducing the fighter to my left, fighting out of the red corner.
With a record of
6 - 2 - 0, fighting out of Las Vegas, Brain Damage!
And introducing the fighter to my right, fighting out of the blue corner.
With a record of
7 - 9 - 0, fighting out of Las Vegas, Palmer Ward!
The judges for this bout are Gwen Towbar, Tiny Johnson and Cecil Peabody.

The bell rings for round one and we are underway!
Ward tries to clinch up but Damage circles away and keeps his distance.
Ward looks really tired already! That doesn't bode well for a good, competitive fight!
Ward moves in looking to clinch but Damage pushes him off.
Ward tries to land a leg kick but Damage saw it coming and moves away.
Damage avoids the head kick by Ward.
Damage shoots for a takedown but Ward saw that one coming a mile off and avoided it easily.
Ward doesn't manage to clinch there - Damage circles away.
Ward throws a nice looking combination but Damage bobs and weaves to avoid any damage.
Damage works Ward's body with a nice hook.
Ward misses with an attempted mid kick.
The fans in attendance giving it up for the two fighters, who have really let it all hang out in the last minute or so!
Damage punishes Ward's body with a nice straight punch.
Ward avoids a punch combination nicely.

Damage moves into range and clinches up with Ward.
Damage lands a shoulder strike.
Damage managing to block the knees to the body from Ward.
Ward takes a shot to the head.
Damage content to slow the pace in the clinch.
Ward is looking to score with knees to the body. Maybe he'll change it up and go body then head. Damage is defending well for now.

That's one minute gone in the round.
Damage tries to throw a body punch but Ward avoids it by throwing Damage back against the cage.
Damage pushes Ward back against the cage and lands a hook to the side of the head.

Damage breaks the clinch and we're back to striking at distance.
Ward takes a hook to the side of the head. I wonder if that's got his ears ringing.

It looks like Palmer Ward has been cut.
Damage fakes high and swings low for a body shot but Ward manages to avoid it.
Ward dodges the punch combination from Damage.
Damage rushes forward with a series of wild hooks but Ward moves out of range and avoids them all easily.
Damage misses with a double jab.
Damage swings for the body but Ward moves out of range.
Damage lands with a hook. Ward tried to avoid it but it clipped the top of his head.
This has been an exciting period of action!
Damage uses good footwork to get in and out and land a nice right hand before Ward has time to react.
Damage throws a wild combination but nothing lands.
Damage shuffles to his left behind two crisp jabs. Ward eats them both and turns towards Damage to reposition himself and eats a stinging right hand-left hook combo.

That's two minutes gone in the round.
Ward doesn't react quick enough there as he takes a shot to the body.
Damage lunges in with swinging rights and lefts but Ward circles away quickly and effectively.
Damage misses with a two punch combination.
Ward throws a body kick but he wasn't in range.
Damage will need to tighten up his combinations if he doesn't want to gas himself out, swinging at thin air.
Damage fakes with an overhand right and moves in to clinch with Ward, pushing him back against the cage.
An uppercut to the body lands inside from Damage.
Damage working on landing some head shots here - that one got through nicely.
Damage misses with a hook to the ribs.
A left hand lands to the body for Damage.
An uppercut on the inside fails to land for Damage.
Damage misses with a hook to the ribs.
Damage has Ward pressed against the cage.
Ward tries to land knees in the clinch but Damage avoids the damage to the body.

That's three minutes gone in the round.
Damage lands with a short head shot on the inside.
Damage lands a shoulder strike.
A head punch blocked on the inside by Ward.
Damage scores with a nice hook to the head.
Damage escapes the clinch and we're back to striking.
Damage closes this distance looking for a takedown but Ward circles away.
Damage looks to land a combination. Ward sees it coming but can only parry a couple of the shots.
Damage fails to land the takedown.
That's three failed takedown attempts in the round for Brain Damage. That's going to take a lot out of him.
Damage uses decent footwork to sidestep a right hand from Ward.
Damage is looking to score with low kicks.
Ward throws a leg kick but Damage sees it coming and moves out of range.
Ward blocks a head kick by Damage.

That's four minutes gone in the round.
Ward takes a jab right on the kisser.
Damage closes the distance and lands a one-two.
The crowd cheering loudly, showing their appreciation for the quality fight we're seeing here.
Damage lands a beauty of a right hand that gets the crowd cheering.
Ward avoids a low kick by using good footwork.
Damage has closed the distance and engaged Ward in a clinch.
Ward throws an elbow but it misses.
Damage misses with a punch on the inside.
Ward wants to break free but Damage has control.
Damage lands a nice shot to the body.
Damage misses with a shot to the kidneys.
Some stalling of biblical proportions here from Damage.
The crowd are going absolutely nuts as the round comes to an end - what a fantastic round of action!
Ward is trying to work out of this bad position, with his back against the cage.
Ward blocks a body shot from Damage.
Damage lands a nice looking hook to the body, against the cage.
Damage breaks the clinch.
And thats the end of the round the fighters go back to their corners.
Brain Damage dominated that round.
The cut man is working on Palmer Ward's cut.
OK. That's time! The bell goes and we're back to the action.

Damage misses with a double jab.
Damage throws a combination. Ward tries to block but a couple of punches get through.
A combination from Damage does no damage.
Damage lands a jab. Then a cross. Then finally a nice hook to the body. Good work there by Damage.

Ward is rocked!
Ward misses with a body shot
and Damage counters with a huge left! Ward is in big trouble! He's backing up but Damage isn't giving him chance to recover. Under a barage of punches the ref has to step in to save Ward from any more damage. A dominating finish by Damage!
Ladies and gentlemen, after 0:23 of round 2, we have a winner by way of TKO (Strikes). Brain Damage!
|
|
|
|
|
|
|
|
|
|
|
|
|
|
|
|
|
|
|
|
|
|
|
| S |
C
A |
G |
S |
C
B |
G |
|
S |
C |
G |
|
energy
A | B |
|
hype
A | B |
|
pop
A | B |
|
mgr
A | B |
|
FIGHT
RATING
100% |
|
|
|
|
|
|

