|
|
PBP Commentary |
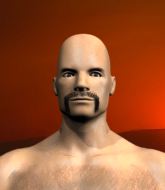
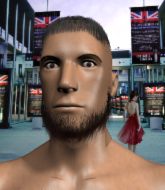
Coming up we have a welterweight MMA rules bout between Stevie Why (ranked 0 p4p, 0 weight class) and Glen McDonald (ranked 0 p4p, 0 weight class). McDonald has chosen Superstar as his entrance music. Both fighters look fresh as a daisy as they make their way towards the cage.
 |
|
 |
| 180 cm
21
180 lbs
3 - 2 - 0 |
|
180 cm
18
182 lbs
3 - 4 - 0 |
BJJ Purple Belt
Counter striker
Cuts easily |
|
BJJ Purple Belt
Counter striker
Knockout power |
|
| |
|
Ladies and gentlemen. This fight is 3 rounds, in the welterweight division.
Introducing the fighter to my left, fighting out of the red corner.
With a record of
3 - 2 - 0, fighting out of Las Vegas, Stevie Why!
And introducing the fighter to my right, fighting out of the blue corner.
With a record of
3 - 4 - 0, fighting out of Las Vegas, Glen McDonald!
The judges for this bout are Daniel Franklin, Stewart Dunkirk and Robert Twigg.

The bell rings for round one and we are underway!
Why takes a swing at McDonald's ribcage but misses.
McDonald pulls out of a head kick attempt.
McDonald tries a head kick but it misses.
Why takes a head kick and shrugs it off.
Why looks frustrated there after his takedown attempt is stuffed easily.

Why scores a trip takedown into side control. Nice.
Why wants to lay and pray for a moment but McDonald keeps working.
McDonald manages to work his way to half guard, despite Why's best efforts.
McDonald is not content to let Why control the position.
McDonald is trying to maintain the position but Why is very close to passing his half guard.

That's one minute gone in the round.
McDonald is looking to improve his position.
Why throwing shots but they're hitting the canvas more than the man.

Why seems to be working for a kimura but McDonald defends the submission attempt.
Why missing with some ground and pound from the half guard.

It looks like we're going to have a standup here. Neither fight is doing enough on the ground.
Why fails with a takedown attempt.

McDonald sets himself and throws a head kick that knocks Why to the ground! McDonald dives into full mount looking to finish!

Why is rocked!

It looks like Stevie Why has been cut.
Why is desperately trying to improve his position but McDonald has a good base and remains in mount.
Oh Why is still in real trouble! Will he be able to recover?!!

That's two minutes gone in the round.
Why is working hard here to advance position.
Why seems to have got his legs back now.
McDonald can't quite control the action as he would like just now, as Why is looking to escape.
Why is writhing around trying to get back to his feet.
The referee warns Why that he has to improve his position here as he takes two more clean shots to the head.

McDonald stands up from the dominant position, so we're back on the feet.
Why looks for a takedown but McDonald sprawls well.
That's three failed takedown attempts in the round for Stevie Why. That's going to take a lot out of him.

That's three minutes gone in the round.
The fight stays on the outside here - Why looks like he's thinking about clinching though.
Why fails miserably with a takedown attempt.
Why tries to close the distance and clinch up against the cage but McDonald paws at him with a jab and circles away.
Why has a takedown stuffed.
Why drops down and drives through with a powerful takedown into guard.
Why is breathing heavily.

That's four minutes gone in the round.
McDonald is trying to keep Why in close.
McDonald controlling the position.
McDonald pushes Why off and scrambles back to his feet.
Why shoots for a takedown but McDonald saw that one coming a mile off and avoided it easily.
Why scores a trip takedown into side control. Nice.
McDonald wants to escape from the position here - easier said than done!
Why is trying to land an Americana. He has the arm isolated but McDonald is keeping cool and he's avoided the danger for now.
McDonald is trying to get back to half guard. He's pushing on Why's leg. He's managed it. Nice work.
And thats the end of the round the fighters go back to their corners.
Glen McDonald dominated that round.
The cut man is working on Stevie Why's cut.
That's the end of the round. The referee orders the cornermen out of the cage so we can get back down to business.

Why shoots for a takedown but McDonald saw that one coming a mile off and avoided it easily.
Why shoots in but no luck this time.
Ouch! a nice leg kick from McDonald, right into the meat.
McDonald throws a combination but comes up with nothing but fresh air.
McDonald throws a wild combination but nothing lands.
McDonald blocks a head kick by Why.
We've had a slow start to the round here - hopefully the action picks up.
McDonald looks to land a left hand but Why moved out of range nicely.
Horrible takedown by Why or perhaps it was just good defense by McDonald which made him look bad.
That's three failed takedown attempts in the round for Stevie Why. That's going to take a lot out of him.
McDonald throws a sloppy head kick and Why moves out of range easily.
Both fighters are absolutely exhausted here.
That's one minute gone in the round.
McDonald misses with a shot to the body
and Why counters with a takedown into side control.
McDonald tries to get back to half guard but can't.
Why looking to control but instead McDonald has slipped a leg in, to regain half guard.
Why stands up from half guard... He's had enough of that ground malarky for the time being.
Why blocks a head kick by McDonald.
Why takes a shot right to the bread basket.
A combination from McDonald does no damage.
That's two minutes gone in the round.
Why decides to change it up a bit and drives through with a nice takedown into half guard.
Why is working for a kimura but McDonald is defending it quite comfortably.
The fighters are pressed up against the cage, both looking to find a bit of space to work.
Why wants to pass the guard but McDonald is defending well.
McDonald tries to kick Why off but Why keeps his base steady and stays in half guard.
Why is looking for a kimura but he's never going to get it from there.
Why with the ground and pound but McDonald uses the opportunity to regain guard.
Why sitting in guard here, content to control.
Why tries to free his leg and advance position but McDonald is retaining full guard.
That's three minutes gone in the round.
The referee decides to stand the fighters back up.
McDonald throws a hook to the body but it doesn't connect.
Why scores with a nice takedown into half guard. Let's see what he's got on the ground.
Why wants to control but McDonald is keeping him busy.
Why content to sit in half guard and control for a moment.
Why is trying a forearm choke
I don't think that's going to do much at this level of the game.
Why wants to pass the guard but McDonald is defending well.
That's four minutes gone in the round.
Why is looking for a kimura here.
McDonald won't allow Why to pass to mount.
Why missing with the ground and pound from half guard.
Well, the referee has seen enough. Neither fighter is active enough on the ground so he's stood them back up.
Why shoots in from a long way out. He's driving through with the takedown attempt and he eventually gets it, landing in McDonald's guard.
Why throws and elbow that misses. McDonald uses the momentum to reverse the position. He's now in Why's guard. Nice move by McDonald!
McDonald stands up and looks to throw the legs aside to pass to side control. Why swivels though and keeps the full guard.
Stevie Why overall seems to be getting the better of the ground position in the fight so far.
Why pulls McDonald in close to prevent any damage.
And thats the end of the round the fighters go back to their corners.
Stevie Why dominated that second round.
The cut man is working on Stevie Why's cut.
OK. That's time! The bell goes and we're back to the action. This is the final round!

McDonald throws a sloppy head kick
and Why counters with a nice double leg into guard.
McDonald manages to escape and get back to his feet.
Nice sprawl there from McDonald as Why shoots in.
McDonald throws a right and a left that Why avoids nicely.
McDonald throws a head kick that Why semi-blocks.
McDonald wants to clinch

and Why counters by moving into the clinch. Good anticipation by Why.
McDonald wants to strike at distance but he can't break free of the clinch.
Why pulls McDonald into guard.
Why looking to hit a scissor sweep but McDonald is one step ahead there.
McDonald trying to stand up but can't free himself from Why's guard.
That's one minute gone in the round.
Why had isolated an arm as going for an omaplata. McDonald is defending the submission well but is in a very vulnerable position. Why Is leaning forward trying to finish the omaplata but decides to abandon it, and take McDonald's back instead.
Both fighters are breathing heavily.
McDonald holding on to Why's left wrist, preventing the choke.
Why looking to break McDonald's wrist control so he can sink in the choke. McDonald remaining controlled and patient though - he really has to keep calm otherwise Why will wrap this one up with the rear naked choke!
McDonald trying to control but he's just got himself in more trouble.
Why has the hooks sunk in and you can see the will to fight slowly draining out of McDonald's body.
Why throws a big right hand but he misses and hits the mat. Ouch.
Why gets his hands free as McDonald looks to control.
The ref warns both fighters not to hold the cage as they work up against the meshing.
Why is looking to finish with some ground and pound!
That's two minutes gone in the round.
Why throws a big right hand but he misses and hits the mat. Ouch.
Why is working for the rear naked choke. He has one arm under the chin but McDonald has hold of the other arm. A bit of a stalemate here.
Why tightening his grip on McDonald, looking for the choke.
Why connects with a big shot to the side of McDonald's head.
McDonald showing good submission defense here.
Why lands an elbow to the side of the head.
You can see the frustration on McDonald's face
He knows he is in trouble unless he improves his position sooner rather than later.
Why has been looking to land a fair amount of strikes on the ground. He might be looking to soften his opponent up in order to work for a submission.
That's three minutes gone in the round.
Why working for a RNC but it's not happening just yet.
McDonald tries to roll but Why sticks to his back.
Why has got one arm under McDonald's chin. This could be trouble... McDonald trying to control the other hand but Why gets it free and sqeezes tight - just a matter of time now! Yep, McDonald has tapped out! The fight is over!
Ladies and gentlemen, after 3:44 of round 3, we have a winner by way of Submission (RNC). Stevie Why!
|
|
|
|
|
|
|
|
|
|
|
|
|
|
|
|
|
|
|
|
|
|
|
| S |
C
A |
G |
S |
C
B |
G |
|
S |
C |
G |
|
energy
A | B |
|
hype
A | B |
|
pop
A | B |
|
mgr
A | B |
|
FIGHT
RATING
62% |
|
|
|
|
|
|
