|
|
PBP Commentary |
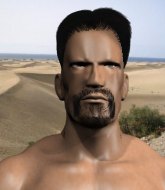
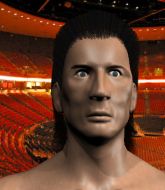
Coming up we have a super heavyweight MMA rules bout between Mark Jo (ranked 0 p4p, 0 weight class) and Laldama Sailo (ranked 0 p4p, 0 weight class). Laldama Sailo is the more experienced fighter, so let's see if that makes a difference tonight.
 |
|
 |
| 225 cm
25
300 lbs
0 - 0 - 0 |
|
196 cm
25
295 lbs
2 - 2 - 0 |
Good wrestling
Good kicks
Cuts easily |
|
BJJ Purple Belt
Decent boxing
Solid chin |
|
| |
|
Ladies and gentlemen. This fight is 3 rounds, in the super heavyweight division.
Introducing the fighter to my left, fighting out of the red corner.
With a record of
0 - 0 - 0, fighting out of Sydney, Mark Jo!
And introducing the fighter to my right, fighting out of the blue corner.
With a record of
2 - 2 - 0, fighting out of Sydney, Laldama Sailo!
The judges for this bout are Donatello Bradman, Eliza Hachem and John Mangel.

The bell rings for round one and we are underway!
Sailo misses with a takedown attempt
and Jo counters with a leg kick.
Sailo has his takedown stuffed
and Jo counters with a big head kick but Sailo shrugs it off.

Jo lands a big head kick that sends Sailo tumbling to the mat! Jo takes a step backwards and waves Sailo back to his feet - he wants the finish!

It looks like Laldama Sailo has been cut.
Wooooo! Give it up for these two warriors! They are putting on a show!

Sailo throws the overhand right but ducks down into a quick takedown attempt. Jo was covering up waiting for the punch and Sailo finishes the takedown easily into guard.
Sailo wants to control from the top but Jo keeps moving.
Jo preventing the ground and pound from doing any damage.
A real slowdown in the pace of the fight for a moment, as Jo holds on and takes a little breather.
Jo tries to strike from the bottom.
Jo seems keen to control rather than go for a submission, at least for now.
The ref warns both fighters not to hold the cage as they work up against the meshing.
Jo looking to hit a scissor sweep but Sailo is one step ahead there.

That's one minute gone in the round.

The referee has ruled that neither fighter is active enough on the ground and has stood them back up.
Jo tries to clinch but fails miserably

and Sailo counters by moving into the clinch.
Sailo prevents a takedown attempt there.
Jo fails to pull guard.
Sailo tries to break the clinch but Jo is controlling the position.
Sailo blocks a knee to the body. He'll have a nicely bruised forearm in the morning.

Jo breaks the clinch and we're back to striking at distance.
Sailo tries to clinch up but Jo circles away and keeps his distance.
Jo moves in looking to clinch but Sailo pushes him off.
Sailo shoots in but doesn't get the takedown
and Jo counters with a flying knee. Nice.
Mark Jo has stuffed three takedown attempts in the round now. That's going to take a lot out of Laldama Sailo.

Jo has closed the distance and engaged Sailo in a clinch.
Sailo is trying to push Jo away but Jo has him pressed against the cage, so he's going nowhere.
Sailo is looking to break free of the clinch but Jo has double underhooks.
Sailo looks gassed!
Jo manages to break the clinch.

That's two minutes gone in the round.
Sailo throws a lazy body kick

and Jo counters with a nice shoot takedown that brings the fighters to the ground.
Jo engaging in some classic timewasting tactics.
This is a great period of action - very entertaining stuff!
The fighters are pressed up against the cage, both looking to find a bit of space to work.
Jo missing there with some ground and pound from the guard.
Jo tries to free his leg and advance position but Sailo is retaining full guard.
Sailo being controlled here, momentarily.
We must be close to a standup if these guys don't pick up the pace.

The referee decides to stand the fighters back up, due to lack of activity on the part of Mark Jo.
Jo keeps the fight standing with a nice sprawl.

That's three minutes gone in the round.
The fight moves into the clinch position.
An uppercut to the body lands inside from Sailo.
Jo manages to pull guard.
Sailo trying to control the position from guard on top but Jo is wriggling around, looking for whatever he can.
Jo knows he needs to get back to his feet asap. He's simply no match for Sailo on the ground.
Jo bucks up whilst keeping hold of a body lock, managing to reverse the position. Now he's in top in Sailo's guard.
Jo will need to keep those long limbs tucked in whilst he's on the ground, to prevent any submissions.
Jo looking to control the position here, rather than advance.
Jo stops Sailo from standing up.

That's four minutes gone in the round.
Sailo has momentary wrist control but Jo slips an elbow through the middle.

Jo stands up from Sailo's guard - Jo perhaps looking for a knockout.
Jo has his takedown stuffed
and Sailo counters with a crisp hook to the side of the head.
Sailo tries to clinch but Jo moves out of range.
The fight stays on the outside here - Sailo looks like he's thinking about clinching though.
Sailo tries to clinch
and Jo counters into the clinch. Nicely done.
Some stalling of biblical proportions here from Sailo.
Sailo wants to strike at distance but he can't break free of the clinch.
As the round comes to an end the crowd are showing their appreciation for a great round of action.
Jo trying to control the position but instead, Sailo has worked for underhooks and has pushed Jo into the cage.
Sailo jumps guard and drags Jo to the mat. He's obviously going to be looking for submissions off his back.
And thats the end of the round the fighters go back to their corners.
Mark Jo dominated that round.
The cut man is working on Laldama Sailo's cut.
That's time! Back to the action!

Sailo tries to close the distance and clinch up but Jo swats him away and circles back towards the center.
Sailo fails with a takedown attempt.
Jo misses with a double jab
and Jo takes a counter punch right on the button for his troubles.
Sailo throws a front kick aimed at Jo's knee but Jo avoids it well.
Jo stuffs the takedown attempt from Sailo. Sailo gets slowly back to his feet.
Mark Jo is looking to throw some combinations by the looks of things.
Jo fakes high and shoots in for a takedown but Sailo avoids it really well and circles away.
Jo gets a double leg takedown into Sailo's guard.

Jo has gone for a leg lock! Sailo slips out almost immediately though and dives into Jo's guard.
Sailo trying to control but Jo is working from the bottom.
Both fighters are absolutely exhausted here.
That's one minute gone in the round.
Jo looking to sweep using the butterfly guard but Sailo puts pay to that idea as he passes nicely into half guard.
Jo throws a strike from the bottom that misses.

Sailo is working for a kimura but Jo is defending it quite comfortably.
Sailo tries to pass the half guard into mount. Jo knows what he's doing though and prevents the attempt.
That's two minutes gone in the round.
There's not a lot going on here and the crowd are letting the fighters know they're not willing to tolerate a lack of action.
Jo is looking to regain full guard. Not this time though.
Sailo tries to stand but his arm is trapped.
Jo is looking to get full guard. It looks like he might be successful but at the last minute Sailo jumps into side control!
Jo scores with a shot to the body.
Sailo trying to control the action but Jo is working from the bottom.
That's three minutes gone in the round.
Sailo looking for an arm triangle but it's way too loose to do anything.
Jo is looking to slip a leg under and get half guard but Sailo is one step ahead and moves to full mount!
Jo is squirming around, avoiding Sailo's attempts to control the action.
Jo tries to lock up and control but Sailo gives him a forearm to the face and pushes him away.
That's four minutes gone in the round.
The crowd are starting to boo a lack of action.
Sailo prevents Jo from getting the reversal.
Sailo trying to control but he's not successful this time.
Sailo has hold of Jo's left arm, perhaps looking for a submission. The two fighters tussle over control of the isolated limb and Jo manages to get his arm back to his side and away from danger.
Jo really trying hard to get back to half guard here.
The crowd thankful this round is nearly over.
And thats the end of the round the fighters go back to their corners.
Laldama Sailo showed his class in that round. I'd imagine he'll take it on all the scorecards.
The cut man is working on Laldama Sailo's cut.
The fighters' corners scream their final instructions, as the referee calls time. Here we go, back to the action! Let's hear some noise people - this is the final round!

Sailo shoots in for a takedown - he's clinched up with Jo but Jo pushes him off and we're back to square one.
Mark Jo is winning the standup battle so far.
Jo fails miserably with a takedown attempt.
Jo throws a left and a right that both miss
enabling Sailo to counter with a crisp jab.
Jo throws a head kick that half lands.
Sailo throws a leg kick that misses.
Sailo misses with a takedown attempt
and Jo counters with a driving takedown into guard. Nice work there by Jo.
Sailo working a defensive guard here.
Sailo has a loose triangle. He'll be looking to tighten that up but Jo can see exactly what he's planning and manages to posture up and free himself.
Sailo is working from a closed guard but he's struggling to control his opponent.
That's one minute gone in the round.
Jo is taking a break and basically stalling. The referee will not allow him to do that for long.
Both fighters are breathing heavily.
Jo working some strikes from top position.
Jo postures up as if he's going to throw some strikes but drops back for an ankle! Sailo is in big trouble! He looks ready to tap! But no, he's escaped and dives on top of Jo, into his guard.
Jo trying to keep a closed guard but Sailo is proving a slippery customer.
That's two minutes gone in the round.
Well. There's a bit of a lull in the action here and the crowd are starting to get restless.
Sailo trying to control but Jo is working from the bottom.

Laldama Sailo has forced the referee to step in and restart the fight on the feet.
Sailo is looking to clinch but Jo is avoiding it.
Jo shoots in but Sailo avoids the takedown attempt easily.
That's three minutes gone in the round.
Sailo tries to clinch but is not successful on this occasion.
Sailo misses with a takedown attempt. He shot from a bit too far out.
Mark Jo has stuffed three takedown attempts in the round now. That's going to take a lot out of Laldama Sailo.
Sailo doesn't manage to clinch there - Jo circles away.
Sailo tries for a takedown but Jo circles away easily
and Jo decides to take the opportunity to score a takedown. He's landed in Sailo's guard.
Jo has to be careful here, sitting in the guard of a superior BJJ player.
Sailo working from the bottom, still in full guard. He's managed to get a loose triangle. Jo doesn't seem to be doing much to defend here, obviously he feels comfortable in the position. Oh but Sailo is tightening it up a little... Jo has to be careful here... He's got his foot tucked under now, this looks tight! Jo reacted too slowly and this one could be over in a matter of seconds! YES! Jo taps out! nice BJJ there by Sailo!
Ladies and gentlemen, after 3:53 of round 3, we have a winner by way of Submission (Triangle Choke). Laldama Sailo!
|
|
|
|
|
|
|
|
|
|
|
|
|
|
|
|
|
|
|
|
|
|
|
| S |
C
A |
G |
S |
C
B |
G |
|
S |
C |
G |
|
energy
A | B |
|
hype
A | B |
|
pop
A | B |
|
mgr
A | B |
|
FIGHT
RATING
66% |
|
|
|
|
|
|

