|
|
PBP Commentary |
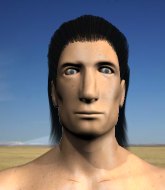
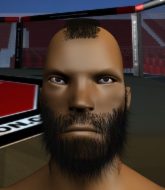
Coming up we have a heavyweight MMA rules bout between Eric Whartenby (ranked 0 p4p, 0 weight class) and dylan madgwick (ranked 0 p4p, 0 weight class). Over to our ring announcer for the fighter introductions!
 |
|
 |
| 190 cm
22
260 lbs
0 - 0 - 0 |
|
210 cm
22
220 lbs
1 - 0 - 0 |
BJJ White Belt
Improved boxing
KO power |
|
BJJ Blue Belt
Counter striker
Determined |
|
| |
|
Ladies and gentlemen. This fight is 3 rounds, in the heavyweight division.
Introducing the fighter to my left, fighting out of the red corner.
With a record of
0 - 0 - 0, fighting out of Sydney, Eric Whartenby!
And introducing the fighter to my right, fighting out of the blue corner.
With a record of
1 - 0 - 0, fighting out of Sydney, dylan madgwick!
The judges for this bout are Skip Squint, Hugh Johnson and Bruno Hogan.

The bell rings for round one and we are underway!
madgwick moves in looking to clinch but Whartenby pushes him off.
Whartenby tries for a takedown but madgwick sees it coming a mile off and avoids it easily.
madgwick shoots in but doesn't get the takedown
and Whartenby counters with a lovely straight right hand!
Whartenby swings away but doesn't land with a series of punches.
Whartenby throws a right and a left that both miss.
No joy there for Whartenby, who threw a few shots but didn't land.
Whartenby throws a right and a left that both miss.
Whartenby lands a jab to the head.
madgwick shoots in for a takedown - he's clinched up with Whartenby but Whartenby pushes him off and we're back to square one.

madgwick darts in and clinches Whartenby up against the cage.

madgwick works for the underhooks and manages to get a trip takedown into guard.
Whartenby wants to control the position but madgwick says "no thanks buddy" and passes to half guard.
madgwick throwing shots but Whartenby is blocking nicely.

madgwick is trying a forearm choke
I don't think that's going to do much at this level of the game.
madgwick seems very keen to just sit and control from half guard but Whartenby does not like that idea so much and is remaining active off his back.

That's one minute gone in the round.
Whartenby pushes madgwick off looking to stand but madgwick dives back in and keeps control.
madgwick lands with a punch from half guard.
madgwick is looking for a kimura. It's going to be difficult to finish that from half guard though and Whartenby defends it well.
madgwick is looking for an arm triangle, whilst trying to pass to side control. Whartenby doesn't seem that keen to cooperate though. No luck this time madgwick.
Whartenby is breathing heavily.
madgwick wants to lay and pray for a moment but Whartenby keeps working.

That's two minutes gone in the round.
Neither fighter has done anything of merit for a good minute or two here and the crowd are not happy about it.

Neither fighter is doing enough for the referee's liking and he's decided to stand them back up.
Whartenby doesn't succeed with the takedown
and madgwick counters with a nice single leg takedown and he's in Whartenby's guard now.
The fighters are pressed up against the cage, both looking to find a bit of space to work.

madgwick gets to his feet - Whartenby follows without any prompting.
madgwick moves into range and throws a combination. A nice jab followed by a hook to the body.
Whartenby misses with a takedown attempt
and madgwick counters by moving into the clinch.
That's three failed takedown attempts in the round for Eric Whartenby. That's going to take a lot out of him.
madgwick tightens his grip and picks Whartenby up, before dumping him to the ground. Whartenby manages to land in guard.
Whartenby is looking to stand up but madgwick isn't so interested in that idea.
Whartenby is active off his back here, looking for submissions.
madgwick is a painfully thin specimen of a man. You do wonder whether a good body kick would snap him clean in two.
Whartenby has his feet on madgwick's hips. He pushes off and gets to his feet. Nice work.

That's three minutes gone in the round.
madgwick has his head snapped back a nice jab. A little nod from madgwick there as he acknowledges the shot.
Whartenby swings away but doesn't land with a series of punches.
madgwick doesn't succeed with the takedown
and Whartenby counters with a kick to the head that grazes his opponent. madgwick is lucky that one didn't land flush.
Whartenby scores with a nice right hand.
Whartenby slips under a jab from madgwick.
A nice combination there by Whartenby.

madgwick is rocked!
madgwick darts in and clinches Whartenby up against the cage.
Whartenby is trying to stall.
madgwick prevents Whartenby from breaking the clinch.
Whartenby wants to get back to striking at distance but madgwick won't allow it.
madgwick blocks an uppercut.

madgwick escapes the clinch and we're back to striking.
madgwick throws a right hand that Whartenby ducks under and follows up with a left that Whartenby also avoids with ease.
Whartenby ducks down and throws a hook to the body but madgwick moves away.

That's four minutes gone in the round.
Whartenby throws a left and a right that both miss
and madgwick counters by moving into the clinch. Good anticipation by madgwick.
madgwick escapes the clinch and we're back to striking.
madgwick shoots in looking for a takedown. Whartenby tries to sprawl out of it but madgwick keeps driving through. The fighters are pinned against the cage. Whartenby manages to get underhooks and after a bit of a struggle, circles away and we're back to standing.
The crowd cheering loudly, showing their appreciation for the quality fight we're seeing here.
madgwick fails with the takedown.
madgwick scores with a big left there. The judges will like that one.
madgwick shoots in and bounces Whartenby off the cage to secure the takedown into guard.
Whartenby keeping moving, preventing madgwick from controlling successfully.
As the round comes to an end the crowd are showing their appreciation for a great round of action.
Whartenby is working an open guard so madgwick takes the opportunity to get back to his feet.
And thats the end of the round the fighters go back to their corners.
dylan madgwick dominated that round.
The fighters get back to their feet, the hooter sounds and we're back to the action!

Whartenby fails with the takedown
and madgwick cracks him with a counter punch right on the button.
Whartenby looks to land a body kick but madgwick moved away.
Whartenby scores with a jab.
Whartenby gets his takedown attempt stuffed easily
and madgwick counters with a shoot takedown into half guard.
Whartenby looks like he's trying to stand up.
madgwick throwing punches and elbows but they're not doing any damage.
madgwick passes into side control, despite Whartenby's attempt to control the position.
madgwick working hard here to secure a kimura but he's not really in the right position for it.
The ref warns both fighters not to hold the cage as they work up against the meshing.
madgwick stands up and we're back to a striking position.
Both fighters are absolutely exhausted here.
That's one minute gone in the round.
Whartenby connects with a single shot there.
Nice sprawl there from madgwick as Whartenby shoots in.
That's three failed takedown attempts in the round for Eric Whartenby. That's going to take a lot out of him.
A really sloppy takedown attempt there from madgwick.
madgwick rushes Whartenby and pushes him back against the cage in a clinch.
madgwick manages to break the clinch.
Whartenby with a lazy takedown attempt
and madgwick counters by moving into the clinch.
madgwick ties up his opponent against the cage and manages to drag the fight down to the ground. madgwick no doubt will be looking to work submissions from his guard.
dylan madgwick has got the better of the ground game so far.
Whartenby tries to free his leg and advance position but madgwick is retaining full guard.
Whartenby gets to his feet - madgwick follows without any prompting.
Eric Whartenby is winning the standup battle so far.
Whartenby clobbers madgwick with an overhand right that has the crowd gasping. That made a horrendous noise.
madgwick takes an uppercut right on the button but keeps his composure.
madgwick is still on wobbly legs! Can Whartenby finish him?
Whartenby feints and then dives in with a takedown. That was a long way out but the feint bought him enough time to close the distance and complete the takedown. Now we'll play guard for a bit and see who can get the better of that position.
That's two minutes gone in the round.
The fans in attendance giving it up for the two fighters, who have really let it all hang out in the last minute or so!
madgwick tries to land a sweep but no joy.
madgwick seems to have recovered his senses.
Whartenby looking to control the position here, rather than advance.
madgwick trying to keep a closed guard but Whartenby is proving a slippery customer.
madgwick pushes Whartenby off and gets back to his feet.
The fighters circling - madgwick throws out the jab but it was never going to land.
Whartenby throws a nice looking combination but madgwick bobs and weaves to avoid any damage.
Horrible takedown by Whartenby or perhaps it was just good defense by madgwick which made him look bad.
That's three minutes gone in the round.
Whartenby misses with the combination.
madgwick tries for a takedown but Whartenby sees it coming a mile off and avoids it easily.
madgwick gets the takedown into side control.
madgwick wants to lay and pray for a moment but Whartenby keeps working.
Whartenby is pushing madgwick's head away, looking to escape. madgwick manages to hold on to the position though.
That's four minutes gone in the round.
madgwick tries for a kimura but Whartenby is defending well.
Whartenby pushes madgwick away and creates a bit of space to escape. He's almost out here... but no, madgwick gets a good hold of his legs and remains firmly in side control.
Neither fighter is doing enough for the referee's liking and he's decided to stand them back up.
Whartenby slips in close and lands a nice hook before moving back out of range.
Whartenby scores with a sloppy punch to the body. Not much technique there but it did the business.
Whartenby throws a right and a left that madgwick avoids nicely.
madgwick has his head snapped back a nice jab. A little nod from madgwick there as he acknowledges the shot.
madgwick is looking to clinch.
Whartenby lands with a nice combination. madgwick backs away looking to recover.
As the round comes to an end the crowd are showing their appreciation for a great round of action.
Whartenby bobbing and weaving well here. And he's unloaded with a massive right hand that drops madgwick! He dives into his guard looking to finish!
This has been an exciting period of action!
Whartenby trying to pass the guard but can't manage it just yet.
And thats the end of the round the fighters go back to their corners.
Eric Whartenby dominated that second round.
The corners get their ten second warning. Both fighters stand from their stools and stare eachother down, ready to get back to the action. So, we enter the final round. Let's see if either fighter can bring us a finish, or whether we're going to the judges scorecards.

madgwick tries to close the distance and clinch up against the cage but Whartenby paws at him with a jab and circles away.
madgwick looking to shoot here. He's gone for it and he's landed a takedown into mount! Oh, that's bad for Whartenby!
madgwick avoids the attempt from Whartenby to control.
madgwick has control of Whartenby's right arm, working for a kimura. It's a bit of a token attempt though and Whartenby regains control of the situation pretty easily.
madgwick wants to control the pace but Whartenby is squirming around nicely.
Whartenby's corner are shouting for him to stand up but that's bad cornering - how is he meant to stand up when he's mounted? He should be looking to improve his position on the ground before trying to stand back up.
Both fighters are breathing heavily.
That's one minute gone in the round.
madgwick is landing with some decent strikes but Whartenby is trying to advance his position so the referee is letting the fight continue.
madgwick connects with a couple of good shots from mount.
madgwick lands a heavy elbow.
madgwick with some aggressive grappling here. He's looking for submissions here, rather than waiting for the opportunity to counter.
madgwick trying to control but he's not successful this time.
madgwick get's back to his feet.
Whartenby scores with a sloppy punch to the body. Not much technique there but it did the business.
madgwick displays some good footwork, moving neatly out of range as Whartenby throws out the jab.
Whartenby throws a series of punches but madgwick moves out of range.
A decent looking cross lands there for Whartenby.
That's two minutes gone in the round.
Whartenby is looking to clinch but madgwick is avoiding it.
Whartenby misses with a takedown attempt
and madgwick counters with a single leg into guard. Whartenby didn't expect that.
The crowd cheering loudly, showing their appreciation for the quality fight we're seeing here.
Whartenby wants to get back to his feet but madgwick is in a dominant position and won't allow it.
madgwick decides he's had enough of playing guard and decides to stand. Come on Whartenby, up you get!
madgwick misses with a takedown attempt - Whartenby sprawls well and throws a nice strike on the way out which just misses.
madgwick fails with a rather predictable takedown attempt.
A combination from Whartenby does no damage.
madgwick lands a high kick!
Eric Whartenby is looking to throw some combinations by the looks of things.
madgwick throws a quick head kick that skims the top of Whartenby's head.
Whartenby throws a jab when madgwick was well out of range.
Whartenby shoots and misses
and madgwick counters with a good right hand that lands right on the jaw.
madgwick drives through and clinches with Whartenby against the cage.
That's three minutes gone in the round.
Whartenby wants to break free but madgwick has control.
Whartenby tries to break the clinch but madgwick is controlling the position.
madgwick fails to pull guard.
Eric Whartenby has stuffed three takedown attempts in the round now. That's going to take a lot out of dylan madgwick.
madgwick letting Whartenby take a breather here.
madgwick breaks the clinch and we're back to striking at distance.
madgwick takes an uppercut right on the button but keeps his composure.
No luck for Whartenby with that takedown attempt.
madgwick has a takedown stuffed.
Whartenby throws a right hand that madgwick ducks under and follows up with a left that madgwick also avoids with ease.
Whartenby throws a jab, cross combination which is slipped
and madgwick counters with a single leg into guard. Whartenby didn't expect that.
madgwick trying to control but Whartenby is working from the bottom.
madgwick stands up and waves to Whartenby to follow him.
This has been an exciting period of action!
Whartenby thows a left - swing and a miss!
That's four minutes gone in the round.
Some wild striking there from Whartenby.
madgwick shoots in with a takedown attempt and he has Whartenby pinned against the cage. Whartenby gets the underhooks and manages to circle away.
Whartenby throws a big shot that misses.
madgwick is looking to take this fight into the clinch.
Whartenby avoids a punch combination nicely.
Whartenby misses with an uppercut.
As the round comes to an end the crowd are showing their appreciation for a great round of action.
madgwick shoots in for a takedown but doesn't get it.
Nice takedown defense from madgwick. No joy for Whartenby on that attempt.
Whartenby throws a monster uppercut resembling something out of street fighter but it doesn't land.
Whartenby misses with the combination.
And that's the end of the fight!
dylan madgwick comfortably won the final round on my scorecard.
I think madgwick has won this one but let's see whether the judges agree with me. Over to the ring announcer for the scorecards.
Ladies and gentlemen, after 3 rounds of action, we go to the scorecards for a decision.
Judge Skip Squint scores the fight 28:29
Judge Hugh Johnson scores the fight 28:29
Judge Bruno Hogan scores the fight 28:29
In favor of your winner, by unanimous decision... dylan madgwick!
|
|
|
|
|
|
|
|
|
|
|
|
|
|
|
|
|
|
|
|
|
|
|
| S |
C
A |
G |
S |
C
B |
G |
|
S |
C |
G |
|
energy
A | B |
|
hype
A | B |
|
pop
A | B |
|
mgr
A | B |
|
FIGHT
RATING
100% |
|
|
|
|
|
|

