|
|
PBP Commentary |
Coming up we have a welterweight MMA rules bout between Max Mad (ranked 0 p4p, 0 weight class) and Curtis Crews (ranked 0 p4p, 0 weight class). Mad comes into the arena with Move aside and let the man go through blaring out of the sound system. Crews has chosen The Game Belong to Me-UGK as his entrance music. These two fighters really are very evenly matched on the feet - it will be fascinating to see who can assert themselves in that aspect of the fight.
 |
|
 |
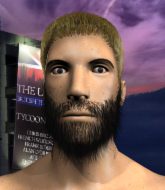
| 180 cm
21
171 lbs
4 - 2 - 0 |
|
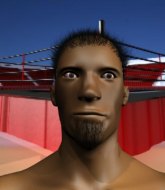
185 cm
22
181 lbs
3 - 3 - 0 |
BJJ Blue Belt
Improved boxing
Self confident |
|
BJJ White Belt
Good kicks
Determined |
|
| |
|
Ladies and gentlemen. This fight is 3 rounds, in the welterweight division.
Introducing the fighter to my left, fighting out of the red corner.
With a record of
4 - 2 - 0, fighting out of Las Vegas, Max Mad!
And introducing the fighter to my right, fighting out of the blue corner.
With a record of
3 - 3 - 0, fighting out of Las Vegas, Curtis Crews!
The judges for this bout are George Francis, Daniel Franklin and Frank Dennis.

The bell rings for round one and we are underway!
Crews tries to clinch there but Mad circles away.
Crews moves in looking to clinch but Mad pushes him off.

Mad closes the distance, clinches up and gets a nice trip takedown into side control. Very smooth.

Crews bucks up and manages to escape back to his feet!
Mad fails to land the takedown.
Mad throws a series of punches but Crews avoids them all with ease.
A nice leg kick lands there from Crews.
Mad digs a good body shot into Crews's ribs.
Mad shoots in for a takedown. "I don't think so" says Crews as he avoids it easily.
Mad shoots in but no luck this time.
That's three failed takedown attempts in the round for Max Mad. That's going to take a lot out of him.
Mad swings away but doesn't land with a series of punches.
A leg kick checked by Mad.

Mad clinches up with Crews and pushes him back against the cage.
Crews misses with a shot to the kidneys.
Crews lands a short shot on the inside that snaps the head of Mad backwards.
Mad pulls Crews into guard.

That's one minute gone in the round.
Crews lands a couple of digs.
Mad has momentary wrist control but Crews slips an elbow through the middle.
Crews tries to free his leg and advance position but Mad is retaining full guard.
Crews thows a big elbow that misses.
Mad wants to stand and escape but Crews is having none of it.
Crews pressing down on his opponent's thigh, looking to pass guard. Mad is keeping the position for now.
Crews postures up.
Crews postures up in Mad's guard and throws a big left but Mad blocks it.
Crews really doesn't want to stay on the ground with Mad. If he can't get it back to his feet, it's only a matter of time before he'll be tapping out.
Crews chips away with some ground and pound.
Mad trying to keep a closed guard but Crews is proving a slippery customer.

The referee decides to stand the fighters back up.
Mad has a takedown stuffed.
Mad is breathing heavily.
Crews keeps the fight standing with a nice sprawl.
Nice sprawl there from Crews as Mad shoots in.
Some wild striking there from Crews.

That's two minutes gone in the round.
Mad misses with a two punch combination.
Mad misses with a takedown attempt. He shot from a bit too far out.
Mad looks for a takedown but Crews sprawls well.
A really sloppy takedown attempt there from Mad.
Crews misses with a jab and misses with a cross straight after too.
Mad shoots in with a takedown attempt and he has Crews pinned against the cage. Crews gets the underhooks and manages to circle away.
Mad fails miserably with a takedown attempt.
Mad closes the distance and looks for a trip takedown... aaaand he's got it - Mad lands in his opponent's guard.

That's three minutes gone in the round.
Mad preventing the sweep.
Both fighters really going for it on the ground here!
Mad slips effortlessly into side control - very nice.
Crews is looking to regain half guard here but Mad keeps moving and retains side control.
Mad trying to control the action but Crews is working from the bottom.

Mad is looking for a kimura. He might have it! No, Crews has escaped the position, nice work there.
Crews tries to escape but Mad is in control.
Crews is not in a great position here, taking some shots.
Mad working hard here to secure a kimura but he's not really in the right position for it.
The ref warns both fighters not to hold the cage as they work up against the meshing.
Mad cracks Crews with a big right hand but Crews just smiles back at him and invites him to have another go.
Crews manages to land a sweep and he's now on top! Lovely Jiu Jitsu!
Mad avoiding damage under a succession of punches from Crews.

That's four minutes gone in the round.
Mad trying to control from the bottom.
Mad gets full guard.
Mad controls Crews momentarily but Crews frees himself.
The fighters are pressed up against the cage, both looking to find a bit of space to work.
Mad is working actively off his back, looking to secure an arm or perhaps work for a triangle.
Crews throwing elbows and punches but not connecting, as Mad works some decent striking defense from the bottom.
Mad looking to hit a scissor sweep but Crews is one step ahead there.
Mad is active off his back here, looking for submissions.
This has been an exciting period of action!
Hammerfist, elbow! yells Crews's corner. There ya go! There ya go!
Crews stopping the sweep attempt from Mad.
The crowd applaud the fighters efforts here as the round comes to an end.
There's a bit of a scramble here and now Mad is on top in guard.
Crews throws a couple of heel strikes.
Mad trying to control but Crews is working from the bottom.
And thats the end of the round the fighters go back to their corners.
Max Mad dominated that round.
That's time! Mad's corner gives him a slap on the ass as he gets ready to fight.

Crews fails with an attempt to clinch.
Mad looks frusrated there after his takedown attempt is stuffed easily.
Mad scores with a nice takedown into half guard. Let's see what he's got on the ground.
Max Mad overall seems to be getting the better of the ground position in the fight so far.
Crews is not content to let Mad control the position.
Crews wants to improve his position but Mad is controlling well.
Mad lands strikes from half guard.
Mad is trying a forearm choke
I don't think that's going to do much at this level of the game.
Crews tries to strike from the bottom but it doesn't land.
Mad works his way into full mount!
Crews bucks up and manages to get a nice reversal! He's in guard on the top - nicely done!
Mad looking for submissions from the bottom here. Moving his hips around, possibly looking for an armbar.
That's one minute gone in the round.
Crews connects with a couple of short punches.
Mad manages to sweep nicely, so he's now on top. Crews manages to get himself to full guard.
Crews wants to sweep but no luck.
Mad pushes down on Crews's leg and manages to get into half guard.
Crews wants to get back to full guard.
Crews is staying active underneath Mad, who seems content to just control the action from this position.
Both fighters are absolutely exhausted here.
Crews flails away from the bottom but he's not doing any damage.
Crews is trying to get back to full guard.
Neither fighter is doing enough for the referee's liking and he's decided to stand them back up.
Mad fails in his attempt to clinch.
Mad shoots in but Crews avoids the takedown attempt easily.
Mad throws a looping left and ducks down for a takedown. He's got his arms around Crews's waist but Crews gets an underhook and avoids the takedown by throwing Mad off to one side.
That's three failed takedown attempts in the round for Max Mad. That's going to take a lot out of him.
That's two minutes gone in the round.
Mad fails with a takedown attempt from distance.
Mad closes this distance looking for a takedown but Crews circles away.
Crews shoots in for a takedown! He's got it and he's managed to land in full mount! That's better than Crews was expecting from the takedown attempt, I'm sure!
Mad is wriggling around trying to escape.
Mad bucks up and manages to get a nice reversal! He's in guard on the top - nicely done!
Mad pushes down on Crews's leg and manages to get into half guard.
Mad wants to lay and pray for a moment but Crews keeps working.
Mad passes to side control.
Mad tries for a kimura but Crews is defending well.
This has been an exciting period of action!
Mad scoring with punches from side control.
Mad passes to full mount! That's big trouble for Crews!
Mad lands with some strikes.
Crews in a bad spot here, taking shots to the head.
Mad has been looking to land a fair amount of strikes on the ground. He might be looking to soften his opponent up in order to work for a submission.
That's three minutes gone in the round.
Mad jumps to side control looking for an arm triangle but Crews manages to avoid the submission attempt.
Mad wants to work for a kimura but he's foiled early by Crews, who protects the arm well.
Mad decides to take the fight back to the feet.
Mad decides to change it up a bit and drives through with a nice takedown into half guard.
Mad seems very keen to just sit and control from half guard but Crews does not like that idea so much and is remaining active off his back.
Mad slips a nice elbow through Crews's hands, connecting with Crews's forehead.
Crews is defending against the submission attempts here by Mad.
We get told so often about how wrestlers don't like to be on their backs. Let's see if Crews can do anything to dispel that myth.
Crews tries to get to full guard but Mad has control of the leg.
Crews pushes Mad off and gets back to his feet.
Mad misses with a takedown
and Crews moves into the clinch.
That's four minutes gone in the round.
Crews gets through Mad's defenses to land a nice punch to the side of the head.
Crews tries a shoulder strike but it doesn't do any damage.
Crews lands a shoulder strike that jolts his opponent's head backwards.
Crews misses with a punch on the inside.
Crews works for underhooks and lands a body shot in the process.
Mad tries for a takedown but Crews manages to get underhooks.
Mad tries to score a body lock takedown but Crews shows good agility there to stay on his feet.
Wooooo! Give it up for these two warriors! They are putting on a show!
Crews lands a shot to the body.
Crews pushes Mad back against the cage and lands a hook to the side of the head.
Crews throws a punch but it's blocked by Mad.
Crews lands with a light punch inside.
Crews lands a hook that snaps the head of Mad backwards.
Crews tries to land knees in the clinch but Mad avoids the damage to the body.
Mad blocks an uppercut.
Crews lands a left hand that snaps the head of Mad backwards.
Crews throws a blind hook that connects with the side of Mads head.
A nice right hand lands inside from Crews.
Crews goes for a body shot but it's blocked.
Crews lands a right hand that snaps the head of Mad backwards.
As the round comes to an end the crowd are showing their appreciation for a great round of action.
Crews misses with a body punch.
Mad wants to strike at distance but he can't break free of the clinch.
Crews swings away with an uppercut that misses.
Crews misses with a shot to the kidneys.
Crews lands a body shot.
A short left from Crews.
Crews doesn't land with the attempted body shot.
And thats the end of the round the fighters go back to their corners.
Max Mad dominated that second round.
The corners get their ten second warning. Both fighters stand from their stools and stare eachother down, ready to get back to the action. This is the final round!

Crews stuffs the takedown.
Crews wants to clinch.
Crews changes levels and drives through with a really nice takedown into side control. Mad looks really pissed at himself for not defending that better.
Crews scores with punches from side control.
Mad is trying to escape and get back to his feet.
Crews lands a decent elbow from side control.
Mad takes a couple of big shots there - the referee warns him that he has to defend himself better.
Mad is sneaking out the side here. He's bucked Crews off and has taken his back!
Crews defends a rear naked choke attempt by controlling one of Mad's arms.
Mad misses with punches from the back.
Mad has his hand under the chin of his opponent looking for the choke. He's nearly got it! This one could be all over! But no, Crews has freed his hand and lives to survive another
well, another couple of seconds at least!
The crowd cheering loudly, showing their appreciation for the quality fight we're seeing here.
Mad softening up his opponent with strikes here.
Mad keeps control of the position as Crews tries to break free.
That's one minute gone in the round.
Mad working for a RNC but it's not happening just yet.
Crews breaks Mad's hooks off and manages to turn into his guard.
Crews is sitting in guard, working some ground and pound.
Crews pressing down on his opponent's thigh, looking to pass guard. Mad is keeping the position for now.
A big thud reverberates around the arena there as Crews accidentally thumps the mat. Hopefully he's not broken his hand.
Crews in full guard, throwing the ground and pound. No damage this time.
Mad tries to land a sweep but no joy.
Mad manages to land a sweep and now he's in mount on top!
Mad has hold of Crews's left arm, perhaps looking for a submission. The two fighters tussle over control of the isolated limb and Crews manages to get his arm back to his side and away from danger.
Both fighters are breathing heavily.
Crews is wriggling around trying to escape.
Mad looks like he's working for a submission but he's not found anything just yet.
Crews can't escape the position.
Curtis Crews has stepped it up - he knows he needs a finish here!
That's two minutes gone in the round.
Mad wants to control the pace but Crews is squirming around nicely.
Crews has given up his back here. Will Mad look for the submission or keep pounding away?
Crews turns into Mad and is now in his guard.
Mad is working actively off his back, looking to secure an arm or perhaps work for a triangle.
Hammerfist, elbow! yells Crews's corner. There ya go! There ya go!
Mad manages to land a sweep and now he's in mount on top!
We've seen a great period of action over the last minute or so - credit to both fighters for leaving it all in the cage!
Mad trying to control but he's not successful this time.
Crews is flailing around, obviously not happy about being mounted. Mad locks hold of one of his arms and spins for an armbar. He's got it! Crews is forced to tap!
Ladies and gentlemen, after 3:05 of round 3, we have a winner by way of Submission (Armbar). Max Mad!
|
|
|
|
|
|
|
|
|
|
|
|
|
|
|
|
|
|
|
|
|
|
|
| S |
C
A |
G |
S |
C
B |
G |
|
S |
C |
G |
|
energy
A | B |
|
hype
A | B |
|
pop
A | B |
|
mgr
A | B |
|
FIGHT
RATING
100% |
|
|
|
|
|
|
