|
|
PBP Commentary |
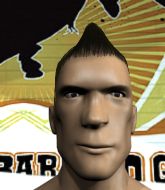
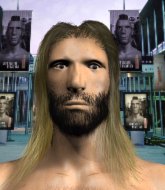
Coming up we have a light heavyweight MMA rules bout between Wa Sa (ranked 0 p4p, 0 weight class) and Yu Kanta (ranked 0 p4p, 0 weight class). Sa comes to the cage accompanied by Fat Lip. Buckle up people - heeeeeeeeeere we go!
 |
|
 |
| 180 cm
19
205 lbs
4 - 3 - 0 |
|
186 cm
25
205 lbs
5 - 5 - 1 |
Dangerous GnP
Brawler
Experienced |
|
BJJ Blue Belt
Excellent MT
Heavy handed |
|
| |
|
Ladies and gentlemen. This fight is 3 rounds, in the light heavyweight division.
Introducing the fighter to my left, fighting out of the red corner.
With a record of
4 - 3 - 0, fighting out of Tokyo, Wa Sa!
And introducing the fighter to my right, fighting out of the blue corner.
With a record of
5 - 5 - 1, fighting out of Tokyo, Yu Kanta!
The judges for this bout are Ren Mimura, Yukihiro Shimada and Shigeki Sano.

The bell rings for round one and we are underway!

Kanta forces Sa back against the cage and clinches.
Kanta wants to strike at distance but he can't break free of the clinch.
Kanta tries to circle away but Sa has him pinned against the cage.

Sa manages to pull guard.
Sa seems keen to control rather than go for a submission, at least for now.
The fighters are pressed up against the cage, both looking to find a bit of space to work.
Kanta wants to control from the top but Sa keeps moving.
Sa has his hands on Kanta's head, controlling the position.
Kanta passes into half guard.
Sa slips a foot under and gets full guard. Nice work.
Sa throwing some rather feeble looking strikes off his back.

That's one minute gone in the round.

Sa pushes Kanta off for just long enough to get back to his feet. Very athletic spring there.
Kanta throws a head kick that misses.
Sa shoots in with a lovely double leg takedown. Kanta manages to land in full guard to minimise the damage.
Sa wants to pass the guard but Kanta is keeping the position.
Sa working in close now, lands a nice elbow to the side of Kanta's head.
Sa works over Kanta with some ground and pound from guard.
Sa working some strikes from top position.
Sa thows a big elbow that misses.
Sa chips away with some ground and pound.
The ref warns both fighters not to hold the cage as they work up against the meshing.

That's two minutes gone in the round.
Kanta can't keep his opponent in guard - Sa advances to half guard, no doubt looking to mount.
The crowd cheering loudly, showing their appreciation for the quality fight we're seeing here.
Kanta moves into full guard.
Sa looking to pass the guard.
The fighters are starting to perspire pretty heavily.
Sa stands up and waves to Kanta to follow him.

Sa moves into the clinch successfully.
Sa has hold of a leg and is looking for a trip takedown. Kanta avoids it nicely though and we remain in the clinch.

That's three minutes gone in the round.
Kanta has had enough of the clinch but Sa keeps him there for the moment.
Sa tries to land a knee to the body but he is off balance and Kanta avoids it.
Sa struggles to land a body shot inside as Kanta controls his hands.

Sa breaks the clinch and we're back to striking at distance.
Sa shoots in for a takedown. "I don't think so" says Kanta as he avoids it easily.
Sa fails with a takedown attempt from distance.
That's three failed takedown attempts in the round for Wa Sa. That's going to take a lot out of him.
Kanta lands a nice looking body shot.
Sa is breathing heavily.
Sa shoots in for a takedown. He's persisting with it as Kanta sprawls well. Kanta wins this battle and keeps the fight standing. Sa gets slowly back to his feet.
Kanta stuffs the takedown.
Nice takedown defense from Sa. No joy for Kanta on that attempt.
Kanta fails miserably with a takedown attempt.
Kanta forces Sa back against the cage and clinches.
Kanta jumps guard but Sa stands there with Kanta around his waist. Kanta gives up and drops back to his feet. We remain in the clinch.

That's four minutes gone in the round.
Sa tries to score a body lock takedown but Kanta shows good agility there to stay on his feet.
Kanta wants to push off and get back to the center of the mat but Sa has him pressed against the cage.
Fantastic stuff here - a very entertaining period of action, which has drawn cheers from the crowd.
A short left from Sa.
Sa lands a left hand that snaps the head of Kanta backwards.
Kanta prevents a takedown attempt there.
Sa working hard to break the clinch.
Sa tried to land a shot to the body but connects with Kanta's elbow.
Kanta is trying to push Sa away but Sa has him pressed against the cage, so he's going nowhere.
Kanta fails to pull guard.
Kanta stalling in the clinch but Sa improves position.
Kanta wants to get back to striking at distance but Sa won't allow it.
Sa lands with a right to the head.
Sa escapes the clinch and we're back to striking.
As the round comes to an end the crowd are showing their appreciation for a great round of action.
Kanta closes the distance and presses his opponent up against the cage.
Sa wants to break free but Kanta has control.
Sa prevents Kanta from breaking the clinch.
Kanta wants to get back to striking at distance but Sa won't allow it.
Sa taking a breather.
And thats the end of the round the fighters go back to their corners.
Wa Sa dominated that round.
That's the end of the round. The referee orders the cornermen out of the cage so we can get back down to business.

Sa misses with a wild combination.
Sa misses with a half-hearted attempt at a head kick.
Sa tries to clinch up.
Sa shoots in but Kanta avoids the takedown attempt easily.
Kanta shoots in for a takedown but doesn't get it.
Sa closes the distance and presses his opponent up against the cage.
Sa lands a shoulder strike that jolts his opponent's head backwards.
Sa fails to pull the fight into his guard.
Kanta wants to break the clinch but can't.
Sa fails to pull the fight into his guard.
That's three failed takedown attempts in the round for Wa Sa. That's going to take a lot out of him.
Kanta gets double underhooks to prevent a takedown attempt from Sa.
Sa missing with knees to the body.
Kanta on the defensive, avoiding the knees to the body.
That's one minute gone in the round.
Sa turns his back and goes for a hip toss. It's a bit messy but it gets the job done and Sa manages to end up in side control.
Sa working the ground and pound.

Sa goes for an armbar here - this could be all over! But no, Kanta has escaped beautifully and is now on top in side control! Oh, that's unlucky for Sa but great work by Kanta.
Both fighters are absolutely exhausted here.
You can see the frustration on Sa's face, being in this tough position on the bottom.
Sa is going to have to think about doing something other than just controlling because Kanta is managing to avoid having the position dictated to him.

Kanta decides to stand back up.
Kanta rushes Sa and presses him up against the cage.
Kanta prevents a takedown attempt there.
Kanta wants to break free. God knows he wants to breaaaak freeee.
Kanta avoiding damage as Sa throws knees to the body.
That's two minutes gone in the round.
The crowd are loving this. Great action here.
Sa tries to pull guard but Kanta holds him up against the cage and eventually Sa drops back down to his feet.
Sa's corner are urging him to control the action in the clinch for a moment, rather than mount any serious offense. I'm sure the crowd appreciate those instructions... not.
Sa misses with a knee to the head.
Sa scores a nice knee to the body.
Wa Sa has scored more points in the clinch so far.
Kanta is trying to work out of this bad position, with his back against the cage.
Kanta prevents a takedown attempt there.
Sa looking to throw knees to the head but Kanta is blocking nicely.
Kanta misses with a body punch.
Kanta drops down looking for an ankle pick but Sa pulls his leg out and moves away.
Sa shoots in looking for a takedown. Kanta tries to sprawl out of it but Sa keeps driving through. The fighters are pinned against the cage. Kanta manages to get underhooks and after a bit of a struggle, circles away and we're back to standing.
Sa throws a looping left and ducks down for a takedown. He's got his arms around Kanta's waist but Kanta gets an underhook and avoids the takedown by throwing Sa off to one side.
Wa Sa seems to be the more aggressive standup fighter in this bout.
That's three minutes gone in the round.
Sa fails to land the takedown.
Sa throws a lazy head kick
and Kanta makes the exchange count by landing a cracking kick to the body. Sa really felt that one!
Kanta has Sa up against the cage in a clinch.
Kanta working hard to break the clinch.
Kanta tries for a takedown but Sa manages to get underhooks.
Kanta wants to break the clinch but can't.
Sa is looking to control Kanta's arms but Kanta gets an underhook and turns him. Now Sa has his back to the cage.
Sa slowing the pace effectively.
Kanta prevents the takedown attempt.
Sa is working for a takedown up against the cage. He can't get it on this occasion though.

Kanta gets control of Sa's arms and successfully pulls guard. Kanta will no doubt be looking for submissions off his back.
Kanta working a defensive guard here.
A big thud reverberates around the arena there as Sa accidentally thumps the mat. Hopefully he's not broken his hand.
That's four minutes gone in the round.
Kanta working the defensive guard well to avoid strikes from Sa.
Fantastic stuff here - a very entertaining period of action, which has drawn cheers from the crowd.
Kanta preventing the ground and pound from doing any damage.
Wa Sa overall seems to be getting the better of the ground position in the fight so far.
Sa works a leg free and moves into half guard.
Kanta is looking to control Sa's leg but it's slowly edging free. Can Kanta avoid being mounted?
Sa is trying a forearm choke
I don't think that's going to do much at this level of the game.
Sa in half guard on the top. He's looking for a kimura... He's got it locked and he's managed to free his trapped foot. Kanta tries to escape but it's on too tight and he has to tap! Great BJJ skills there from Sa!
Ladies and gentlemen, after 4:52 of round 2, we have a winner by way of Submission (Kimura). Wa Sa!
|
|
|
|
|
|
|
|
|
|
|
|
|
|
|
|
|
|
|
|
|
|
|
| S |
C
A |
G |
S |
C
B |
G |
|
S |
C |
G |
|
energy
A | B |
|
hype
A | B |
|
pop
A | B |
|
mgr
A | B |
|
FIGHT
RATING
40% |
|
|
|
|
|
|
